Chapter 2-5: Infiltrating Jungle Base III


Navigation:
Chapter 1: Carrington Institute Training
Chapter 2: The Jungles of South America
-2-1: Infiltrating Jungle Base I
-2-2: River Crossing
-2-3: Infiltrating Jungle Base II
-2-4: Jungle Chase
-2-5: Infiltrating Jungle Base III
-2-6: dataDyne Hind Attack
-2-7: Cyborg Factory: Sniper Assignment
Chapter 3: dataDyne Cybernetic Manufacturing
Chapter 4: dataDyne Operations Base/Crash Site
Chapter 5: Captive aboard the Pelagic I
Chapter 6: Carrington Institute HQ
Chapter 7: Perfect Dark GBC Secrets and Extras
JUNGLE BASE III – COMPOUND: MAP OVERVIEW
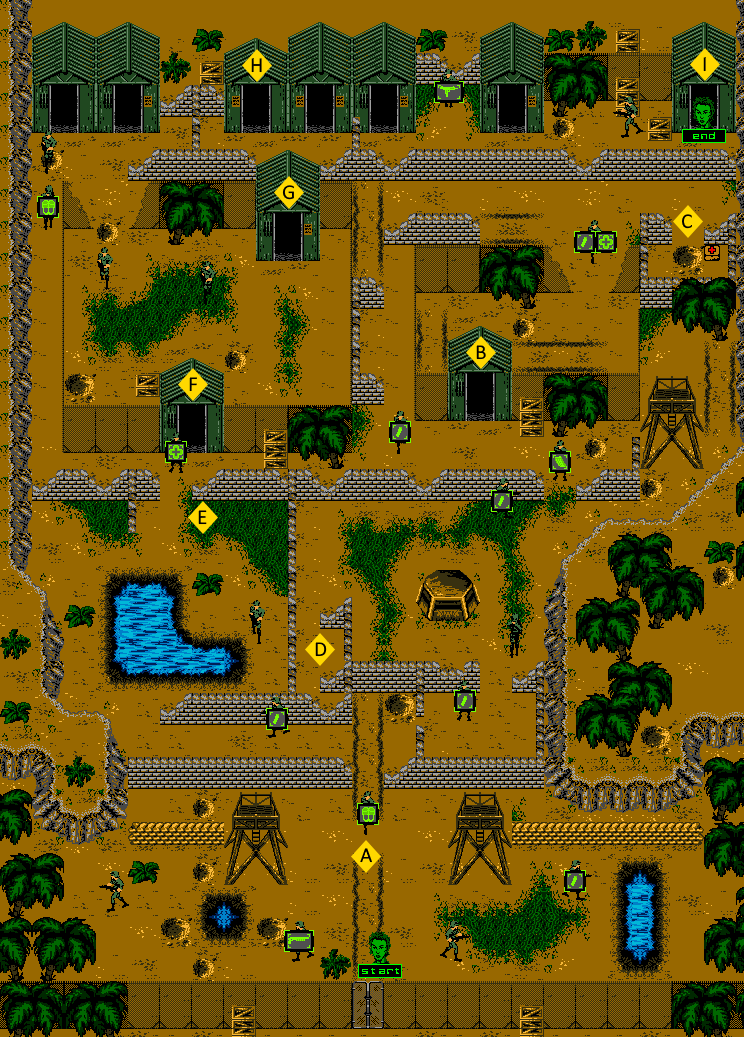
MISSION OBJECTIVES:
• LOCATE AND DESTROY CYBORG FACTORY
• DEFEAT MINK HUNTER
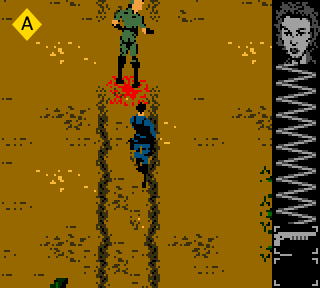
![]() Since we’re equipped with the Shotgun, we’re going to forgo stealth entirely and devastate dataDyne’s opposition with a wave of unstoppable destruction, so if you’ve been waiting for a chance for some action, this is your baptism by fire. We’re going to ignore the guards pacing to the left and right, as they’re heading away from our current position – instead, center yourself between the vehicle treads and walk north until you come across the first guard. Respond to his shots with your Shotgun and then inspect his body to recover 8 rounds of Shotgun Ammunition. From here, we’ll continue walking to the north to enter the brickwork.
Since we’re equipped with the Shotgun, we’re going to forgo stealth entirely and devastate dataDyne’s opposition with a wave of unstoppable destruction, so if you’ve been waiting for a chance for some action, this is your baptism by fire. We’re going to ignore the guards pacing to the left and right, as they’re heading away from our current position – instead, center yourself between the vehicle treads and walk north until you come across the first guard. Respond to his shots with your Shotgun and then inspect his body to recover 8 rounds of Shotgun Ammunition. From here, we’ll continue walking to the north to enter the brickwork.
If you look to the east, you’ll see an opening where the second guard stands at attention, oblivious to our arrival. If you want to conserve Shotgun ammunition, you can switch over to the Falcon 2 and approach cautiously for an assassination – otherwise you can fire the Shotgun as soon as you’ve crossed the threshold to neutralize the threat. Inspect the guard for a Falcon 2 clip and then head to the north towards the Pillbox where you’ll encounter the third guard pacing vertically.
Respond in kind with your Shotgun, and then travel to the northwest to find another guard pacing horizontally. When you’ve taken out both guards in this area, inspect the latter for a Falcon 2 ammunition clip and then follow the brickwork ahead to the east to find the next passage.
You’ll find another guard standing at attention in this opening, and he can be taken out without resistance if you face yourself diagonally from the protection of the brickwork. Send him reeling with your Shotgun and then head to the west to find the first Warehouse. We’ll enter the building as soon as it comes into view.
JUNGLE BASE III – WAREHOUSE I: MAP OVERVIEW
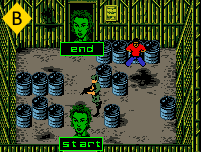
You’ll likely be spotted by the guard to the north as soon as you’ve entered the Warehouse, so make quick work of him with your Shotgun to eliminate any threat he poses. From here, you’ll need to work your way around the barrels to the right in order to make a path towards the Hostage held captive in the Warehouse. Once you’ve liberated the Hostage, head back out through the barrles and head to the north through the only available exit.
JUNGLE BASE III – COMPOUND II
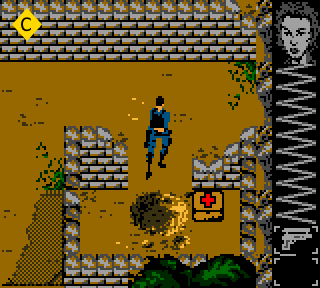
![]() Now that we’re inside the enclosure on the opposite side of the Warehouse, we’ll locate the next guard that paces vertically through the break in the fence. If you stand beside the jungle tree in this area, you should be able to surprise the guard when he passes. If you’d prefer to employ a bit of stealth, you can assassinate him with your Falcon 2, though using your Shotgun is equally as effective. Inspect he guard when you’ve finished with him and you’ll recover a Falcon 2 clip along with a Med-Kit (25% Health Restore). From here we’ll head to the northeast in order to find a second Med-Kit enclosed in a bit of brickwork and take it as well.
Now that we’re inside the enclosure on the opposite side of the Warehouse, we’ll locate the next guard that paces vertically through the break in the fence. If you stand beside the jungle tree in this area, you should be able to surprise the guard when he passes. If you’d prefer to employ a bit of stealth, you can assassinate him with your Falcon 2, though using your Shotgun is equally as effective. Inspect he guard when you’ve finished with him and you’ll recover a Falcon 2 clip along with a Med-Kit (25% Health Restore). From here we’ll head to the northeast in order to find a second Med-Kit enclosed in a bit of brickwork and take it as well.
Now that our health is a little more manageable, we’re ready for more direct confrontations with the Shotgun. Before we engage in that however, we’re going to use our current vantage point to take out two guards without any resistance. If you travel to the north from the second Med-Kit, you’ll locate a large brick wall that runs horizontally. If you approach the wall and begin to walk along its length, you’ll spot a guard pacing above. He won’t take any heed to your appearance, but he can still be effected by our fire. Line yourself up with the guard from below, and then fire your Shotgun as he approaches, killing him instantly.
Continue to follow the wall and you’ll locate the second guard patrolling in a similar manner to the north – utilize the same technique and take him out with the Shotgun as well.
Once that’s taken care of, we’ll continue to follow the wall to the west until it runs into a corner, at which point we’ll start to head south through a tight alleyway between the fence and brickwork. You will encounter a guard to the south in this area that may begin firing if he’s spotted you coming. Be prepared with your Shotgun in hand and he shouldn’t pose much of a threat for very long. Inspect his body afterwards and you’ll find a Falcon 2 clip.
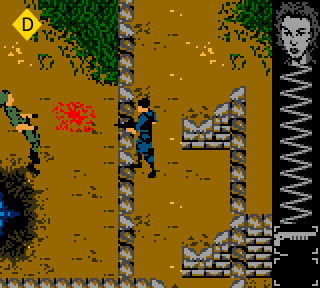
![]() Now that this area is finished, we’re going to retrace our steps back towards the Pillbox. Once you’ve passed the entrance to the first Warehouse, head south through the opening in the brickwork and then follow it to the west until you find a corner. If you walk to the south from here you should be able to spot another guard pacing vertically just on the other side of the brickwork. When you’re ready, face the guard and open up with your Shotgun, killing him instantly. From here, head back over to the east towards the Pillbox and then back south through the entrance where we took care of the second oblivious guard.
Now that this area is finished, we’re going to retrace our steps back towards the Pillbox. Once you’ve passed the entrance to the first Warehouse, head south through the opening in the brickwork and then follow it to the west until you find a corner. If you walk to the south from here you should be able to spot another guard pacing vertically just on the other side of the brickwork. When you’re ready, face the guard and open up with your Shotgun, killing him instantly. From here, head back over to the east towards the Pillbox and then back south through the entrance where we took care of the second oblivious guard.
We won’t be returning to the southern portion of the base where we began, so instead, we’ll continue walking to the west over the vehicle tracks and into further brickwork. Depending on your timing, you’ll either encounter the next guard as he faces away, continuing his patrol to the west, or you’ll confront him head-on as he begins the assault. You can either use the Shotgun, or the 6-YYY if you want to conserve ammo during a direct confrontation, and the Falcon 2 for an assassination if you catch him from behind.
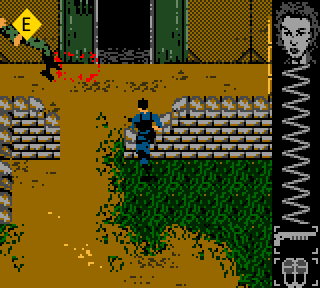
![]() Inspect the guard for another Falcon 2 clip and then work your way through to the north, following the pool of water right. As you follow the shore, you’ll come across the guard we had taken out previously from behind the brickwork to the east. Carry on to the north and you’ll find another guard standing in front of the next Warehouse – once again, we can face the guard diagonally and take him out without a fight with our Shotgun. Optional Shotgun ammunition can be obtained by taking out the guard in the alleyway to the west, otherwise we’ll inspect the fallen guard for a Med-Kit (25% Health Restore) and enter the Warehouse.
Inspect the guard for another Falcon 2 clip and then work your way through to the north, following the pool of water right. As you follow the shore, you’ll come across the guard we had taken out previously from behind the brickwork to the east. Carry on to the north and you’ll find another guard standing in front of the next Warehouse – once again, we can face the guard diagonally and take him out without a fight with our Shotgun. Optional Shotgun ammunition can be obtained by taking out the guard in the alleyway to the west, otherwise we’ll inspect the fallen guard for a Med-Kit (25% Health Restore) and enter the Warehouse.
JUNGLE BASE III – WAREHOUSE II: MAP OVERVIEW
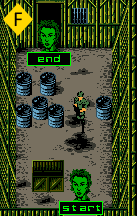
As soon as you enter the warehouse, you should manage to locate a dataDyne guard heading away from your current position to the north. You can follow behind the guard cautiously until the barrels come into view on the left, at which point we’ll hide behind them before the guard can turn around and spot us. From here, we can wait until the guard patrols to the south out of view to make our escape through to the north exit, or we can surprise him with the Shotgun or Falcon 2. The guard doesn’t carry anything on his person, so it’s a waste of time when our escape doesn’t depend on taking him out. Whichever strategy you prefer, execute it and then head out through the exit to the north.
JUNGLE BASE III – COMPOUND III
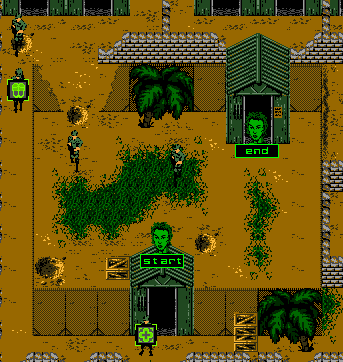
As soon as you exit the warehouse, you’ll be set upon by a guard to the northeast. Return fire with your Shotgun while avoiding the guard to the west and you should be able to avoid an unnecessary confrontation while silencing your attacker. Continue to the northeast and you’ll find the next Warehouse.
JUNGLE BASE III – WAREHOUSE III: MAP OVERVIEW
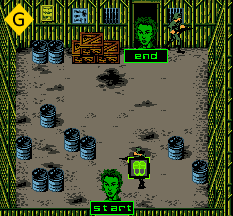
You’ll be thrust into another confrontation as soon as you enter the Warehouse courtesy of a dataDyne guard to the northeast – locate his position and return fire with the Shotgun to gain the upper hand. Inspecting the fallen guard will offer up a further 8 rounds of Shotgun ammunition, which we’ll take with us. If you head to the north you’ll find the next guard near the exit, we’ll eschew any stealth and simply take him out with our Shotgun before he has a chance to react. Once we’ve cleared out the Warehouse, we’ll exit through the doorway to the north.
JUNGLE BASE III – COMPOUND IV
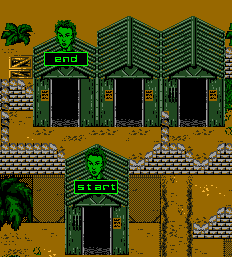
Luckily you’ll find the next series of Warehouses directly ahead without any opposition. There are three doors that lead into the same Warehouse, though you’ll notice that the third entrance will lead to a path on the east side – our aim will be to enter the leftmost Warehouse entrance and work our way to the right. Before we do so however, make sure that your Shotgun is prepared – you’ll need to fire it off as soon as you enter the Warehouse to take out the first guard waiting for us. When you’re ready, enter the leftmost entrance.
JUNGLE BASE III – WAREHOUSE IV: MAP OVERVIEW
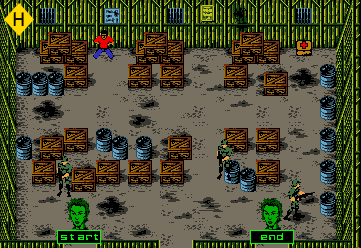
Firing immediately as you enter the Warehouse will allow you to get the jump on the first dataDyne guard without any return fire. Once the guard has been taken out, you’ll need to step over his body and head to the north, snaking your way through the crates and barrels until the path opens up. If you head north from here, you’ll be able to rescue the second and final Hostage in Jungle Base III. Once you’re finished, head back down and start heading east; you should be able to spot another dataDyne guard facing away from your position. Approach the guard from behind cautiously and then open fire with the Shotgun to neutralize the threat, pinning him to the barrels. In order to take out the final guard in this area, we’ll snake through the pathway between crates next to the pinned guard, and position ourselves between the last two crates as we face south. This should give us an ideal vantage point to locate the guard when he patrols horizontally. Carefully line up the shot and then ring out a Shotgun blast when he’s in your sights, and you’ll exterminate him without issue. If you travel to the northeastern corner of the Warehouse, you’ll recover a Med-Kit (25% Health Restore) that should make up for a lot of the damage we’ve accumulated during our rampage. When you’re ready to leave, head south from the Med-Kit and you’ll come across the door that leads to the next area.
JUNGLE BASE III – COMPOUND V
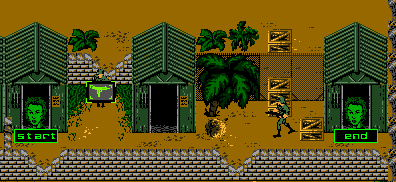
We’re onto the final stretch now, as there’s only one last Warehouse to enter to complete our mission. We’ll begin traveling east to locate the Warehouse after a set of a crates – the other Warehouse that you’ll pass in this area provides a Med-Kit (25% Health Restore), but we won’t require it to finish the area. Luckily there isn’t any opposition to fend off, as we would have taken both dataDyne guards out earlier on in the mission, so step over the bodies of the fallen guards and then make your way into the last Warehouse.
JUNGLE BASE III – WAREHOUSE V: MAP OVERVIEW
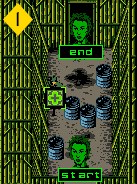
The final dataDyne guard will begin to charge through a series of barrels before he can descend on your position – fortunately we’re in an ideal position to simply open fire with the Shotgun as he rounds the final barrel. Doing so will send him reeling before he can even pull the trigger himself. Once you’ve taken out the last dataDyne guard, inspect his person to locate a Med-Kit (25% Health Restore) and then make your way around the barrels towards the exit.