Chapter 3-4: Cybernetics Division III


Navigation:
Chapter 1: Carrington Institute Training
Chapter 2: The Jungles of South America
Chapter 3: dataDyne Cybernetic Manufacturing
3-1: Cybernetics Division I
3-2: Cybernetics Division II
3-3: Attack Cyborg
3-4: Cybernetics Division III
3-5: Cybernetics Division IV
3-6: Mink Hunter
Chapter 4: dataDyne Operations Base/Crash Site
Chapter 5: Captive aboard the Pelagic I
Chapter 6: Carrington Institute HQ
Chapter 7: Perfect Dark GBC Secrets and Extras
DATADYNE CYBERNETIC FACILITY: MAP OVERVIEW
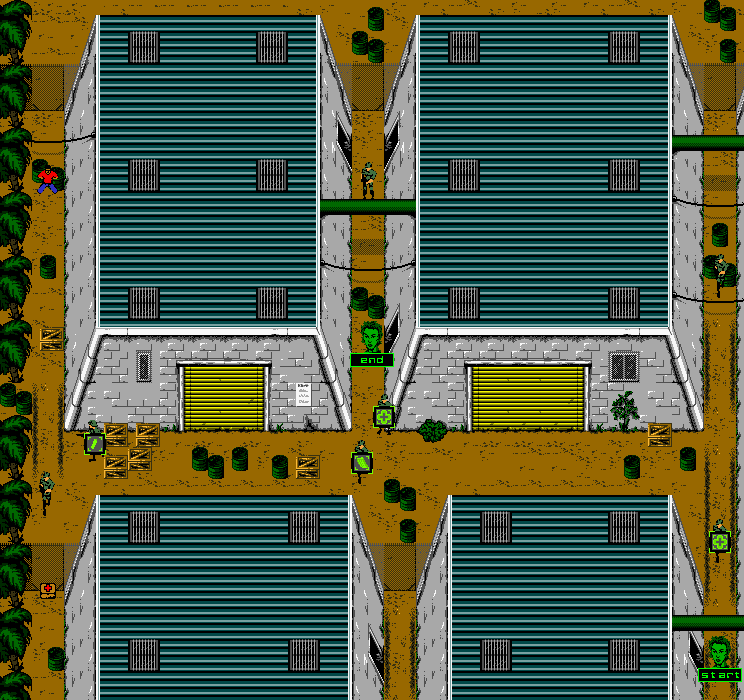
As you emerge from the third factory exit, you’ll be able to locate a guard pacing to the north. If you’re quick enough on the trigger, you’ll be able to reach him before he turns back around to the south and take him out with an assassination. Otherwise, you’re free to use the Shotgun to send the guard reeling. Inspecting the fallen guard will reveal a Med-Kit (25% Health Restore), which we’ll take with us as we head to the west. You’ll come across two further guards in the alleyway between the third and fourth buildings; use your Shotgun to take them out as they charge towards your position, and you’ll be rewarded with a Med-Kit (25% Health Restore) and a Machine Gun clip upon inspection. Rather than heading up to the north through the alley straight away, we’re going to continue walking to the west. Take out the final pair of guards ahead with your Shotgun as you step out in front of the last factory, and then inspect the northern-most guard for a Falcon 2 clip. From here, we’re going to continue walking to the north until we locate a hostage – untie him from the barrels and then retrace your steps to the initial confrontation with the first pair of guards. Once you’ve returned to the gap between the third and forth factory, head north and then enter the door to your right.
CYBERNETICS DIVISION III: MAP OVERVIEW
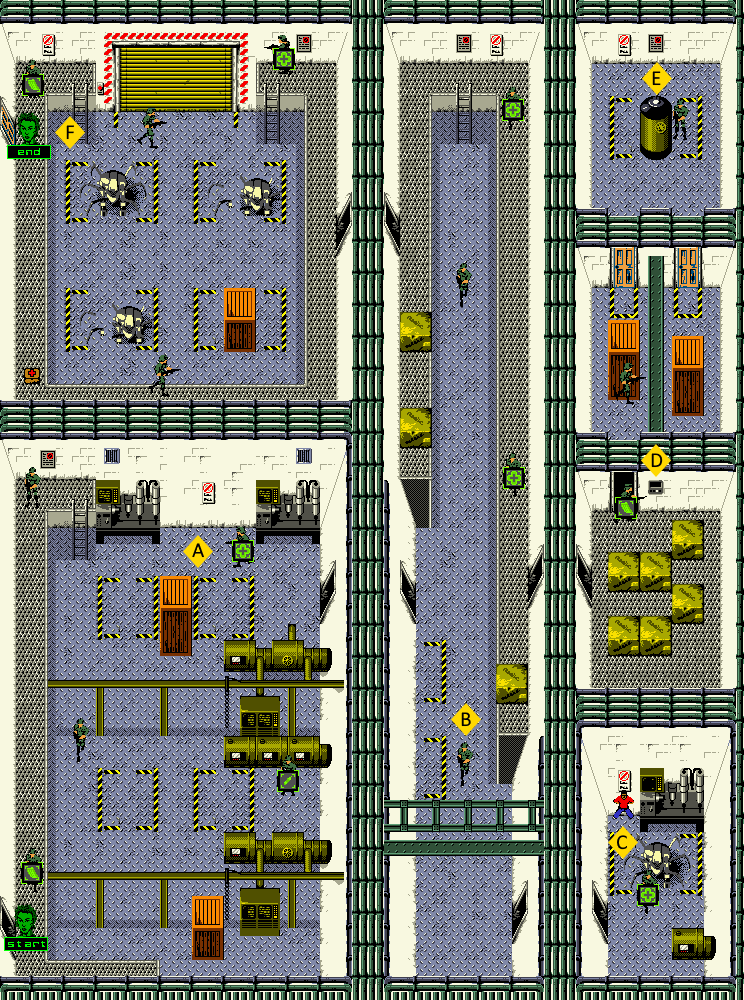
MISSION OBJECTIVES:
• LOCATE VOLATILE LIQUID CANNISTER
• PLACE C4 EXPLOSIVE ON CANNISTER
• REACH FACTORY EXIT
Since we haven’t gotten a chance to try out the Rocket Launcher since we picked up in the previous factory, let’s see what it’s capable of. Switch over from the Shotgun to the Rocket Launcher as soon as you enter the third factory and then face north – you should be able to spot a guard heading to your position. Fire your Rocket Launcher towards the guard and you’ll take him out in a single hit. If you head north from here, you’ll spot a guard pacing vertically on the factory floor to the right. You can also use the Rocket Launcher to take him out by facing east and lining up the shot, but it isn’t a necessity as we won’t need to confront the guard otherwise.
We’re going to continue following the catwalk to the north until we can just spot a ladder off to the right. From here, edge your way cautiously to the north to reveal the legs of the next guard – if you fire the Rocket Launcher to the north, you should be able to take him out without much resistance.
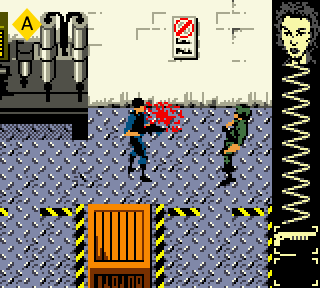
![]() Switch back over to your Shotgun, and then use the ladder to descend to the factory floor. Once you’ve done so, head to the right and then prepare to encounter a guard as soon as you’ve passed a large crate. Take the guard out with a single Shotgun blast before he’s gotten much of a chance to react, and then take his Med-Kit (25% Health Restore) with an inspection. If you’d like to replenish your Rockets, there is one final stationary guard to the south, just around the industrial equipment. Assassinating the guard with the Falcon 2 and then inspecting him will provide you with 4 further Rockets, but it’s entirely optional.
Switch back over to your Shotgun, and then use the ladder to descend to the factory floor. Once you’ve done so, head to the right and then prepare to encounter a guard as soon as you’ve passed a large crate. Take the guard out with a single Shotgun blast before he’s gotten much of a chance to react, and then take his Med-Kit (25% Health Restore) with an inspection. If you’d like to replenish your Rockets, there is one final stationary guard to the south, just around the industrial equipment. Assassinating the guard with the Falcon 2 and then inspecting him will provide you with 4 further Rockets, but it’s entirely optional.
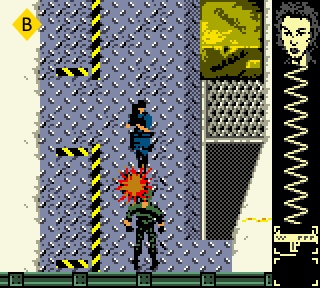
![]() When you’re ready to move on, we’ll locate the door at the northeast corner of the room and then progress into the thin corridor on the other side. Switch over to the Rocket Launcher and start heading south – you’ll eventually come across a guard pacing vertically, traveling in the same direction. Get as close to the guard as you can and then fire a Rocket from your Launcher; the guard won’t have any time to react and will be engulfed from the ensuing explosion, even if he tries to escape. Once you’ve dealt with the guard, continue heading south and you’ll discover a door on the right at the end of the hall.
When you’re ready to move on, we’ll locate the door at the northeast corner of the room and then progress into the thin corridor on the other side. Switch over to the Rocket Launcher and start heading south – you’ll eventually come across a guard pacing vertically, traveling in the same direction. Get as close to the guard as you can and then fire a Rocket from your Launcher; the guard won’t have any time to react and will be engulfed from the ensuing explosion, even if he tries to escape. Once you’ve dealt with the guard, continue heading south and you’ll discover a door on the right at the end of the hall.
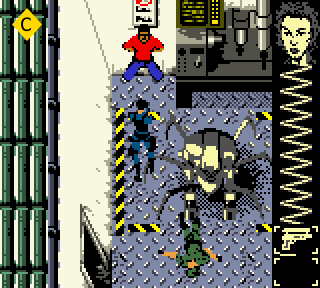
![]() You’ll need to be cautious as you enter the doorway, as there’s a guard that paces a short vertical route just ahead. Once you’ve edged your way towards the threshold, the guard should become visible. You can either approach the guard covertly with your Falcon 2, or you can take him out with the Shotgun from the doorway once he’s properly aligned. Inspect the guard once he’s been taken out for a Med-Kit (25% Health Restore) and then head towards the northwest corner of the room. You should be able to locate the second factory hostage between the wall and the table; free him from his bounds and then return to the corridor.
You’ll need to be cautious as you enter the doorway, as there’s a guard that paces a short vertical route just ahead. Once you’ve edged your way towards the threshold, the guard should become visible. You can either approach the guard covertly with your Falcon 2, or you can take him out with the Shotgun from the doorway once he’s properly aligned. Inspect the guard once he’s been taken out for a Med-Kit (25% Health Restore) and then head towards the northwest corner of the room. You should be able to locate the second factory hostage between the wall and the table; free him from his bounds and then return to the corridor.
Switch over to the Falcon 2 when you’ve returned to the hallway and then head back up to the north. You should be able to locate a guard on the catwalk to the right as you travel – as soon as you’ve done so, line yourself up with his position and then assassinate with the Falcon 2 from the floor below.
From here, we’re going to switch back over to the Rocket Launcher and continue heading north – once you encounter the next guard in the center of your path, we’ll fire a single Rocket towards him and neutralize the threat.
If you continue walking to the north you’ll find the ladder that leads up towards the catwalk along with a guard pacing south on its surface to the right. Switch over to the Falcon 2 and assassinate the guard from your position on the floor below to take him out without any resistance.
Both guards on the catwalk will provide a Med-Kit (25% Health Restore) upon inspection, though you might want to reflect on your current health before scavenge the pair together. If you health is below 60%, you should inspect both guards to recover to 100%. If your health is above 70% however, it might be wise to leave at least one Med-Kit behind, as we’ll be returning to this location on our way back. When you’re ready to continue, follow the catwalk to the south and then enter the doorway on the right.

![]() From your vantage point in the doorway, you should be able to spot the legs of a guard pacing horizontally to the north – wait until the guard has finished his patrol to the left and then hide inside the space afforded behind the boxes as he heads to the right. From here, you should be able to employ a bit of stealth by waiting until the guard paces once more to the left and then leave the boxes as he turns to the right. Follow him closely and then go in for an assassination when the time is right. You should be able to locate a Door Control panel just to the right of the door; interface with the panel and then repeat the six stage pattern shown.
From your vantage point in the doorway, you should be able to spot the legs of a guard pacing horizontally to the north – wait until the guard has finished his patrol to the left and then hide inside the space afforded behind the boxes as he heads to the right. From here, you should be able to employ a bit of stealth by waiting until the guard paces once more to the left and then leave the boxes as he turns to the right. Follow him closely and then go in for an assassination when the time is right. You should be able to locate a Door Control panel just to the right of the door; interface with the panel and then repeat the six stage pattern shown.
Once you’ve aced the Door Control, you’ll allow passage into the room with the third liquid cannister to the north. From your current position at the Door Control panel, head into the doorway the previous guard was pacing in front of and you should be able to identify another guard that paces between two large crates. It is possible to covertly approach the guard and assassinate him with the Falcon 2, but it’s quite difficult to catch up to him before he’s reached the end of his patrol.
The preferable option is to switch over to the Shotgun and wait in the doorway until the guard is in an ideal position just ahead, and then fire to take him out with a single shot.
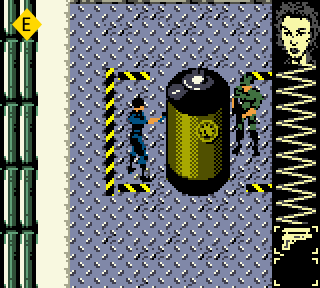
![]() Once the guard has been neutralized, continue to the north between the crates and you’ll discover two doors that lead into the same room. Choose the door on the left and you’ll be able to enter the room without being set upon by the guard placed in line with the door on the right. Approach the left side of the cannister and you’ll plant the third C-4 Explosive successfully. When this is done, head around the top of the cannister so that you can approach the guard from behind, and then go in for an assassination with the Falcon 2. After the guard has been neutralized, we’ll make our way back out to the corridor.
Once the guard has been neutralized, continue to the north between the crates and you’ll discover two doors that lead into the same room. Choose the door on the left and you’ll be able to enter the room without being set upon by the guard placed in line with the door on the right. Approach the left side of the cannister and you’ll plant the third C-4 Explosive successfully. When this is done, head around the top of the cannister so that you can approach the guard from behind, and then go in for an assassination with the Falcon 2. After the guard has been neutralized, we’ll make our way back out to the corridor.
If you’ve come under fire at all during the trip to the liquid cannister, you can use this time to search the fallen guards on the catwalk for their Med-Kits (25% Health Restore). Otherwise, we’re going to continue to the north on the catwalk and then follow it as it curves around to the south. You should be able to locate a door on the left side as you reach the end of the path, which will lead us to the final area of the third factory.
Enter the doorway and then follow the catwalk on the other side to the north. When the top of the ladder on the left comes into view, stop walking and you should be able to locate the legs of a guard that paces horizontally. Wait until the guard has finished his patrol to the right, and then prepare to follow him as he moves left. Once you’ve bridged the distance, assassinate the guard with the Falcon 2 and then inspect his body for a Med-Kit (25% Health Restore).
From here, we’re going to descend down the ladder towards the factory floor and then follow the catwalk we were just on to travel around the perimeter. When you reached the southern point of the catwalk, follow its edge to the left and you’ll locate another guard that paces horizontally along its surface. Line yourself up with the guard and assassinate him with the Falcon 2 from the floor below.
When you reach the corner of the catwalk, you should be able to spot a Med-Kit (25% Health Restore) left in the open, which we can grab once we’re on the same elevation.
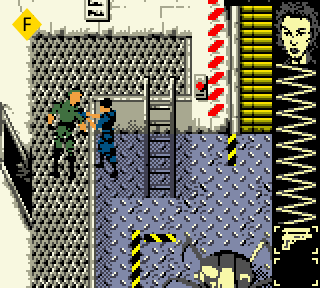
![]() From the corner, head to the north and you’ll discover a ladder and another guard that paces vertically on the catwalk. Once again, we’re going to line up the guard with our Falcon 2, and then go in for an assassination when he’s directly in front of us. Now that all of the catwalk guards have been taken out, we can ascend the ladder without fear of being discovered. You can take this time to view your health as well – if you’re under 100%, you can travel south to the corner of the catwalk for the Med-Kit we saw before. Once you’re all patched up, we’ll make our way back north towards the exit on the left to leave the third factory.
From the corner, head to the north and you’ll discover a ladder and another guard that paces vertically on the catwalk. Once again, we’re going to line up the guard with our Falcon 2, and then go in for an assassination when he’s directly in front of us. Now that all of the catwalk guards have been taken out, we can ascend the ladder without fear of being discovered. You can take this time to view your health as well – if you’re under 100%, you can travel south to the corner of the catwalk for the Med-Kit we saw before. Once you’re all patched up, we’ll make our way back north towards the exit on the left to leave the third factory.