Chapter 3-5: Cybernetics Division IV


Navigation:
Chapter 1: Carrington Institute Training
Chapter 2: The Jungles of South America
Chapter 3: dataDyne Cybernetic Manufacturing
3-1: Cybernetics Division I
3-2: Cybernetics Division II
3-3: Attack Cyborg
3-4: Cybernetics Division III
3-5: Cybernetics Division IV
3-6: Mink Hunter
Chapter 4: dataDyne Operations Base/Crash Site
Chapter 5: Captive aboard the Pelagic I
Chapter 6: Carrington Institute HQ
Chapter 7: Perfect Dark GBC Secrets and Extras
DATADYNE CYBERNETIC FACILITY: MAP OVERVIEW
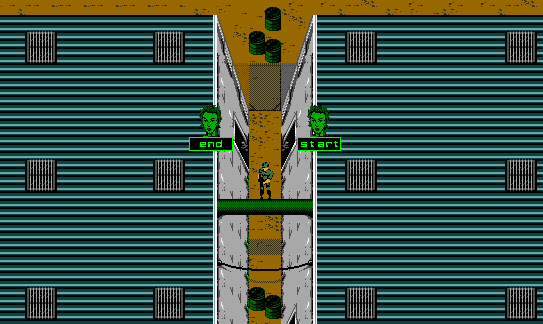
You’ll find the entrance to the final factory as soon as you’ve stepped out in the alleyway between the third and fourth building. There is a single guard stationed to the south, but he won’t offer us any provisions if assassinated, so we’re going to ignore him entirely and step through the doorway as silently as possible.
CYBERNETICS DIVISION IV: MAP OVERVIEW
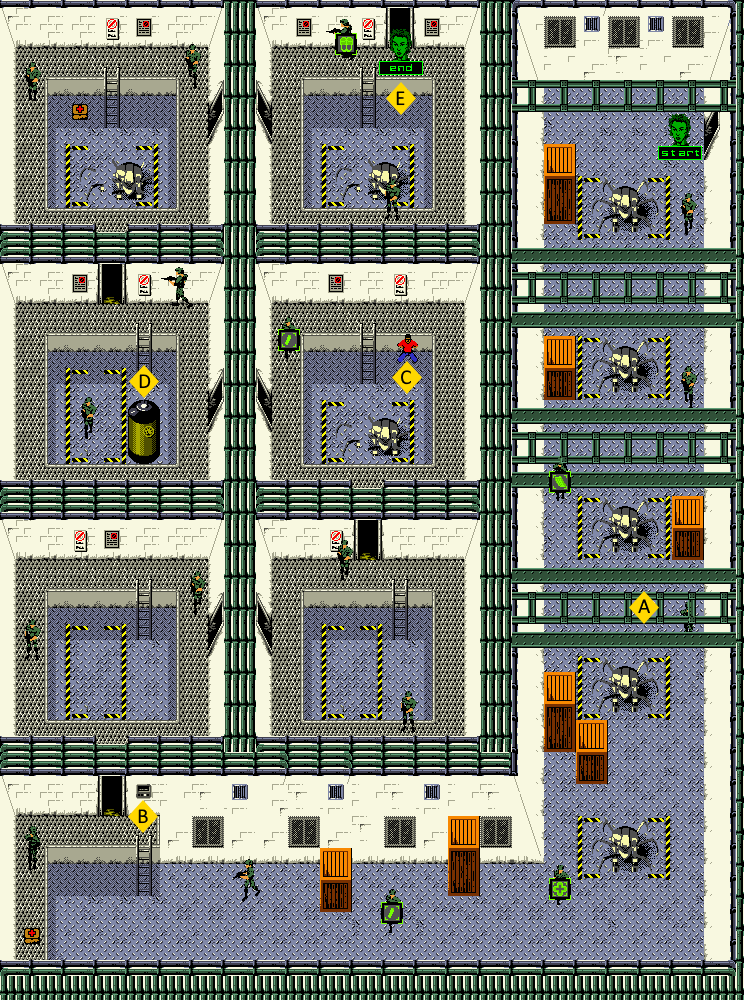
MISSION OBJECTIVES:
• LOCATE VOLATILE LIQUID CANNISTER
• PLACE C4 EXPLOSIVE ON CANNISTER
• REACH FACTORY EXIT
From the entrance, you should spot a guard heading to the immediate south – we’re going to follow the guard with our Shotgun drawn and take him out when we’ve bridged the distance. The guard doesn’t have any supplies for us, so we’ll ignore inspecting his body and instead continue walking to the south. A second guard can be found heading in the same direction, and with any luck you’ll be able to catch up with him as he’s walking south as well. Deal with this second guard in the same manner as we dealt with his partner and you shouldn’t have any trouble.
Continue walking to the south and you’ll find that your path is blocked by a tall crate; approach the crate to make contact and then head to the west and you’ll discover the third guard passing your position to the north. You should just miss getting spotted by the guard as he passes, so get behind him and then unload your Shotgun to take him out. Inspecting the fallen guard will provide us with a Machine Gun clip, which we’ll take with us as we head down to the south.
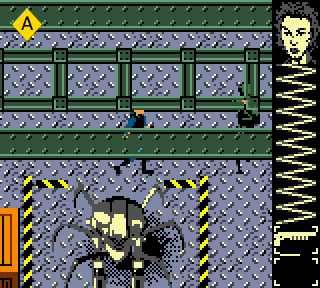
![]() Eventually, you’ll come across another tall crate that blocks the path to the south. This time, we’ll touch the crate and then begin walking towards the east, where we’ll come across the fourth guard heading north on the opposite side. Once again, you should be able to remain undetected as the guard ignores our presence and continues his patrol. Finish walking to the east and then head north so that you’re aligned with the guard and then open fire. If you’ve done this correctly you’ll manage to get the jump on the guard before he’s managed to turn around. Since the guard doesn’t offer any supplies, we’ll just continue walking to the south.
Eventually, you’ll come across another tall crate that blocks the path to the south. This time, we’ll touch the crate and then begin walking towards the east, where we’ll come across the fourth guard heading north on the opposite side. Once again, you should be able to remain undetected as the guard ignores our presence and continues his patrol. Finish walking to the east and then head north so that you’re aligned with the guard and then open fire. If you’ve done this correctly you’ll manage to get the jump on the guard before he’s managed to turn around. Since the guard doesn’t offer any supplies, we’ll just continue walking to the south.
Take note of the Attack Cyborg skeleton surrounded by the yellow and black hazard stripes to the left as you begin your trek to the south. We’re going to pass by the first Cyborg skeleton without issue – but when we see the second come into view, we’re going to immediately head west so that we pass over to the top of the hazard stripes. You’ll pass under another tall crate and come across the final southern patrolling guard. Follow the guard and then open up with your Shotgun to take him out without any resistance.
Inspecting the guard will reveal a Med-Kit (25% Health Restore) which we can take with us, or we can skip the inspection all together if you’d prefer to double back to this location if things get too dire up ahead.
From here, we’ll follow the corridor as it rounds to the corner to the west. After you pass a tall crate against the northern wall, make sure that you’re in the center of the path and you should be able to spot a guard pacing vertically. You should find yourself aligned with this guard as he passes to the south, so unload another round courtesy of your Shotgun and you’ll neutralize him without issue. Inspecting the guard will provide us with a round of ammunition for our Falcon 2, which we’ll take with us.
Before we continue, we’re going to get some use out of our newly acquired ammunition and switch over from the Shotgun to the Falcon 2. Carefully edge your way past the smaller crate along the wall ahead and you should be able to spot a guard facing away from us as he stands at attention. If you can work your way around to his rear without being spotted, you’ll be able to assassinate him covertly without drawing any suspicion.
If we continue our trek to the east we’ll come across a ladder that leads up towards a catwalk and a locked door. We’re going to ignore the ladder for the time being, and instead continue walking to the west where we’ll discover a guard patrolling the vertical length of the catwalk. From our position of relative safety underneath the catwalk, we’re going to line up our Falcon 2 with the guard and then assassinate him once he manages to pass our line of fire.
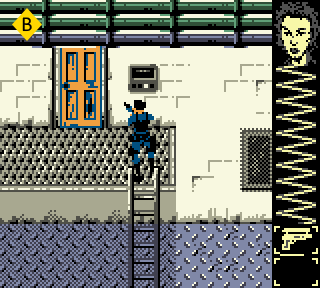
![]() With the area cleared, we’ll make our way towards the ladder and climb onto the catwalk. You’ll find another Door Control panel next to the locked door – interface with the panel and you’ll be tasked with matching the six color sequence provided. Once you’ve satisfied these conditions, the door next to the panel will unlock, allowing you passage into the final area of the factory. Before you continue however, you can find a Med-Kit (25% Health Restore) on the corner of the catwalk. It’s unlikely that you’ll need to use the Med-Kit at this point, but you can always return to this location if you require it in the future.
With the area cleared, we’ll make our way towards the ladder and climb onto the catwalk. You’ll find another Door Control panel next to the locked door – interface with the panel and you’ll be tasked with matching the six color sequence provided. Once you’ve satisfied these conditions, the door next to the panel will unlock, allowing you passage into the final area of the factory. Before you continue however, you can find a Med-Kit (25% Health Restore) on the corner of the catwalk. It’s unlikely that you’ll need to use the Med-Kit at this point, but you can always return to this location if you require it in the future.
The rooms ahead are arranged in small chambers with catwalk perimeters – for the most part, the objective of the ‘annex chambers’ will be trying to descend into the lower portion of the room from the ladders provided where we can start picking off guards on the catwalks above.
Once you’ve entered the first annex chamber, we’ll approach the edge of the southern catwalk and then ease our way to the west so that we can see the feet of the guard on the left side of the chamber. We’ll switch our Falcon 2 out for the Rocket Launcher and then face the guard by positioning ourselves diagonally by aiming northwest. We’ll release the Rocket once we’re aligned and obliterate the guard on contact.
From here, we’ll head up the left path in a clock-wise fashion until we can locate the ladder on the north side of the room leading down into the factory floor below. Once you’ve done so, switch out the Rocket Launcher for the Falcon 2 and then approach the right edge of the catwalk. You should be able to locate a guard that patrols vertically just above – once again, we’ll line up the Falcon 2 with the guard and then assassinate him as he crosses into our line of fire.
Now that the first annex chamber has been cleared, we can climb out of the pit and make our way to the right to find the exit to the next chamber.
Inside the second room, you’ll need to head to the south and then follow the catwalk to the east in order to discover the first guard. Luckily for us, the guard is facing towards the south and is entirely oblivious to our position, so it’s just a matter of switching out to the Falcon 2 and approaching the guard from the side for an easy assassination.
After this is accomplished, you can continue following the catwalk as it wraps around to the north. Take note of the ladder as it comes into view, as you’ll need to descend the rungs before you come too close to the guard patrolling just in front of the exit. Once you’ve been able to lower yourself into the pit, switch over to the Shotgun and then approach the guard from below. From here it’s just a case of lining yourself up with the guard above and then taking him out with a blast from the Shotgun.
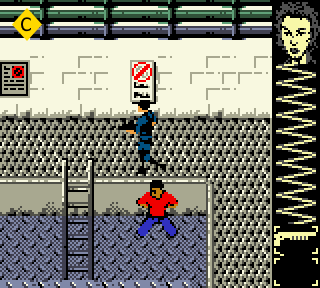
![]() The third chamber will prove to the easiest yet – from the entrance, follow the catwalk to the right and you’ll be able to locate the ladder without any resistance. Descend down from the catwalk into the pit and you’ll be able to rescue the Hostage that’s been held captive next to the ladder. Once you’ve liberated the Hostage, switch over to the Falcon 2 and then approach the catwalk on the left to find the lone guard pacing vertically above. Assassinate the guard by lining up your shot with the Falcon 2, and then inspect his body for a round of Falcon 2 ammunition. When you’re ready to leave, you’ll find the next doorway to the left.
The third chamber will prove to the easiest yet – from the entrance, follow the catwalk to the right and you’ll be able to locate the ladder without any resistance. Descend down from the catwalk into the pit and you’ll be able to rescue the Hostage that’s been held captive next to the ladder. Once you’ve liberated the Hostage, switch over to the Falcon 2 and then approach the catwalk on the left to find the lone guard pacing vertically above. Assassinate the guard by lining up your shot with the Falcon 2, and then inspect his body for a round of Falcon 2 ammunition. When you’re ready to leave, you’ll find the next doorway to the left.
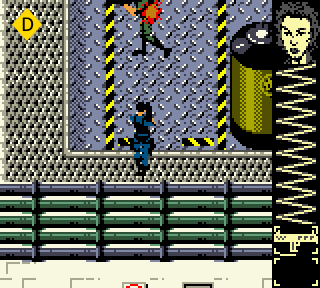
![]() As you enter the fourth annex chamber, switch over from the Falcon 2 to the Rocket Launcher and then head down to the southern portion of the catwalk. After you pass the final cannister, you should be able to spot a guard patrolling vertically inside the pit. The easiest way to take out this guard is to stand just below his position and then fire a rocket when his back is turned. Once the guard is taken out, follow the catwalk to the left and you should be able to spot the final guard ahead pacing horizontally. Take him out with the Rocket Launcher as well and you’ll have a clear path to the ladder, and by extension, the final cannister.
As you enter the fourth annex chamber, switch over from the Falcon 2 to the Rocket Launcher and then head down to the southern portion of the catwalk. After you pass the final cannister, you should be able to spot a guard patrolling vertically inside the pit. The easiest way to take out this guard is to stand just below his position and then fire a rocket when his back is turned. Once the guard is taken out, follow the catwalk to the left and you should be able to spot the final guard ahead pacing horizontally. Take him out with the Rocket Launcher as well and you’ll have a clear path to the ladder, and by extension, the final cannister.
As soon as you’ve made your way into the pit, approach the cannister and you’ll prime the last charge of C4 Explosive to complete the objective. Now that everything is ready to blow, we’ll head back out of the pit and work our way into the fifth annex by heading through the exit to the north.
Once you’re inside the fifth annex chamber, edge your way to the left side of the room and you’ll locate a guard pacing the catwalk vertically. If you can keep your distance as the guard heads south, you should be able to remain undetected as he turns on his heel and continues his patrol to the north. When this occurs, switch over to the Falcon 2 and then pursue him covertly – once you’ve bridged the distance, go in for an assassination and take him out. From here, we’ll continue to follow the catwalk ahead to discover the ladder that descends into the pit. If you’ve managed to avoid any confrontation in the annex chambers, you should have any need for the Med-Kit (25% Health Restore) beside the ladder, but if you’ve come under fire you can grab it now to get back to 100%.
When you’re ready, you can find the final guard in this chamber patrolling vertically on the catwalk to the right. You can either choose to take him out by getting close with the Falcon 2 for an assassination, or you can keep your distance with the Rocket Launcher and obliterate him entirely.
Once you’ve managed to clear the room, climb out of the pit and make your way to the right side of the catwalk to discover the exit to the final annex chamber.
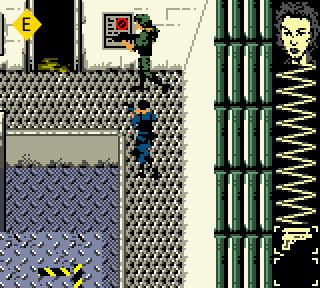
![]() Follow the catwalk in this annex chamber to the south and then to the right to find an oblivious southern-facing guard. Covertly approach the guard from the side and then take him out with an assassination from the Falcon 2. From here, we’ll continue following the catwalk to the north to find the final guard pacing the northern portion of the chamber horizontally. You can either choose to assassinate the guard with the Falcon 2, or you can use the Rocket Launcher or the Shotgun if your’re running low on ammunition. Once both guards have been neutralized and you’ve cleared the final annex chamber, you’ll find the factory exit to the north.
Follow the catwalk in this annex chamber to the south and then to the right to find an oblivious southern-facing guard. Covertly approach the guard from the side and then take him out with an assassination from the Falcon 2. From here, we’ll continue following the catwalk to the north to find the final guard pacing the northern portion of the chamber horizontally. You can either choose to assassinate the guard with the Falcon 2, or you can use the Rocket Launcher or the Shotgun if your’re running low on ammunition. Once both guards have been neutralized and you’ve cleared the final annex chamber, you’ll find the factory exit to the north.
If you find that the factory exit is locked, it means that you’ve yet to plant the C4 Explosive on the Liquid cannister in this factory. You’ll need to retrace your steps to the fourth annex chamber and then descend into the pit and approach the cannister. Once the C4 Explosive has been placed on the cannister, the door will open and you’ll be able to confront Mink Hunter…