Chapter 5-5: Pelagic I Main Deck


Navigation:
Chapter 1: Carrington Institute Training
Chapter 2: The Jungles of South America
Chapter 3: dataDyne Cybernetic Manufacturing
Chapter 4: dataDyne Operations Base/Crash Site
Chapter 5: Captive aboard the Pelagic I
5-1: Pelagic I Lower Deck
5-2: Pelagic I Mid Deck
5-3: Pelagic I Upper Deck
5-4: Octopus Prime Showdown
5-5: Pelagic I Main Deck
5-6: Pelagic I Escape
Chapter 6: Carrington Institute HQ
Chapter 7: Perfect Dark GBC Secrets and Extras
PELAGIC I MAIN DECK (BOW): MAP OVERVIEW
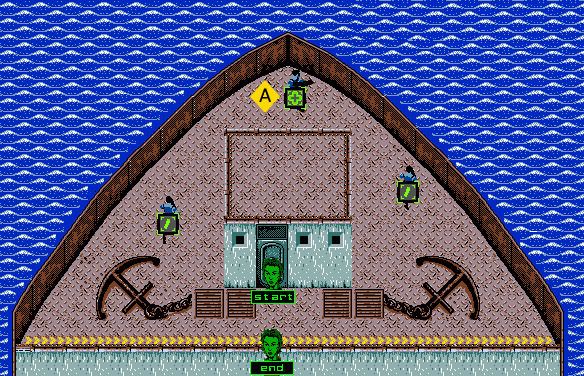
MISSION OBJECTIVES:
• DESTROY PELAGIC I
• ESCAPE USING SHIPS HELICOPTER
If you’ve managed to arrive at the Main Deck with full health, you can leave the bow by taking the ladder to the south from your current position and skip to the next section on the Main Deck (Bridge).
If not, you can restore your health by making your way back towards the wrought-iron hatch door and then very carefully inching your way to the west towards the leftmost square porthole. You’ll find that a guard paces vertically to the west, but you’ll need to keep care that you remain hidden as he makes his way south; try to position yourself so that only a sliver of the right half of the guard can be seen, as you’ll be detected otherwise.
Once the guard reaches the large anchor, he’ll turn around to continue his patrol to the north – prepare to trail the guard the second he’s turned away from your location, and then go in for an assassination with the Falcon 2.
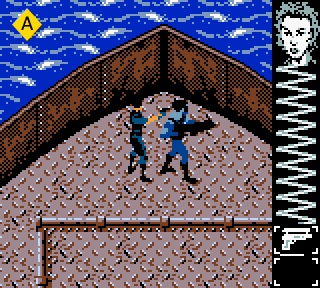
![]() Once you’ve taken out the guard, inspect his body for a Falcon 2 ammunition clip and then make your way to the northeast towards the bow of the Pelagic I. You’ll locate the second guard standing in place here, facing to the east. This is ideal for our purposes, as we’ll simply need to approach the guard from behind to neutralize him effortlessly. Inspect the guard once you’ve done so for a Med-Kit (25% Health Restore), then retrace your steps back to your starting position at the wrought-iron hatch door. From here, we’ll just need to head south until we’re able to locate the ladder that leads to the Main Deck (Bridge).
Once you’ve taken out the guard, inspect his body for a Falcon 2 ammunition clip and then make your way to the northeast towards the bow of the Pelagic I. You’ll locate the second guard standing in place here, facing to the east. This is ideal for our purposes, as we’ll simply need to approach the guard from behind to neutralize him effortlessly. Inspect the guard once you’ve done so for a Med-Kit (25% Health Restore), then retrace your steps back to your starting position at the wrought-iron hatch door. From here, we’ll just need to head south until we’re able to locate the ladder that leads to the Main Deck (Bridge).
PELAGIC I MAIN DECK (BRIDGE): MAP OVERVIEW
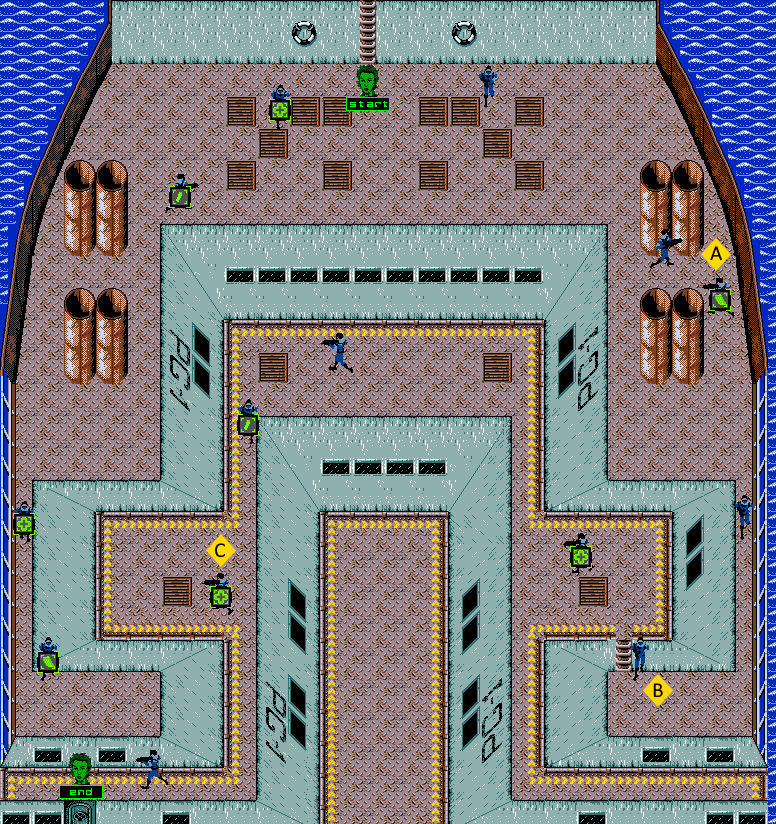
Once you’ve descended to the Main Deck (Bridge), follow the wall to the right until you arrive at a life preserver and you’ll encounter a guard patrolling to the south. Once you’ve located the guard, follow him covertly, and then go in for an assassination with the Falcon 2. This guard won’t offer us any supplies, so we’ll ignore an inspection and begin heading to the east until we’ve arrived at the ships’ guardrail. To the immediate south, you should be able to locate a pair of smokestacks – approach the middle of the smokestacks from the north and you’ll be able to remain hidden from the horizontally patrolling guard on the other side.
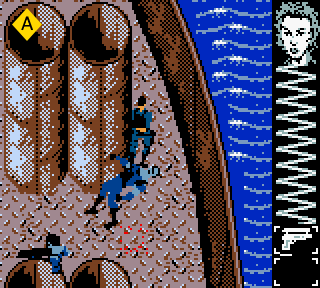
![]() While it might be tempting to assassinate the guard as he leaves the smokestack to the left, you’ll alert a second unseen guard also patrolling this area. To circumvent this, we’re going to attempt to assassinate the first guard on the right side instead. Carefully inch your way to the right side of the smokestack, easing your way towards the middle of the base so that both of the patrolling guards can be seen. Once this is accomplished, position yourself so that you’re able to align your Falcon 2 shot with the guard below, and you should be able to assassinate him when he reaches the end of his path.
While it might be tempting to assassinate the guard as he leaves the smokestack to the left, you’ll alert a second unseen guard also patrolling this area. To circumvent this, we’re going to attempt to assassinate the first guard on the right side instead. Carefully inch your way to the right side of the smokestack, easing your way towards the middle of the base so that both of the patrolling guards can be seen. Once this is accomplished, position yourself so that you’re able to align your Falcon 2 shot with the guard below, and you should be able to assassinate him when he reaches the end of his path.
The second guard will remain oblivious to our activities, continuing to pace to the guardrail as he passes by his fallen comrade again and again. We’ll remain in position on the right side of the smokestack until the guard reaches the guardrail and then turns to resume his patrolling to the west. When this occurs, pursue the guard covertly and then assassinate him before he can reach the leftmost smokestack.
If you’re detected by either guard, you can switch over to the Fantom and lay down some suppressive fire before you’re taken out – otherwise, we’ll inspect the second guard for a Fantom ammunition clip and then head back to the guardrail on the right. Once you’ve arrived at the edge of the ship, begin heading to the south and you’ll encounter the next guard as the path thins drastically – luckily the guard is facing away from us as he continues his patrol, which means that we can either bridge the distance and assassinate him with the Falcon 2, or we can switch over to the Disruptor and transmute his body into anti-matter before he has a chance to react.
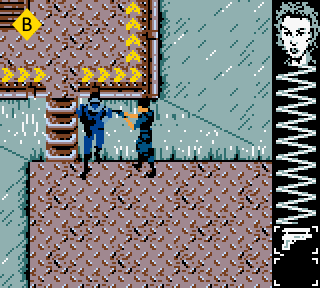
![]() Once the guard has been taken out, we’ll continue to follow the narrow passage to the south until it widens once again. From here, follow the left wall as it rounds the corner and heads to the west – once you’ve done so, you’ll locate another guard, standing at attention beside the ladder we’ll need to access. Luckily, this guard won’t notice if we stick to the wall and approach him from the right side, allowing us to bridge the distance and take him out with the Falcon 2 or the Disruptor without any resistance. Unfortunately, the next guard that we’re going to encounter isn’t going to provide us with the same courtesy…
Once the guard has been taken out, we’ll continue to follow the narrow passage to the south until it widens once again. From here, follow the left wall as it rounds the corner and heads to the west – once you’ve done so, you’ll locate another guard, standing at attention beside the ladder we’ll need to access. Luckily, this guard won’t notice if we stick to the wall and approach him from the right side, allowing us to bridge the distance and take him out with the Falcon 2 or the Disruptor without any resistance. Unfortunately, the next guard that we’re going to encounter isn’t going to provide us with the same courtesy…
Before ascending the ladder ahead, switch over from the Falcon 2 to the Fantom sub-machine gun. We’re going to charge up the ladder so that we alert the guard of our presence, then we’re going to turn on our heel and retreat back down again. You may take some initial damage upon altering the guard, but as soon as you’ve made your way to the ladder he should cease firing entirely. Before the guard has a chance to move away from the ladder, hone in on his position and return fire with the Fantom.
If the guard escapes from view, approach him again and lure him back towards the ladder for a second chance. Once you’ve managed to take out the guard, you can inspect him for a Med-Kit (25% Health Restore) that should make up for any damage you’ve taken during the firefight.
When you’re ready to continue, switch out the Fantom for the Disruptor, and then make your way to the left side of this area and head north to travel up the thin pathway. Once the pathway widens to reveal a section that stretches off to the east, you should be able to locate a single brown grate on the floor. Step on top of the grate and then begin walking to the left – you’ll find that a single guard will be pacing between the two grates, with our position aligning us perfectly for a single shot assassination with the Disruptor. If you’re quick enough, you’ll de-atomize the guard before he’s managed to return fire, otherwise, you’ll take some negligible damage.
Once you’ve taken out the guard with the Disruptor, wait for the weapon to recharge, and then make your way to the south to travel along the lowest wall. If you make your way to the right, you’ll locate the next guard traveling south down the adjacent thin pathway. You can either approach the guard from behind with the Disruptor to vaporize him entirely, or you can covertly assassinate the guard with the Falcon 2 for a pistol ammunition clip upon inspection.
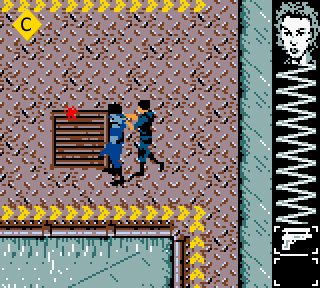
![]() Follow the thin path to the south as it widens once more, and continue walking unabated – if you’ve this correctly, you’ll find that you’re able to pass the next guard as he faces the left to resume his patrol. You can either choose to carry on to the south and leave the guard behind, or you can wait until the guard resumes his patrol to the west and then covertly re-approach him with your Falcon 2 drawn. The guard will provide us with a Med-Kit (25% Health Restore) if you’ve taken significant damage on the Bridge – otherwise we’ll ignore the guard and continue heading to the south down the thin path below.
Follow the thin path to the south as it widens once more, and continue walking unabated – if you’ve this correctly, you’ll find that you’re able to pass the next guard as he faces the left to resume his patrol. You can either choose to carry on to the south and leave the guard behind, or you can wait until the guard resumes his patrol to the west and then covertly re-approach him with your Falcon 2 drawn. The guard will provide us with a Med-Kit (25% Health Restore) if you’ve taken significant damage on the Bridge – otherwise we’ll ignore the guard and continue heading to the south down the thin path below.
There’s one final guard to encounter on the Bridge, and he can be located after the thin path carries onto the west. Equip the Disruptor and then follow the pathway, keeping an eye out for any sign of movement. As soon as you catch sight of the last guard approaching your position, fire the Disruptor and you’ll neutralize the threat while sustaining minimal damage. Once the guard has been de-atomized, continue to the west and you’ll locate a wrought-iron hatch door below; approach the door and you’ll be lead to the Main Deck (Stern).
PELAGIC I MAIN DECK (STERN): MAP OVERVIEW
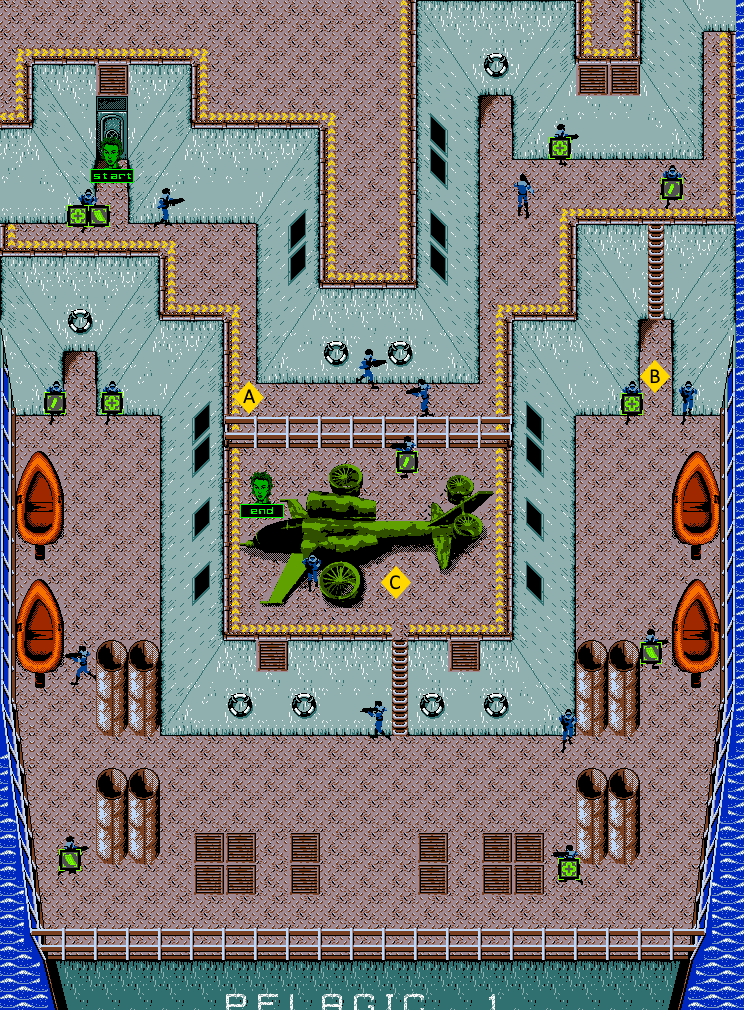
As you emerge on the Main Deck (Stern), you should be able to locate two guards to the south of your current position; the guard on the left stands at attention facing to the south, while the guard on the right paces horizontally. Wait until the guard on the right has left his post, and then approach the guard on the left from the side and assassinate him with the Falcon 2 – the second this is accomplished, retreat back towards the door and wait for the guard on the right to reappear.
When the second guard returns, he’ll walk across to his fallen comrade and then turn on his heel to resume his patrol to the right; you’ll need to approach the guard from behind when he’s done so, and then assassinate him with the Falcon 2 as well.
Inspecting the first guard will provide us with a Med-Kit (25% Health Restore) and a Machine Gun Ammunition clip, though it’s wise to leave it behind for the time being and return to it when needed. Before we continue, we’ll switch out our Falcon 2 for the Fantom, as we prepare for a confrontation against two dataDyne guards ahead.
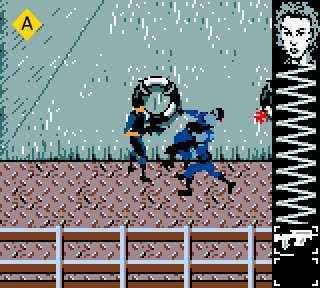
![]() Travel to the southeast and follow the pathway until it thins considerably and continues to the right – you should notice a pronounced guardrail to the south that runs its length. Make your way to the upper wall in this area and begin to walk to the right where you’ll encounter the first guard patrolling to the east; open fire on the guard with the Fantom and you’ll take him out without much resistance. Unfortunately, the resulting gunfire will alert the second guard to your presence, but if you make quick work of the first guard you’ll be able to re-focus your efforts on the second when he arrives and neutralize him as well.
Travel to the southeast and follow the pathway until it thins considerably and continues to the right – you should notice a pronounced guardrail to the south that runs its length. Make your way to the upper wall in this area and begin to walk to the right where you’ll encounter the first guard patrolling to the east; open fire on the guard with the Fantom and you’ll take him out without much resistance. Unfortunately, the resulting gunfire will alert the second guard to your presence, but if you make quick work of the first guard you’ll be able to re-focus your efforts on the second when he arrives and neutralize him as well.
Once both guards have been taken care of, make your way back to the entrance of the Main Deck (Stern) and inspect the leftmost guard for a Med-Kit (25% Health Restore) and a Machine Gun ammunition clip. Work your way back down to the section where we encountered the pair of guards, and follow the pronounced guardrail to the right until the path turns to the north.
There are two further dataDyne guards ahead; the first guard you’ll encounter will patrol vertically; the second guard further ahead will patrol horizontally. It’s quite difficult to approach either guard and remain covert, so we’re going to arm ourselves with the Fantom once more and engage in a firefight as we continue to the north.
Open fire on the first guard and you’ll manage to catch him in the back; if you’re quick enough with Fantom, you should be able to put him down before he has the chance to return fire or escape your line of sight. The noise should attract the attention of the second guard, which you can deal with in a similar manner; if you’ve managed to avoid detection, you can venture a little farther to the north to locate the second guard resuming his patrol.
As soon as both guards have been taken out with the Fantom, inspect the second guard and you’ll be provided with a Med-Kit (25% Health Restore) that should mitigate any damage you’ve taken.
When you’re ready to continue, we’ll head to the right in order to locate another guard, standing at attention and facing to the south. Avoid getting too close to the guards line of sight, or the ladder that he’s guarding, and instead make your way to the north so that you can approach him covertly from behind. Once you’re in position, switch out the Fantom for the Falcon 2 and then go in for an assassination; you’ll be rewarded with a Falcon 2 ammunition clip for your efforts upon inspection.
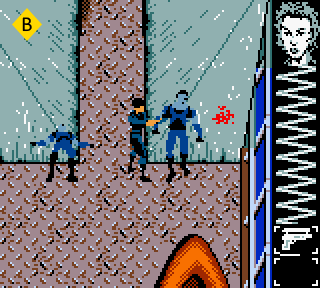
![]() From here, descend to the next level using the ladder provided and then cautiously make your way to the south. As the corridor opens up, you’ll locate two dataDyne guards on either side of the passage; both are standing at attention and facing to the south. Provided that you don’t step into their line of sight, you can approach either guard from the side and easily take them out with assassination. After you’ve finished with the first guard, turn on your heel and assassinate the guard opposite. The leftmost guard does provide a Med-Kit (25% Health Restore), but we’ll avoid picking it up for the time being.
From here, descend to the next level using the ladder provided and then cautiously make your way to the south. As the corridor opens up, you’ll locate two dataDyne guards on either side of the passage; both are standing at attention and facing to the south. Provided that you don’t step into their line of sight, you can approach either guard from the side and easily take them out with assassination. After you’ve finished with the first guard, turn on your heel and assassinate the guard opposite. The leftmost guard does provide a Med-Kit (25% Health Restore), but we’ll avoid picking it up for the time being.
Position yourself in between the two fallen guards so that you’re in the center of the corridor, and then begin walking south. You’ll encounter a scenario similar to the one we experienced with the penultimate guard on the Main Deck (Bridge), where you should be able to pass by the next guard undetected, provided that you don’t stop walking.
Once you’ve managed to pass the pair of smokestacks that the guard patrols behind, you’ll be out of his line of sight. Don’t venture too far south from this position though, as there’s another guard that waits on the left side of the smokestacks. Your best course is to stay as close to the smokestacks as you can manage, hugging them as you make your way to the left. You’ll find that the guard is standing at attention and facing to the south, so it’s fairly easy to approach him from the right and then assassinate him with the Falcon 2.
Once the guard has been taken out, we’ll switch over to the Disruptor and then continue walking to the left in order to encounter a guard that patrols horizontally. Once the guard walks into your line of sight, fire the Disruptor and you should be able to de-atomize him without taking any damage. Once the guard has been dealt with, we’ll wait until the Disruptor has recharged and then climb the ladder provided.
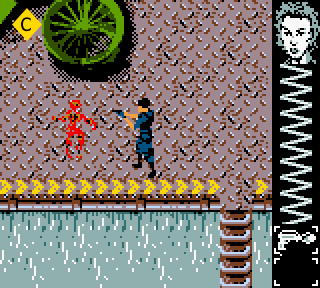
![]() As soon as you’ve ascended to the helicopters platform, head to the left and you’ll manage to encounter the final guard on the Pelagic I. Don’t worry too much about taking damage here, and instead focus on lining yourself up with the guard so that you can take him out with a single shot from the Disruptor. If you’ve missed, switch to the Fantom and lay down heavy suppression fire until you’ve managed to take him out instead. Once you’re finished, you’ll need to head left to pass the helicopters wing, and then enter the cockpit by heading up to the north after you’ve arrived at the edge of the platform.
As soon as you’ve ascended to the helicopters platform, head to the left and you’ll manage to encounter the final guard on the Pelagic I. Don’t worry too much about taking damage here, and instead focus on lining yourself up with the guard so that you can take him out with a single shot from the Disruptor. If you’ve missed, switch to the Fantom and lay down heavy suppression fire until you’ve managed to take him out instead. Once you’re finished, you’ll need to head left to pass the helicopters wing, and then enter the cockpit by heading up to the north after you’ve arrived at the edge of the platform.