Chapter 2-3: Infiltrating Jungle Base II


Navigation:
Chapter 1: Carrington Institute Training
Chapter 2: The Jungles of South America
-2-1: Infiltrating Jungle Base I
-2-2: River Crossing
-2-3: Infiltrating Jungle Base II
-2-4: Jungle Chase
-2-5: Infiltrating Jungle Base III
-2-6: dataDyne Hind Attack
-2-7: Cyborg Factory: Sniper Assignment
Chapter 3: dataDyne Cybernetic Manufacturing
Chapter 4: dataDyne Operations Base/Crash Site
Chapter 5: Captive aboard the Pelagic I
Chapter 6: Carrington Institute HQ
Chapter 7: Perfect Dark GBC Secrets and Extras
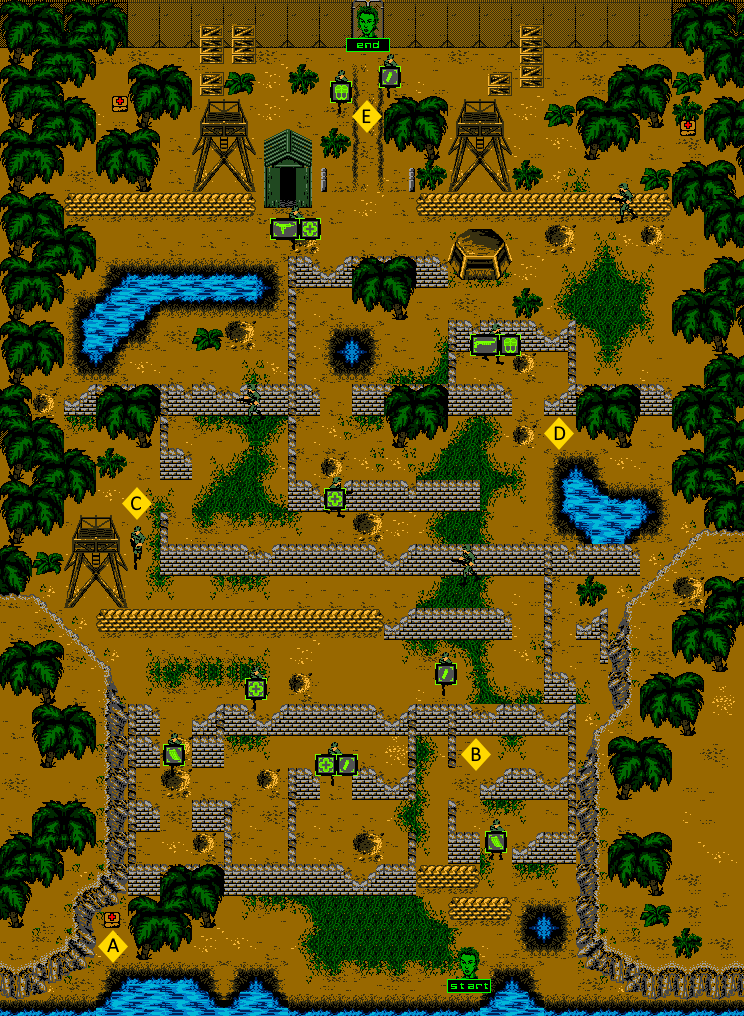
JUNGLE BASE II – PERIMETER: MAP OVERVIEW
MISSION OBJECTIVES:
• LOCATE AND DESTROY CYBORG FACTORY
• DEFEAT MINK HUNTER
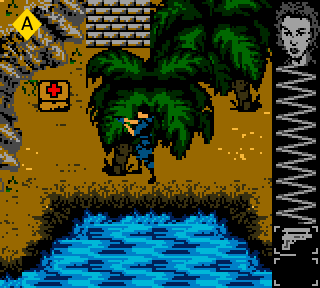
![]() From your current position at the southern shore, walk to the west and you’ll locate a pair of trees that hide a Med-Kit (25% Health Restore). You won’t need to grab the Med-Kit yet, as you’ll start every mission with full health, but do keep its location in mind should you need to return here if and when things start looking dire. We’ll head back to the east and find the string of sandbags to the left of the small pool of water. When you arrive, you should be able to see a jungle guard just to the north of the sandbags; keep yourself behind them and you won’t be seen. Switch over to the 6-YYY and position yourself so you’re facing the guard.
From your current position at the southern shore, walk to the west and you’ll locate a pair of trees that hide a Med-Kit (25% Health Restore). You won’t need to grab the Med-Kit yet, as you’ll start every mission with full health, but do keep its location in mind should you need to return here if and when things start looking dire. We’ll head back to the east and find the string of sandbags to the left of the small pool of water. When you arrive, you should be able to see a jungle guard just to the north of the sandbags; keep yourself behind them and you won’t be seen. Switch over to the 6-YYY and position yourself so you’re facing the guard.
Open fire when you’ve lined up the shot and you’ll neutralize him without much resistance. If the guard manages to avoid successive fire, he’ll run around your sandbag cover as he rushes the shore – if this happens, reposition yourself and finish him off with a final burst of the 6-YYY. Inspecting the guard will relinquish a Machine Gun clip, which we’ll take as we head north past the sandbag cover and into the brickwork ruins.
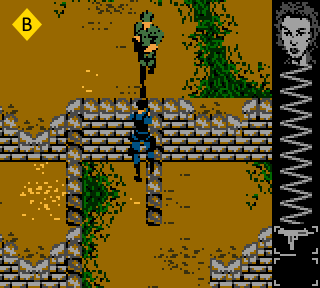
![]() Once you’re inside the decimated structure, walk towards the northern wall – you’ll be able to spot a patrolling guard that paces vertically, turning as he reaches the brickwork. From here you can approach the area just in front of the guard and he won’t be able to see you; line up your shot and wait until he turns back around to pace northward, and then take him out with a few burst-fire rounds courtesy of your 6-YYY. Once you’ve neutralized the guard, head to the south and you should be able to spot an opening that allows us passage to the west side of the brickwork. The area is rather open, with our first face-to-face confrontation ahead.
Once you’re inside the decimated structure, walk towards the northern wall – you’ll be able to spot a patrolling guard that paces vertically, turning as he reaches the brickwork. From here you can approach the area just in front of the guard and he won’t be able to see you; line up your shot and wait until he turns back around to pace northward, and then take him out with a few burst-fire rounds courtesy of your 6-YYY. Once you’ve neutralized the guard, head to the south and you should be able to spot an opening that allows us passage to the west side of the brickwork. The area is rather open, with our first face-to-face confrontation ahead.
If you’re lucky, you’ll be able to catch the guard as he’s facing away from you, patrolling vertically – if this is the case, switch over to the Falcon 2 for a quick assassination. If the guard is facing your position, or you’ve been compromised, put down some suppressive fire with the 6-YYY and you’ll take him out easily enough. If you’ve run into any trouble, you can inspect the fallen guard for a Falcon 2 clip, and a Med-Kit (25% Health Restore), otherwise we’ll continue onto the west.
You’ll be able to spot another guard that paces vertically to the north, just ahead of a crack in the wall that forms a ‘V’ shape. Before we take him out, however, we’ll need to focus on a second guard to the west that paces in and out of the brickwork structure. Standing underneath the ‘V’ shape, switch over to the Falcon 2 and wait until the second guard turns on his heel to leave the structure – follow him stealthily and take him out with a single shot, then double back and return to the ‘V’ shape.
Once again, switch over to the 6-YYY and then line up your shot with the guard that patrols vertically – when he faces away from us and resumes his patrol we’ll fire a few burst rounds from the 6-YYY and neutralize him.
When this is accomplished, return to the west where we encountered the guard we took out with our Falcon 2 and then inspect his body – doing so will relinquish an ammunition clip for the 6-YYY. From here, head north out of the brickwork and you’ll find that the pathway heads to the east. Since the two guards that would have patrolled this area have already been taken out, we shouldn’t run into any opposition as we follow the trail. Use this time to pause and examine your health; if you’ve taken some damage, you can inspect the guard above the ‘V’ shape to find a Med-Kit (25% Health Restore), otherwise we can leave it behind for later. The second guard will offer a Falcon 2 clip upon inspection, which we’ll take with us. If you look to the north you should be able to spot a length sandbags that turn into a bit of wall – approach it and you’ll discover a guard pacing just beyond the structure. The guard will walk the path horizontally all to the east adjacent to the sandbags, and then turn on his heel and return to the west. You’ll need to stay behind the wall and keep him in your sights as you follow him to the east. When he turns around to the west, keep him in your sights and wait until he’s ready to spin around once more. When this occurs, switch over to the Falcon 2 and then bridge the distance to the guard as you both head east, and then assassinate him.
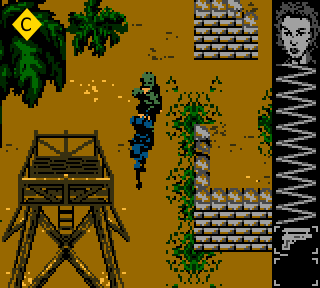
![]() The fallen guard won’t provide us with anything, so we’ll carry on over to the east until we arrive at a wooden guard tower. As you approach the tower, you should be able to spot an opening that features a vertically patrolling guard. If you see the guard heading through the opening, walking to the east until he’s out of view will prevent you from being seen – wait a few seconds and then return to find the guard heading back to the north. Follow the guard with your Falcon 2 still equipped and then go in for an assassination. This guard won’t provide us with anything either, so we’ll carry on without an inspection.
The fallen guard won’t provide us with anything, so we’ll carry on over to the east until we arrive at a wooden guard tower. As you approach the tower, you should be able to spot an opening that features a vertically patrolling guard. If you see the guard heading through the opening, walking to the east until he’s out of view will prevent you from being seen – wait a few seconds and then return to find the guard heading back to the north. Follow the guard with your Falcon 2 still equipped and then go in for an assassination. This guard won’t provide us with anything either, so we’ll carry on without an inspection.
This next area to the west can be a little tricky as there are two guards you’ll need to contend with. The easiest strategy is to switch over to the 6-YYY and then head to the northeast to discover the first guard patrolling the corner. It’s very likely that you’ll be spotted, so lay down some suppression fire and you’ll take him out without too much difficulty. When this is done, we can carry on to the west to locate the second guard. If you’re particularly lucky, you’ll come across the guard as he’s faced away heading west – if this is the case, switch over to the Falcon 2 and go in for an assassination, otherwise you’ll just need to take him out with the 6-YYY as well.
Inspect the second guard for a Med-Kit (25% Health Restore) and then continue to the north. You’ll find that the path diverges here, with an opening to the north and a wide path to the east.
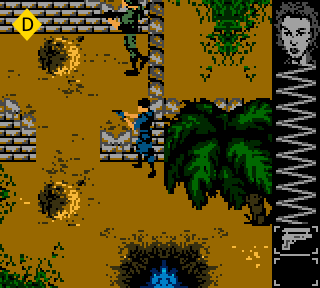
![]() We’re going to approach the opening to the north, but take care not to compromise our position, as there’s a guard that paces horizontally ahead. If you head towards the pool to the right, you’ll be able to travel north without passing in front of the opening. Once you’ve arrived at the tree, you should be able to position yourself just beside the opening to keep an eye on the guard. As soon as the guard reaches the rightmost wall and turns back to the east, head into the opening and assassinate him with the Falcon 2. Inspect the guard and you’ll discover a new weapon – the Shotgun, along with 8 rounds of Shotgun ammunition.
We’re going to approach the opening to the north, but take care not to compromise our position, as there’s a guard that paces horizontally ahead. If you head towards the pool to the right, you’ll be able to travel north without passing in front of the opening. Once you’ve arrived at the tree, you should be able to position yourself just beside the opening to keep an eye on the guard. As soon as the guard reaches the rightmost wall and turns back to the east, head into the opening and assassinate him with the Falcon 2. Inspect the guard and you’ll discover a new weapon – the Shotgun, along with 8 rounds of Shotgun ammunition.
Equip the Shotgun, and then head out towards the west – you should be able to head to the north through an opening where you’ll come across a small pool of water. From the pool, head to the northwest and you should be able to spot a guard patrolling vertically just beyond the wall. Head into the corner and face to the north in order to line up your shot; when the guard reaches the wall and turns to face the north, fire your Shotgun and you’ll send him flying backwards, killing him instantly after only a single round!
When you’re finished, head back towards the pool and then head east until you come across a pillbox after the tree. You’ll find another guard to the northeast here, and it’s too difficult to avoid a confrontation, so ready your Shotgun and head off to the northeast. As soon as the guard comes into view, you can return fire with the Shotgun, blowing him back for another instant kill.
When you’re ready, we’ll head around the pillbox and head east where we’ll discover the body of the guard we neutralized just before in front of an inaccessible warehouse. Inspecting the guard will provide us with a Med-Kit (25% Health Restore) and another 6-YYY. Unfortunately, we’ll have to leave the 6-YYY behind as we’ve already got one, but we can take the Med-Kit without issue.
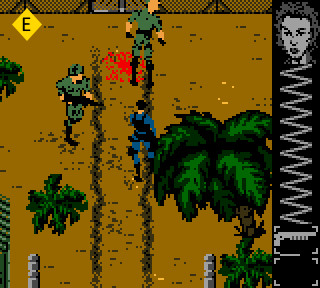
![]() There are only two guards left in this area, and they’re both directly ahead, so when you’re ready head north and follow the vehicle treads past the warehouse. You’ll come under fire from the guards as soon as you’ve stepped into their line of sight, but a few response shots from your Shotgun will silence them pretty effectively. Once you’ve neutralized the guards, you can inspect them to find 8 rounds of Shotgun ammo and a clip for the Falcon 2. From here you can head to the east or west to discover a pair of Med-Kits (25% Health Restore Each), and then head up towards the gate to clear the area and begin the next mission.
There are only two guards left in this area, and they’re both directly ahead, so when you’re ready head north and follow the vehicle treads past the warehouse. You’ll come under fire from the guards as soon as you’ve stepped into their line of sight, but a few response shots from your Shotgun will silence them pretty effectively. Once you’ve neutralized the guards, you can inspect them to find 8 rounds of Shotgun ammo and a clip for the Falcon 2. From here you can head to the east or west to discover a pair of Med-Kits (25% Health Restore Each), and then head up towards the gate to clear the area and begin the next mission.