
Banjo-Kazooie Cheat Codes
Don’t miss out on over 50 unique Banjo-Kazooie cheat codes that you can use to enhance your adventure by unlocking goodies and secrets!
Don’t miss out on over 50 unique Banjo-Kazooie cheat codes that you can use to enhance your adventure by unlocking goodies and secrets!

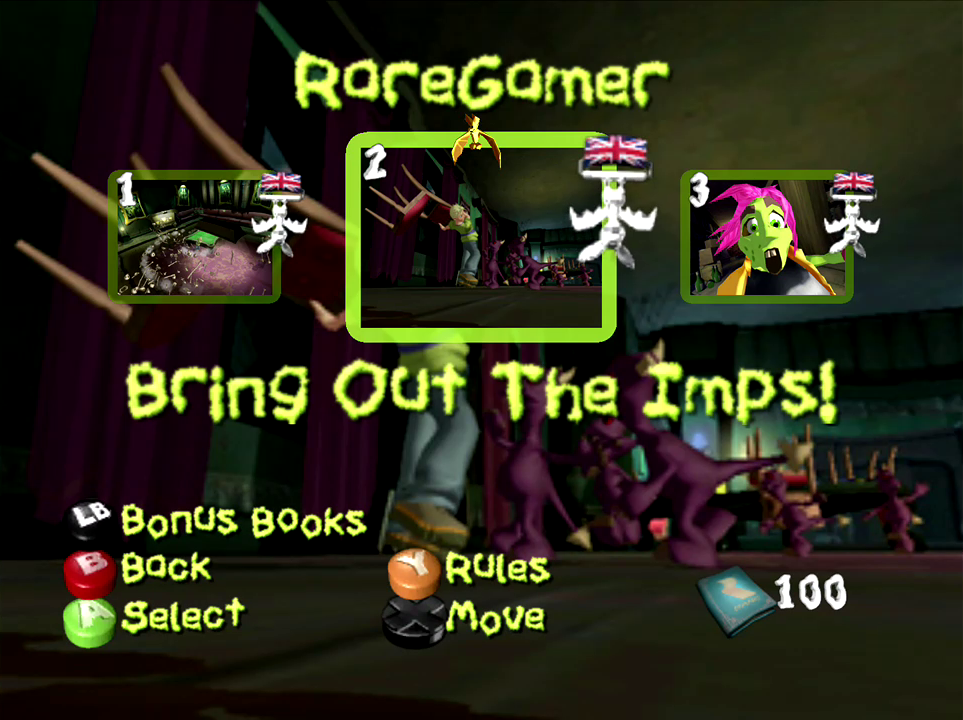
Scenario: The cramped quarters of the Games Room not only serve as a haven for Rare’s ZX Spectrum posters and Xbox Hopefuls on the shelves, but also a hot spot for a plethora of Imps in this mundane game of tag. Simply put, if any of the Imps come in contact with Cooper even once, the game is over. Your objective is to see how long you can go about avoiding these ankle biters, with medals awarded for every 12 Seconds you manage to stave them off.
Strategy: Don’t expect to earn the Platinum Medal on this challenge during your first play through, it’s going to be quite tough starting out. If you’re able to utilize this strategy to your benefit however, you’ll walk away with the Platinum if you press on. As you start off you’ll notice an Imp jumping out from the window to your right, you’ll need to act fast to get one of the most difficult portions of this challenge out of the way. From where you stand, sprint toward the table and grab the chair closest off; when the Imp rounds the table you’ll have to hit him before he hits you, which is fairly risky. The best way to go about doing this is to back away slightly from the Imp, stop for a split second and continue backing up. If you’ve done this correctly then the Imp will stop as well and attempt a failed attack. Use this time you smack the chair across its face and you’ll take care of him. Now, the moment you’ve sent the Imp for a one way trip to the other side of the room, move quickly toward the window where the Imp originated from. More Imps will pile out from the window one at a time, but if you’re ready at the base you’ll manage to pick the Imps off before they’ve gotten a chance to hit the ground running. Be sure to grab a replacement chair off the table once you’ve defeated three of them as you’ll be out of a weapon once you’ve exhausted your initial chair. After you’ve gotten rid of your sixth Imp with your newly found second chair you’ll find the timer around 20 Seconds, nearly at Silver yet. Make your way over to the playpen constructed from Bones in the corner of the room and you’ll find a Turbo Cooper Soup Tin inside. You’ll need to break open the playpen with a well timed kick, just be sure to distance yourself away from the Imps so you don’t let them get in a hit as you’re breaking down the bones. After you’ve done that, venture into the pen and grab the Soup Tin, you should be around 30 seconds at this point. Be wary as you exit the pen as it’s likely that you’ve captured the interest of the Imps trailing behind, you should be able to find an opening if you continue past the Xbox Console Box and then veer to the immediate right to avoid the Imps in front and behind you. Now that you’ve got speed on your side continue back toward the side of the room you’ve started on, being extra careful to avoid crossing in front of any windows to avoid having Cooper jump into the air out of fear and leaving you vulnerable. As you approach the fireplace you should manage to spot a golden bucket filled with coals, if you’re feeling brave you can grab this item off the floor and cast it toward the wave of steadily approaching Imps to get them out of your hair. Circle back around to the pen and you should be able to kill enough time to put your timer past the 48 second mark.
![]()
![]() Bronze Medal: Avoid the Imps for 12 Seconds
Bronze Medal: Avoid the Imps for 12 Seconds
![]()
![]() Silver Medal: Avoid the Imps for 24 Seconds
Silver Medal: Avoid the Imps for 24 Seconds
![]()
![]() Gold Medal: Avoid the Imps for 36 Seconds
Gold Medal: Avoid the Imps for 36 Seconds
![]()
![]() Platinum Medal: Avoid the Imps for 48 Seconds
Platinum Medal: Avoid the Imps for 48 Seconds


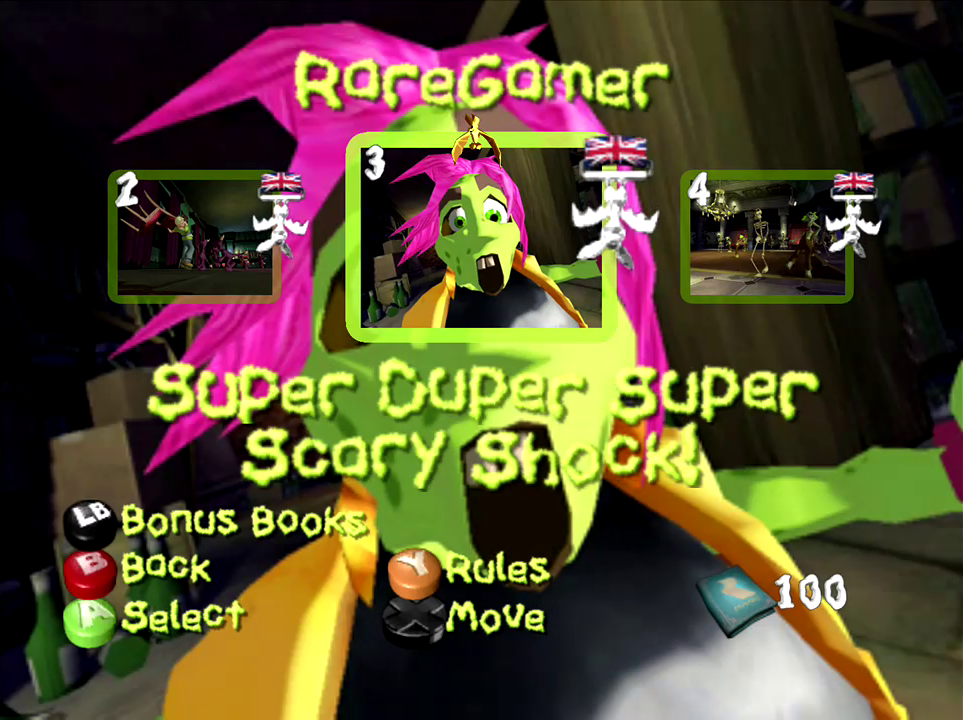
Scenario: It’s back to the Archives where Cooper will have to brave Ambers terrifying transformation to Ghoulidome once more. Unlike last time however, Cooper will have a total of 15 buttons to match in the Shock Sequence and aim at acquiring the high score in the limited time provided.
Strategy: Since the button set-up is completely random each time you play this Challenge, there isn’t any feasible strategy to offer to have you beating the game quicker, however there are a few tips that you can keep in mind as you bash these buttons. Firstly, reduce your risk of making mistakes by slowing the rate you slam each button in succession. You’ll acquire a much higher score if you tackle the challenge calmly rather than mashing the buttons far too quickly. If it’s the Platinum Medal you seek this sound advice especially rings true, as it’s impossible to earn the ranking with even a single mistake, so keep trying until you’ve nailed it. Second, while the button set-up is random, you’ll find that the pattern of the Super Scary Shock always leads around the face buttons in a clockwise or anti-clockwise fashion before looping back around; so long as you’re mentally prepared to go in a circle, the game shouldn’t be able to throw you a curve ball. Lastly, have patience. The Challenge is set up so that you’ll just manage to get 12 Buttons pressed as soon the timer ends if you’re spending around half a second on each button. Keep at it and eventually you’ll manage to hit 12 and earn the Platinum, and with concentration perhaps you’ll nail the entire button sequence as time goes on.
![]()
![]() Bronze Medal: Successfully match 3 buttons.
Bronze Medal: Successfully match 3 buttons.
![]()
![]() Silver Medal: Successfully match 6 buttons.
Silver Medal: Successfully match 6 buttons.
![]()
![]() Gold Medal: Successfully match 9 buttons.
Gold Medal: Successfully match 9 buttons.
![]()
![]() Platinum Medal: Successfully match 12 buttons.
Platinum Medal: Successfully match 12 buttons.
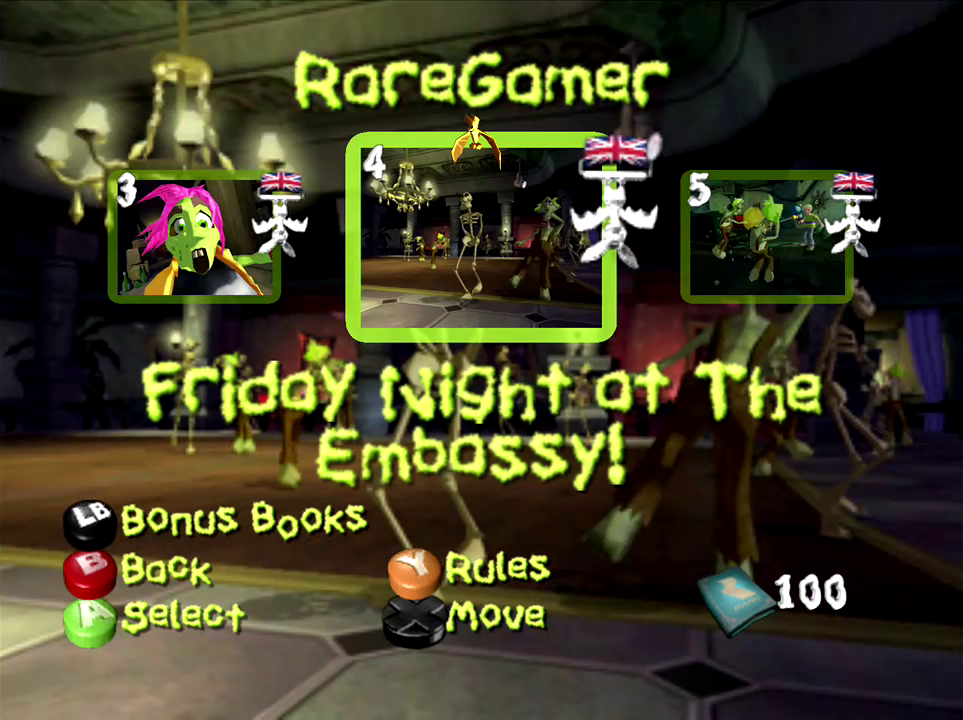
Scenario: Returning to the Embassy Ballroom, Cooper will be tasked with clearing a dance floor full of Ghoulies before while leaving himself at the mercy of a gaggle of Ghoulies that just got their grooves thrown off by an off step and uncoordinated boy in green. In this Bonus Challenge you’ll be tasked with playing the role of the bouncer as you eliminate all the Skeletons and Zombies populating the dance floor. There’s no time limit or fighting style requirements hindering your range of attacks, it’s all about emerging on the other side as unscathed as possible; the higher your health points by the end of the elimination, the higher your reward.
Strategy: From where you start off, head down the left hand side of the Embassy passing the group of bottles on the ledge. Once you’ve rounded the corner you should manage to spot a dining section with a few tables and chairs; work your way to the end of this section and you should manage to spot a single potted plant against the fence. When you`re ready, pick up the potted plant and line yourself up with a good chunk of Skeletons and Zombies on the Dance Floor, they’ll constantly be in motion so just wait until they conglomerate into a large cluster and then toss it towards the group. Once you’ve managed that you`re free to grab the bottles in this area on the table and the ledge and try your best to take out the Skeletons specifically as you`ll find them more nimble than the Zombie dancers, so when it comes time to enter the dance floor you’ll want to put some serious space between yourself and the Ghoulies remaining. Once you’ve exhausted the bottles on the table, and ledge, head back toward the entrance and ignore the last pile of bottles on the ledge here; we’ll need them for the last dance. From here, make your way to the swinging gate outside of the dance floor and smash the portrait of Ghoulhaven Hall to the right to pick up an Energy Boost! Soup Tin worth 5 points and then work your way onto the main floor. Once the gate has locked firmly behind you, venture onto the left side of the dance floor and you’ll spot a portrait of the Hunchback hanging from the central pillar; take it down without disturbing the dancers and destroy it immediately by pressing B to leave your Skeleton opponents without any ammunition, save for the bottles on the ledge. Once you’ve done that, work your way back around to the entrance and pass three pillars ahead on the right to find a Knock-Out Mania! Soup Tin hidden behind the portrait on the forth pillar where a duo of Zombies have gathered. Pick up tin and grab the Violin just to the left of the pillar behind the Zombies and start taking out the Skeletons exclusively, the first strike will begin the challenge. After you’ve exhausted the Violin, work your way back to the entrance and grab the potted plant on your side of the gate and then cast it toward your Ghoulish pursuers. If you can, try and lead them into a nice lineup by picking up the plant and running away from the scene, adjusting the camera when necessary. When the time is right, cast the potted plant towards the Ghoulies to bowl them over, and then head over to the remaining bottles waiting on the ledge and take out any stragglers that are one foot in the grave as identified by the red hearts above their heads. After you`ve taken careful aim and dispatched the weaker Ghoulies you`ll be tasked with running back to the entrance and picking up the second potted plant on the opposite side nearest the Ghoulhaven Hall portrait. Bulk up a nice line and send the plant rolling to knock the remaining Ghoulies to the floor and you`ll find yourself out of objects to throw. From here it`s just a matter of giving the Ghoulies the run around; lead them around the room for a while and you`ll find that some of the Ghoulies don`t get on with one another. Let them have it out in their own private match and you`ll find them doing your work for you. Remember, while all of the Ghoulies have to be defeated to complete the challenge, your main priority will be getting away with as much health as possible by playing defensively. Once the feuding Ghoulies have been taken care of and the remaining handful of dancers are all hot on your tail, it`s time to get physical. Try your best not to leave yourself vulnerable as you work your way into the crowd, it`s better to sneak in a solid hit and then back out again so you`re not caught in a flurry of swinging. If you can take out the ring leader however, it`s likely that the cluster of Ghoulies will become overwhelmed and you`ll manage to get a few heavy-handed hits in to knock the dancers down. Don`t get too anxious here; Ghoulies take less damage as they lay on the floor, so it`s not worth desperately trying to get some kicks in as the crowd surrounds Cooper. Instead, when you manage to knock the Zombies to the floor, they should leave behind one of their arms for you to pick up. After you`ve taken down a Zombie, grab the remaining Arm and use the extended distance to give the others a slap. If you can manage this you`ll have the dancers whittled down to a single member; so long as your health remains above 18 you`ll earn the Platinum Medal in spades.
![]()
![]() Bronze Medal: Retain at least 3 Health at completion
Bronze Medal: Retain at least 3 Health at completion
![]()
![]() Silver Medal: Retain at least 8 Health at completion
Silver Medal: Retain at least 8 Health at completion
![]()
![]() Gold Medal: Retain at least 13 Health at completion
Gold Medal: Retain at least 13 Health at completion
![]()
![]() Platinum Medal: Retain at least 18 Health at completion
Platinum Medal: Retain at least 18 Health at completion
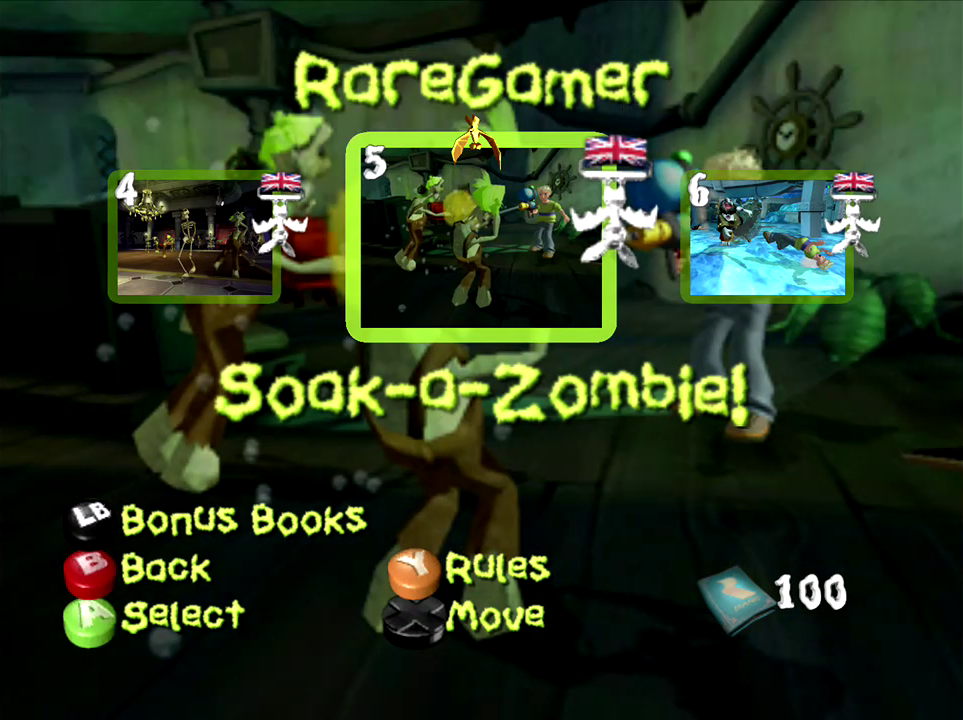
Scenario: It’s normal fare in the Lighthouse Living Quarters for this Bonus Challenge, as you’ll be tasked with eliminating as many Zombies as possible with your trusty Water Squirter. The faster you send them packing, the higher your reward in the end.
For the purposes of this challenge you’ll need to conserve your water supply above all else to have enough to spare throughout the challenge, if you overwater the individual Zombies you’ll have difficulty in reaching a suitable time, but if you’re level headed about it you’ll manage to clear the room with time to spare. The Zombies will start out slow, bursting forth from the objects around the room and leaving you with plenty of time to deal with each one at point blank range. Make sure that you avoid having the Water Squirter needle reaching the yellow gauge area by ceasing fire just as the Zombies are defeated. The needle should have plenty of time to reach the bottom before working your way to the next Zombie, so spare a few seconds while you`re rushing over and see that the needle doesn`t leave the green comfort zone. If you find yourself dealing with a few Ghoulies at once, spend your alloted green round on one of the Zombies and once you`ve finished squirting, swing your Water Squirter at the remaining Zombies to send them to the floor; this will give you some ample time to recharge before they rise up ready for more, but it will also take away a bit of their health, meaning you`ll conserve more water for the later rounds. After you`ve managed to defeat 5 Zombies or so, you`ll find that you`ll be crowded with an average of three Zombies at a time. Once this occurs you`ll be able to venture out into the yellow gauge area, taking care to avoid getting too far into the red area of course. Once you`ve dealt with at least 10 Zombies from this round you`ll likely find yourself around 50 seconds with at least 5 Zombies remaining. Thanks to your conservation in the rounds previous you`ll manage to cash it all in for a steady stream of unfaltering water at the remaining Zombies. You`ll want to move quickly, so keep an eye on your gauge so you don`t step into overkill territory so you don`t overdue things and let your stream reach the others for you. Once you reach the final Zombie you should manage to get in one last stream before the gauge caps off. If you`ve managed to conserve your supply by knocking a few Zombies down you`ll wind up finishing with a time around a minute and a few seconds on, just enough to warrant yourself a shiny Platinum Medal.
![]()
![]() Bronze Medal: All Zombies defeated by 1 Minute and 55 Seconds
Bronze Medal: All Zombies defeated by 1 Minute and 55 Seconds
![]()
![]() Silver Medal: All Zombies defeated by 1 Minute and 40 Seconds
Silver Medal: All Zombies defeated by 1 Minute and 40 Seconds
![]()
![]() Gold Medal: Retain All Zombies defeated by 1 Minute and 25 Seconds
Gold Medal: Retain All Zombies defeated by 1 Minute and 25 Seconds
![]()
![]() Platinum Medal: All Zombies defeated by 1 Minute and 10 Seconds
Platinum Medal: All Zombies defeated by 1 Minute and 10 Seconds

Navigation:
Chapter 1: The Rescue
-1-1: Welcome to Ghoulhaven Hall
-1-2: A Slight Detour…
-1-3: Reunion to Repulsion
Chapter 2: The Restoration
Chapter 3: The Riddle
Chapter 4: The Reckoning
Chapter 5: The Race
SHEDDING SOME LIGHT ON THE SITUATION
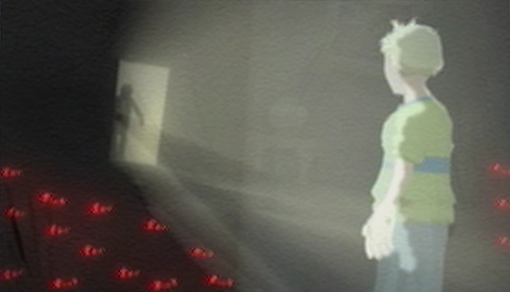
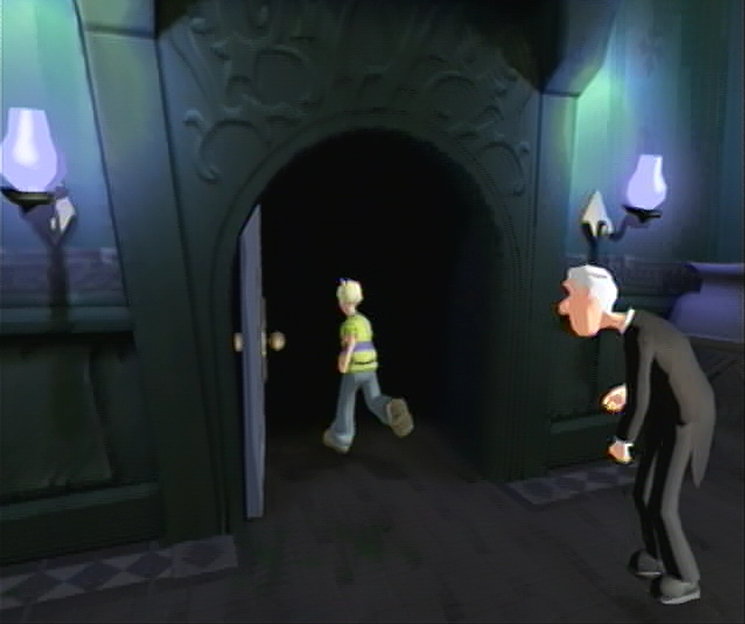
![]() Reluctantly, Cooper makes his way up the steps that lead to the large door at the front of Ghoulhaven Hall and proceeds to open it cautiously; the ancient hinges creak in protest as Cooper peers down the dark hallway. Taking a deep breath he ventures into the mansion, taking every precaution to keep his presence unknown to the Ghoulies. Just as Cooper steps away from the light and into the darkness, however, the large doors slam themselves shut, leaving Cooper locked inside! Left without recourse Cooper travels further into the darkness, feeling his way toward the center of the Grand Hallway before stopping to get his bearings. Big mistake. A thousand beady red eyes illuminate in the darkness followed by jeering snarls as they begin to collectively creep toward Cooper. Before things take a definite turn for the worst a door opens on the opposite side of the room, casting a strong light across the floor which the Ghoulies take an instant disliking to.
Reluctantly, Cooper makes his way up the steps that lead to the large door at the front of Ghoulhaven Hall and proceeds to open it cautiously; the ancient hinges creak in protest as Cooper peers down the dark hallway. Taking a deep breath he ventures into the mansion, taking every precaution to keep his presence unknown to the Ghoulies. Just as Cooper steps away from the light and into the darkness, however, the large doors slam themselves shut, leaving Cooper locked inside! Left without recourse Cooper travels further into the darkness, feeling his way toward the center of the Grand Hallway before stopping to get his bearings. Big mistake. A thousand beady red eyes illuminate in the darkness followed by jeering snarls as they begin to collectively creep toward Cooper. Before things take a definite turn for the worst a door opens on the opposite side of the room, casting a strong light across the floor which the Ghoulies take an instant disliking to.
![]() A figure emerges from the open doorway, the strong light emanating from the lone candlestick he’s carried with him. “What’s all this noise? I’m trying to get some sleep, Ghoulhavens’ elderly Butler, Crivens, calls into the darkness, And who turned the lights out?”. Reaching out to the left the Butler flicks on the manual switch only to reveal the cluster of Imps surrounding Cooper that the beady eyes belonged to. “Arrgh! The Ghoulies! Leave me alone!” Crivens shouts toward the purple ankle biters. The duo share a unified scream before the Butler ducks back into his room and slams the door behind him. Wait! He’s forgetting something important! Crivens opens the door a crack and reaches for the candlestick he’s dropped out of fright before withdrawing his hand and locking the door entirely. With Crivens off the menu the Imps draw their attention back to Cooper who remains completely surrounded on all sides. He lets out a gasp as the Ghoulies edge ever closer…
A figure emerges from the open doorway, the strong light emanating from the lone candlestick he’s carried with him. “What’s all this noise? I’m trying to get some sleep, Ghoulhavens’ elderly Butler, Crivens, calls into the darkness, And who turned the lights out?”. Reaching out to the left the Butler flicks on the manual switch only to reveal the cluster of Imps surrounding Cooper that the beady eyes belonged to. “Arrgh! The Ghoulies! Leave me alone!” Crivens shouts toward the purple ankle biters. The duo share a unified scream before the Butler ducks back into his room and slams the door behind him. Wait! He’s forgetting something important! Crivens opens the door a crack and reaches for the candlestick he’s dropped out of fright before withdrawing his hand and locking the door entirely. With Crivens off the menu the Imps draw their attention back to Cooper who remains completely surrounded on all sides. He lets out a gasp as the Ghoulies edge ever closer…
Is this the end of our hero?
MAKING A GOOD FIRST IMP-RESSION!
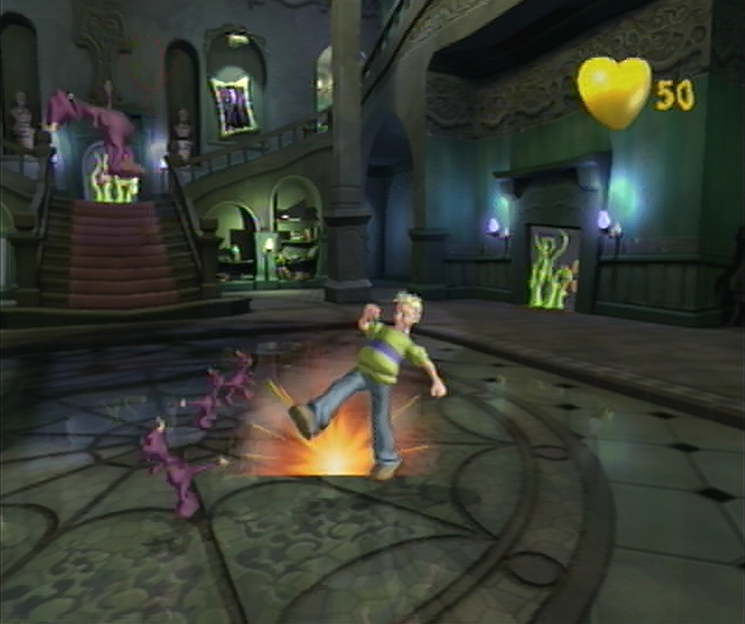
![]() Of course not! What a ridiculously short game that would be. It seems you’ll have to fend for yourself in this room; you can move freely with the left thumbstick around the area while the right thumbstick has been dedicated to controlling your attacks. Use the right thumbstick to point in the direction that you wish to attack, once you’ve done so you’ll send a limb flying in response. There are only 5 Imps that you’ll have to take out in the Grand Hallway, but each one will take two hits to defeat. The first hit will allow you to stun them in place which is handy for crowd control, while your second hit will send them careening across the room like a purple rocket. The best way to go about taking out these five Imps is to get in two quick jabs with your controlstick once you’ve chosen an Imp you’d like to defeat until you’ve kicked it across the room. You can also try to gather a few next to each other and pile into them with a hearty tackle to make quick work of them as well.
Of course not! What a ridiculously short game that would be. It seems you’ll have to fend for yourself in this room; you can move freely with the left thumbstick around the area while the right thumbstick has been dedicated to controlling your attacks. Use the right thumbstick to point in the direction that you wish to attack, once you’ve done so you’ll send a limb flying in response. There are only 5 Imps that you’ll have to take out in the Grand Hallway, but each one will take two hits to defeat. The first hit will allow you to stun them in place which is handy for crowd control, while your second hit will send them careening across the room like a purple rocket. The best way to go about taking out these five Imps is to get in two quick jabs with your controlstick once you’ve chosen an Imp you’d like to defeat until you’ve kicked it across the room. You can also try to gather a few next to each other and pile into them with a hearty tackle to make quick work of them as well.
![]() Right, now that you’ve gotten comfortable using your brawn, it’s time to use your brain by utilizing the art of armed combat. As you tour around Ghoulhaven Hall you’ll spot a number of items lying around that have a grab icon hovering above, which means the object can be fashioned as a weapon against the Ghoulies once you pick it up with the A button. Once you’ve done that you can swing away as you’d normally do with your normal control settings. Keep in mind that the objects you pick up do accumulate damage, so once you’ve exhausted an items potential as indicated by the number in the bottom right hand corner it will explode into bits; alternately you can use the B Button to destroy any item that you’ve picked up regardless of damage if you wish to switch back to unarmed combat. Luckily these rules don’t apply to the Cooks’ Chair which Crivens has provided for you! Once you’re ready, pick up the chair with A and get ready for an onslaught of Imps…
Right, now that you’ve gotten comfortable using your brawn, it’s time to use your brain by utilizing the art of armed combat. As you tour around Ghoulhaven Hall you’ll spot a number of items lying around that have a grab icon hovering above, which means the object can be fashioned as a weapon against the Ghoulies once you pick it up with the A button. Once you’ve done that you can swing away as you’d normally do with your normal control settings. Keep in mind that the objects you pick up do accumulate damage, so once you’ve exhausted an items potential as indicated by the number in the bottom right hand corner it will explode into bits; alternately you can use the B Button to destroy any item that you’ve picked up regardless of damage if you wish to switch back to unarmed combat. Luckily these rules don’t apply to the Cooks’ Chair which Crivens has provided for you! Once you’re ready, pick up the chair with A and get ready for an onslaught of Imps…
![]() This time you’ll need to defeat 10 Imps with the Cooks’ Chair to progress any further as indicated by the Challenge Rules. The Challenge will vary in every room, so pay attention to the scenario and then go to town. You can refresh yourself with the rules by pressing the Start Button and then the Y button. You shouldn’t have too much trouble in clearing this room as you’ve been given a lofty amount of health which only drops a single point if an Imp sinks its teeth into your leg, combined with the fact that the Cooks’ Chair can dispatch of each Imp with one solid hit as well. As soon as you manage to clear out the swarm with the Chair you’ll have completed the challenge as indicated by the audio cue, and the door leading to the next room will open. Wander over to Crivens and he’ll introduce himself explaining that he’ll pop up from time to time in order to provide hints as you progress through the Hall. Once he’s finished you’re free to continue through the door you’ve unlocked.
This time you’ll need to defeat 10 Imps with the Cooks’ Chair to progress any further as indicated by the Challenge Rules. The Challenge will vary in every room, so pay attention to the scenario and then go to town. You can refresh yourself with the rules by pressing the Start Button and then the Y button. You shouldn’t have too much trouble in clearing this room as you’ve been given a lofty amount of health which only drops a single point if an Imp sinks its teeth into your leg, combined with the fact that the Cooks’ Chair can dispatch of each Imp with one solid hit as well. As soon as you manage to clear out the swarm with the Chair you’ll have completed the challenge as indicated by the audio cue, and the door leading to the next room will open. Wander over to Crivens and he’ll introduce himself explaining that he’ll pop up from time to time in order to provide hints as you progress through the Hall. Once he’s finished you’re free to continue through the door you’ve unlocked.
TROPHY ROOM
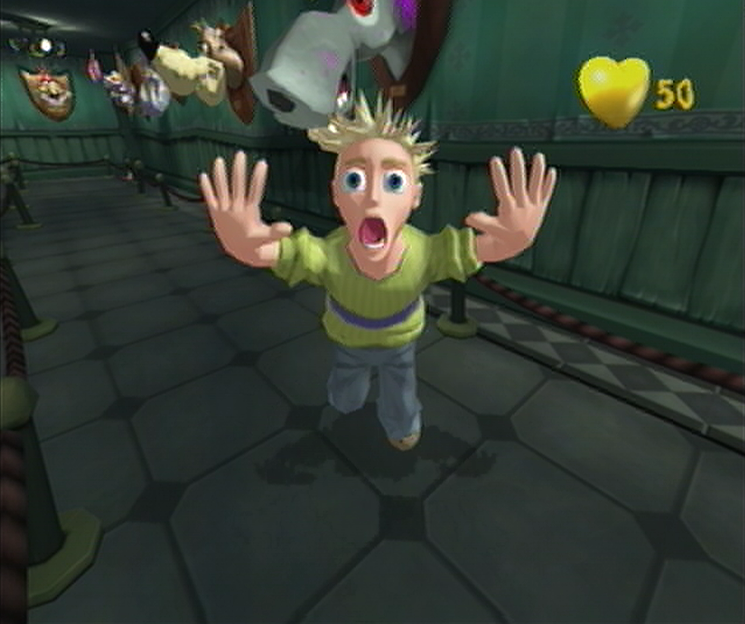
![]() This room offers up quite a different challenge to what you’re used to at this point; there are no Ghoulies to defeat, you’ll just have to survive through the room. You’ll automatically walk through the tethered hallway as Coopers perspective takes in the sights of the Grotesque Game Trophies on display along the walls which can spring to life at any moment. Should this happen you’ll find yourself in a quicktime event wherein you’ll be tasked with entering the buttons displayed on the bottom of the screen as quickly as possible. If you make a mistake you’ll be able to try again, but only after sacrificing some precious seconds that go toward entering the entire combination. If you let the rising cadence finish without entering the correct sequence you’ll suffer a Super Scary Shock and you’ll lose a total of 10 healthpoints in the process. Luckily you’re provided with 50 healthpoints as you explore this room, so you’ll manage to fail four Super Scary Shocks without penalty, often the exact number of living Game Trophies found within this room.
This room offers up quite a different challenge to what you’re used to at this point; there are no Ghoulies to defeat, you’ll just have to survive through the room. You’ll automatically walk through the tethered hallway as Coopers perspective takes in the sights of the Grotesque Game Trophies on display along the walls which can spring to life at any moment. Should this happen you’ll find yourself in a quicktime event wherein you’ll be tasked with entering the buttons displayed on the bottom of the screen as quickly as possible. If you make a mistake you’ll be able to try again, but only after sacrificing some precious seconds that go toward entering the entire combination. If you let the rising cadence finish without entering the correct sequence you’ll suffer a Super Scary Shock and you’ll lose a total of 10 healthpoints in the process. Luckily you’re provided with 50 healthpoints as you explore this room, so you’ll manage to fail four Super Scary Shocks without penalty, often the exact number of living Game Trophies found within this room.
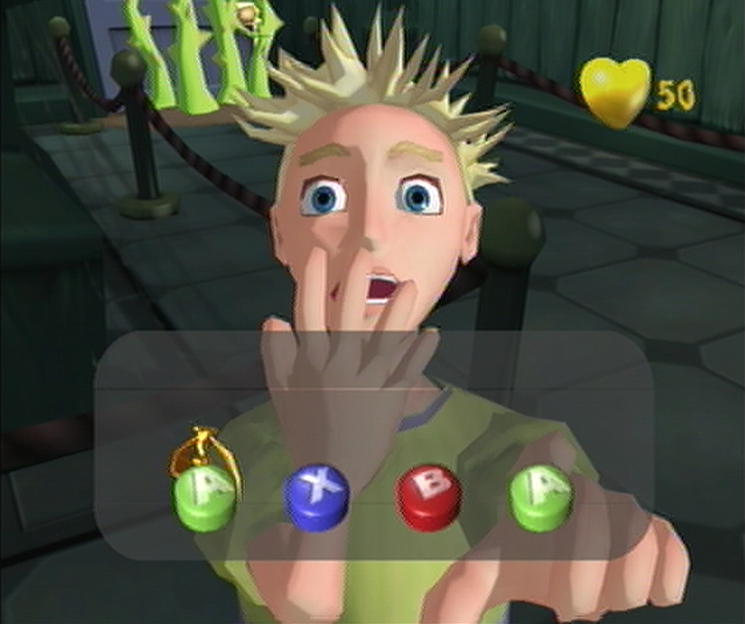
![]() The real trick is to enter the button combination as accurately as possible while speed becomes something of an afterthought. If you can keep a steady pace with entering the proper button sequence you’ll find that you’ll get through the sequence a lot more efficiently. While each living Trophies’ appearance and their Super Scary Shock button sequences are completely random, the first Super Scary Shock sequence you encounter in this room will be ‘A A A A’, so as long as you’re quick on the draw you should manage to get through that Shock unscathed. Once you’ve reached the end of the hallway you’ll automatically pick up a weighty Rare tome in the open doorway. This is a Bonus Book, one of a hundred located around Ghoulhaven Hall, and while it’s not instrumental to completing your campaign adventure it does unlock secret bonus content. You can find all 100 in the Bonus Book Location Guide, though it’s recommended to seek them out after you’ve finished with the campaign…
The real trick is to enter the button combination as accurately as possible while speed becomes something of an afterthought. If you can keep a steady pace with entering the proper button sequence you’ll find that you’ll get through the sequence a lot more efficiently. While each living Trophies’ appearance and their Super Scary Shock button sequences are completely random, the first Super Scary Shock sequence you encounter in this room will be ‘A A A A’, so as long as you’re quick on the draw you should manage to get through that Shock unscathed. Once you’ve reached the end of the hallway you’ll automatically pick up a weighty Rare tome in the open doorway. This is a Bonus Book, one of a hundred located around Ghoulhaven Hall, and while it’s not instrumental to completing your campaign adventure it does unlock secret bonus content. You can find all 100 in the Bonus Book Location Guide, though it’s recommended to seek them out after you’ve finished with the campaign…
BILLIARD ROOM
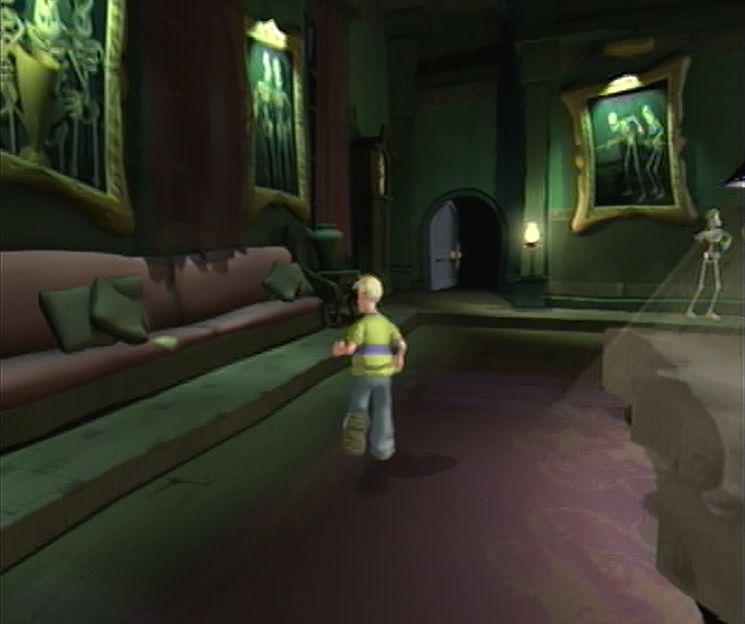
![]() Now that you’ve gotten through the Trophy Room you’ll find yourself in the Billiard Room with your health restored, which will occur each time you complete a room and enter a new one. Unlike future rooms that you’ll encounter within the game, the door on the opposite end of the Billiard Room will remain open the entire time, allowing you to pass through without penalty when you’re ready to leave – these types of rooms will become increasingly rare as you progress through the Hall. While you’re meandering about in the Billiard Room, it would be worth your while to quickly take care of the Skeleton duo having a chat near the exit. You’ll want to try to bulk up your Ghoulies Defeated counter as much as possible early on when you’re not in so much of a rush to squeeze for the 3 and a half-hour mark, especially when the difficulty of the game ramps up and you’re left trying desperately to work the offensive while you’re being overwhelmed. Once you manage to defeat the twin Skeletons you’re free to make your way through the exit door to the next area.
Now that you’ve gotten through the Trophy Room you’ll find yourself in the Billiard Room with your health restored, which will occur each time you complete a room and enter a new one. Unlike future rooms that you’ll encounter within the game, the door on the opposite end of the Billiard Room will remain open the entire time, allowing you to pass through without penalty when you’re ready to leave – these types of rooms will become increasingly rare as you progress through the Hall. While you’re meandering about in the Billiard Room, it would be worth your while to quickly take care of the Skeleton duo having a chat near the exit. You’ll want to try to bulk up your Ghoulies Defeated counter as much as possible early on when you’re not in so much of a rush to squeeze for the 3 and a half-hour mark, especially when the difficulty of the game ramps up and you’re left trying desperately to work the offensive while you’re being overwhelmed. Once you manage to defeat the twin Skeletons you’re free to make your way through the exit door to the next area.
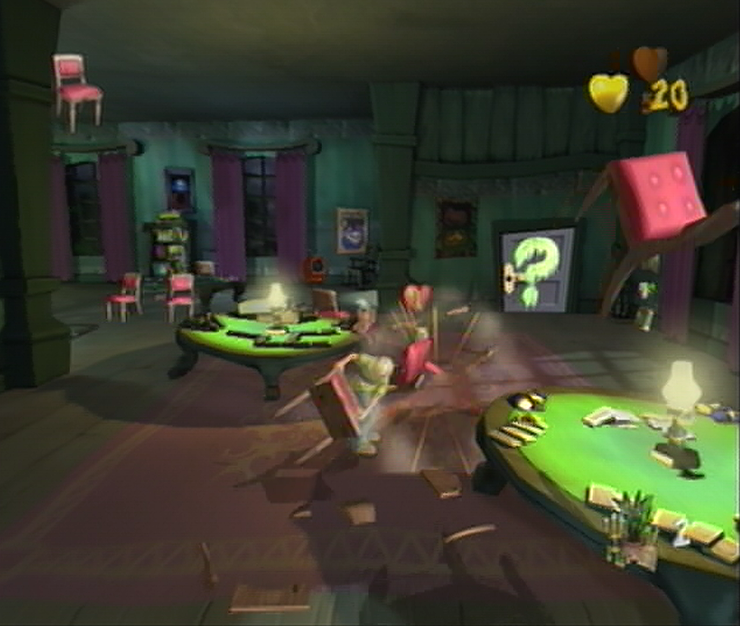
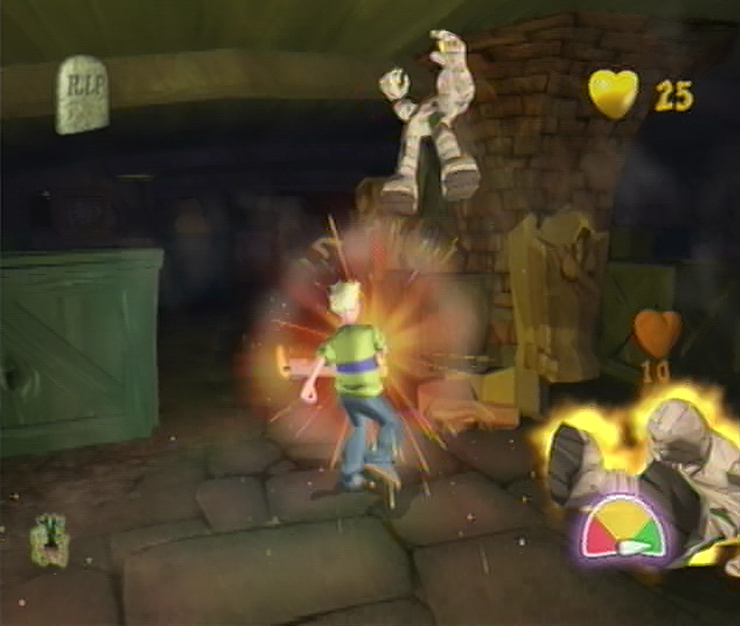
GAMING ROOM
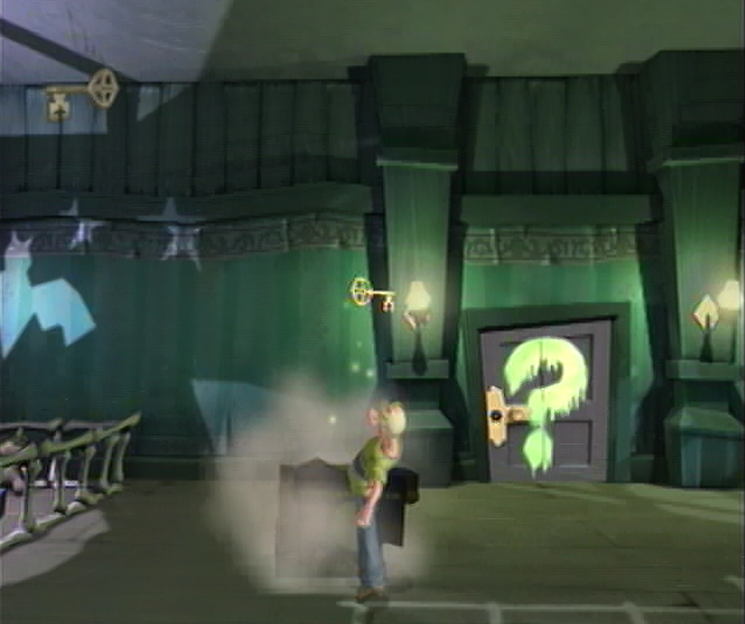
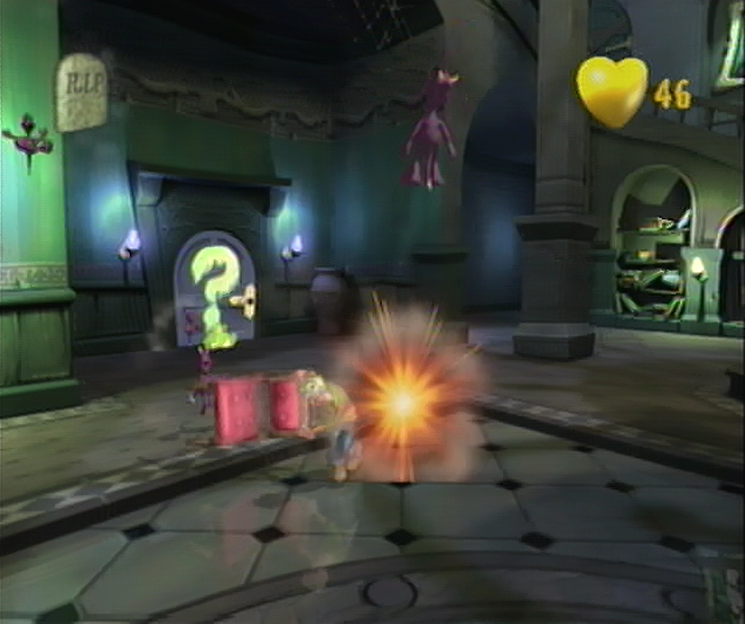
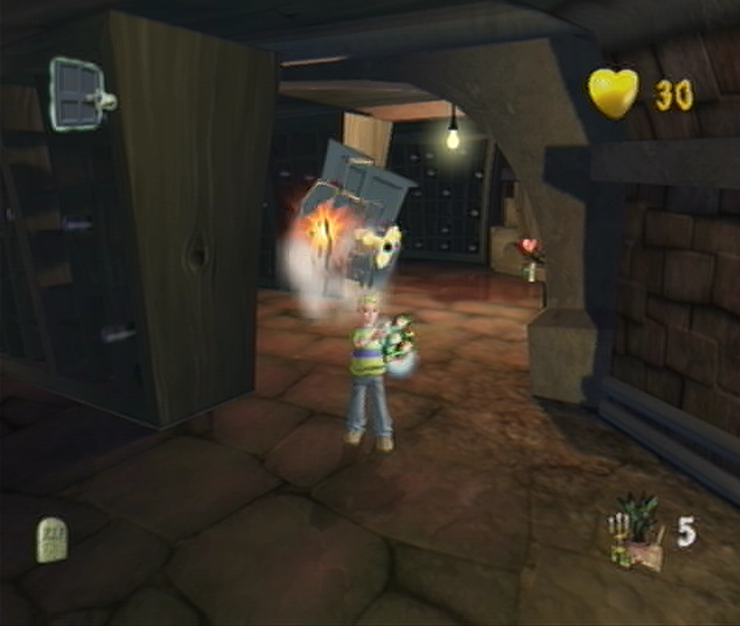
![]() As Cooper peers uneasily into the Gaming Room he manages to a gagged Amber who’s been perched precariously inside the open chamber of a large fireplace on the opposite side of the room. Suddenly the fireplace springs to life, rotating within the wall and ending its journey by putting Amber on the opposite side of the wall! To make matters worse we’ve traded off the girl for a gaggle of Ghoulies: a dozen Imps inside the opposite end of the fireplace! While your priority in this room is locating a key that’s been hidden in the room that will allow you to escape, you should focus on defeating the Imps around the room and dropping in from the windows, until Crivens pipes up regarding your priority once more. Once this occurs, make your way to the Bone Cradle on the opposite side of the room and you should manage to spot a large Xbox/Rarf box next to it; break it open and you’ll find the key inside. Carry on through the challenge door back to the Billiard Room.
As Cooper peers uneasily into the Gaming Room he manages to a gagged Amber who’s been perched precariously inside the open chamber of a large fireplace on the opposite side of the room. Suddenly the fireplace springs to life, rotating within the wall and ending its journey by putting Amber on the opposite side of the wall! To make matters worse we’ve traded off the girl for a gaggle of Ghoulies: a dozen Imps inside the opposite end of the fireplace! While your priority in this room is locating a key that’s been hidden in the room that will allow you to escape, you should focus on defeating the Imps around the room and dropping in from the windows, until Crivens pipes up regarding your priority once more. Once this occurs, make your way to the Bone Cradle on the opposite side of the room and you should manage to spot a large Xbox/Rarf box next to it; break it open and you’ll find the key inside. Carry on through the challenge door back to the Billiard Room.
BILLIARD ROOM
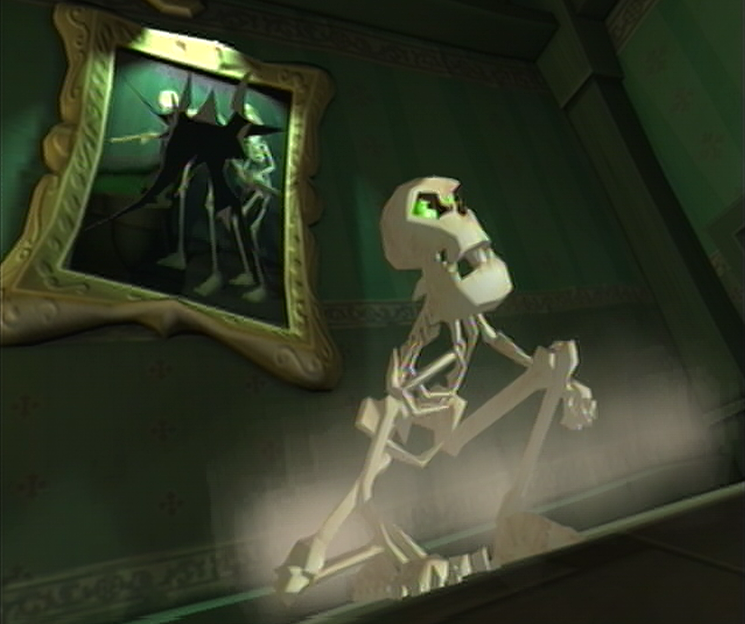
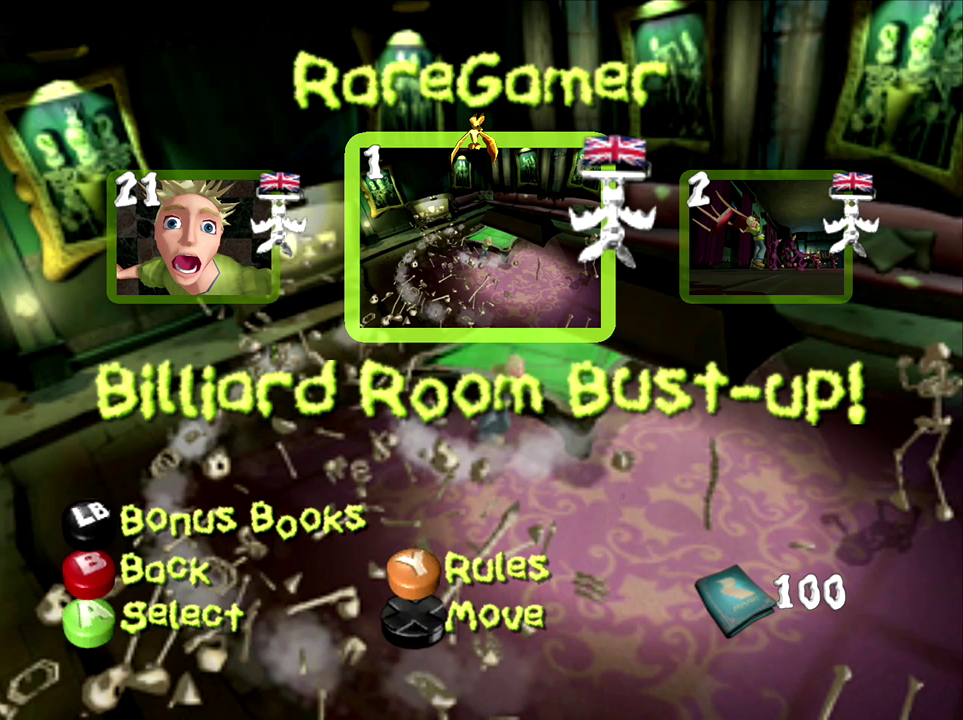
![]() Once you’ve traveled back to the Billiard Room a second time you’ll notice that your maximum energy has been modified by the Baron to 25. This will occur from this point forward in every room of the Hall to step up the difficulty considerably. If you take notice to the open Challenge Door on the opposite side of the room it appears as though you’ll manage to strut through this room just as last time, not so much. Take this available time to grab a pool cue from the left side of the room and when you’re ready approach the door to begin the Challenge! In response it will trap you inside as three Skeletons burst forth from the paintings located around the room; you’ll have to defeat eight of them to advance to the next room. Now that you’re armed with a Pool Cue this should be a fairly simple feat, especially if you manage some crowd control and use the improved distance from the Cue to snap across them all in one swipe, or use the Large Trophy on the couch to bowl at them from afar.
Once you’ve traveled back to the Billiard Room a second time you’ll notice that your maximum energy has been modified by the Baron to 25. This will occur from this point forward in every room of the Hall to step up the difficulty considerably. If you take notice to the open Challenge Door on the opposite side of the room it appears as though you’ll manage to strut through this room just as last time, not so much. Take this available time to grab a pool cue from the left side of the room and when you’re ready approach the door to begin the Challenge! In response it will trap you inside as three Skeletons burst forth from the paintings located around the room; you’ll have to defeat eight of them to advance to the next room. Now that you’re armed with a Pool Cue this should be a fairly simple feat, especially if you manage some crowd control and use the improved distance from the Cue to snap across them all in one swipe, or use the Large Trophy on the couch to bowl at them from afar.
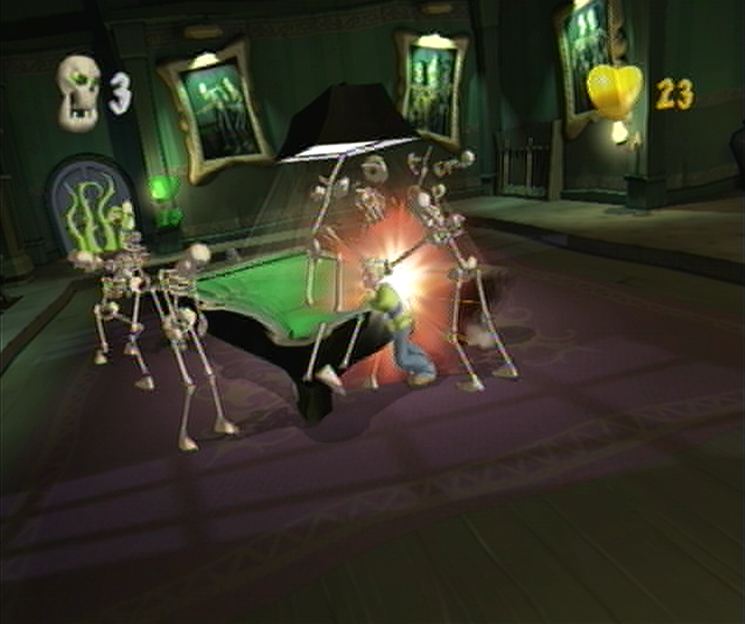
![]() Once you’ve managed to defeat the trio of Skeletons you’ll knock your counter down to 5, with an impeccable sense of timing the blanket covering the Pool Table will launch off as 6 Skeletons burst forth from the remaining Paintings. There’s no sense in trying to take on the Skeletons one a time, especially when this newly available Pool Table will do all the work for you. You’ll manage to see an ‘Item Grab’ indication on either end of this Pool Table; pressing A as you approach this icon will allow Cooper to swing the Pool Table around in one fluid motion, taking out any Skeleton that comes in contact with the table with just one hit. The most efficient way to accomplish this is by running around the perimeter Pool Table and having the Skeletons chase after you until you’ve built up a solid line-up, once the timing is right grab one of the ends and spin the table around, you shouldn’t have a problem taking out the Skeletons and solving the Challenge.
Once you’ve managed to defeat the trio of Skeletons you’ll knock your counter down to 5, with an impeccable sense of timing the blanket covering the Pool Table will launch off as 6 Skeletons burst forth from the remaining Paintings. There’s no sense in trying to take on the Skeletons one a time, especially when this newly available Pool Table will do all the work for you. You’ll manage to see an ‘Item Grab’ indication on either end of this Pool Table; pressing A as you approach this icon will allow Cooper to swing the Pool Table around in one fluid motion, taking out any Skeleton that comes in contact with the table with just one hit. The most efficient way to accomplish this is by running around the perimeter Pool Table and having the Skeletons chase after you until you’ve built up a solid line-up, once the timing is right grab one of the ends and spin the table around, you shouldn’t have a problem taking out the Skeletons and solving the Challenge.
LOWER CORRIDORS
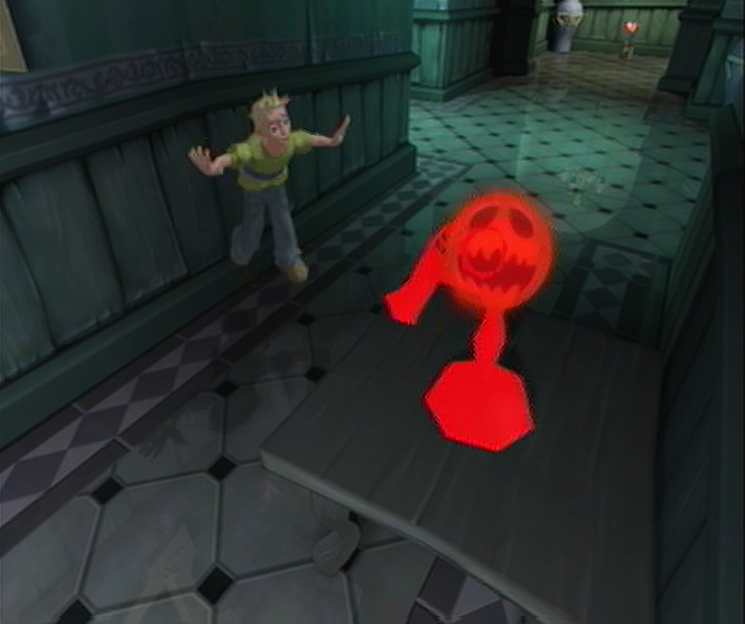
![]() Well done, you’ve made it through to the Lower Corridors! You’ll manage to find an alluring open doorway at the end of the hallway, just a brisk walks duration; there is a slight catch however that will be sure to slow your pace, but first, something to perk you up as you explore the Hall. As soon as you begin exploring the Lower Corridors you’ll spot a tin of bouncing soup, run over to it and you’ll add a single unit of energy to your health. It may not be much, but there are Soup Tins that have the power to make you invulnerable, defeat Ghoulies in a single hit and even complete the Challenge at hand. Once you’ve collected your first tin, carry on forward and attempt to squeeze between the telephone and the wall to the left. Once you’ve made your way past the phone it will spring to life, giving Cooper a Scare! In future you’ll manage to spot the red Ghoulish face beginning to expand and escape before it blossoms to encompass an infected area, but for this demonstration you won’t have the option.
Well done, you’ve made it through to the Lower Corridors! You’ll manage to find an alluring open doorway at the end of the hallway, just a brisk walks duration; there is a slight catch however that will be sure to slow your pace, but first, something to perk you up as you explore the Hall. As soon as you begin exploring the Lower Corridors you’ll spot a tin of bouncing soup, run over to it and you’ll add a single unit of energy to your health. It may not be much, but there are Soup Tins that have the power to make you invulnerable, defeat Ghoulies in a single hit and even complete the Challenge at hand. Once you’ve collected your first tin, carry on forward and attempt to squeeze between the telephone and the wall to the left. Once you’ve made your way past the phone it will spring to life, giving Cooper a Scare! In future you’ll manage to spot the red Ghoulish face beginning to expand and escape before it blossoms to encompass an infected area, but for this demonstration you won’t have the option.

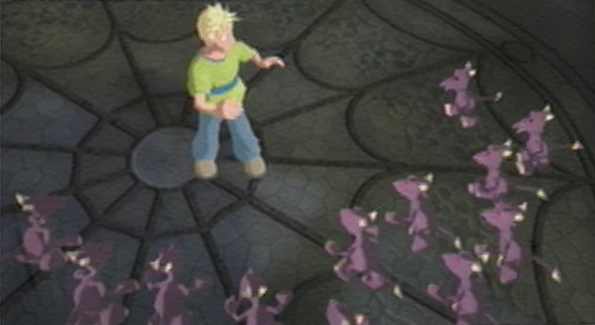
![]() While Coopers total energy won’t take a hit from these Scares, you’ll find yourself unable to act on the offensive as you dodder around looking a bit daft. If you come in contact with a Ghouly while in this state they’ll manage to cause twice as much damage as usual, so keep your distance and try to wait this one out. Once you’ve managed to recover from the Scare continue down the hallway toward the second Health Soup Tin and you’ll be introduced to a new Ghouly hiding inside the vase to the left; The Spider! Their only attack is a rolling jump that takes quite some time to execute, though it does take away two health points. They may slow you down with some webbing, so keep an eye out if you hear them getting ready to spit. Make quick work of the Spider here and round the corner tightly to locate a small table that you can pick up. As you make your way toward the exit you’ll be ambushed by four more Spiders, use the table to knock them aside and work your way through the exit.
While Coopers total energy won’t take a hit from these Scares, you’ll find yourself unable to act on the offensive as you dodder around looking a bit daft. If you come in contact with a Ghouly while in this state they’ll manage to cause twice as much damage as usual, so keep your distance and try to wait this one out. Once you’ve managed to recover from the Scare continue down the hallway toward the second Health Soup Tin and you’ll be introduced to a new Ghouly hiding inside the vase to the left; The Spider! Their only attack is a rolling jump that takes quite some time to execute, though it does take away two health points. They may slow you down with some webbing, so keep an eye out if you hear them getting ready to spit. Make quick work of the Spider here and round the corner tightly to locate a small table that you can pick up. As you make your way toward the exit you’ll be ambushed by four more Spiders, use the table to knock them aside and work your way through the exit.
CINEMA
![]() Inside the Cinema is where you’ll manage to find Amber now that the Fireplace has managed to spin her around from the Games Room. As you start off you’ll have to continue ahead to tackle a set of uneasy stairs before reaching to the top and finding another set of uneasy stares from the girl bound with chains stuffed in the shelving unit with a collection of film reels. Crivens will explain that this girl is one of the ten children the Baron has taken prisoner and stowed away in the mansion, locked with a key that only he possesses. Right… well, after taking in the sights of the projection booth you’ll manage to spot a second set of stairs descending toward a lone hallway toward the main Cinema room. As you approach the window at the end of the hall however, a duo of Skeletons and Imps will break through ready to fight. Although they may have gotten the upper hand with the element of surprise, you’ll manage to take them out easily enough with just a few punches, or steady kicks with the Imps. Once you’ve finished, carry on down the hallway to have a cutscene begin…
Inside the Cinema is where you’ll manage to find Amber now that the Fireplace has managed to spin her around from the Games Room. As you start off you’ll have to continue ahead to tackle a set of uneasy stairs before reaching to the top and finding another set of uneasy stares from the girl bound with chains stuffed in the shelving unit with a collection of film reels. Crivens will explain that this girl is one of the ten children the Baron has taken prisoner and stowed away in the mansion, locked with a key that only he possesses. Right… well, after taking in the sights of the projection booth you’ll manage to spot a second set of stairs descending toward a lone hallway toward the main Cinema room. As you approach the window at the end of the hall however, a duo of Skeletons and Imps will break through ready to fight. Although they may have gotten the upper hand with the element of surprise, you’ll manage to take them out easily enough with just a few punches, or steady kicks with the Imps. Once you’ve finished, carry on down the hallway to have a cutscene begin…
![]() After Cooper makes an uneasy trek down the narrow corridor he rounds the bend as a look of surprise washes over his face. At the opposite end of the room he manages to spot the large Fireplace, along with Amber who’s getting a little fed up with Coopers’ roundabout means of escape. Taking in the problem at hand, Cooper gestures Amber to hop away from the Fireplace, as to avoid another one way trip back to the Games Room. Clutching the base of her chair, Amber moves the chair slowly away from the reach of the false fireplace. Her journey finds her atop a large suspicious looking square just in front of the fireplace… Without warning, the panel swings open revealing itself to be a trap door as Amber plummets down the open hole helpless to remove herself from her chair as she free falls in the Archives. Well, at least we don’t have to worry about that rotating fireplace puzzle any longer…
After Cooper makes an uneasy trek down the narrow corridor he rounds the bend as a look of surprise washes over his face. At the opposite end of the room he manages to spot the large Fireplace, along with Amber who’s getting a little fed up with Coopers’ roundabout means of escape. Taking in the problem at hand, Cooper gestures Amber to hop away from the Fireplace, as to avoid another one way trip back to the Games Room. Clutching the base of her chair, Amber moves the chair slowly away from the reach of the false fireplace. Her journey finds her atop a large suspicious looking square just in front of the fireplace… Without warning, the panel swings open revealing itself to be a trap door as Amber plummets down the open hole helpless to remove herself from her chair as she free falls in the Archives. Well, at least we don’t have to worry about that rotating fireplace puzzle any longer…
Navigation:
Chapter 1: The Rescue
-1-1: Welcome to Ghoulhaven Hall
-1-2: A Slight Detour…
-1-3: Reunion to Repulsion
Chapter 2: The Restoration
Chapter 3: The Riddle
Chapter 4: The Reckoning
Chapter 5: The Race
SHEDDING SOME LIGHT ON THE SITUATION
Reluctantly, Cooper makes his way up the steps that lead to the large door at the front of Ghoulhaven Hall and proceeds to open it cautiously; the ancient hinges creak in protest as Cooper peers down the dark hallway. Taking a deep breath he ventures into the mansion, taking every precaution to keep his presence unknown to the Ghoulies. Just as Cooper steps away from the light and into the darkness, however, the large doors slam themselves shut, cutting off any contact to the outside world and leaving Cooper locked inside! Left without recourse Cooper travels further into the darkness, feeling his way toward the center of the Grand Hallway before stopping to get his bearings. Big mistake. A thousand beady red eyes illuminate in the darkness followed by jeering snarls as they begin to collectively creep toward Cooper. Before things take a definite turn for the worst a door opens on the opposite side of the room, casting a strong light across the floor which the Ghoulies take an instant disliking to.
A figure emerges from the open doorway, the strong light emanating from the lone candlestick he’s carried with him. “What’s all this noise? I’m trying to get some sleep, Ghoulhavens’ elderly Butler, Crivens, calls into the darkness, And who turned the lights out?”. Reaching out to the left the Butler flicks on the manual switch only to reveal the cluster of Imps surrounding Cooper that the beady eyes belonged to. “Arrgh! The Ghoulies! Leave me alone!” Crivens shouts toward the purple ankle biters. The duo share a unified scream before the Butler ducks back into his room and slams the door behind him. Wait! He’s forgetting something important! Crivens opens the door a crack and reaches for the candlestick he’s dropped out of fright before withdrawing his hand and locking the door entirely. With Crivens off the menu the Imps draw their attention back to Cooper who remains completely surrounded on all sides. He lets out a gasp as the Ghoulies edge ever closer…
Is this the end of our hero?
MAKING A GOOD FIRST IMP-RESSION!
Of course not! What a ridiculously short game that would be. It seems you’ll have to fend for yourself in this room; you can move freely with the left thumbstick around the area while the right thumbstick has been dedicated to controlling your attacks. Use the right thumbstick to point in the direction that you wish to attack, once you’ve done so you’ll send a limb flying in response. There are only 5 Imps that you’ll have to take out in the Grand Hallway, but each one will take two hits to defeat. The first hit will allow you to stun them in place which is handy for crowd control, while your second hit will send them careening across the room like a purple rocket. The best way to go about taking out these five Imps is to get in two quick jabs with your controlstick once you’ve chosen an Imp you’d like to defeat until you’ve kicked it across the room. You can also try to gather a few next to each other and pile into them with a hearty tackle to make quick work of them as well.
Right, now that you’ve gotten comfortable using your brawn, it’s time to use your brain by utilizing the art of armed combat. As you tour around Ghoulhaven Hall you’ll spot a number of items lying around that have a grab icon hovering above, which means the object can be fashioned as a weapon against the Ghoulies once you pick it up with the A button. Once you’ve done that you can swing away as you’d normally do with your normal control settings. Keep in mind that the objects you pick up do accumulate damage, so once you’ve exhausted an items potential as indicated by the number in the bottom right hand corner it will explode into bits; alternately you can use the B Button to destroy any item that you’ve picked up regardless of damage if you wish to switch back to unarmed combat. Luckily these rules don’t apply to the Cooks’ Chair which Crivens has provided for you! Once you’re ready, pick up the chair with A and get ready for an onslaught of Imps to emerge from inside Crivens Quarters.
This time you’ll need to defeat 10 Imps with the Cooks’ Chair to progress any further as indicated by the Challenge Rules. The Challenge will vary in every room, so pay attention to the scenario and then go to town. You can refresh yourself with the rules by pressing the Start Button and then the Y button. You shouldn’t have too much trouble in clearing this room as you’ve been given a lofty amount of health which only drops a single point if an Imp sinks its teeth into your leg, combined with the fact that the Cooks’ Chair can dispatch of each Imp with one solid hit as well. As soon as you manage to clear out the swarm with the Chair you’ll have completed the challenge as indicated by the audio cue, and the door leading to the next room will open. Wander over to Crivens and he’ll introduce himself explaining that he’ll pop up from time to time in order to provide hints as you progress through the Hall. Once he’s finished you’re free to continue through the door you’ve unlocked.
TROPHY ROOM
This room offers up quite a different challenge to what you’re used to at this point; there are no Ghoulies to defeat, you’ll just have to survive through the room. You’ll automatically walk through the tethered hallway as Coopers perspective takes in the sights of the Grotesque Game Trophies on display along the walls which can spring to life at any moment. Should this happen you’ll find yourself in a quicktime event wherein you’ll be tasked with entering the buttons displayed on the bottom of the screen as quickly as possible. If you make a mistake you’ll be able to try again, but only after sacrificing some precious seconds that go toward entering the entire combination. If you let the rising cadence finish without entering the correct sequence you’ll suffer a Super Scary Shock and you’ll lose a total of 10 healthpoints in the process. Luckily you’re provided with 50 healthpoints as you explore this room, so you’ll manage to fail four Super Scary Shocks without penalty, often the exact number of living Game Trophies found within this room.
BILLIARD ROOM
Now that you’ve gotten through the Trophy Room you’ll find yourself in the Billiard Room with your health completely restored, which will occur each time you complete a room and enter a new one. Unlike the other rooms that you’ll encounter within the game, the door on the opposite end of the Billiard Room will remain open the entire time you’re inside, allowing you to pass through without penalty when you’re ready to leave; a rarity to be sure as you progress through the Hall when the game turns a lot less lenient. While you’re meandering about in the Billard Room, it would be worth your while to quickly take care of the Skeleton duo having a chat near the exit. You’ll want to try to bulk up your Ghoulies Defeated counter as much as possible early on when you’re not in so much of a rush to squeeze for the 3 and a half-hour mark, especially when the difficulty of the game ramps up and you’re left trying desperately to work the offensive while getting the tar beaten out of you. Once you manage to defeat the twin Skeletons you’re free to make your way through the exit door to the next area.
GAMING ROOM
As Cooper peers uneasily into the Gaming Room he manages to a gagged Amber who’s been perched precariously inside the open chamber of a large fireplace on the opposite side of the room. Suddenly the fireplace springs to life, rotating within the wall and ending it’s dizzyingly dramatic journey by putting Amber on the opposite side of the wall! To make matters worse we’ve traded off the girl for a gaggle of Ghoulies as a dozen Imps hiding inside the opposite end of the fireplace! While your priority in this room is locating a key that’s been hidden in the room that will allow you to escape, you should instead focus on defeating the Imps around the room and dropping in from the windows, until Crivens pipes up regarding your priority once more. Once this occurs, make your way to the Bone Cradle on the opposite side of the room and you should manage to spot a large Xbox/Rarf box next to it; break the box open and you’ll find the key inside. Carry on through the challenge door back to the Billiard Room.
BILLIARD ROOM
Once you’ve traveled back to the Billiard Room a second time you’ll notice that your maximum energy has been modified by the Baron to 25 healthpoints. This will occur from this point forward in every room of the Hall to step up the difficulty considerably. If you take notice to the open Challenge Door on the opposite side of the room it appears as though you’ll manage to strut through this room just as last time, not so much. Take this available time to grab a pool cue located on the left side of the room and when you’re ready approach the door to begin the Challenge! In response it will slam shut trapping you inside as three Skeletons burst forth from the paintings located around the room; you’ll have to defeat eight of them to advance to the next room. Now that you’re armed with a Pool Cue this should be a fairly simple feat, especially if you manage some crowd control and use the improved distance from the Cue to snap across them all in one swipe, or use the Large Trophy on the couch to bowl at them from afar.
Once you’ve managed to defeat the trio of Skeletons you’ll knock your counter down to 5, with an impeccable sense of timing the blanket covering the Pool Table will launch off as 6 Skeletons burst forth from the remaining Paintings. There’s no sense in trying to take on the Skeletons one a time, especially when this newly available Pool Table will do all the work for you. You’ll manage to see an ‘Item Grab’ indication on either end of this Pool Table; pressing A as you approach this icon will allow Cooper to swing the Pool Table around in one fluid motion, taking out any Skeleton that comes in contact with the table with just one hit. The most efficient way to accomplish this is by running around the perimeter Pool Table and having the Skeletons chase after you until you’ve built up a solid line-up, once the timing is right grab one of the ends and spin the table around, you shouldn’t have a problem taking out the Skeletons and solving the Challenge.
LOWER CORRIDORS
Well done, you’ve made it through to the Lower Corridors! You’ll manage to find an alluring open doorway at the end of the hallway, just a brisk walks duration; there is a slight catch however that will be sure to slow your pace, but first, something to perk you up as you explore the Hall. As soon as you begin exploring the Lower Corridors you’ll spot a tin of bouncing soup, run over to it and you’ll add a single unit of energy to your health. It may not be much, but there are Soup Tins that have the power to make you invulnerable, defeat Ghoulies in a single hit and even complete the Challenge at hand. Once you’ve collected your first tin, carry on forward and attempt to squeeze between the telephone and the wall to the left. Once you’ve made your way past the phone it will spring to life, giving Cooper a Scare! In future you’ll manage to spot the red Ghoulish face beginning to expand and escape before it blossoms to encompass an infected area, but for this demonstration you won’t have any choice on the matter.
While Coopers total energy won’t take a hit from these Scares, you’ll find yourself unable to act on the offensive as you dodder around looking a bit daft. If you come in contact with a Ghouly while in this state they’ll manage to cause more damage, twice as much as normal to be exact, so keep your distance and try to wait this one out. Once you’ve managed to recover from the Scare continue down the hallway toward the second Health Soup Tin and you’ll be introduced to a new Ghouly hiding inside the vase to the left; The Spider! Their only attack is a rolling jump that takes quite some time to execute, though it does take away two health points. They may slow you down with some webbing, so keep an eye out if you hear them getting ready to spit. Make quick work of the Spider here and round the corner tightly to locate a small table that you can pick up. As you make your way toward the exit you’ll be ambushed by four more Spiders, use the table to knock them aside and work your way through the exit.
CINEMA
Inside the Cinema is where you’ll manage to find Amber now that the Fireplace has managed to spin her around from the Games Room. As you start off you’ll have to continue ahead to tackle a set of uneasy stairs before reaching to the top and finding another set of uneasy stares from the girl bound with chains stuffed in the shelving unit with a collection of film reels. Crivens will explain that this girl is one of the ten children the Baron has taken prisoner and stowed away in the mansion, locked with a key that only he possesses. Right… well, after taking in the sights of the projection booth you’ll manage to spot a second set of stairs descending toward a lone hallway toward the main Cinema room. As you approach the window at the end of the hall however, you’ll discover a duo of Skeletons and Imps have broken through the pane ready to fight. Although they may have gotten the upper hand with the element of surprise, you’ll manage to take them out easily enough with just a few punches, or steady kicks with the Imps. Once you’ve finished, carry on down the hallway to have a cutscene begin…
After Cooper makes an uneasy trek down the narrow corridor he rounds the bend as a look of surprise washes over his face. At the opposite end of the room he manages to spot the large Fireplace, along with Amber who’s getting a little fed up with Coopers’ roundabout means of escape. Taking in the problem at hand, Cooper gestures Amber to hop away from the Fireplace, as to avoid another one way trip back to the Games Room. Clutching the base of her chair, Amber moves the chair slowly away from the reach of the false fireplace. Her journey finds her atop a large suspicious looking square just in front of the fireplace… Without warning, the panel swings open revealing itself to be a trap door as Amber plummets down the open hole helpless to remove herself from her chair as she free falls in the Archives. Well, at least we don’t have to worry about that rotating fireplace puzzle any longer…
Next: A Slight Detour…img src=”http://www.raregamer.co.uk/staf/Ghoulies.png”
Navigation:
Chapter 1: The Rescue
-1-1: Welcome to Ghoulhaven Hall
-1-2: A Slight Detour…
-1-3: Reunion to Repulsion
Chapter 2: The Restoration
Chapter 3: The Riddle
Chapter 4: The Reckoning
Chapter 5: The Race
SNEAKING OUT OF THE THEATER

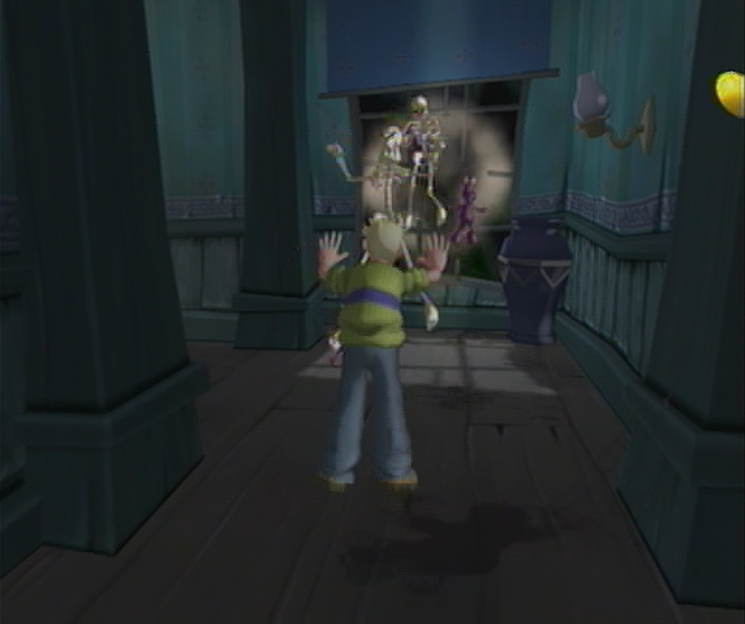
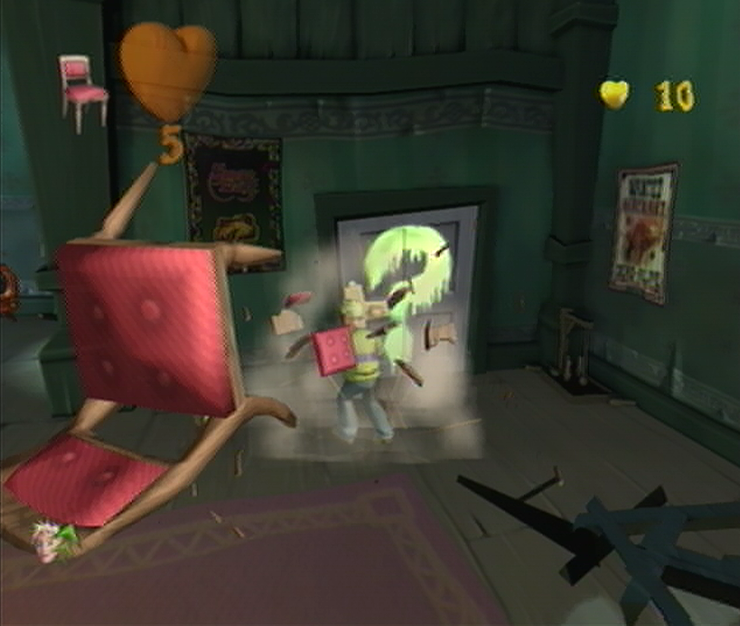
![]() While Amber had little difficulty in making a quick getaway, you won’t be able to follow suit – instead, you’ll be tasked with taking the revolving fireplace back to the Gaming Room and get on track once you’ve escaped the Cinema. Once the cutscene has ended you’ll find yourself behind the couch just in front of the large Cinema screen, you’re lined up to face the Fireplace which seems as though you can leisurely stroll right up to it. The game seems to have other plans however, as you’ll discover your path blocked by a Haunted Television Set; a Ghouly with the ability to spawn minion Ghoulies from its screen to send your way. If you try to attack the Haunted Television directly it’ll give you a nasty shock, so you’ll have to rely on tossing the potted plants in its direction, found in plenty supply around the room. If the Haunted Television does bring forth a digital Ghouly, take care of it quickly. Once you manage to defeat the Haunted Television Set, jump into the fireplace.
While Amber had little difficulty in making a quick getaway, you won’t be able to follow suit – instead, you’ll be tasked with taking the revolving fireplace back to the Gaming Room and get on track once you’ve escaped the Cinema. Once the cutscene has ended you’ll find yourself behind the couch just in front of the large Cinema screen, you’re lined up to face the Fireplace which seems as though you can leisurely stroll right up to it. The game seems to have other plans however, as you’ll discover your path blocked by a Haunted Television Set; a Ghouly with the ability to spawn minion Ghoulies from its screen to send your way. If you try to attack the Haunted Television directly it’ll give you a nasty shock, so you’ll have to rely on tossing the potted plants in its direction, found in plenty supply around the room. If the Haunted Television does bring forth a digital Ghouly, take care of it quickly. Once you manage to defeat the Haunted Television Set, jump into the fireplace.
GAMING ROOM
![]() The Gaming Room harbors a deceptive exit akin to the Billiards Room previous; under normal circumstances the challenge would begin as soon as you’ve attempted to walk through the doorway, but since we already know this rooms ruse there are more productive means of setting off the challenge. Rather than walking across the room and having the Haunted Chairs start their ambush, simply walk to the first table to pick up the closest Chair and then destroy it using the B Button; this will cause the challenge to begin leaving you with one less Ghouly to defeat. There are a number of ways to take out all of the Haunted Chairs; if you’re unarmed it’s going to take five hits per Chair, using an inanimate Chair against a Haunted Chair will take two hits, and using a large throwable object like a Television Set or Large Trophy will manage it in a single toss. You can also have one of the sweeping Chairs take out another steadily approaching Chair if you manage to have their paths cross.
The Gaming Room harbors a deceptive exit akin to the Billiards Room previous; under normal circumstances the challenge would begin as soon as you’ve attempted to walk through the doorway, but since we already know this rooms ruse there are more productive means of setting off the challenge. Rather than walking across the room and having the Haunted Chairs start their ambush, simply walk to the first table to pick up the closest Chair and then destroy it using the B Button; this will cause the challenge to begin leaving you with one less Ghouly to defeat. There are a number of ways to take out all of the Haunted Chairs; if you’re unarmed it’s going to take five hits per Chair, using an inanimate Chair against a Haunted Chair will take two hits, and using a large throwable object like a Television Set or Large Trophy will manage it in a single toss. You can also have one of the sweeping Chairs take out another steadily approaching Chair if you manage to have their paths cross.
![]() Make sure to take full advantage of the inanimate Chairs by destroying them before they’ve gotten a chance to spring to life. There’s also a Turbo Cooper Soup Tin located near the Challenge Door which will increase your speed dramatically, allowing you to take care of the Chairs more quickly. Each time you manage to defeat one of the Haunted Chairs they’ll leave a single health Soup Tin behind, these can come in handy if you’re running low on health yourself, as each sweep from a Chair will take off three health points. If you find yourself being pursued by a number of chairs in a line-up, use the Television Set around the corner of the Challenge Door or the Large Trophy to the right of the Fireplace in order to send a ripple through the swarm. The challenge will complete once the Chairs are defeated, though if you break open the Xbox Box where we found our key just three scenes ago, you’ll expose a trio of Skeletons inside which will go down easily enough.
Make sure to take full advantage of the inanimate Chairs by destroying them before they’ve gotten a chance to spring to life. There’s also a Turbo Cooper Soup Tin located near the Challenge Door which will increase your speed dramatically, allowing you to take care of the Chairs more quickly. Each time you manage to defeat one of the Haunted Chairs they’ll leave a single health Soup Tin behind, these can come in handy if you’re running low on health yourself, as each sweep from a Chair will take off three health points. If you find yourself being pursued by a number of chairs in a line-up, use the Television Set around the corner of the Challenge Door or the Large Trophy to the right of the Fireplace in order to send a ripple through the swarm. The challenge will complete once the Chairs are defeated, though if you break open the Xbox Box where we found our key just three scenes ago, you’ll expose a trio of Skeletons inside which will go down easily enough.
BASEMENT
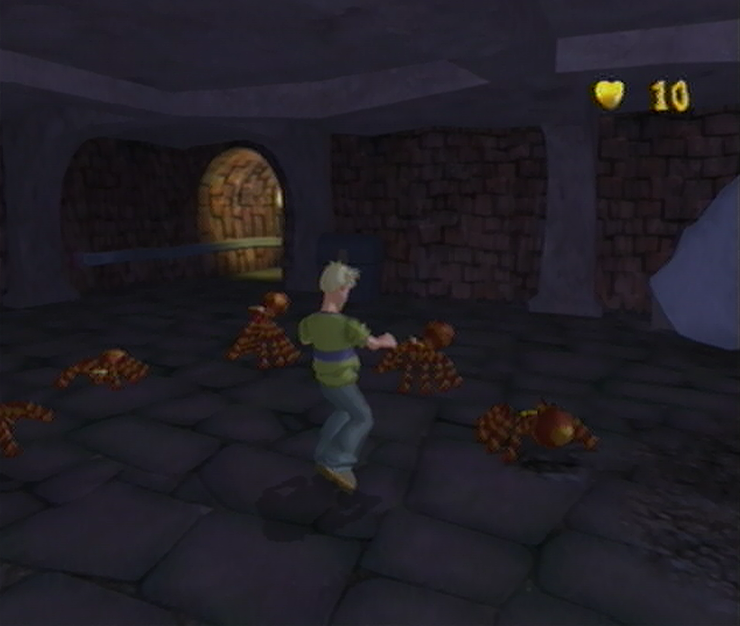
![]() It’s a treacherous trek through the Basement, and you’ll only have a meager 10 health to carry you through and a few dozen falling Spiders to contend with. Let’s employ the use of some Super Soups to get us through shall we? If you go back toward the Challenge Door you’ve just walked through you’ll locate a Health Soup Tin that will increase your energy to 15, carry on through the doorway ahead and swing an immediate right to discover a Turbo Cooper Soup Tin that you can use to make easy work of this room. The set-up of the basement is fairly linear, so as long as you keep sprinting through the corridors you should manage to make it out alright. Be sure to stop along the way to do battle with 15 Spiders which will go to benefit your Ghoulies Defeated score greatly, since their rolling attacks generally take a while to execute, you’ll have plenty of time to land a Cooper boot in some arachnid abdomen before you’re caught up in a sticky situation.
It’s a treacherous trek through the Basement, and you’ll only have a meager 10 health to carry you through and a few dozen falling Spiders to contend with. Let’s employ the use of some Super Soups to get us through shall we? If you go back toward the Challenge Door you’ve just walked through you’ll locate a Health Soup Tin that will increase your energy to 15, carry on through the doorway ahead and swing an immediate right to discover a Turbo Cooper Soup Tin that you can use to make easy work of this room. The set-up of the basement is fairly linear, so as long as you keep sprinting through the corridors you should manage to make it out alright. Be sure to stop along the way to do battle with 15 Spiders which will go to benefit your Ghoulies Defeated score greatly, since their rolling attacks generally take a while to execute, you’ll have plenty of time to land a Cooper boot in some arachnid abdomen before you’re caught up in a sticky situation.
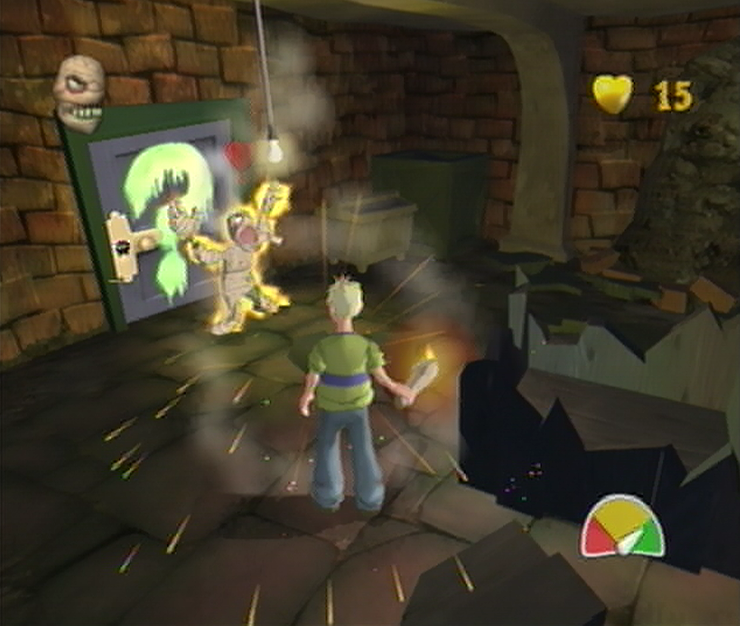
![]() Once you’ve made it through the first three rooms you’ll notice that the fourth room has a large central pillar with a circuit box on the side. A second Turbo Cooper Soup Tin can be found in front of the circuit box next to the large crate here, which you can use to keep a running pace if necessary. In the hallway ahead you’ll manage to locate your final five Spiders of the Basement which will conveniently ambush you in one Spider squashing location. Once you’ve finished taking care of the Spiders, it’s time to meet a new face in the room ahead. After you’ve picked up the 5 Health Soup Tin in the doorway you’ll manage to spot an open Challenge Door, approach it and you’ll be introduced to the Mummy! This Ghouly is only vulnerable to flame, so just beat up on him unarmed until Crivens provides you with a Special Candle which results in 20 damage if the Mummy is standing, and 10 if he’s recovering from a hit. Finish it off and you’ll be granted access to the Relic Store.
Once you’ve made it through the first three rooms you’ll notice that the fourth room has a large central pillar with a circuit box on the side. A second Turbo Cooper Soup Tin can be found in front of the circuit box next to the large crate here, which you can use to keep a running pace if necessary. In the hallway ahead you’ll manage to locate your final five Spiders of the Basement which will conveniently ambush you in one Spider squashing location. Once you’ve finished taking care of the Spiders, it’s time to meet a new face in the room ahead. After you’ve picked up the 5 Health Soup Tin in the doorway you’ll manage to spot an open Challenge Door, approach it and you’ll be introduced to the Mummy! This Ghouly is only vulnerable to flame, so just beat up on him unarmed until Crivens provides you with a Special Candle which results in 20 damage if the Mummy is standing, and 10 if he’s recovering from a hit. Finish it off and you’ll be granted access to the Relic Store.
RELIC STORE
![]() As soon as you walk into the Relic Store you’ll see through Coopers perspective, much like the Trophy Room previous. Use these precious seconds as you first step into the room to look toward the right side where you’ll spot a bouncing Soup Tin, keep its location in mind; we’re going to make a beeline for it once we regain control. Once Coopers put into a Super Scary Shock by a single Mummy that’s bounded out of one of the Sarcophagi, survive the button sequence and you’ll be able to go back and grab the Super Weapons Soup Tin. Left to your own devices the Candle will only manage to take out a single Mummy before it nearly loses all of its fuel. If the Candle runs out you’ll have to wait around for it to recharge and then use it sparingly so it doesn’t happen again. The Super Weapons Soup Tin enables infinite fuel on the Candle for a limited time, so once you’ve picked it up go to town on the Mummy and you’ll be tasked with defeating the remaining four Mummies as quickly as possible. Once you’ve done that it’s off to the Archives to see Amber!
As soon as you walk into the Relic Store you’ll see through Coopers perspective, much like the Trophy Room previous. Use these precious seconds as you first step into the room to look toward the right side where you’ll spot a bouncing Soup Tin, keep its location in mind; we’re going to make a beeline for it once we regain control. Once Coopers put into a Super Scary Shock by a single Mummy that’s bounded out of one of the Sarcophagi, survive the button sequence and you’ll be able to go back and grab the Super Weapons Soup Tin. Left to your own devices the Candle will only manage to take out a single Mummy before it nearly loses all of its fuel. If the Candle runs out you’ll have to wait around for it to recharge and then use it sparingly so it doesn’t happen again. The Super Weapons Soup Tin enables infinite fuel on the Candle for a limited time, so once you’ve picked it up go to town on the Mummy and you’ll be tasked with defeating the remaining four Mummies as quickly as possible. Once you’ve done that it’s off to the Archives to see Amber!
Navigation:
Chapter 1: The Rescue
-1-1: Welcome to Ghoulhaven Hall
-1-2: A Slight Detour…
-1-3: Reunion to Repulsion
Chapter 2: The Restoration
Chapter 3: The Riddle
Chapter 4: The Reckoning
Chapter 5: The Race
SNEAKING OUT OF THE THEATER
GAMING ROOM
The Gaming Room harbors a deceptive exit akin to the Billiards Room previous; under normal circumstances the challenge would begin as soon as you’ve attempted to walk through the doorway, but since we already know of this rooms ruse there are more productive means of setting off the challenge. Rather than walking across the room and having the Haunted Chairs start their ambush, simply walk to the first table to pick up the closest Chair and then destroy it using the B Button; this will cause the challenge to begin straight away leaving you with one less Ghouly to defeat. There are a number of ways to take out all of the Haunted Chairs here, if you’re unarmed it’s going to take five hits per Chair, using an inanimate Chair against a Haunted Chair will take two hits, and using a large throwable object like a Television Set or Large Trophy will manage it in a single toss. You can also have one of the sweeping Chairs take out another steadily approaching Chair if you manage to have their paths cross.
BASEMENT
RELIC STORE
As soon as you walk into the Relic Store you’ll be treated to Coopers perspective much like the Trophy Room previous, use these precious seconds as you first step into the room to look toward the right side where you’ll spot a bouncing Soup Tin, keep its location in mind; we’re going to make a beeline for it once we regain control. Once Coopers managed to examine the room throughly enough he’ll be put into a Super Scary Shock by a single Mummy that’s bounded out of one of the Sarcophagi, survive the button sequence and you’ll be able to go back and grab the Super Weapons Soup Tin. Left to your own devices the Candle will only manage to take out a single Mummy before it nearly loses all of its fuel. If the Candle runs out you’ll have to wait around for it to recharge and then use it sparingly so it doesn’t happen again. The Super Weapons Soup Tin enables infinite fuel on the Candle for a limited time, so once you’ve picked it up go to town on the Mummy and you’ll be tasked with defeating the remaining four Mummies as quickly as possible. Once you’ve done that it’s off to the Archives to see Amber!
Navigation:
Chapter 1: The Rescue
-1-1: Welcome to Ghoulhaven Hall
-1-2: A Slight Detour…
-1-3: Reunion to Repulsion
Chapter 2: The Restoration
Chapter 3: The Riddle
Chapter 4: The Reckoning
Chapter 5: The Race
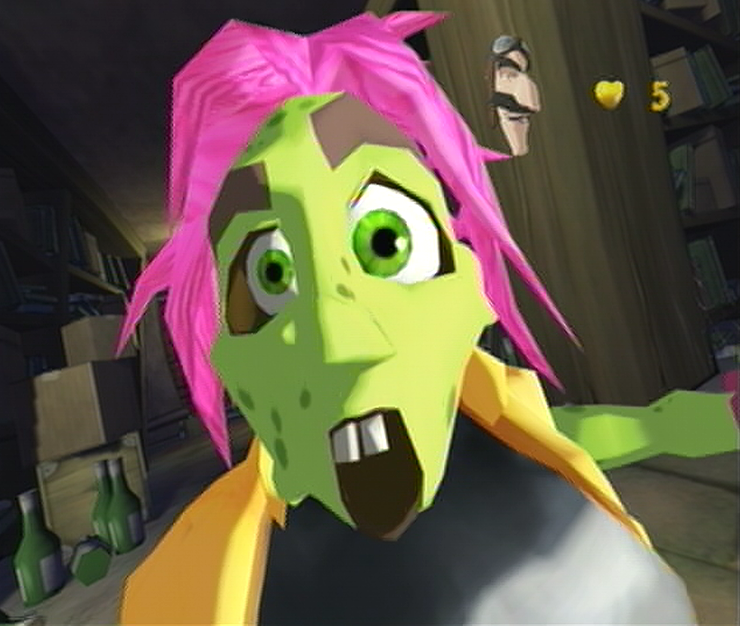
AMBER GETS A GHOULISH MAKEOVER
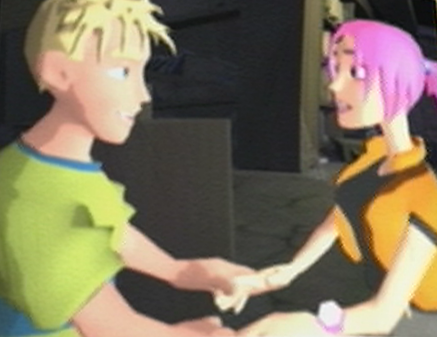
After a brush in with a bunch of ancient annoyances Cooper rushes through the door to the Archives only to find a daunting figure waiting for him, luckily Cooper will go on to fight bandaged brutes another day, as the figure turns out to be Crivens who takes a subtle bow as Cooper comes into view. “Greetings again, Sir.” the kindly butler remarks, “Good to see you have made it safely thus far. But I have far better news than that – I have found Miss Amber!” Crivens leads Cooper around the large bookcase to reveal Amber in the center of the room, massaging her wrist as the last bit of rope falls onto the floor. The couple rush over to each other and collectively sigh as they hold hands. “At last! No thanks to you, I’ve been freed by that smelly old butler guy!” Amber snaps before approaching the situation more delicately. “Sigh, I suppose you’ll be wanting a hug now…” Leaping at the invitation Cooper embraces Amber and the two share a moment of solace inside the manic mansion.
CELLAR
Optimal Super Scary Score Assessment:
Ghoulies Defeated: 100+
Time Taken: >15 minutes
Navigation:
Chapter 1: The Rescue
-1-1: Welcome to Ghoulhaven Hall
-1-2: A Slight Detour…
-1-3: Reunion to Repulsion
Chapter 2: The Restoration
Chapter 3: The Riddle
Chapter 4: The Reckoning
Chapter 5: The Race
ANY GHOULHAVEN IN A STORM
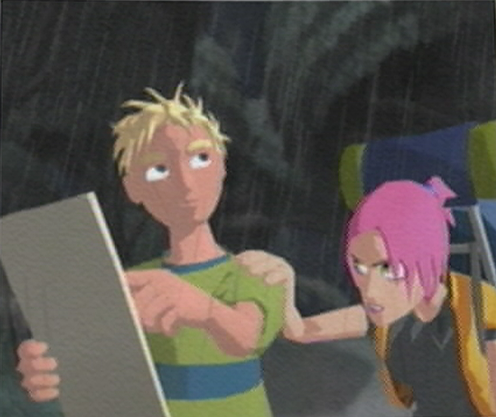
![]() A storm had been brewing all day, but thankfully for Cooper Chance and his girlfriend Amber, it had held off as they trekked across a foreign countryside towards civilization. At least, that was Coopers intention before his map had led him astray into a spooky forest. With the light behind them fading fast, the scarlet sunset was soon crowded with a number of fat inky clouds threatening to erupt at any moment. As Cooper stopped to take another look at his faithful map, Amber followed in his wake, resting her arm on his shoulder as she panted heavily; she was all for a romantic walk in the woods, but when her Casanova had given her the heavy backpack to carry as he led them in circles she was beginning to get a little fed up. How could this day get any worse? she thought to herself. As if on cue a clap of thunder sounded in the distance followed by a torrent of heavy raindrops. Cooper dismissed his girlfriends angry growl with a sheepish chuckle and a shrug.
A storm had been brewing all day, but thankfully for Cooper Chance and his girlfriend Amber, it had held off as they trekked across a foreign countryside towards civilization. At least, that was Coopers intention before his map had led him astray into a spooky forest. With the light behind them fading fast, the scarlet sunset was soon crowded with a number of fat inky clouds threatening to erupt at any moment. As Cooper stopped to take another look at his faithful map, Amber followed in his wake, resting her arm on his shoulder as she panted heavily; she was all for a romantic walk in the woods, but when her Casanova had given her the heavy backpack to carry as he led them in circles she was beginning to get a little fed up. How could this day get any worse? she thought to herself. As if on cue a clap of thunder sounded in the distance followed by a torrent of heavy raindrops. Cooper dismissed his girlfriends angry growl with a sheepish chuckle and a shrug.
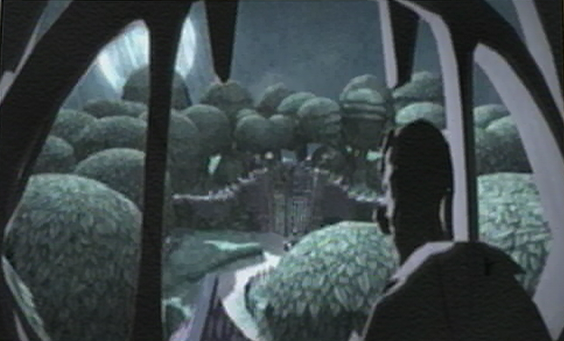
![]() “I’m sure we should have taken a right back there” Cooper pipes up doing nothing to alleviate the situation. Glancing back to Ambers stern look of disapproval Cooper tries his best to solve the problem at hand. “We need to find some shelter, and fast!“. As the duo trudge through the forest and into a clearing, a hulking mansion in the distance leers over the surroundings like a vulture. Amber is the first to jump at the opportunity as she grabs Coopers arm and points upward at the massive manor. “How about that old house?” she offers as Coopers attention is drawn from the map. Another bolt of lightning illuminated the scene in full; Ghoulhaven Hall looked as menacing as ever, each window was lit with an eerie green glow, the lightning accentuating its foreboding nature. Unbeknownst to the couple, a dark figure watches them from the largest window, gaped open like a wide mouth. “That’s right my pretties,” sneers Baron Von Ghoul, “come in and say hello!”
“I’m sure we should have taken a right back there” Cooper pipes up doing nothing to alleviate the situation. Glancing back to Ambers stern look of disapproval Cooper tries his best to solve the problem at hand. “We need to find some shelter, and fast!“. As the duo trudge through the forest and into a clearing, a hulking mansion in the distance leers over the surroundings like a vulture. Amber is the first to jump at the opportunity as she grabs Coopers arm and points upward at the massive manor. “How about that old house?” she offers as Coopers attention is drawn from the map. Another bolt of lightning illuminated the scene in full; Ghoulhaven Hall looked as menacing as ever, each window was lit with an eerie green glow, the lightning accentuating its foreboding nature. Unbeknownst to the couple, a dark figure watches them from the largest window, gaped open like a wide mouth. “That’s right my pretties,” sneers Baron Von Ghoul, “come in and say hello!”

![]() As Cooper takes in the scene, Amber takes her boyfriends indifference in stride as she makes her way toward the manor. “No way!” Cooper protests, “Let’s try and make it to the next village.” He uses his map to motion toward the nearest sign, Ghoulsville in the Gloom – 6 Miles, but Amber ignores him entirely. “Places like this are always full of creeps,” Cooper tries to reason, “or worse!“. From high above an outraged Baron Von Ghoul loses his composure, “Me, a creep?! Baron Von Ghoul? How dare he! I do believe a lesson in manners is required here!” The Baron stokes his chin for a few seconds contemplating a cunningly appropriate punishment, then flashes a wicked smile as he becomes enlightened. At the base of the Hall, Cooper and Amber look over the map once more, completely ignorant of the large stone Gargoyles atop the gate. With a few cracks and crumbles they shed their solid skin and proceed to creep down towards Amber!
As Cooper takes in the scene, Amber takes her boyfriends indifference in stride as she makes her way toward the manor. “No way!” Cooper protests, “Let’s try and make it to the next village.” He uses his map to motion toward the nearest sign, Ghoulsville in the Gloom – 6 Miles, but Amber ignores him entirely. “Places like this are always full of creeps,” Cooper tries to reason, “or worse!“. From high above an outraged Baron Von Ghoul loses his composure, “Me, a creep?! Baron Von Ghoul? How dare he! I do believe a lesson in manners is required here!” The Baron stokes his chin for a few seconds contemplating a cunningly appropriate punishment, then flashes a wicked smile as he becomes enlightened. At the base of the Hall, Cooper and Amber look over the map once more, completely ignorant of the large stone Gargoyles atop the gate. With a few cracks and crumbles they shed their solid skin and proceed to creep down towards Amber!
GRABBED BY THE GHOULIES!
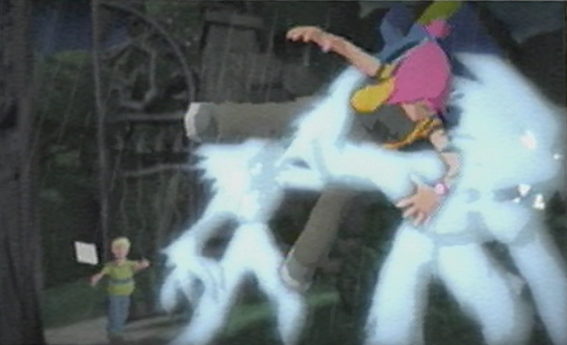
![]()
The two ghostly Gargoyles finish their descent and appear on either side of Amber who lets out a gasp as the growling behemoths edge ever closer. In one swift motion Amber is tackled to the ground, her pack removed and mouth covered as she attempts to draw Coopers attention away from the map. Fortunately her plea is answered, but as Cooper begins to pursue the Ghoulish kidnappers they dart around the front gate and toward the Mansions’ door, leaving him desperately trying to make up lost ground. As he relinquishes his ever-trusty map to the earth below he calls out to the Gargoyles, “Hey! Get your hands off her!”. Just as he finishes however, the Ghoulies reach the door and taunt him before slamming it shut behind them. The Baron chortles in his quarters, “Excellent, two new additions to my collection!” he pauses, watching his master plan unfold before his very eyes, I must make sure they’re most unwelcome…”
Navigation:
Chapter 1: The Rescue
Chapter 2: The Restoration
-2-1: Ingress with Ingredients
-2-2: Eggs for cracking, Ghoulies for smacking
-2-3: Someone has a Bone to pick with you…
-2-4: Sugar, Spice and Dungweed
-2-5: A Curious Concoction
-2-6: Too many cooks spoil the broth
Chapter 3: The Riddle
Chapter 4: The Reckoning
Chapter 5: The Race
GUARDING THE GOURMET GLOW-WORMS
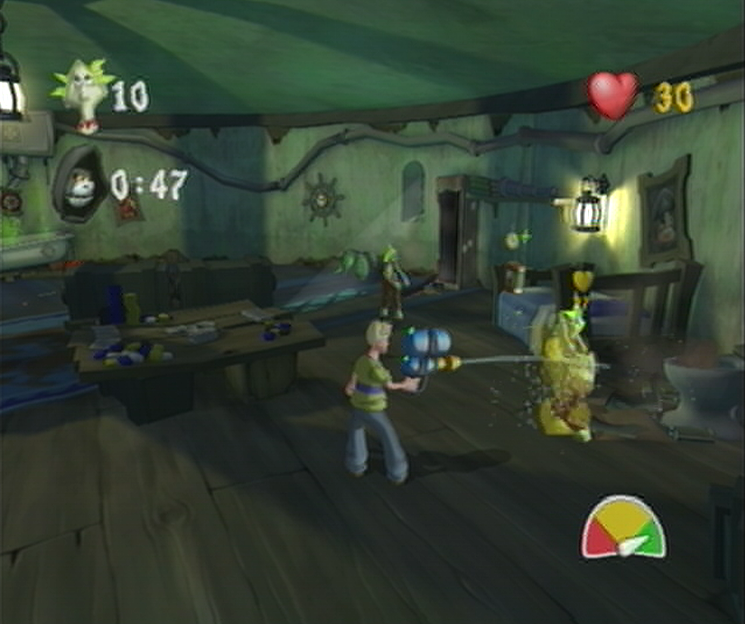
![]() Descending toward the Lighthouse Living Quarters you’ll notice that things have gotten quite eerie. While we’re sure of a surprise down the line, it’s better to prepare now while we still have the time. From where you start, make your way over toward the bathtub behind the Television set and you’ll find a pink chest to the left. Break it open and you’ll expose an Extra Time! Soup Tin, avoid collecting it and instead pick up the 25 Health Soup Tin on the table in the center. When you’re ready, walk over to the door and the challenge will begin; you’ll need to defeat 10 Zombies in 50 seconds. Wander over to the right and you’ll spot a shelving unit next to the door, break it open and you’ll find a Super Weapons! Soup Tin, pick it up and then use your untapped supply to go against the Zombies. If you’re running low on time, grab the Extra Time! Soup Tin that you found in the chest with its counterpart on the bed. Once you’ve gotten rid of at least 10 Zombies you’ll be able to progress ahead.
Descending toward the Lighthouse Living Quarters you’ll notice that things have gotten quite eerie. While we’re sure of a surprise down the line, it’s better to prepare now while we still have the time. From where you start, make your way over toward the bathtub behind the Television set and you’ll find a pink chest to the left. Break it open and you’ll expose an Extra Time! Soup Tin, avoid collecting it and instead pick up the 25 Health Soup Tin on the table in the center. When you’re ready, walk over to the door and the challenge will begin; you’ll need to defeat 10 Zombies in 50 seconds. Wander over to the right and you’ll spot a shelving unit next to the door, break it open and you’ll find a Super Weapons! Soup Tin, pick it up and then use your untapped supply to go against the Zombies. If you’re running low on time, grab the Extra Time! Soup Tin that you found in the chest with its counterpart on the bed. Once you’ve gotten rid of at least 10 Zombies you’ll be able to progress ahead.
LIGHTHOUSE STORE

![]() After a particularly intense water squirter session that saved our skin in the room above we’ll descend toward the Lighthouse Store below. As we emerge from the doorway we’ll find that Fiddlesworth has braved the Boathouse and has come forward to rip Little Willys Water Squirter from our hands -just for the time being- leaving us defenseless against the Medusas in the main area. You’ll have to be extra cautious as you work your way through the Store as you’ve only been given a meager 10 Health to start off with, which can be drained with a single failed Super Scary Shock sequence. The best way to combat this is to break the first collection of barrels you manage to spot as you descend the initial staircase toward the Medusas, inside you’ll find a Shocker Blocker! Soup Tin which will solve any Super Shock sequence automatically. Snatch it up in one fluid motion and then bolt for the Lighthouse Store Door, and you should manage to make it out alright.
After a particularly intense water squirter session that saved our skin in the room above we’ll descend toward the Lighthouse Store below. As we emerge from the doorway we’ll find that Fiddlesworth has braved the Boathouse and has come forward to rip Little Willys Water Squirter from our hands -just for the time being- leaving us defenseless against the Medusas in the main area. You’ll have to be extra cautious as you work your way through the Store as you’ve only been given a meager 10 Health to start off with, which can be drained with a single failed Super Scary Shock sequence. The best way to combat this is to break the first collection of barrels you manage to spot as you descend the initial staircase toward the Medusas, inside you’ll find a Shocker Blocker! Soup Tin which will solve any Super Shock sequence automatically. Snatch it up in one fluid motion and then bolt for the Lighthouse Store Door, and you should manage to make it out alright.
BOATHOUSE

![]() Akin to the Lighthouse Living Quarters previous, a return trip to the Boathouse will have the room completely vacant, a tip off that a challenge is sure to start should we attempt an escape. Work your way through the Boathouse and approach the open Challenge Door to meet your new breed of Ghouly; the Hunchback. Damage will only register if you hit the Hunchback in his face, anywhere else will see him completely invulnerable. In order to get to his face you’ll have to chase him down and hit him in the back a few times, then steadily work around his side toward his front. Each time you send a limb flying at the Hunchbacks face you’ll take away a single hitpoint, do this in quick succession and you’ll manage to deliver a final blow in the combination which will send the Hunchback staggering back causing a whopping 10 damage. Once you’ve done that the Hunchback will cover his face with his hand, leaving you unable to deal out any damage.
Akin to the Lighthouse Living Quarters previous, a return trip to the Boathouse will have the room completely vacant, a tip off that a challenge is sure to start should we attempt an escape. Work your way through the Boathouse and approach the open Challenge Door to meet your new breed of Ghouly; the Hunchback. Damage will only register if you hit the Hunchback in his face, anywhere else will see him completely invulnerable. In order to get to his face you’ll have to chase him down and hit him in the back a few times, then steadily work around his side toward his front. Each time you send a limb flying at the Hunchbacks face you’ll take away a single hitpoint, do this in quick succession and you’ll manage to deliver a final blow in the combination which will send the Hunchback staggering back causing a whopping 10 damage. Once you’ve done that the Hunchback will cover his face with his hand, leaving you unable to deal out any damage.
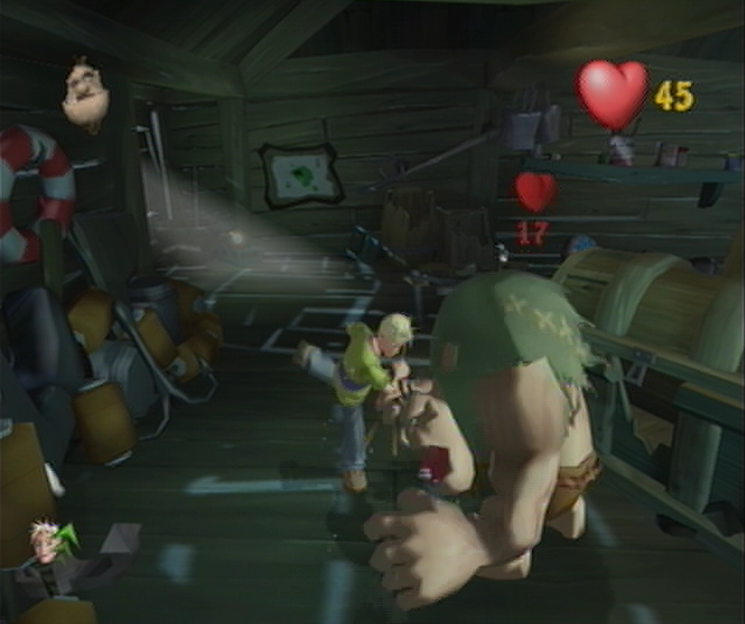
![]() If you attack the Hunchback while he’s in this condition he’ll grow violently angry and come up swinging, dishing out some serious damage as he spins his large arms around. Instead, give the Hunchback some space and he’ll let his guard down, meandering around the room allowing you a chance for a second assault. To make matters easier you’ll locate a Turbo Cooper! Soup Tin by the window next to the shelving unit with another hidden inside a barrel with a Skeletons arm sticking out behind the large center Chest. Using these Super Soups will allow you to move more quickly to the Hunchbacks face once you’ve attacked his back. You’re also free to bring out the Imp by breaking open the barrel next to the crate to the left of the center Chest. Doing so will reveal a trio of traitorous Imps that will wander over to Hunchy and attack his face directly. Once you get this Ghouly off your back the challenge will complete and you’ll be able to work your way back to Ghoulhaven Hall.
If you attack the Hunchback while he’s in this condition he’ll grow violently angry and come up swinging, dishing out some serious damage as he spins his large arms around. Instead, give the Hunchback some space and he’ll let his guard down, meandering around the room allowing you a chance for a second assault. To make matters easier you’ll locate a Turbo Cooper! Soup Tin by the window next to the shelving unit with another hidden inside a barrel with a Skeletons arm sticking out behind the large center Chest. Using these Super Soups will allow you to move more quickly to the Hunchbacks face once you’ve attacked his back. You’re also free to bring out the Imp by breaking open the barrel next to the crate to the left of the center Chest. Doing so will reveal a trio of traitorous Imps that will wander over to Hunchy and attack his face directly. Once you get this Ghouly off your back the challenge will complete and you’ll be able to work your way back to Ghoulhaven Hall.
DINING ROOM
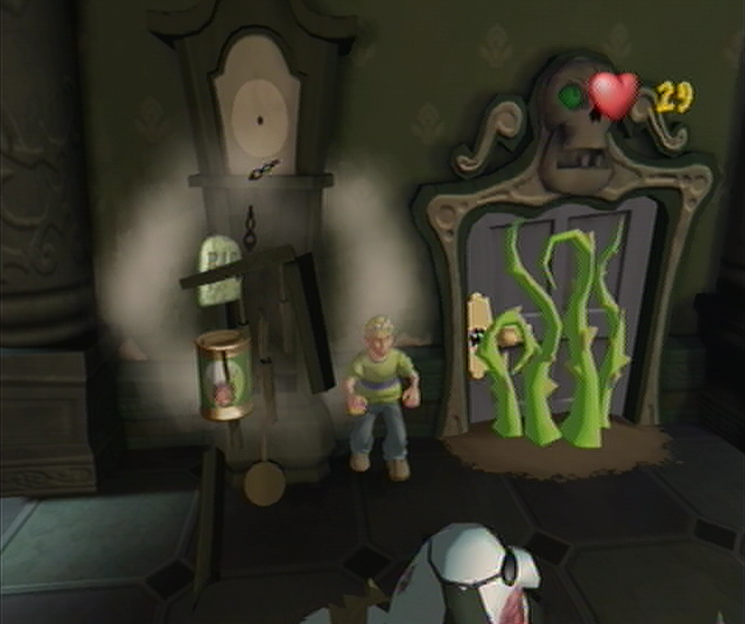
![]() Inside the Dining Room you’ll discover that the Pirate Captain and his Cutlass Crew have conducted a fearsome feast, threatening anyone who dares to interrupt their meal. Cooper will have a little bit of trouble in this respect as the Captain will send one of his lackeys, ‘Andsome Pete, to show him the door as he tries to sneak across the floor. You shouldn’t have too much difficulty in taking out this single Zombie Pirate – but doing so will coax the Pirate Captain in sending the rest of his undead crew out to ‘run ye through’! Let the battle begin! Once the trio of Zombie Pirates begin to limp over to your current position, take advantage of this time and turn around to spot a Grandfather Clock against the wall – break it open and you’ll find a One-Hit Wonder! Soup Tin inside. Snatch up this Super Soup and pick up a pile of Burgers off the nearest table when the Zombie Pirates are close enough, send a patty off in their direction to take them out in a single hit.
Inside the Dining Room you’ll discover that the Pirate Captain and his Cutlass Crew have conducted a fearsome feast, threatening anyone who dares to interrupt their meal. Cooper will have a little bit of trouble in this respect as the Captain will send one of his lackeys, ‘Andsome Pete, to show him the door as he tries to sneak across the floor. You shouldn’t have too much difficulty in taking out this single Zombie Pirate – but doing so will coax the Pirate Captain in sending the rest of his undead crew out to ‘run ye through’! Let the battle begin! Once the trio of Zombie Pirates begin to limp over to your current position, take advantage of this time and turn around to spot a Grandfather Clock against the wall – break it open and you’ll find a One-Hit Wonder! Soup Tin inside. Snatch up this Super Soup and pick up a pile of Burgers off the nearest table when the Zombie Pirates are close enough, send a patty off in their direction to take them out in a single hit.
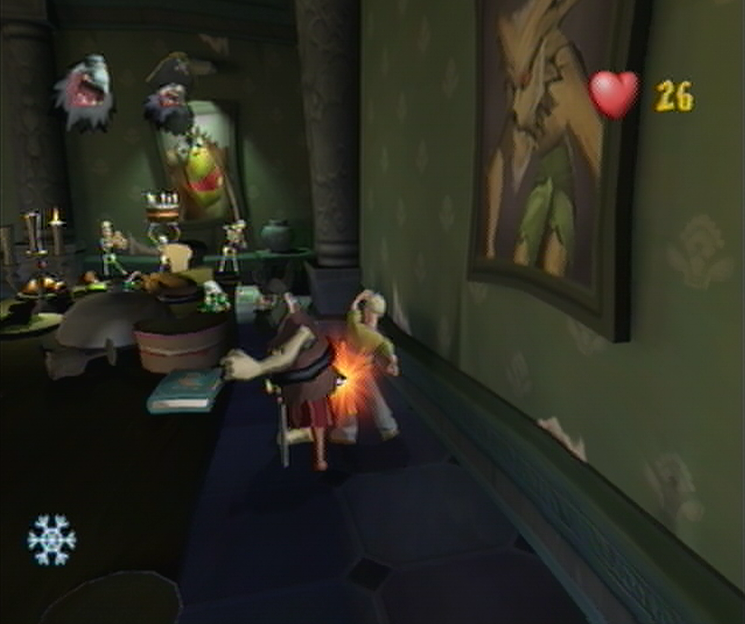
![]() Once you’ve defeated the trio, six more Zombie Pirates will burst forth from the windows around the room. Keep fighting until your One-Hit Wonder! Super Soup runs out and then work your way through the ranks toward the Captains table. You’ll find a trio of Skeletons on one side of the table and a potted plant on the other, go toward the potted plant and you’ll find a Freeze Ghoulies! Soup Tin hidden behind it. Once you’ve grabbed the Super Soup, approach the Captain and give him a swift kick to the ribs – doing so will have the Skeletons turn on the Pirates which will help to clear the room. While the freezing is still active, work your way back to the front of the room to grab the Invulnerability! Soup Tin (depicted by its Iron Heart icon for temporary invincibility) and then beat on the frozen crew until the effect has worn off. Once you manage to clear the room you’ll beat the challenge, stay away from the now traitorous Skeletons and work your way to the open challenge door.
Once you’ve defeated the trio, six more Zombie Pirates will burst forth from the windows around the room. Keep fighting until your One-Hit Wonder! Super Soup runs out and then work your way through the ranks toward the Captains table. You’ll find a trio of Skeletons on one side of the table and a potted plant on the other, go toward the potted plant and you’ll find a Freeze Ghoulies! Soup Tin hidden behind it. Once you’ve grabbed the Super Soup, approach the Captain and give him a swift kick to the ribs – doing so will have the Skeletons turn on the Pirates which will help to clear the room. While the freezing is still active, work your way back to the front of the room to grab the Invulnerability! Soup Tin (depicted by its Iron Heart icon for temporary invincibility) and then beat on the frozen crew until the effect has worn off. Once you manage to clear the room you’ll beat the challenge, stay away from the now traitorous Skeletons and work your way to the open challenge door.
EMBASSY BALLROOM
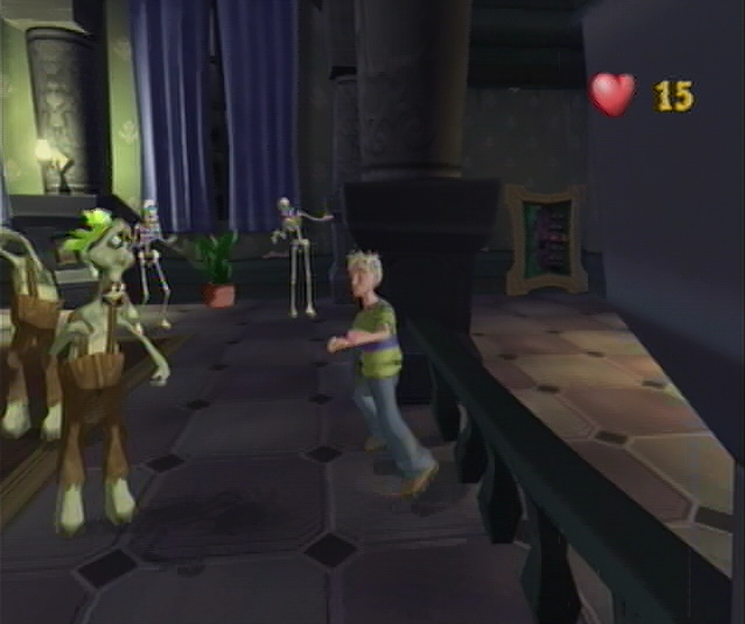
![]() The same rules to the Embassy Ballroom apply: once you step onto the dance floor you can’t interrupt the dancers, otherwise you’ll have to defeat them all in order to pass on through the exit. Unlike last time however, there isn’t an abundance of items you can use to take out the Ghoulies blocking the exit, or even cast onto the dance floor for crowd control. If you don’t feel like wandering through the floor there is a way to get through with a little help from the DJ. From your starting position, break open the large dispenser to your left to receive a 10 Health Soup Tin, then get on stage by walking up the stairs to your left as you walk toward the dance floor. Once there you should spot another 10 Health Soup Tin to bring your overall health to 35. Now that you’ve bulked up your health considerably we won’t have an issue with taking out the dancers to benefit our Ghoulies Defeated score. Grab a collection of bottles before descending to the dance floor.
The same rules to the Embassy Ballroom apply: once you step onto the dance floor you can’t interrupt the dancers, otherwise you’ll have to defeat them all in order to pass on through the exit. Unlike last time however, there isn’t an abundance of items you can use to take out the Ghoulies blocking the exit, or even cast onto the dance floor for crowd control. If you don’t feel like wandering through the floor there is a way to get through with a little help from the DJ. From your starting position, break open the large dispenser to your left to receive a 10 Health Soup Tin, then get on stage by walking up the stairs to your left as you walk toward the dance floor. Once there you should spot another 10 Health Soup Tin to bring your overall health to 35. Now that you’ve bulked up your health considerably we won’t have an issue with taking out the dancers to benefit our Ghoulies Defeated score. Grab a collection of bottles before descending to the dance floor.
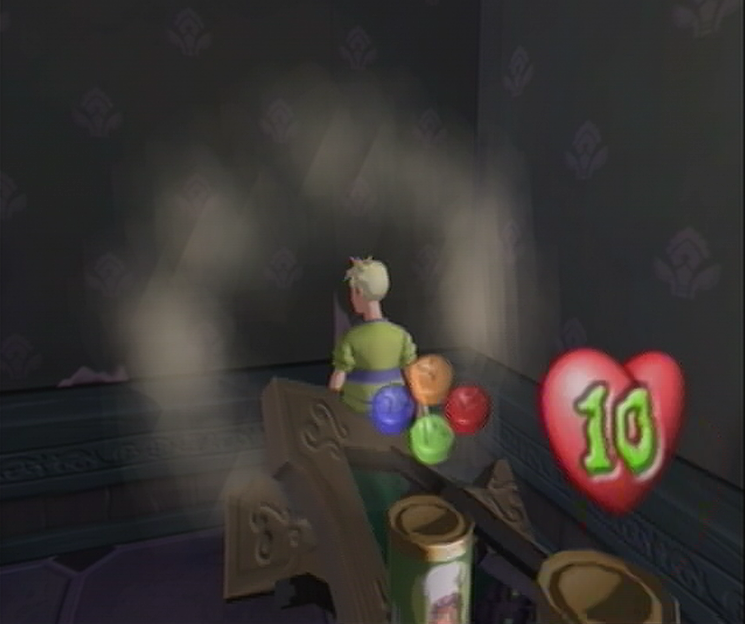
![]() Once you’re on the dance floor you’ll notice a collection of portraits around the perimeter, smashing them open with bottles will reveal some Super Soups underneath – you’ll find 1 Freeze Ghoulies! Tin, 2 Super Weapons! Tins, and 1 Turbo Cooper Tin altogether. Once all the Soups have been found, start a fight with the Skeletons. It’s fairy easy to avoid the Zombies, but ignoring the Skeletons will have them looking out for items to use against you. After exhausting the bottles, pick up the lonely guitar at rear to the right of the DJ Podium. Once you’re out of usable weapons, lure all of them into one spot and freeze them with the Freeze Ghoulies! Soup Tin. Reach over the low gate near the exit and grab the potted plant – line them all up and throw it, then use any remaining time to take care of any left overs. Once you’ve done that, break the portrait of Ghoulhaven Hall to reveal a 10 Health Super Soup, survive the Super Shock sequence ahead, and then leave the Embassy.
Once you’re on the dance floor you’ll notice a collection of portraits around the perimeter, smashing them open with bottles will reveal some Super Soups underneath – you’ll find 1 Freeze Ghoulies! Tin, 2 Super Weapons! Tins, and 1 Turbo Cooper Tin altogether. Once all the Soups have been found, start a fight with the Skeletons. It’s fairy easy to avoid the Zombies, but ignoring the Skeletons will have them looking out for items to use against you. After exhausting the bottles, pick up the lonely guitar at rear to the right of the DJ Podium. Once you’re out of usable weapons, lure all of them into one spot and freeze them with the Freeze Ghoulies! Soup Tin. Reach over the low gate near the exit and grab the potted plant – line them all up and throw it, then use any remaining time to take care of any left overs. Once you’ve done that, break the portrait of Ghoulhaven Hall to reveal a 10 Health Super Soup, survive the Super Shock sequence ahead, and then leave the Embassy.
LOWER CORRIDORS
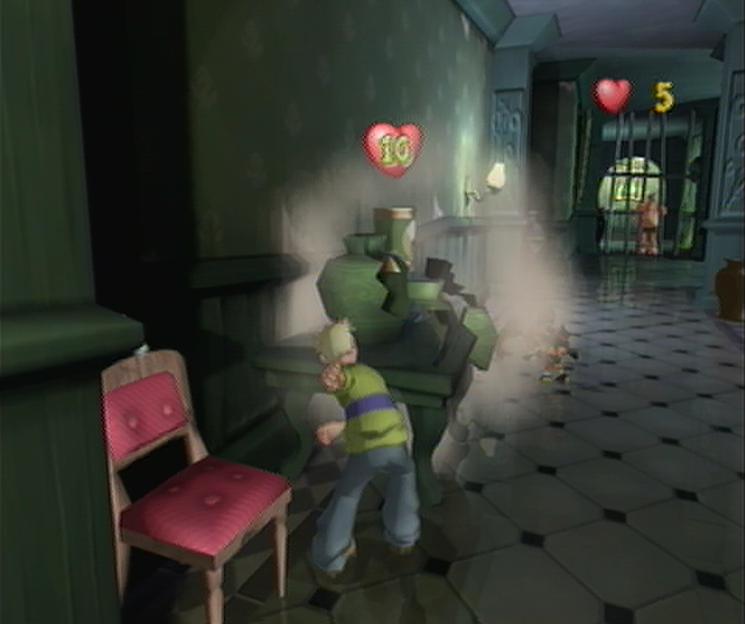
![]() The Lower Corridors can be especially nerve wracking with an extremely limited amount of health provided coupled with the ambush from the nimble Ninja Imps located throughout the passage. You can attempt to run through the onslaught as it comes, though this is ill-advised as you risk a hit to Coopers’ health; each time a new grouping of Ninja Imps expose themselves from their hiding place, Cooper will jump into the air out of fear which provides a previous group of Imps ample time to catch up and dish out the damage. Instead, you’ll notice a rather round vase atop a table on the left side of the corridor that harbors a 10 Health Super Soup Tin inside. Approach it very cautiously as your first bout of Imps are hiding in the brown vase just in front of this table, and they’ll likely spring out once you smash open the round vase. Once you’ve revealed the Health Tin inside, you’ll need to snatch it up as soon as possible and then launch toward the doorway on the opposite side of the hall.
The Lower Corridors can be especially nerve wracking with an extremely limited amount of health provided coupled with the ambush from the nimble Ninja Imps located throughout the passage. You can attempt to run through the onslaught as it comes, though this is ill-advised as you risk a hit to Coopers’ health; each time a new grouping of Ninja Imps expose themselves from their hiding place, Cooper will jump into the air out of fear which provides a previous group of Imps ample time to catch up and dish out the damage. Instead, you’ll notice a rather round vase atop a table on the left side of the corridor that harbors a 10 Health Super Soup Tin inside. Approach it very cautiously as your first bout of Imps are hiding in the brown vase just in front of this table, and they’ll likely spring out once you smash open the round vase. Once you’ve revealed the Health Tin inside, you’ll need to snatch it up as soon as possible and then launch toward the doorway on the opposite side of the hall.
SCULLERY
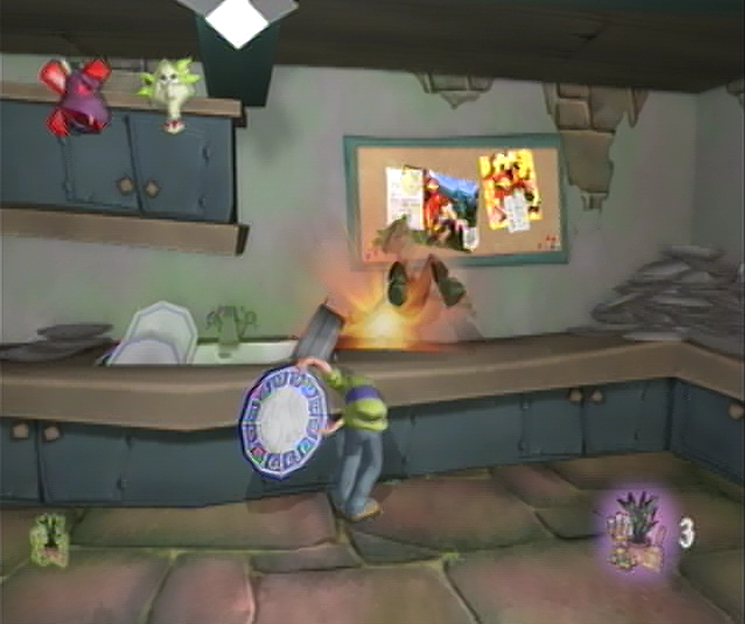
![]() Our return to the Scullery will prove to be as Reaper-filled as the last, though if you’re able to stick to the rules you can avoid an unwanted confrontation. Work your way through the shelves to find your way to the Challenge Door. Before you’ll get a chance to walk through, your invitation will be taken by two Zombies who enter the room. For the purposes of this challenge you’ll need to defeat both of the Zombies, but avoid defeating any Imps while you’re still stringing the Zombies along; a difficult proposition as you’ll find them getting in between your sure foot and the Zombie limb you’re aiming for. Take care of the Zombie to the right by picking up the Rare Plate and the Super Weapons! Soup Tin that can be found amongst the cluttered shelf to the right of the challenge door. Avoid smacking him into the row of plates between the shelf and the sink, as an Imp hides inside the stack of dirty dishes and will come to intervene should you expose his hiding place.
Our return to the Scullery will prove to be as Reaper-filled as the last, though if you’re able to stick to the rules you can avoid an unwanted confrontation. Work your way through the shelves to find your way to the Challenge Door. Before you’ll get a chance to walk through, your invitation will be taken by two Zombies who enter the room. For the purposes of this challenge you’ll need to defeat both of the Zombies, but avoid defeating any Imps while you’re still stringing the Zombies along; a difficult proposition as you’ll find them getting in between your sure foot and the Zombie limb you’re aiming for. Take care of the Zombie to the right by picking up the Rare Plate and the Super Weapons! Soup Tin that can be found amongst the cluttered shelf to the right of the challenge door. Avoid smacking him into the row of plates between the shelf and the sink, as an Imp hides inside the stack of dirty dishes and will come to intervene should you expose his hiding place.
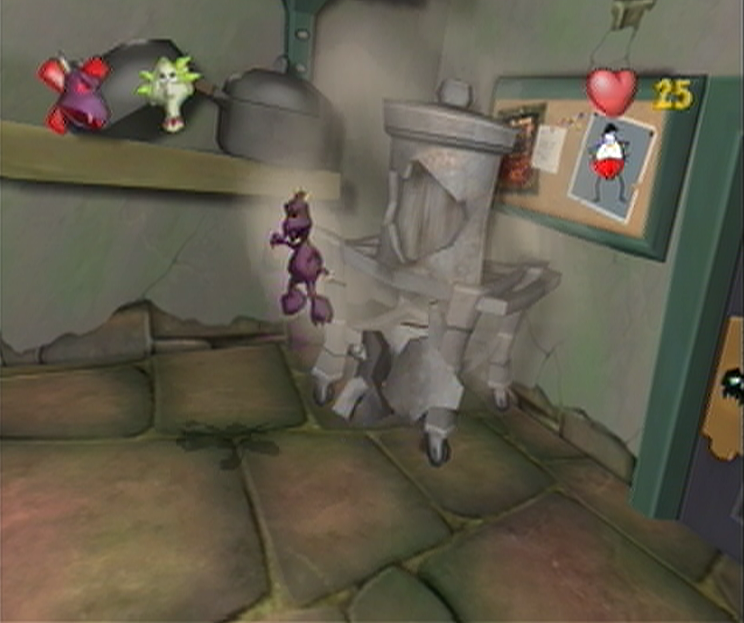
![]() After a certain duration regardless whether or not you’ve defeated the first Zombie in the Scullery, you’ll find your first Imp bursting out from the metal dispensary to the left of the Challenge door. Avoid taking out this Imp at all costs and remain fixed on defeating your current Zombie and then moving onto the second under the same circumstances. If you do end up accidentally snuffing the Imp, there’s a Dizzy Reaper! Soup Tin back in the first room after the shelving units that you can use to keep the Reaper at bay while you finish up on the last Zombie. Otherwise, once both Zombies have been laid to rest, you’re free to take out your anguish on the Imps, now that the rules no longer apply to sparing them. Once you’ve kicked off the first Imp from the dispensary, expose the second Imp hiding inside the dirty dishes if you haven’t already, and then lay it on thick. Once both Zombies and Imps have been defeated you’re free to sprint toward the exit and back to the Kitchen.
After a certain duration regardless whether or not you’ve defeated the first Zombie in the Scullery, you’ll find your first Imp bursting out from the metal dispensary to the left of the Challenge door. Avoid taking out this Imp at all costs and remain fixed on defeating your current Zombie and then moving onto the second under the same circumstances. If you do end up accidentally snuffing the Imp, there’s a Dizzy Reaper! Soup Tin back in the first room after the shelving units that you can use to keep the Reaper at bay while you finish up on the last Zombie. Otherwise, once both Zombies have been laid to rest, you’re free to take out your anguish on the Imps, now that the rules no longer apply to sparing them. Once you’ve kicked off the first Imp from the dispensary, expose the second Imp hiding inside the dirty dishes if you haven’t already, and then lay it on thick. Once both Zombies and Imps have been defeated you’re free to sprint toward the exit and back to the Kitchen.
KITCHEN

![]() With our Glow Worms secure, Ma adds them to the pot to simmer where they’ll be soon joined by the other ingredients shortly. We’ll manage to find the next ingredient – a more sensible sounding Egg – inside the Chicken Shed. Let’s get cracking shall we? Once Soupswill has finished her speech, a doorway on the opposite end of the Kitchen will open as a single Zombie Pirate shambles in. While a confrontation may seem unnecessary with the salty dog, there’s a simple means of defeating the Zombie Pirate; once approached, the Zombie Pirate he’ll drop his sword as he pulls out a large treasure chest to throw in your direction. Do what you can to avoid being on the receiving end of the plunder blunder and then rush into grab the sword when the coast is clear. Slice the Zombie Pirate with his own sword and he’ll go down in a single hit! How’s that for a weak spot? Once you’ve finished with that, continue through the frozen doorway the Pirate emerged from to enter the Ffffreezer.
With our Glow Worms secure, Ma adds them to the pot to simmer where they’ll be soon joined by the other ingredients shortly. We’ll manage to find the next ingredient – a more sensible sounding Egg – inside the Chicken Shed. Let’s get cracking shall we? Once Soupswill has finished her speech, a doorway on the opposite end of the Kitchen will open as a single Zombie Pirate shambles in. While a confrontation may seem unnecessary with the salty dog, there’s a simple means of defeating the Zombie Pirate; once approached, the Zombie Pirate he’ll drop his sword as he pulls out a large treasure chest to throw in your direction. Do what you can to avoid being on the receiving end of the plunder blunder and then rush into grab the sword when the coast is clear. Slice the Zombie Pirate with his own sword and he’ll go down in a single hit! How’s that for a weak spot? Once you’ve finished with that, continue through the frozen doorway the Pirate emerged from to enter the Ffffreezer.
Navigation:
Chapter 1: The Rescue
Chapter 2: The Restoration
-2-1: Ingress with Ingredients
-2-2: Eggs for cracking, Ghoulies for smacking
-2-3: Someone has a Bone to pick with you…
-2-4: Sugar, Spice and Dungweed
-2-5: A Curious Concoction
-2-6: Too many cooks spoil the broth
Chapter 3: The Riddle
Chapter 4: The Reckoning
Chapter 5: The Race
GUARDING THE GOURMET GLOW-WORMS
LIGHTHOUSE STORE
After a particularly intense water squirter session that saved our skin in the room above we’ll descend toward the Lighthouse Store below. As we emerge from the doorway we’ll find that Fiddlesworth has braved the Boathouse and has come forward to rip Little Willys Water Squirter from our hands -just for the time being- leaving us defenseless against the Medusas in the main area. You’ll have to be extra cautious as you work your way through the Store as you’ve only been given a meager 10 Health to start off with, which can be drained with a single failed Super Scary Shock sequence. The best way to combat this is to break the first collection of barrels you manage to spot as you descend the initial staircase toward the Medusas, inside you’ll find a Shocker Blocker! Soup Tin which will solve any Super Shock sequence automatically. Snatch it up in one fluid motion and then bolt for the Lighthouse Store Door, and you should manage to make it out alright.
BOATHOUSE
DINING ROOM
While the Lighthouse would seem like a beacon for nautical Ghouly activity, it looks as though the Zombie Pirates couldn’t resist a large buffet. Inside you’ll discover that the Pirate Captain and his Cutlass Crew have commandeered the Dining Room, challenging anyone who steps up to interrupt their feast, case in point Cooper will have a little bit of trouble as he enters the room, as the Captain will send one of his lackeys, ‘Andsome Pete, to show you the door. You shouldn’t have much difficulty in taking out this single Zombie Pirate which will coax the captain in sending the rest of his undead crew, let the battle begin! Once the trio of Zombie Pirates begin to limp over take this time to turn around and break open the Grandfather Clock thats been placed against the wall, inside you’ll find a One-Hit Wonder! Soup Tin. Snatch up this Super Soup and pick up a pile of Burgers off the nearest table when the Zombie Pirates are close enough, send a patty off in their direction to take them out in a single hit.
EMBASSY BALLROOM
LOWER CORRIDORS
The Lower Corridors can be especially nerve wracking with an extremely limited amount of health provided coupled with the ambush from the nimble Ninja Imps located throughout the passage. You can attempt to run through the onslaught as it comes, though this is ill-advised as you risk a hit to Coopers’ health; each time a new grouping of Ninja Imps expose themselves from their hiding place, Cooper will jump into the air out of fear which provides a previous group of Imps ample time to catch up and dish out the damage. Instead, you’ll notice a rather round vase atop a table on the left hand side of the corridor that harbors a 10 Health Super Soup Tin inside. Approach it very cautiously as your first bout of Imps are hiding in the brown vase just in front of this table, and it’s likely they’ll spring out once you smash open the round vase. Once you’ve revealed the Health Tin inside, you’ll need to snatch it up as soon as possible and then launch toward the doorway on the opposite side of the hall.
SCULLERY
Our return to the Scullery will prove to be as Reaper-filled as the last, though if you’re able to stick to the rules you’ll find that you’ll avoid an unwanted confrontation. Work your way through the corridor of shelves to find your way toward the alluring Challenge Door. Before you’ll get a chance to walk through the frame, your invitation will be taken by two Zombies who enter the room, locking themselves in for good measure. For the purposes of this challenge you’ll need to defeat both of your newly acquainted Zombies, but avoid defeating any Imps while you’re still stringing your Zombies along; a difficult proposition as you’ll find them getting in between your sure foot and the Zombie limb you’re aiming for. Take care of the Zombie to the right by picking up the Rare Plate and the Super Weapons! Soup Tin that can be found wedged in amongst the cluttered shelf to the right of the challenge door; be sure to avoid smacking him into the row of plates between the shelf and the sink, as an Imp hides inside the stack of dirty dishes and will come to intervene should you expose his hiding place.
KITCHEN
With our Glow Worms secure, Ma adds them to the pot to simmer where they’ll be soon joined by the other ingredients shortly. Speaking of, we’ll manage to find the next ingredient – a more sensible sounding Egg – inside the Chicken Shed on the outside of Ghoulhaven Hall. Let’s get cracking shall we? Once Soupswill has finished her speech, a doorway on the opposite end of the Kitchen will open as a single Zombie Pirate shambles in. While a confrontation may seem unnecessary with the salty dog, there’s a simple means of defeating the Zombie Pirate which you’re free to use in future fights. As you approach the Zombie Pirate he’ll drop his sword as he pulls out a large treasure chest to hoist over his head and throw in your direction. Do what you can to avoid being on the receiving end of the plunder blunder and then rush into grab the sword when the coast is clear. Slice the Zombie Pirate with his own sword when the time is right and he’ll go down in a single hit! How’s that for a weak spot? Once you’ve finished with that, continue through the frozen doorway the Pirate emerged from to enter the Ffffreezer.
Navigation:
Chapter 1: The Rescue
Chapter 2: The Restoration
-2-1: Ingress with Ingredients
-2-2: Eggs for cracking, Ghoulies for smacking
-2-3: Someone has a Bone to pick with you…
-2-4: Sugar, Spice and Dungweed
-2-5: A Curious Concoction
-2-6: Too many cooks spoil the broth
Chapter 3: The Riddle
Chapter 4: The Reckoning
Chapter 5: The Race
THE EERIE BIRD FOLLOWS THE WORM

Right, just two more ingredients now before we can return Amber back to her less-repulsive self. Now that we’ve entered the Ffffreezer your health will drop to a mere 15 Points, definitely not the most virile state to go about attacking the Ghoulies found in this room, and provided you don’t bash open the large freezer located in the center of this room, you won’t have to. Instead you should focus on clearing out this room in a timely fashion rather than clearing it out of Ghoulies, and since your Time Taken should be just over half-an-hour at this point it would be best to bee-line for the exit. From where you stand at the front of Ffffreezer, make your way out into the open and resist cracking open any Freezers found throughout this chamber. While the Ghoulies inside are friendly, you’ll find without anyone to fight, they’ll come after you instead. Carry on past the center freezer and you should manage to spot a green shelf ahead, once you’ve reached it turn to your immediate left and you’ll locate the alluring open Challenge Door.
GARBAGE YARD
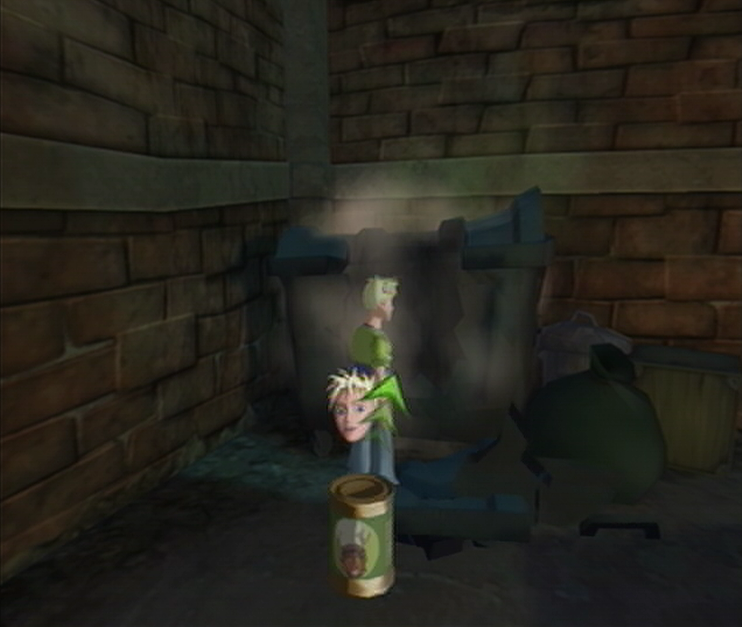
At first glance, the Garbage Yard appears to be just as vacant as the Ffffreezer, don’t let your guard down however, as a Ghouly Ambush is surely headed your way… From where you stand at the top of the Garbage Ramp, you’ll need to descend toward a large dumpster found wedged in the corner. Crack the front open and your efforts will be rewarded with a Turbo Cooper! Soup Tin. Work your way through the Yard until you’ve come across a yellow U-Dump Dumpster to the left. Once you carry on ahead and find yourself between the Garbage Can piles and the Challenge Door ahead will slam in defiance. So much for an easy way out. In response you’ll find a total of 12 Spiders have splattered in pairs of 3 around the Garbage Yard. Once you’ve regained control, it’s better not to run in to do battle, but instead pick up the garbage cans to your left or right. Since the Spiders are motionless and grouped in threes, locate each ‘gathering’ essentially and fling a can towards them.
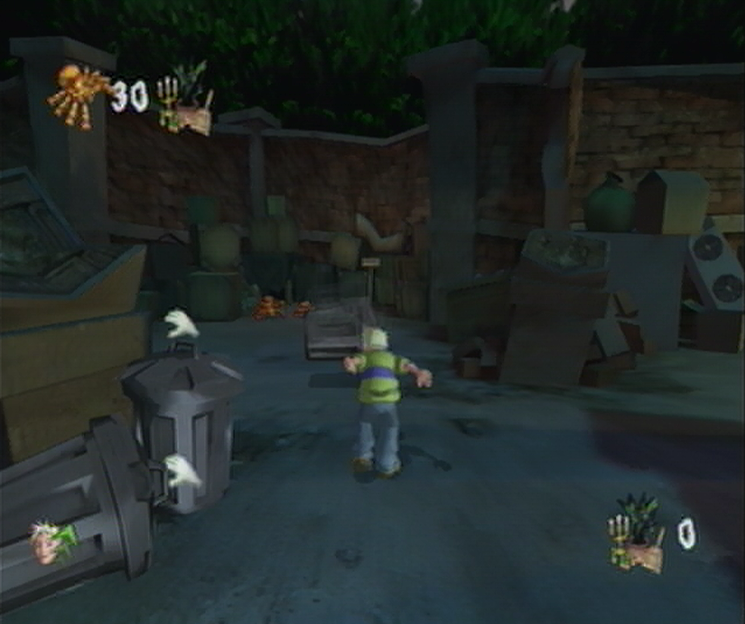
With any luck you’ll manage to use your bounding bin to squash all three Spiders in their collective group, if you do miss one however, just move onto the next pile rather than trying a second attempt. You’ll find the first group just to the left of your position nearest the large Garbage Yard Doors and the second group can be found in front of a window to the right, nearly symmetrical to the first group. You’ll find the next group directly behind your current position, you’ll need to grab a new Garbage Can and whip it around to hit the Spiders waiting at the end of the U-Dump Dumpster area. The final group can be found tucked in the corner hiding behind the U-Dump Dumpster, you’ll need to grab your forth and final can to take them out from in front of the U-Dump. You’ll only have a limited time before the Spiders start to give chase, so try your best to clear them all out. If you have any Spiders left over there are plenty of objects found around the Yard that you can use to fend yourself without breaking the rules.
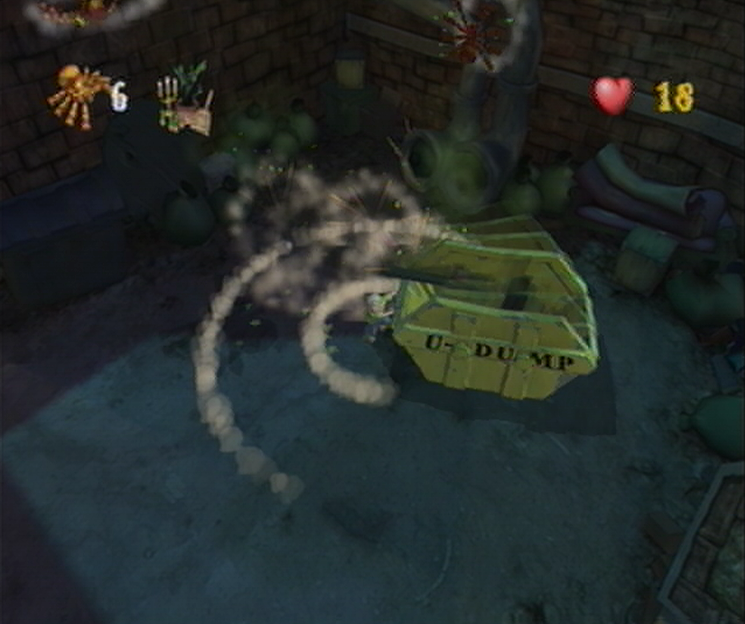
WOOD SHED

The Woodshed is an extremely dangerous ground to be treading on, as you’ll only be supplied with a meager 3 energy to take you through the room which is set up like a maze and you’ll be constantly assaulted by the new breed of Ghouly; the Flying Imp. It’s easily comparable to the challenge set in the Lower Corridor with the Ninja Imps, except this time it’s been drawn out to torturous extremes. Just like the Lower Corridors it’s not worth running through trying to survive, it’s best to have a strategy, and this time we’ll be going out fighting! The first thing you’ll want to do is take out all of the Ghoulies in the main area, the most imperative being the Flying Imp as it will try attacking you the second your health has been decided. The best way to ground these Ghoulies is to bludgeon them with a Tree Stump, which can be found conveniently in plenty of supply around the Wood Shed. Once you manage to pick one up, keep your distance and launch one at your persistent Flying Imp to take him out in a single hit.
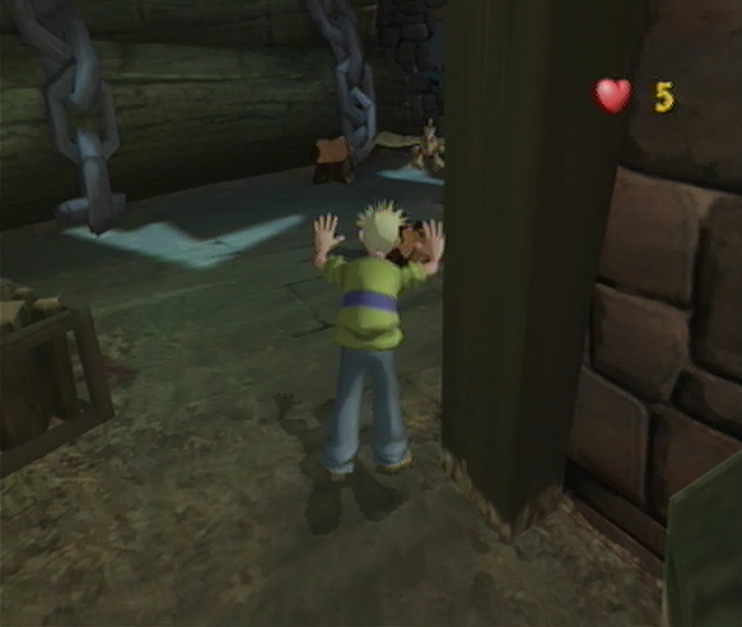

As you make your way through the log labyrinth you’ll find that there are a number of Stumps that litter the area; some Stumps will serve the same purpose to you as before, in that you can use them to take out future Flying Imps, others will house Flying Imps inside, so take care of a single Flying Imp at a time before heading off to the next Stump that you might see ahead. During the course of your journey you should manage to deal with four Flying Imps and a duo of Spiders before coming across a small plant in the corner harboring a trio of Spiders, nearly finished yet! Take them out with your fists and then make your way around the final log where you’ll come across a Medusa. While you’ll naturally want to avoid the Medusa’s deadly glare, as it’ll drain your health and then some, you’ll also want to avoid grabbing the final Stump ahead, as two Flying Imps are hiding inside. Weasel your way by both the Medusa and the remaining Flying Imps to locate the open Challenge Door, then travel through it to the Farmyard.
FARMYARD
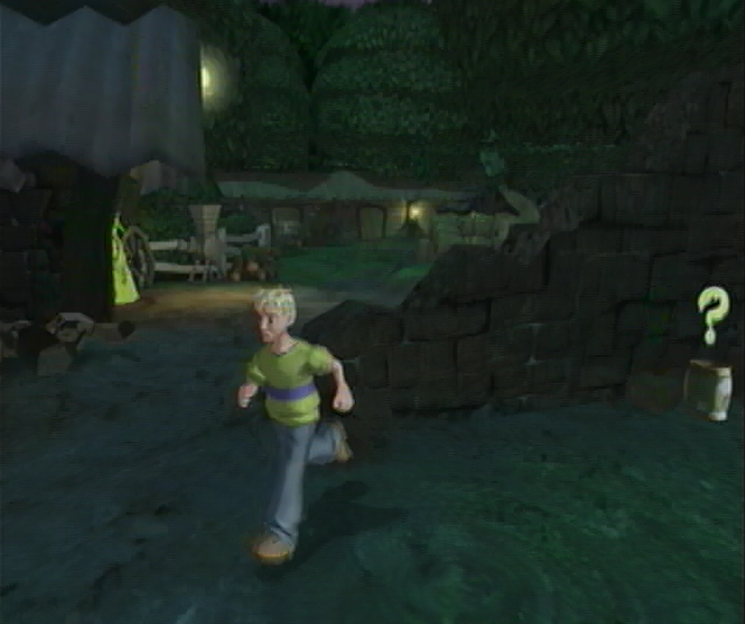
As soon as you step foot onto the Farmyard you’ll manage to see a familiar face from the Boathouse; It’s Ol’ Fiddlesworth, who seems to be having a little bit of trouble with an Imp attacking his shins as he requests your assistance. Before you go sprinting off to help the grown man keep the small Imp at bay, it’s worth your while to explore your surroundings first, in particular the crumbly stone wall to your immediate right. Make your way to the opposite side of this stone wall and you’ll spot a Challenge Complete! Soup Tin. Do not pick up this Soup Tin just yet, as it won’t do anything until a challenge has been set, otherwise you’ll have just wasted it. Do remember where its location is though, as you’ll need to return to this spot later. For now, you’ll just need to concern yourself with getting the Imp off of Fiddlesworths’ back. After you’ve plowed into the Imp will you discover his alliance with the other Ghoulies as Roger the Cabin Boy, who only had two more days until his retirement. This can’t be good…
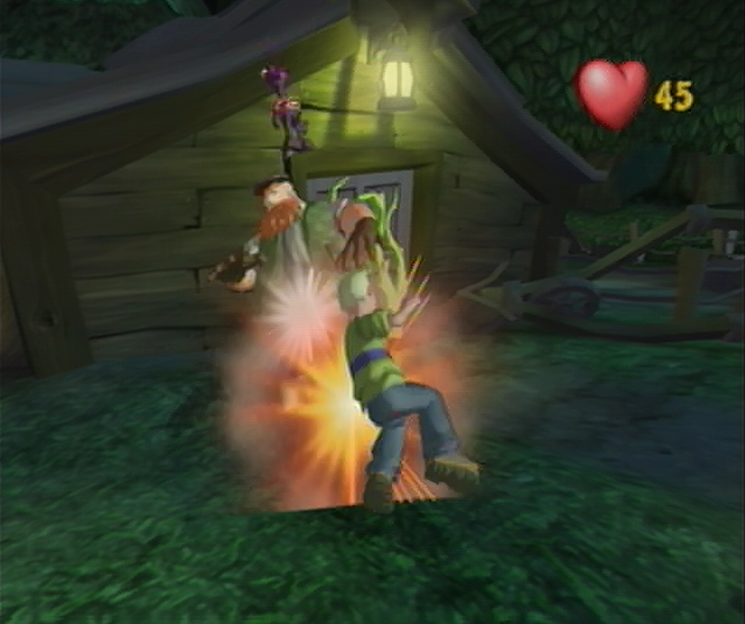
BURGLARIZING THE BARONS’ BREAKFAST
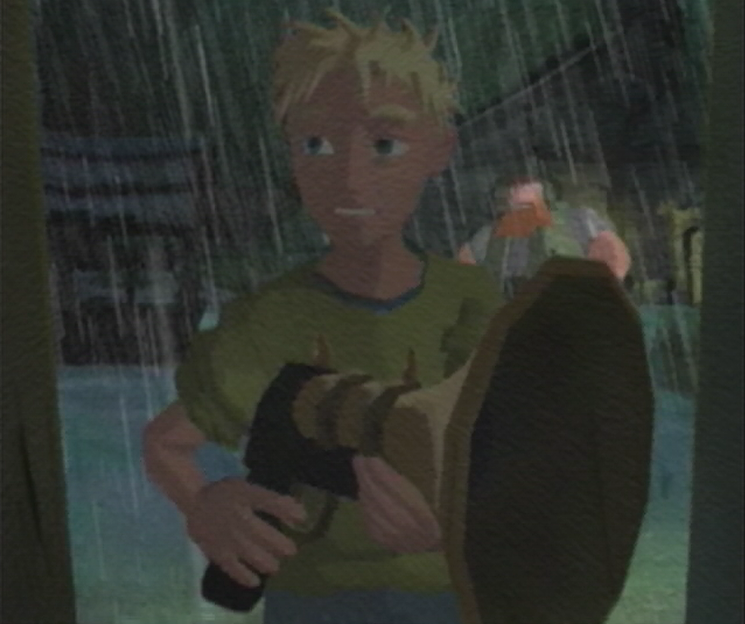
Thanks for all the help Fiddlesworth, nobody quite stands as idly by as you do. No use holding a grudge however, as Fiddlesworth is about to pull through in his area of expertise; offering highly dangerous weaponry to children. From within his large green vest, Fiddlesworth withdraws a small pistol that looks as if it swallowed a musket. “This be Ol’ Edna!” Fiddlesworth says, rapping his fingers across the mouth of the firearm. “Giant cloves of me most pungent and an’ potent garlic she be shootin’. Jus’ what yer be needin’ in there!”. Cooper cocks his head as he handles the gun, looking up toward Fiddlesworth for some much-needed reassurance. “A bit dubious lookin’ an’ well-used she may be, but what she be lackin’ in looks, she more than makes up fer in ‘er performance” Cooper nods and makes headway for the entrance. “Take good care of ‘er lad. Me an’ Edna ‘ave ‘ad some ripe ‘ol times t’gether!” Fiddlesworth watches as Cooper is soon engulfed by the darkness and makes his way toward the untold horrors inside…
CHICKEN SHED
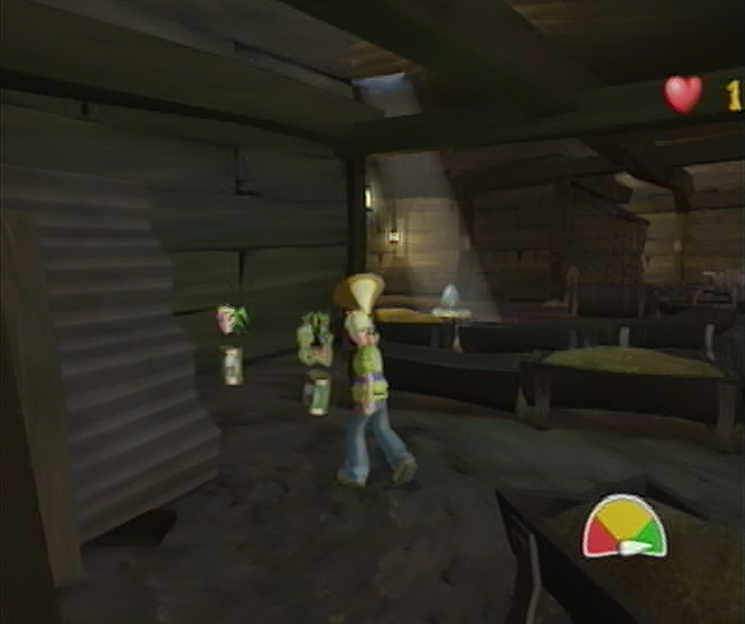
It’s standard fare inside the Chicken Shed; you’ll be shown where to find the Giant Egg once you’ve carried on far enough and it’s just a matter of navigating through the hay-bale hallways in linear fashion until you’ve arrived at the nest harboring the Egg in question. You may run into a spot of bother with your new breed of Ghouly however; the Vampire Chicken! If you happen to cross paths with these foul fowls they can be dealt with rather swiftly using a single garlic shot from Ol’ Edna, but otherwise you won’t be able to harm them as they jump onto your neck and err…peck your blood. They can also divebomb into you with a little charge up causing 4 damage to Coopers energy. The normal Chickens identified by their lighter auburn feathers shouldn’t cause you any trouble unless you manage to provoke them, in which case they’ll undergo a transformation to become Vampire Chickens themselves. You’ll only bump into one Vampire Chicken during your initial run to the Egg, so fire accurately and surely.
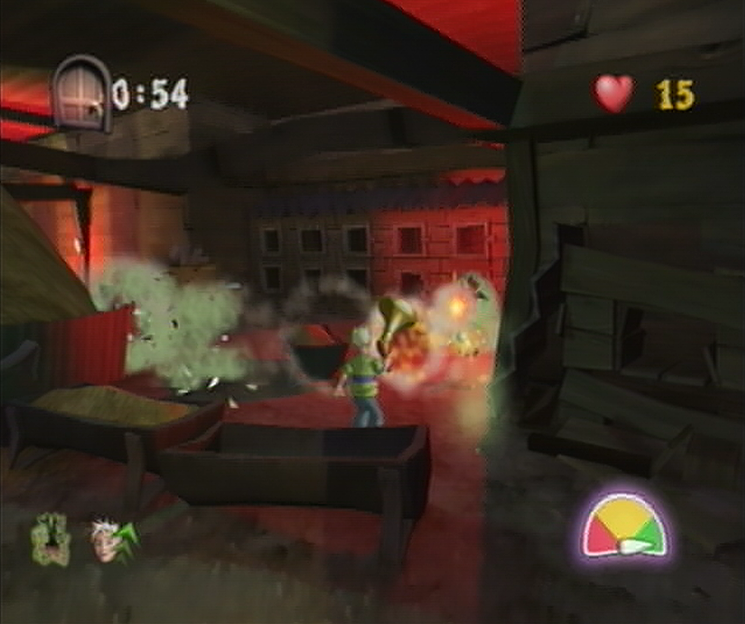
KEEPING THE EGG (AND COOPER) INTACT

Breathing a heavy sigh of relief Cooper steps through the Chicken Shed door and back into the moonlight, the heavy Egg rests on his shoulder as Ol’ Edna hangs at his side. Fiddlesworth smiles at the sight of Cooper emerging in one piece – and more imporantly – with Ol’ Edna still in his possession as well. The groundskeeper raises a hand to wave as an exhausted Cooper shows off the Giant Egg with a gingerly smile. “Trample my turnips!” Fiddlesworth exclaims, That be a big ‘un young master! I guess you won’ need Ol’ Edna fer the time bein’.” Fiddlesworth frees Coopers hands to handle the Egg as he examines Ol’ Edna. “I’ll take ‘er off yer ‘ands ‘an give ‘er a good wipe with me rag.” As the duo continue their banter, somewhere on the fringes of the Farmyard unbeknowst to both groundskeeper and Cooper the bushes rustle with activity. A lone figure has popped up from underneath the fauna, his polished head beaming in the moonlight and his eyes fixated on the large Egg that Cooper is currently carrying…
Navigation:
Chapter 1: The Rescue
Chapter 2: The Restoration
-2-1: Ingress with Ingredients
-2-2: Eggs for cracking, Ghoulies for smacking
-2-3: Someone has a Bone to pick with you…
-2-4: Sugar, Spice and Dungweed
-2-5: A Curious Concoction
-2-6: Too many cooks spoil the broth
Chapter 3: The Riddle
Chapter 4: The Reckoning
Chapter 5: The Race
THE EERIE BIRD FOLLOWS THE WORM
![]() Right, just two more ingredients now before we can return Amber back to her less-repulsive self. Now that we’ve entered the Ffffreezer your health will drop down to a just 15 Points; definitely not the best state to go about attacking a freezer filled with frozen frights. Fortunately you won’t need to face any, provided you don’t bash open the large freezer located in the center of this room. Since your Time Taken should be just over half an hour at this point, it would be best to bee-line for the exit and avoid any confrontation altogether. From where you stand at the front of Ffffreezer, make your way out into the open and resist cracking open any Freezers found throughout this chamber. While the Ghoulies inside are friendly, you’ll find without anyone to fight, they’ll come after you instead. Carry on past the center freezer and you should manage to spot a green shelf ahead, once you’ve reached it turn to your immediate left and you’ll locate the alluring open Challenge Door.
Right, just two more ingredients now before we can return Amber back to her less-repulsive self. Now that we’ve entered the Ffffreezer your health will drop down to a just 15 Points; definitely not the best state to go about attacking a freezer filled with frozen frights. Fortunately you won’t need to face any, provided you don’t bash open the large freezer located in the center of this room. Since your Time Taken should be just over half an hour at this point, it would be best to bee-line for the exit and avoid any confrontation altogether. From where you stand at the front of Ffffreezer, make your way out into the open and resist cracking open any Freezers found throughout this chamber. While the Ghoulies inside are friendly, you’ll find without anyone to fight, they’ll come after you instead. Carry on past the center freezer and you should manage to spot a green shelf ahead, once you’ve reached it turn to your immediate left and you’ll locate the alluring open Challenge Door.
GARBAGE YARD
![]() At first glance, the Garbage Yard seems just as vacant as the Ffffreezer – don’t let your guard down however, as a Ghouly Ambush is headed your way… From where you stand at the top of the Garbage Ramp, you’ll need to descend toward a large dumpster found wedged in the corner. Crack the front open and your efforts will be rewarded with a Turbo Cooper! Soup Tin. Work your way through the Yard until you’ve come across a yellow U-Dump Dumpster to the left. Once you carry on ahead and find yourself between the Garbage Can piles and the Challenge Door ahead will slam in defiance. So much for an easy way out. In response you’ll find a total of 12 Spiders have splattered in pairs of 3 around the Garbage Yard. Once you’ve regained control, it’s better not to run in to do battle, but instead pick up the garbage cans to your left or right. Since the Spiders are motionless and grouped in threes, locate each ‘gathering’ essentially and fling a can towards them.
At first glance, the Garbage Yard seems just as vacant as the Ffffreezer – don’t let your guard down however, as a Ghouly Ambush is headed your way… From where you stand at the top of the Garbage Ramp, you’ll need to descend toward a large dumpster found wedged in the corner. Crack the front open and your efforts will be rewarded with a Turbo Cooper! Soup Tin. Work your way through the Yard until you’ve come across a yellow U-Dump Dumpster to the left. Once you carry on ahead and find yourself between the Garbage Can piles and the Challenge Door ahead will slam in defiance. So much for an easy way out. In response you’ll find a total of 12 Spiders have splattered in pairs of 3 around the Garbage Yard. Once you’ve regained control, it’s better not to run in to do battle, but instead pick up the garbage cans to your left or right. Since the Spiders are motionless and grouped in threes, locate each ‘gathering’ essentially and fling a can towards them.
![]() With any luck you’ll manage to use your bounding bin to squash all three Spiders in their collective group, if you do miss one however, just move onto the next pile rather than trying a second attempt. You’ll find the first group just to the left of your position nearest the large Garbage Yard Doors and the second group can be found in front of a window to the right, nearly symmetrical to the first group. You’ll find the next group directly behind your current position, you’ll need to grab a new Garbage Can and whip it around to hit the Spiders waiting at the end of the U-Dump Dumpster area. The final group can be found tucked in the corner hiding behind the U-Dump Dumpster, you’ll need to grab your forth and final can to take them out from in front of the U-Dump. You’ll have a limited time before the Spiders begin to move, so try your best to clear them all out. If you have any Spiders left over there are plenty of objects in the Yard that you can use without breaking the rules.
With any luck you’ll manage to use your bounding bin to squash all three Spiders in their collective group, if you do miss one however, just move onto the next pile rather than trying a second attempt. You’ll find the first group just to the left of your position nearest the large Garbage Yard Doors and the second group can be found in front of a window to the right, nearly symmetrical to the first group. You’ll find the next group directly behind your current position, you’ll need to grab a new Garbage Can and whip it around to hit the Spiders waiting at the end of the U-Dump Dumpster area. The final group can be found tucked in the corner hiding behind the U-Dump Dumpster, you’ll need to grab your forth and final can to take them out from in front of the U-Dump. You’ll have a limited time before the Spiders begin to move, so try your best to clear them all out. If you have any Spiders left over there are plenty of objects in the Yard that you can use without breaking the rules.
![]() Once you’ve managed to clear out all twelve Spiders, you’ll find the remaining eighteen Spiders pouring in from all sides of the Yard. If you’ve left a few Garbage cans remaining, you’re free to use them to take out the cluster of Spiders that stalk you around the yard, otherwise you’ll find a Mini-Cooper! Soup Tin nearest the Challenge Door and in front of the large window where the second Spider group could be seen. Once you’ve exhausted your Soup supply there’s plenty of old rubbish that you can use around the Yard, such as chairs, brooms and ladders. If you can manage to get a steady crowd pursuing you as their numbers really start dwindling, lead them back to the U-Dump Dumpster and lure them around the perimeter until you’re certain they’re as near as possible, then press A to rotate the U-Dump! Take out any left over Spiders with the objects left over; once the challenge is complete you’re free to use your fists to take out the six remaining Spiders before heading off to the exit.
Once you’ve managed to clear out all twelve Spiders, you’ll find the remaining eighteen Spiders pouring in from all sides of the Yard. If you’ve left a few Garbage cans remaining, you’re free to use them to take out the cluster of Spiders that stalk you around the yard, otherwise you’ll find a Mini-Cooper! Soup Tin nearest the Challenge Door and in front of the large window where the second Spider group could be seen. Once you’ve exhausted your Soup supply there’s plenty of old rubbish that you can use around the Yard, such as chairs, brooms and ladders. If you can manage to get a steady crowd pursuing you as their numbers really start dwindling, lead them back to the U-Dump Dumpster and lure them around the perimeter until you’re certain they’re as near as possible, then press A to rotate the U-Dump! Take out any left over Spiders with the objects left over; once the challenge is complete you’re free to use your fists to take out the six remaining Spiders before heading off to the exit.
WOOD SHED
![]() The Woodshed is an extremely dangerous ground to be treading on, as you’ll only be supplied with a meager 3 energy to take you through the room which is set up like a maze and you’ll be constantly assaulted by the new breed of Ghouly; the Flying Imp. It’s easily comparable to the challenge set in the Lower Corridor with the Ninja Imps, except this time it’s been drawn out to torturous extremes. Just like the Lower Corridors it’s not worth running through trying to survive, it’s best to have a strategy, and this time we’ll be going out fighting! The first thing you’ll want to do is take out all of the Ghoulies in the main area, the most imperative being the Flying Imp as it will try attacking you the second your health has been decided. The best way to ground these Ghoulies is to bludgeon them with a Tree Stump, which can be found in plenty of supply around the Wood Shed. Once you manage to pick one up, keep your distance and launch one at a Flying Imp to take it out in a single hit.
The Woodshed is an extremely dangerous ground to be treading on, as you’ll only be supplied with a meager 3 energy to take you through the room which is set up like a maze and you’ll be constantly assaulted by the new breed of Ghouly; the Flying Imp. It’s easily comparable to the challenge set in the Lower Corridor with the Ninja Imps, except this time it’s been drawn out to torturous extremes. Just like the Lower Corridors it’s not worth running through trying to survive, it’s best to have a strategy, and this time we’ll be going out fighting! The first thing you’ll want to do is take out all of the Ghoulies in the main area, the most imperative being the Flying Imp as it will try attacking you the second your health has been decided. The best way to ground these Ghoulies is to bludgeon them with a Tree Stump, which can be found in plenty of supply around the Wood Shed. Once you manage to pick one up, keep your distance and launch one at a Flying Imp to take it out in a single hit.
![]() Once you’ve done that, travel the perimeter of the room to collect the Health Soup Tins that lie out in the open and then go about breaking the crates the line the edges -except the ones near the exit – to find further Health Soup Tins that will go to providing you more ample energy. After you’ve built up a good defense, it’s time to go on the offense; approach the center of the room to coax the Spiders into dropping down where you can get at them. Don’t bother wasting any of the Stumps around the room on these annoying arachnids, you should be able to take care of all five Spiders with a round of swift kicks before any of them begin their rolling attacks to dish out the damage. For the last task in this room you’ll need to head toward the log path that leads out of this area where you should manage to see a large blue crate. Once you’ve gotten close enough you’ll find your next Flying Imp hiding inside, grab a new Stump and take care of him before it’s gotten too close.
Once you’ve done that, travel the perimeter of the room to collect the Health Soup Tins that lie out in the open and then go about breaking the crates the line the edges -except the ones near the exit – to find further Health Soup Tins that will go to providing you more ample energy. After you’ve built up a good defense, it’s time to go on the offense; approach the center of the room to coax the Spiders into dropping down where you can get at them. Don’t bother wasting any of the Stumps around the room on these annoying arachnids, you should be able to take care of all five Spiders with a round of swift kicks before any of them begin their rolling attacks to dish out the damage. For the last task in this room you’ll need to head toward the log path that leads out of this area where you should manage to see a large blue crate. Once you’ve gotten close enough you’ll find your next Flying Imp hiding inside, grab a new Stump and take care of him before it’s gotten too close.
![]() As you make your way through the log labyrinth you’ll find that there are a number of Stumps that litter the area; some Stumps will serve the same purpose to you as before, in that you can use them to take out future Flying Imps, others will house Flying Imps inside, so take care of a single Flying Imp at a time before heading off to the next Stump that you might see ahead. You should manage to deal with four Flying Imps and a duo of Spiders before coming across a small plant in the corner harboring a trio of Spiders, nearly finished yet! Take them out with your fists and then make your way around the final log where you’ll come across a Medusa. While you’ll naturally want to avoid the Medusa’s deadly glare, as it’ll drain your health and then some, you’ll also want to avoid grabbing the final Stump ahead, as two Flying Imps are hiding inside. Weasel your way by both the Medusa and the remaining Flying Imps to locate the open Challenge Door, then travel through it to the Farmyard.
As you make your way through the log labyrinth you’ll find that there are a number of Stumps that litter the area; some Stumps will serve the same purpose to you as before, in that you can use them to take out future Flying Imps, others will house Flying Imps inside, so take care of a single Flying Imp at a time before heading off to the next Stump that you might see ahead. You should manage to deal with four Flying Imps and a duo of Spiders before coming across a small plant in the corner harboring a trio of Spiders, nearly finished yet! Take them out with your fists and then make your way around the final log where you’ll come across a Medusa. While you’ll naturally want to avoid the Medusa’s deadly glare, as it’ll drain your health and then some, you’ll also want to avoid grabbing the final Stump ahead, as two Flying Imps are hiding inside. Weasel your way by both the Medusa and the remaining Flying Imps to locate the open Challenge Door, then travel through it to the Farmyard.
FARMYARD
![]() As soon as you step foot onto the Farmyard you’ll manage to see a familiar face from the Boathouse; it’s Ol’ Fiddlesworth, who seems to be having a little bit of trouble with an Imp attacking his shins. Before you go sprinting off to help the grown man keep the small Imp at bay, it’s worth your while to explore your surroundings first, in particular the crumbly stone wall to your immediate right. Make your way to the opposite side of this stone wall and you’ll spot a Challenge Complete! Soup Tin. Do not pick up this Soup Tin just yet, as it won’t do anything until a challenge has been set, otherwise you’ll have just wasted it. Do remember where its location is though, as you’ll need to return to this spot later. For now, you’ll just need to concern yourself with getting the Imp off of Fiddlesworths’ back. After you’ve plowed into the Imp will you discover his alliance with the other Ghoulies as Roger the Cabin Boy, who only had two more days until his retirement. This can’t be good…
As soon as you step foot onto the Farmyard you’ll manage to see a familiar face from the Boathouse; it’s Ol’ Fiddlesworth, who seems to be having a little bit of trouble with an Imp attacking his shins. Before you go sprinting off to help the grown man keep the small Imp at bay, it’s worth your while to explore your surroundings first, in particular the crumbly stone wall to your immediate right. Make your way to the opposite side of this stone wall and you’ll spot a Challenge Complete! Soup Tin. Do not pick up this Soup Tin just yet, as it won’t do anything until a challenge has been set, otherwise you’ll have just wasted it. Do remember where its location is though, as you’ll need to return to this spot later. For now, you’ll just need to concern yourself with getting the Imp off of Fiddlesworths’ back. After you’ve plowed into the Imp will you discover his alliance with the other Ghoulies as Roger the Cabin Boy, who only had two more days until his retirement. This can’t be good…
![]() After the Captain has finished his speech the hidden Ghoulies will expose themselves as the Farmyard fills up with a pair of Zombies, Ninja Imps, Flying Imps, and Skeletons with the Captain leading the fray. You’ll be given a single minute to brawl with the lot or else the Reaper will make an appearance! While your main priority will be retrieving the Challenge Complete! Soup Tin, there’s plenty of time to take out some select Ghoulies to increase your Ghoulies Defeated score. From where you start off, defeat the two Ninja Imps to your immediate left and then finish off the Flying Imps. Work your way to the Zombie Pirate afterwards and use his own dropped sword against him for a single hit takedown. Now that you’ve gotten rid of all the weaker Ghoulies, it’s time to grab the Challenge Complete! Soup Tin from behind the crumbly wall. Once you’ve done that, the challenge will not only complete, but you won’t even have to waste time walking back to Fiddlesworth.
After the Captain has finished his speech the hidden Ghoulies will expose themselves as the Farmyard fills up with a pair of Zombies, Ninja Imps, Flying Imps, and Skeletons with the Captain leading the fray. You’ll be given a single minute to brawl with the lot or else the Reaper will make an appearance! While your main priority will be retrieving the Challenge Complete! Soup Tin, there’s plenty of time to take out some select Ghoulies to increase your Ghoulies Defeated score. From where you start off, defeat the two Ninja Imps to your immediate left and then finish off the Flying Imps. Work your way to the Zombie Pirate afterwards and use his own dropped sword against him for a single hit takedown. Now that you’ve gotten rid of all the weaker Ghoulies, it’s time to grab the Challenge Complete! Soup Tin from behind the crumbly wall. Once you’ve done that, the challenge will not only complete, but you won’t even have to waste time walking back to Fiddlesworth.
BURGLARIZING THE BARONS’ BREAKFAST
![]() Thanks for all the help Fiddlesworth, nobody quite stands as idly by as you do. No use holding a grudge however, as Fiddlesworth is about to pull through in his area of expertise; offering highly dangerous weaponry to children. From within his large green vest, Fiddlesworth withdraws a small pistol that looks like it swallowed a musket. “This be Ol’ Edna!” Fiddlesworth says, rapping his fingers across the mouth of the firearm. “Giant cloves of me most pungent and an’ potent garlic she be shootin’. Jus’ what yer be needin’ in there!”. Cooper cocks his head as he handles the gun, looking up toward Fiddlesworth for some much-needed reassurance. “A bit dubious lookin’ an’ well-used she may be, but what she be lackin’ in looks, she more than makes up fer in ‘er performance” Cooper nods, making his way to the entrance. “Take good care of ‘er lad. Me an’ Edna ‘ave ‘ad some ripe ‘ol times t’gether!” Fiddlesworth watches on as Cooper is engulfed by the darkness…
Thanks for all the help Fiddlesworth, nobody quite stands as idly by as you do. No use holding a grudge however, as Fiddlesworth is about to pull through in his area of expertise; offering highly dangerous weaponry to children. From within his large green vest, Fiddlesworth withdraws a small pistol that looks like it swallowed a musket. “This be Ol’ Edna!” Fiddlesworth says, rapping his fingers across the mouth of the firearm. “Giant cloves of me most pungent and an’ potent garlic she be shootin’. Jus’ what yer be needin’ in there!”. Cooper cocks his head as he handles the gun, looking up toward Fiddlesworth for some much-needed reassurance. “A bit dubious lookin’ an’ well-used she may be, but what she be lackin’ in looks, she more than makes up fer in ‘er performance” Cooper nods, making his way to the entrance. “Take good care of ‘er lad. Me an’ Edna ‘ave ‘ad some ripe ‘ol times t’gether!” Fiddlesworth watches on as Cooper is engulfed by the darkness…
CHICKEN SHED
![]() It’s standard fare inside the Chicken Shed; you’ll be shown where to find the Giant Egg once you’ve carried on far enough and it’s just a matter of navigating through the hay-bale hallways in linear fashion until you’ve arrived at the nest harboring the Egg in question. You may run into some trouble with your new breed of Ghouly however; the Vampire Chicken! If you happen to cross paths with these foul fowls they can be taken care of with a single garlic shot from Ol’ Edna, but otherwise you won’t be able to harm them as they jump onto your neck and err…peck your blood. They can also divebomb into you with a little charge up causing 4 damage to Coopers energy. The normal Chickens identified by their lighter auburn feathers shouldn’t cause you any trouble unless you manage to provoke them, in which case they’ll undergo a transformation to become Vampire Chickens themselves. You’ll only bump into one Vampire Chicken during your initial run to the Egg, so fire accurately!
It’s standard fare inside the Chicken Shed; you’ll be shown where to find the Giant Egg once you’ve carried on far enough and it’s just a matter of navigating through the hay-bale hallways in linear fashion until you’ve arrived at the nest harboring the Egg in question. You may run into some trouble with your new breed of Ghouly however; the Vampire Chicken! If you happen to cross paths with these foul fowls they can be taken care of with a single garlic shot from Ol’ Edna, but otherwise you won’t be able to harm them as they jump onto your neck and err…peck your blood. They can also divebomb into you with a little charge up causing 4 damage to Coopers energy. The normal Chickens identified by their lighter auburn feathers shouldn’t cause you any trouble unless you manage to provoke them, in which case they’ll undergo a transformation to become Vampire Chickens themselves. You’ll only bump into one Vampire Chicken during your initial run to the Egg, so fire accurately!
![]() Once you manage to make it to the Giant Egg at the end of the path, you’ll collect it seemingly without issue, but once you’re back on the path Baron Von Ghoul will send his feathered friends after you. Quickly make your way back through the first pathway of troughs and you should manage to spot a piece of tin roof leaning against an unfinished coop. Send a clove of garlic firing into it and you’ll cause a Turbo Cooper!, and Super Weapons! Soup Tin to jut out from within. Snatch them up quickly and then work your way back to the entrance by taking out the Vampire Chickens that stand in your way. You’ll have to survive for an entire minute before the Challenge Door opens up once more, and even with your Turbo speed in check you won’t reach it before the minute is up, so take careful aim to defeat all 22 Vampire Chickens before your time is up. Savor the time you have increasing your Ghoulies Defeated score and then make your way through the open Challenge Door.
Once you manage to make it to the Giant Egg at the end of the path, you’ll collect it seemingly without issue, but once you’re back on the path Baron Von Ghoul will send his feathered friends after you. Quickly make your way back through the first pathway of troughs and you should manage to spot a piece of tin roof leaning against an unfinished coop. Send a clove of garlic firing into it and you’ll cause a Turbo Cooper!, and Super Weapons! Soup Tin to jut out from within. Snatch them up quickly and then work your way back to the entrance by taking out the Vampire Chickens that stand in your way. You’ll have to survive for an entire minute before the Challenge Door opens up once more, and even with your Turbo speed in check you won’t reach it before the minute is up, so take careful aim to defeat all 22 Vampire Chickens before your time is up. Savor the time you have increasing your Ghoulies Defeated score and then make your way through the open Challenge Door.
KEEPING THE EGG (AND COOPER) INTACT
![]() Breathing a heavy sigh of relief Cooper steps through the Chicken Shed door and back into the moonlight, the heavy Egg rests on his shoulder as Ol’ Edna hangs at his side. Fiddlesworth smiles at the sight of Cooper emerging in one piece – and more imporantly – with Ol’ Edna still in his possession as well. The groundskeeper raises a hand to wave as an exhausted Cooper shows off the Giant Egg with a gingerly smile. “Trample my turnips!” Fiddlesworth exclaims, That be a big ‘un young master! I guess you won’ need Ol’ Edna fer the time bein’.” Fiddlesworth frees Coopers hands to handle the Egg as he examines Ol’ Edna. “I’ll take ‘er off yer ‘ands ‘an give ‘er a good wipe with me rag.” As the duo continue their banter, somewhere on the fringes of the Farmyard the bushes rustle with activity. A lone figure has popped up from underneath the fauna, his polished head beaming in the moonlight and his eyes fixated on the large Egg that Cooper is currently carrying…
Breathing a heavy sigh of relief Cooper steps through the Chicken Shed door and back into the moonlight, the heavy Egg rests on his shoulder as Ol’ Edna hangs at his side. Fiddlesworth smiles at the sight of Cooper emerging in one piece – and more imporantly – with Ol’ Edna still in his possession as well. The groundskeeper raises a hand to wave as an exhausted Cooper shows off the Giant Egg with a gingerly smile. “Trample my turnips!” Fiddlesworth exclaims, That be a big ‘un young master! I guess you won’ need Ol’ Edna fer the time bein’.” Fiddlesworth frees Coopers hands to handle the Egg as he examines Ol’ Edna. “I’ll take ‘er off yer ‘ands ‘an give ‘er a good wipe with me rag.” As the duo continue their banter, somewhere on the fringes of the Farmyard the bushes rustle with activity. A lone figure has popped up from underneath the fauna, his polished head beaming in the moonlight and his eyes fixated on the large Egg that Cooper is currently carrying…
Navigation:
Chapter 1: The Rescue
Chapter 2: The Restoration
-2-1: Ingress with Ingredients
-2-2: Eggs for cracking, Ghoulies for smacking
-2-3: Someone has a Bone to pick with you…
-2-4: Sugar, Spice and Dungweed
-2-5: A Curious Concoction
-2-6: Too many cooks spoil the broth
Chapter 3: The Riddle
Chapter 4: The Reckoning
Chapter 5: The Race
AN EGG IN THE HAND IS WATCHED BY BONES IN THE BUSH
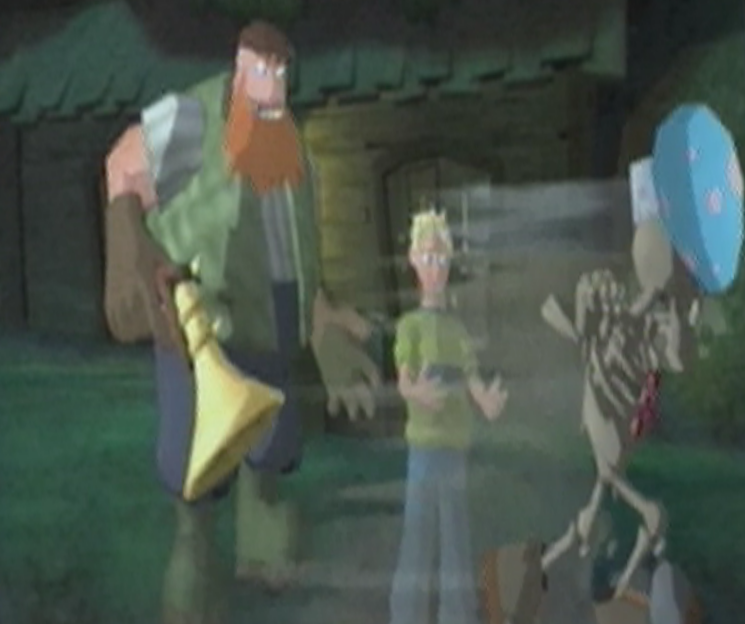
![]() From his hidden vantage point in the bush, the short Skeleton brushes a bit of greenery out of the way to get a better look. While the rustling goes unheard, the same can not be said for the Skeletons audible and agitated ‘Tsk’ as he raises a questioning arm into the air. Fiddlesworth manages to turn and see the source of the sound just as the nimble Skeleton bounds over the fence and makes a beeline toward Cooper! No sooner had the dubious duo taken in the ridiculous scene before them had the Skeleton swiped the Giant Egg right from Coopers hands, much to the surprise of a startled Fiddlesworth! “Pick my plums!” the groundskeeper shouts aghast as he points toward the direction of the Skeleton, “That be a strange occurence an’ no mistake! You’d best be after ‘im quick an’ get back that big egg o’ yers!” And just as many scenes previous Cooper is once again to fend for himself as he chases the eggcentric Skeleton around the yard in hopes to steal his Giant Egg once again…
From his hidden vantage point in the bush, the short Skeleton brushes a bit of greenery out of the way to get a better look. While the rustling goes unheard, the same can not be said for the Skeletons audible and agitated ‘Tsk’ as he raises a questioning arm into the air. Fiddlesworth manages to turn and see the source of the sound just as the nimble Skeleton bounds over the fence and makes a beeline toward Cooper! No sooner had the dubious duo taken in the ridiculous scene before them had the Skeleton swiped the Giant Egg right from Coopers hands, much to the surprise of a startled Fiddlesworth! “Pick my plums!” the groundskeeper shouts aghast as he points toward the direction of the Skeleton, “That be a strange occurence an’ no mistake! You’d best be after ‘im quick an’ get back that big egg o’ yers!” And just as many scenes previous Cooper is once again to fend for himself as he chases the eggcentric Skeleton around the yard in hopes to steal his Giant Egg once again…
FARM YARD
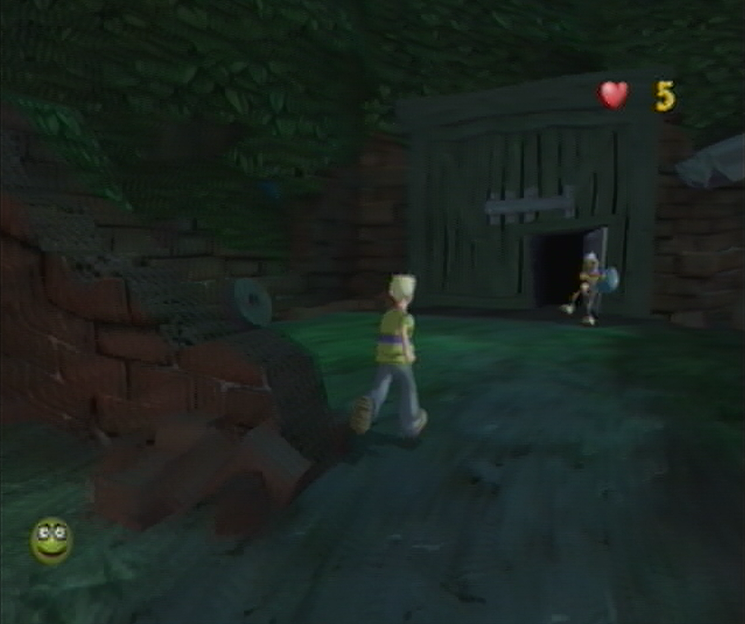
![]() Luckily the Farmyard itself doesn’t pose a challenge that you’ll have to beat before you can go chasing after the heels of the swindling Skeleton, but getting there is going to be half the battle. There isn’t much ground to cover, and you’ll find yourself completing the trek rather easily, but your meager amount of health provided in the Farmyard could run you into a spot of trouble all the same. While you’ll naturally want to hit the ground running, be sure to avoid getting too close to the well in the center of the yard which harbors a collection of four Ninja Imps just waiting to pounce out. You can turn this outcome in your favor by collecting the Traitor Fever! Soup Tin just to the left of the well; this will keep the Ninja Imps busy practicing their lethal martial arts on each other, allowing you to slip by completely unscathed. Keep an eye out for the second ambush that will keep themselves busy as you approach the crumbly wall near the egg touting Skeleton.
Luckily the Farmyard itself doesn’t pose a challenge that you’ll have to beat before you can go chasing after the heels of the swindling Skeleton, but getting there is going to be half the battle. There isn’t much ground to cover, and you’ll find yourself completing the trek rather easily, but your meager amount of health provided in the Farmyard could run you into a spot of trouble all the same. While you’ll naturally want to hit the ground running, be sure to avoid getting too close to the well in the center of the yard which harbors a collection of four Ninja Imps just waiting to pounce out. You can turn this outcome in your favor by collecting the Traitor Fever! Soup Tin just to the left of the well; this will keep the Ninja Imps busy practicing their lethal martial arts on each other, allowing you to slip by completely unscathed. Keep an eye out for the second ambush that will keep themselves busy as you approach the crumbly wall near the egg touting Skeleton.
WORKSHOP
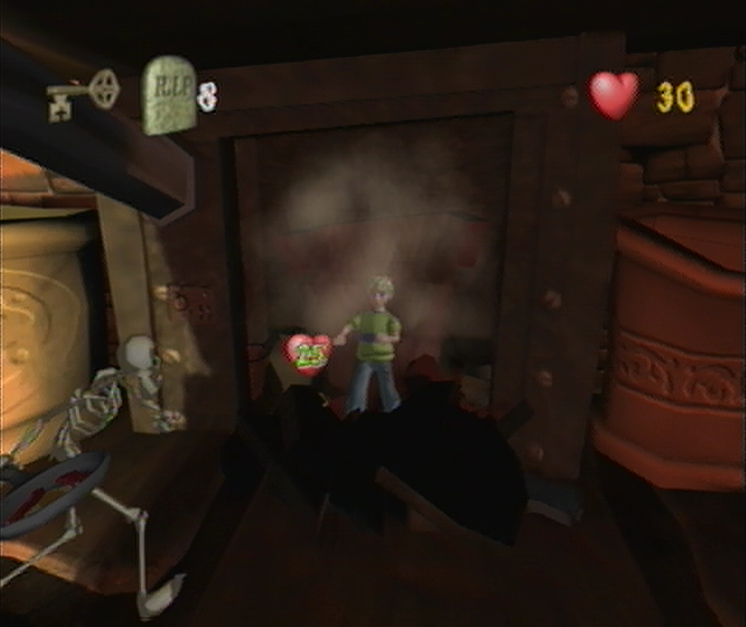
![]() When you enter the Workshop for the first time you’ll swear you were seeing double! In front of the central fireplace crouches a Skeleton roasting an egg, luckily it isn’t yours, but on the other hand this gives the real Skeleton ample time to exit the room and leave you a hefty challenge, brilliant! In this case you’ll have to beat a total of eight Ghoulies in the Workshop and locate the Key that’s been hidden in some rare pottery. You’ll want to avoid the Skeleton wielding the Frying Pan here, and use this time before the waves of Ghoulies start swamping into the room to look for the Kiln Room around the perimeter. Once you’ve managed to locate the Kiln Room, as evidenced by the large iron door, give yourself plenty of space from the Skeleton and smash yourself an opening. After you’ve scooped up the 25 Health Soup Tin off the floor you’re free to go to work on the Skeleton which shouldn’t be too difficult. Once you’ve done that, the real fun begins.
When you enter the Workshop for the first time you’ll swear you were seeing double! In front of the central fireplace crouches a Skeleton roasting an egg, luckily it isn’t yours, but on the other hand this gives the real Skeleton ample time to exit the room and leave you a hefty challenge, brilliant! In this case you’ll have to beat a total of eight Ghoulies in the Workshop and locate the Key that’s been hidden in some rare pottery. You’ll want to avoid the Skeleton wielding the Frying Pan here, and use this time before the waves of Ghoulies start swamping into the room to look for the Kiln Room around the perimeter. Once you’ve managed to locate the Kiln Room, as evidenced by the large iron door, give yourself plenty of space from the Skeleton and smash yourself an opening. After you’ve scooped up the 25 Health Soup Tin off the floor you’re free to go to work on the Skeleton which shouldn’t be too difficult. Once you’ve done that, the real fun begins.
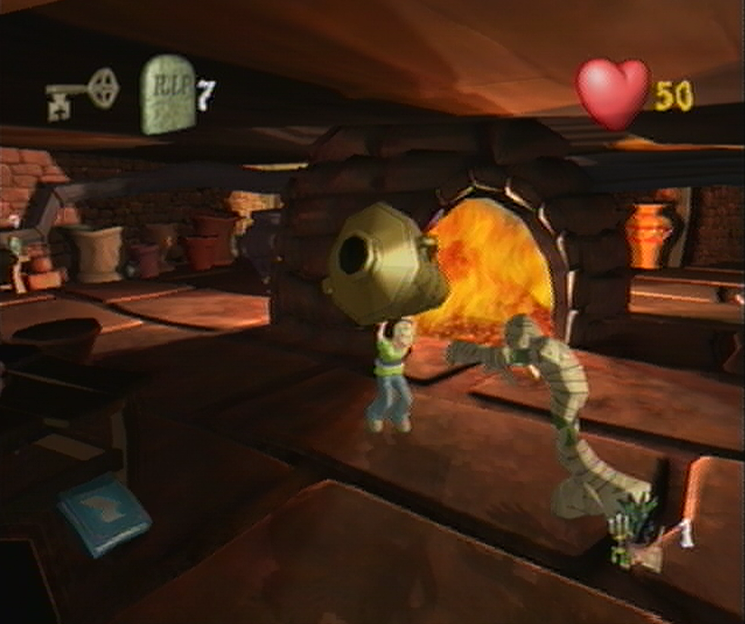
![]() Once the Skeleton has been panhandled, you’ll find that a Mummy has burst forth from one of the pots nearest one of the locked Challenge Doors. Since you’re without a torch in the Workshop you’ll have to do a little improvisation with your surroundings by kicking the Mummies into the large oven in the center of the room. Before we tackle our first Mummy, let’s avoid a potential problem and add to our Ghouly counter as well. Take note from where the first Mummy came from in the Workshop and you’ll spot a large bronze vase in the corner that you can pick up once you’ve gotten close enough. After you’ve hoisted it above your head, launch it into the fireplace and you’ll notice your Ghouly counter on the top right hand side of the screen will decrease by a single point; turns out that your vase also harbored a Cursed Mummy inside that would have popped out later on. By utilizing this strategy you’ll benefit your score and save time otherwise spent kicking him in as well.
Once the Skeleton has been panhandled, you’ll find that a Mummy has burst forth from one of the pots nearest one of the locked Challenge Doors. Since you’re without a torch in the Workshop you’ll have to do a little improvisation with your surroundings by kicking the Mummies into the large oven in the center of the room. Before we tackle our first Mummy, let’s avoid a potential problem and add to our Ghouly counter as well. Take note from where the first Mummy came from in the Workshop and you’ll spot a large bronze vase in the corner that you can pick up once you’ve gotten close enough. After you’ve hoisted it above your head, launch it into the fireplace and you’ll notice your Ghouly counter on the top right hand side of the screen will decrease by a single point; turns out that your vase also harbored a Cursed Mummy inside that would have popped out later on. By utilizing this strategy you’ll benefit your score and save time otherwise spent kicking him in as well.
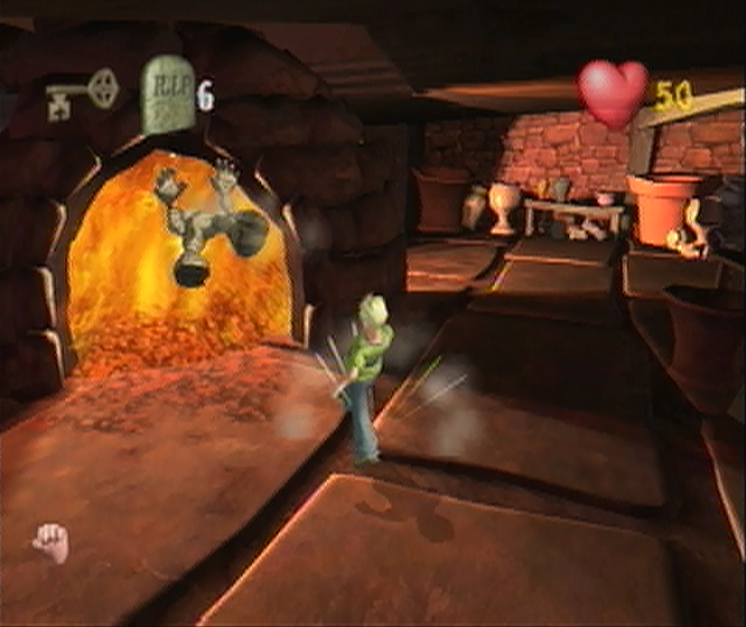
![]() Right, it’s time to turn around and deal with the Mummy that’s been pursuing you around the Workshop. Move in close in order to get in some quick hits that direct him toward the fireplace in the center of the room. After a few successful combos you’ll notice that he’s gotten rather dizzy; it’s time for the finisher. Line up your shot and deliver one final blow to send him into the flames, if you’ve missed there’s still time to adjust your new angle and kick him into the fireplace before he gets to his feet. It’s a good idea to go around the edges of the Workplace to look for the Knockdown Mania! Soup Tin found atop one of the benches; this will allow you to deliver one of the ‘finishing blows’ without the tedium of sending the Mummy into a dizzy spell first. After you’ve defeated your fifth Ghouly the ante is upped considerably as two Mummies will come to fight you at the same time, which can be rather difficult when you’re trying to align a precise shot into the fireplace.
Right, it’s time to turn around and deal with the Mummy that’s been pursuing you around the Workshop. Move in close in order to get in some quick hits that direct him toward the fireplace in the center of the room. After a few successful combos you’ll notice that he’s gotten rather dizzy; it’s time for the finisher. Line up your shot and deliver one final blow to send him into the flames, if you’ve missed there’s still time to adjust your new angle and kick him into the fireplace before he gets to his feet. It’s a good idea to go around the edges of the Workplace to look for the Knockdown Mania! Soup Tin found atop one of the benches; this will allow you to deliver one of the ‘finishing blows’ without the tedium of sending the Mummy into a dizzy spell first. After you’ve defeated your fifth Ghouly the ante is upped considerably as two Mummies will come to fight you at the same time, which can be rather difficult when you’re trying to align a precise shot into the fireplace.
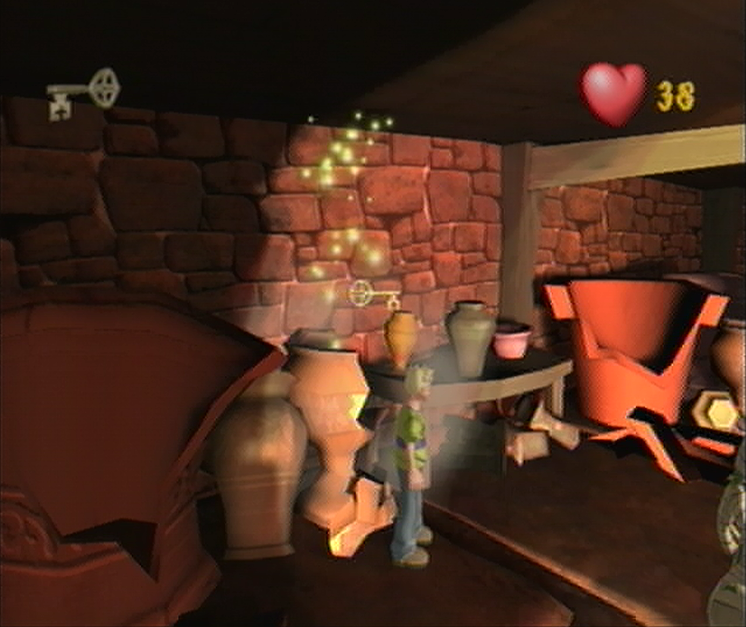
![]() If you’ve been hit by one of the Mummies over the head you’ll go lose 3 Health Points and enter a stunned mode. From here you’re vulnerable for the Mummy to club you with his large staf, an attack that takes away 6 whole points once it connects with Cooper, so you’ll want to avoid that at all costs or your health will be drained in no time flat. The best maneuver is to rotate the right thumbstick to regain composure and then flee the area of attack. This also works if you get a little wrapped up in bandages yourself, and if that’s the case a staf smash is sure to follow! Try your best to multi-task with the duo of Mummies by stunning one and dealing with another alternately. Once you manage to get your counter to 0, check round the room for any remaining Mummies and slam them into the fire to increase your Ghoulies Defeated score. Your last task is to find the Hidden Key inside one of the Rare ceramic works around the Workshop, smash them all open and you’ll find the key allowing you to progress.
If you’ve been hit by one of the Mummies over the head you’ll go lose 3 Health Points and enter a stunned mode. From here you’re vulnerable for the Mummy to club you with his large staf, an attack that takes away 6 whole points once it connects with Cooper, so you’ll want to avoid that at all costs or your health will be drained in no time flat. The best maneuver is to rotate the right thumbstick to regain composure and then flee the area of attack. This also works if you get a little wrapped up in bandages yourself, and if that’s the case a staf smash is sure to follow! Try your best to multi-task with the duo of Mummies by stunning one and dealing with another alternately. Once you manage to get your counter to 0, check round the room for any remaining Mummies and slam them into the fire to increase your Ghoulies Defeated score. Your last task is to find the Hidden Key inside one of the Rare ceramic works around the Workshop, smash them all open and you’ll find the key allowing you to progress.
LOWER CORRIDORS
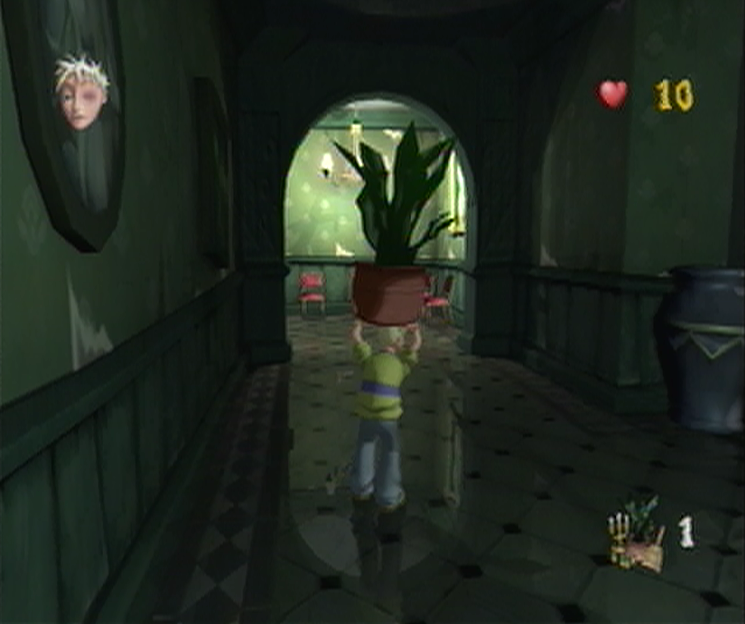
![]() Now that we’ve found our way back inside Ghoulhaven Hall we’ll be thrown into a new challenge straight away; get through the Lower Corridors without succumbing to any damage whatsoever. While this challenge comes off as difficult at first, there’s one crucial move that sends it all unraveling. As you start off, ignore the chairs ahead and instead turn to your left to find a single potted plant in the corner. Pick up the plant and pitch it toward the second chair from the left in the corner ahead. If you’ve done this correctly you’ll manage to defeat all four Haunted Chairs, which clears out all of the Ghoulies found in this room. Once you’ve done that continue down the corridor and you’ll find a 5 Health Point Soup Tin just around the corner, which prepares you for the challenge ahead. Drink up and head for the exit where you’ll unwillingly enter a Super Scary Shock event. Survive the sequence – or fail thanks to the Soup – and carry on through the exit once you’ve been returned to the ground.
Now that we’ve found our way back inside Ghoulhaven Hall we’ll be thrown into a new challenge straight away; get through the Lower Corridors without succumbing to any damage whatsoever. While this challenge comes off as difficult at first, there’s one crucial move that sends it all unraveling. As you start off, ignore the chairs ahead and instead turn to your left to find a single potted plant in the corner. Pick up the plant and pitch it toward the second chair from the left in the corner ahead. If you’ve done this correctly you’ll manage to defeat all four Haunted Chairs, which clears out all of the Ghoulies found in this room. Once you’ve done that continue down the corridor and you’ll find a 5 Health Point Soup Tin just around the corner, which prepares you for the challenge ahead. Drink up and head for the exit where you’ll unwillingly enter a Super Scary Shock event. Survive the sequence – or fail thanks to the Soup – and carry on through the exit once you’ve been returned to the ground.
PANTRY
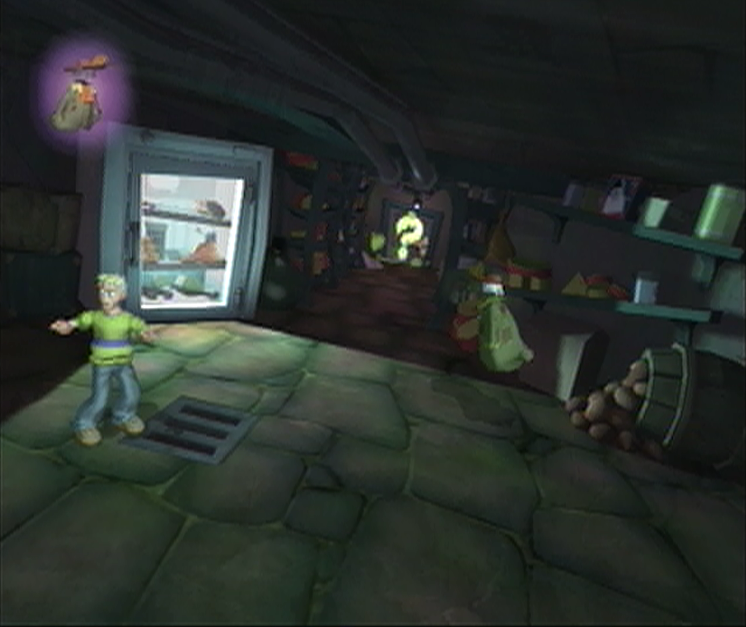
![]() Akin to the room previous, the Pantry also features a rather lofty challenge that can easily be worked around if you execute the correct strategy. As you start off you’ll need to make your way to the center of the room where you’ll see a discarded piece of clothing on the ground. Once you’ve walked far enough the Egg-bearing Skeleton will run through the open door as it slams behind him, this will also introduce you to the Haunted Coat as the once inanimate coat springs to life. Dealing with this load of laundry is actually quite simple; just lay it on thick without giving it a chance to deck you with its spinning sleeves. Right, this bit is crucial – until instructed, do not continue down the corridor toward the Challenge Door or this entire plan will be for naught. If the Haunted Coat ventures off between the shelves, stay back and you’ll lure him toward the center of the room after he’s finished. Defeat the Haunted Coat and the Challenge Door will open – don’t fall for this deception!
Akin to the room previous, the Pantry also features a rather lofty challenge that can easily be worked around if you execute the correct strategy. As you start off you’ll need to make your way to the center of the room where you’ll see a discarded piece of clothing on the ground. Once you’ve walked far enough the Egg-bearing Skeleton will run through the open door as it slams behind him, this will also introduce you to the Haunted Coat as the once inanimate coat springs to life. Dealing with this load of laundry is actually quite simple; just lay it on thick without giving it a chance to deck you with its spinning sleeves. Right, this bit is crucial – until instructed, do not continue down the corridor toward the Challenge Door or this entire plan will be for naught. If the Haunted Coat ventures off between the shelves, stay back and you’ll lure him toward the center of the room after he’s finished. Defeat the Haunted Coat and the Challenge Door will open – don’t fall for this deception!
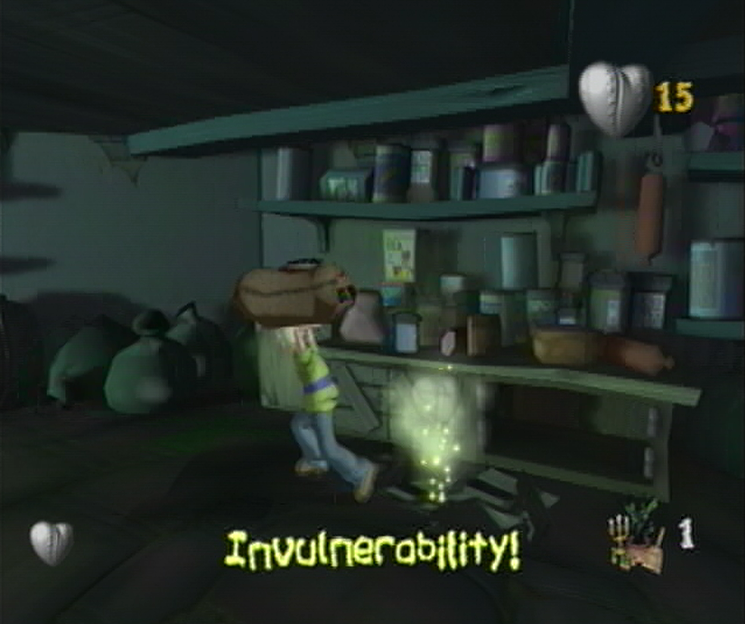
![]() Once the Haunted Coat has returned to a lump on the floor, the dusty fabric will dissolve, revealing some Imps who are perfectly ripe for a good kick. Do what you can to take out the Imps in a timely fashion, just remember that the same rules apply as before; avoid venturing down the Corridor at all costs. Once you manage to take out the Imps you should notice a short cabinet with four doors underneath a row of shelves. Walk up to this cabinet and kick out the farthest door to the right, doing so will reveal the last Imp as well as an Invulnerability! Soup Tin. Defeat the Imp but avoid collecting this Super Soup just yet. Once the room has been cleared out from its Imp infestation we’ll be ready for the next step; working our way back to the area that we started off in behind the Freezer. From here, you should manage to see a large bag of flour to the left, tucked behind a pile of potatoes. Pick it up and collect the Invulnerability! Soup Tin back in the main room.
Once the Haunted Coat has returned to a lump on the floor, the dusty fabric will dissolve, revealing some Imps who are perfectly ripe for a good kick. Do what you can to take out the Imps in a timely fashion, just remember that the same rules apply as before; avoid venturing down the Corridor at all costs. Once you manage to take out the Imps you should notice a short cabinet with four doors underneath a row of shelves. Walk up to this cabinet and kick out the farthest door to the right, doing so will reveal the last Imp as well as an Invulnerability! Soup Tin. Defeat the Imp but avoid collecting this Super Soup just yet. Once the room has been cleared out from its Imp infestation we’ll be ready for the next step; working our way back to the area that we started off in behind the Freezer. From here, you should manage to see a large bag of flour to the left, tucked behind a pile of potatoes. Pick it up and collect the Invulnerability! Soup Tin back in the main room.
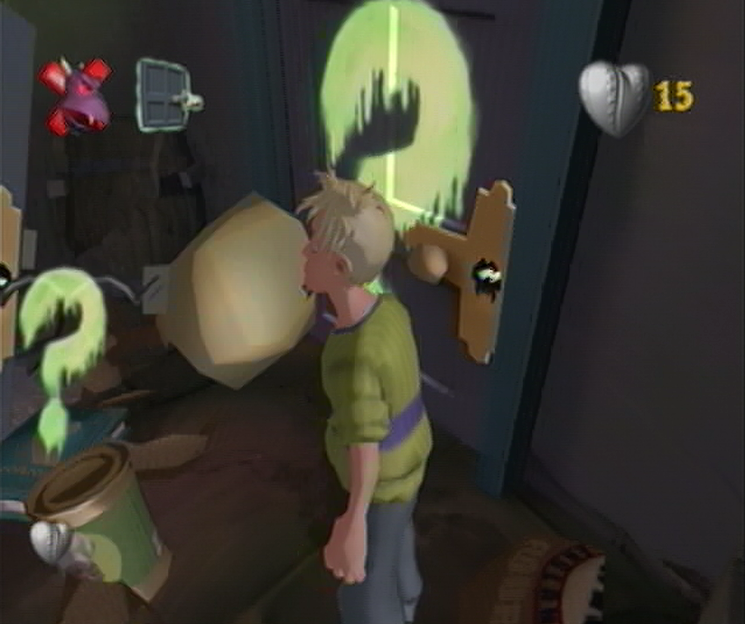
![]() You’ll need to start down the corridor that features the open Challenge Door at the end, but you must not go past the first shelving unit or you’ll trigger the event too early. Instead, position yourself midway when you arrive at the shelving unit and then toss your bag of flour directly at the center of the Challenge Door. If you’ve done this correctly, the Door will reveal itself to be of the Haunted variety, but not before an ill-placed barrel to the left of it explodes, leaving a Challenge Complete! Soup Tin in its wake. With the Imps out of the picture we won’t accidentally defeat them as we make our way toward the door, and thanks to the Invulnerability! Soup Tin we’ll be able to sneak right past the Haunted Door. Once you’ve managed to squeeze by the Doors’ frame, or sent it into submission, you’ll spot the Challenge Complete! Soup Tin on the ground just in front of the real Challenge Door. Scoop it up as quickly as possible and then carry on through to the Kitchen.
You’ll need to start down the corridor that features the open Challenge Door at the end, but you must not go past the first shelving unit or you’ll trigger the event too early. Instead, position yourself midway when you arrive at the shelving unit and then toss your bag of flour directly at the center of the Challenge Door. If you’ve done this correctly, the Door will reveal itself to be of the Haunted variety, but not before an ill-placed barrel to the left of it explodes, leaving a Challenge Complete! Soup Tin in its wake. With the Imps out of the picture we won’t accidentally defeat them as we make our way toward the door, and thanks to the Invulnerability! Soup Tin we’ll be able to sneak right past the Haunted Door. Once you’ve managed to squeeze by the Doors’ frame, or sent it into submission, you’ll spot the Challenge Complete! Soup Tin on the ground just in front of the real Challenge Door. Scoop it up as quickly as possible and then carry on through to the Kitchen.
KITCHEN

![]() Well, it was a bit of a round about way of doing things, but here we are back in the Kitchen with our second ingredient; now to just pry it from Bone Boys’ hands and we’ll be set! As you start off you’ll find the Skeleton at Ma Soupswils’ Cauldron in the center of the room, without anywhere left to run you’ll only need to approach him for a chase to ensue! You shouldn’t have much trouble dishing out the damage on this sprinting Skeleton, as he starts off at a nice pace that you can easily catch up to and plan out your route well in advance. However, the more hits you land, the faster he moves, so the best course of action is to use the items around the room in order to attack him from afar. The best course of action is to ignore chasing him at all and instead head over to a garbage pile near the Christmas Pudding atop the table. On the pile closest to the fireplace you’ll find a collection of Hamburgers which you can pick up and toss freely in his direction which leads to a very quick confrontation.
Well, it was a bit of a round about way of doing things, but here we are back in the Kitchen with our second ingredient; now to just pry it from Bone Boys’ hands and we’ll be set! As you start off you’ll find the Skeleton at Ma Soupswils’ Cauldron in the center of the room, without anywhere left to run you’ll only need to approach him for a chase to ensue! You shouldn’t have much trouble dishing out the damage on this sprinting Skeleton, as he starts off at a nice pace that you can easily catch up to and plan out your route well in advance. However, the more hits you land, the faster he moves, so the best course of action is to use the items around the room in order to attack him from afar. The best course of action is to ignore chasing him at all and instead head over to a garbage pile near the Christmas Pudding atop the table. On the pile closest to the fireplace you’ll find a collection of Hamburgers which you can pick up and toss freely in his direction which leads to a very quick confrontation.
NOW YOU’VE WOUND UP WITH EGG ON YOUR FACE
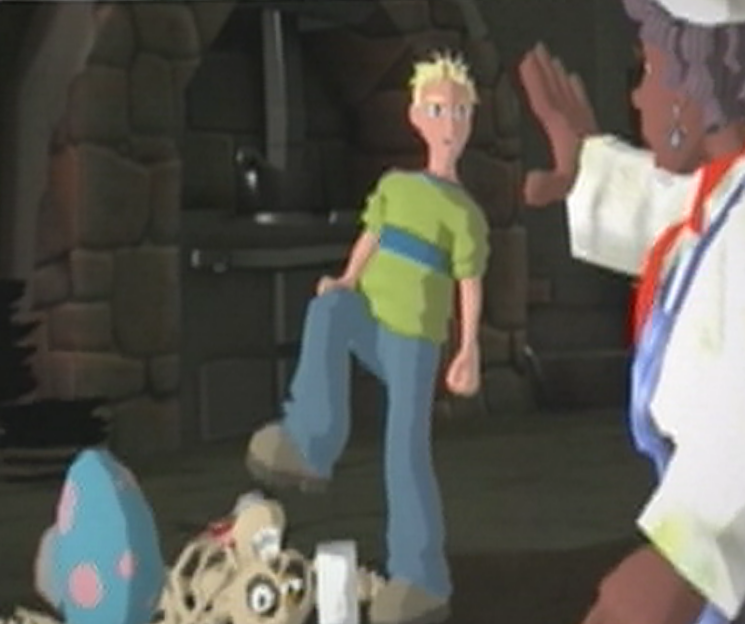
![]() After receiving a startling blow to his polished skull, the Skeleton nearly drops the egg on the floor, but its shell is able to withstand much more abuse – perhaps even more than he can. Cooper stands daunting over top, exasperated and bent on revenge, he raises his shoe into the air preparing himself to come down hard, when suddenly – Ma Soupswill flies into the room, waving her arms trying to get Coopers’ attention. “Oh Lordy! Don’t hurt poor Mister Ribs!” the Cook pleads aloud, “Mr. Ribs is me trusty assistant! I asked ‘im t’help yer by fetchin’ that pretty egg!” Mr. Ribs sighs a breath of relief before wiping a bony hand across his sweaty brow. As the realization washes over Coopers face he smiles coyly and reaches out a hand to help Mr. Ribs to his feet. Well, isn’t this just a tad embarrassing… “Phew! Mr. Ribs okay, no broken bones!” the Skeleton offers seeing Coopers apologetic face. “Look, me get tasty egg for Cookie and strange boy, hee hee!” Mr. Ribs gently removes the egg off the floor.
After receiving a startling blow to his polished skull, the Skeleton nearly drops the egg on the floor, but its shell is able to withstand much more abuse – perhaps even more than he can. Cooper stands daunting over top, exasperated and bent on revenge, he raises his shoe into the air preparing himself to come down hard, when suddenly – Ma Soupswill flies into the room, waving her arms trying to get Coopers’ attention. “Oh Lordy! Don’t hurt poor Mister Ribs!” the Cook pleads aloud, “Mr. Ribs is me trusty assistant! I asked ‘im t’help yer by fetchin’ that pretty egg!” Mr. Ribs sighs a breath of relief before wiping a bony hand across his sweaty brow. As the realization washes over Coopers face he smiles coyly and reaches out a hand to help Mr. Ribs to his feet. Well, isn’t this just a tad embarrassing… “Phew! Mr. Ribs okay, no broken bones!” the Skeleton offers seeing Coopers apologetic face. “Look, me get tasty egg for Cookie and strange boy, hee hee!” Mr. Ribs gently removes the egg off the floor.
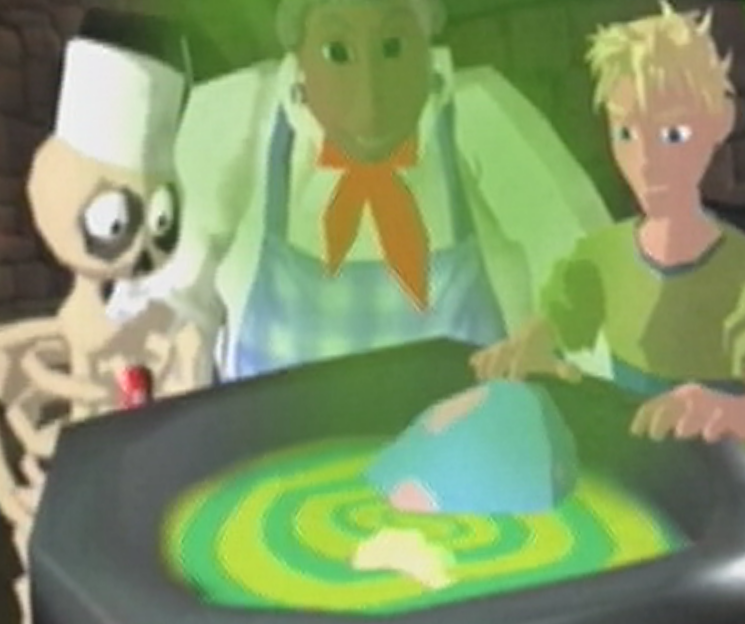
![]() Using both hands, Cooper and Mr. Ribs handle the Egg with extreme care, it would be a shame for it to crack here after coming so far. As Cooper hands off the Giant Egg to Ma Soupswill she throws it behind her shoulder with one hand directly into the frothing Cauldron, nice one! The trio stare into the mix as the Glow Worms and Giant Egg float to the surface and circle around eachother. “Excellent! remarks Ma, “Just a sprig o’ Dungweed left for our potion now! I do believe I’ve seen some potent Dungweed growin’ in the Walled Garden. Head on out through the Grand Hallway to start with!” Right, now that we’ve procured the cure from the first two ingredients, we’re on the last leg of our trip to locate the final ingredient that will see Amber restored to her less-disgusting self! How far we’ve come indeed. Once you’re ready to get moving we’ll continue on ahead to the Grand Hallway where we can be assured that the Ghoulies are sure to intervene during the trek…
Using both hands, Cooper and Mr. Ribs handle the Egg with extreme care, it would be a shame for it to crack here after coming so far. As Cooper hands off the Giant Egg to Ma Soupswill she throws it behind her shoulder with one hand directly into the frothing Cauldron, nice one! The trio stare into the mix as the Glow Worms and Giant Egg float to the surface and circle around eachother. “Excellent! remarks Ma, “Just a sprig o’ Dungweed left for our potion now! I do believe I’ve seen some potent Dungweed growin’ in the Walled Garden. Head on out through the Grand Hallway to start with!” Right, now that we’ve procured the cure from the first two ingredients, we’re on the last leg of our trip to locate the final ingredient that will see Amber restored to her less-disgusting self! How far we’ve come indeed. Once you’re ready to get moving we’ll continue on ahead to the Grand Hallway where we can be assured that the Ghoulies are sure to intervene during the trek…
Navigation:
Chapter 1: The Rescue
Chapter 2: The Restoration
-2-1: Ingress with Ingredients
-2-2: Eggs for cracking, Ghoulies for smacking
-2-3: Someone has a Bone to pick with you…
-2-4: Sugar, Spice and Dungweed
-2-5: A Curious Concoction
-2-6: Too many cooks spoil the broth
Chapter 3: The Riddle
Chapter 4: The Reckoning
Chapter 5: The Race
MAKING A MAD DASH IN A QUICK PINCH
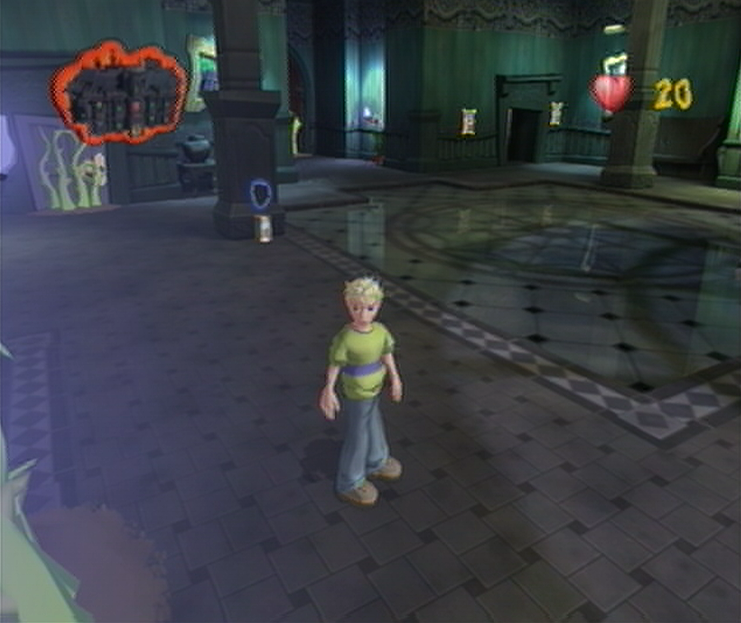
![]() While our run thus far has had us taking care of Ghoulies left, right and center to benefit our ever growing Ghoulies Defeated score, we’ve been rather ignorant of our Time Taken score. Luckily, the start of the Dungweed quest will give us ample opportunity to skip some unnecessary confrontations that would otherwise take upwards of around ten minutes or so to solve and progress onward. Let’s start straight off in the Grand Hallway by locating the Invisibility! Soup Tin just in front of the nearest pillar and then using the guise to traverse toward the open Challenge Door completely undetected. Through normal means the two Haunted Portraits would pop off of the wall to give you a hard time, but with your current form they should be completely ignorant of your presence. Use this to your advantage by passing in between the two right through the doorway to the next room. Insultingly simple, but there’s still more invisible antics yet to come as we continue onward.
While our run thus far has had us taking care of Ghoulies left, right and center to benefit our ever growing Ghoulies Defeated score, we’ve been rather ignorant of our Time Taken score. Luckily, the start of the Dungweed quest will give us ample opportunity to skip some unnecessary confrontations that would otherwise take upwards of around ten minutes or so to solve and progress onward. Let’s start straight off in the Grand Hallway by locating the Invisibility! Soup Tin just in front of the nearest pillar and then using the guise to traverse toward the open Challenge Door completely undetected. Through normal means the two Haunted Portraits would pop off of the wall to give you a hard time, but with your current form they should be completely ignorant of your presence. Use this to your advantage by passing in between the two right through the doorway to the next room. Insultingly simple, but there’s still more invisible antics yet to come as we continue onward.
CLOAK ROOM
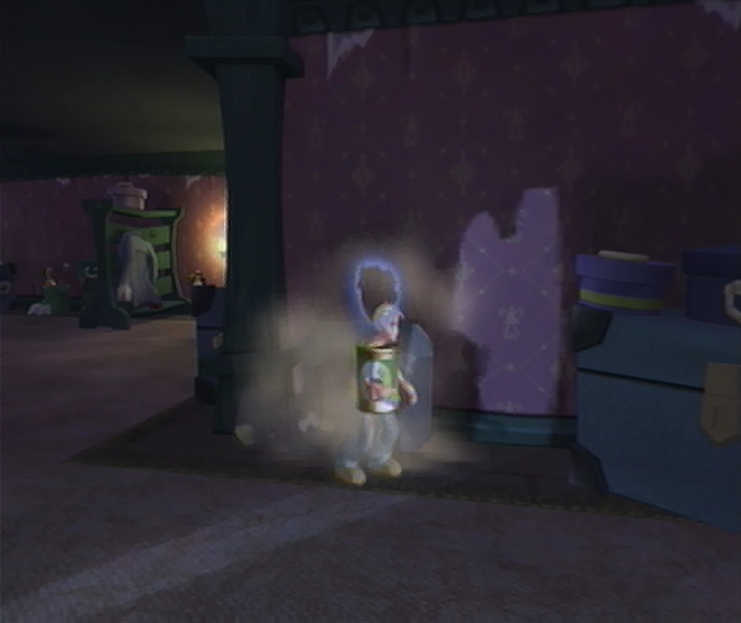
![]() You’ll need to be exceedingly cautious in the Cloak Room, as one false step could have you starting the challenge unwillingly. As you step into the room you should manage to spot two clothing trunks to your left, one is blue and the other is green; you’ll need to follow the wall that these trunks rest against until you’ve rounded the corner. From there you should spot a single rotund suitcase with two stickers leaning up against the wall as you round the bend. Give the suitcase a swift kick and you’ll expose the Invisibility! Soup Tin inside. Snatch it up and use its stealthy abilities to carry on through to the Challenge Door on the opposite side of the room; you should manage to spot it as you look to your left while facing the suitcase. What would have hurtled you into a brawl with Haunted Coats, Portraits, Imps and ultimately the Grim Reaper should now only take a brisk walk where you’re free to pass right through the Challenge Door undetected. Sneaky stuff!
You’ll need to be exceedingly cautious in the Cloak Room, as one false step could have you starting the challenge unwillingly. As you step into the room you should manage to spot two clothing trunks to your left, one is blue and the other is green; you’ll need to follow the wall that these trunks rest against until you’ve rounded the corner. From there you should spot a single rotund suitcase with two stickers leaning up against the wall as you round the bend. Give the suitcase a swift kick and you’ll expose the Invisibility! Soup Tin inside. Snatch it up and use its stealthy abilities to carry on through to the Challenge Door on the opposite side of the room; you should manage to spot it as you look to your left while facing the suitcase. What would have hurtled you into a brawl with Haunted Coats, Portraits, Imps and ultimately the Grim Reaper should now only take a brisk walk where you’re free to pass right through the Challenge Door undetected. Sneaky stuff!
SITTING ROOM

![]() If you’re hoping for another freebie in the Sitting Room you’ll be sadly mistaken, as the Invisibly Soup is nowhere to be seen. In this challenge you’ll need to pertain to the “Next One Different” set-up, in that you’re not allowed to defeat the same breed of Ghouly twice. As you start off the most irritating aspect of this challenge will come to fruition; the sluggish Zombies have much more health than the nimble Skeletons, and the bony bunch will constantly be within your line of fire as you try to take care of the Zombies. The first thing you should set out doing in this challenge is taking out the first Skeleton you see, it shouldn’t take very much to send him packing. Once you’ve done that avoid the other Skeleton at all costs, and instead approach the fireplace in the cramped Sitting Room quarters where you’ll spot a Haunted Chair just to the right. Take out the Haunted Chair as efficiently as possible and you’ll spot a Knock-Down Mania! Soup Tin atop the table closest to the fire.
If you’re hoping for another freebie in the Sitting Room you’ll be sadly mistaken, as the Invisibly Soup is nowhere to be seen. In this challenge you’ll need to pertain to the “Next One Different” set-up, in that you’re not allowed to defeat the same breed of Ghouly twice. As you start off the most irritating aspect of this challenge will come to fruition; the sluggish Zombies have much more health than the nimble Skeletons, and the bony bunch will constantly be within your line of fire as you try to take care of the Zombies. The first thing you should set out doing in this challenge is taking out the first Skeleton you see, it shouldn’t take very much to send him packing. Once you’ve done that avoid the other Skeleton at all costs, and instead approach the fireplace in the cramped Sitting Room quarters where you’ll spot a Haunted Chair just to the right. Take out the Haunted Chair as efficiently as possible and you’ll spot a Knock-Down Mania! Soup Tin atop the table closest to the fire.
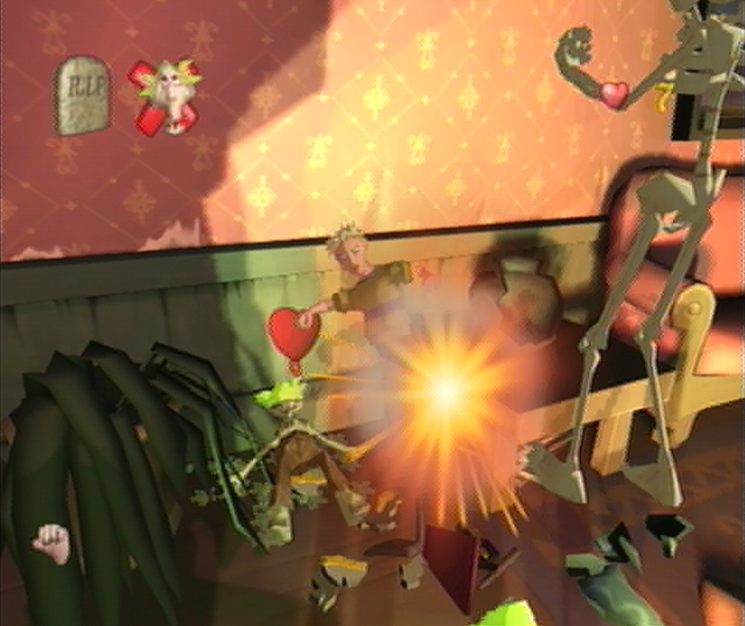
![]() Pick it up and then work your way over to one of the Zombies. The only thing you’ll need to worry about here is the single remaining Skeleton running over to intervene, if you manage to keep your attacks squarely on the Zombie. With the added benefit of the Knock Down Mania! Super Soup you should find it a tad easier to defeat the Zombie since you won’t have to land any initial hits before slamming it across the room. After you’ve defeated the first Zombie, you’ll need to take out the Skeleton next. With the second Skeleton out of the way there’s nothing stopping you from chipping away at the final Zombie uninterrupted. While it’s likely that you’ve used up your Knock-Down Mania! Soup Tin by now, there are several objects around the room that you can use to take care of the Zombie a little quicker, which would have been a risky decision earlier in the challenge. Once you’ve managed to take out the final Zombie the Challenge Door will open.
Pick it up and then work your way over to one of the Zombies. The only thing you’ll need to worry about here is the single remaining Skeleton running over to intervene, if you manage to keep your attacks squarely on the Zombie. With the added benefit of the Knock Down Mania! Super Soup you should find it a tad easier to defeat the Zombie since you won’t have to land any initial hits before slamming it across the room. After you’ve defeated the first Zombie, you’ll need to take out the Skeleton next. With the second Skeleton out of the way there’s nothing stopping you from chipping away at the final Zombie uninterrupted. While it’s likely that you’ve used up your Knock-Down Mania! Soup Tin by now, there are several objects around the room that you can use to take care of the Zombie a little quicker, which would have been a risky decision earlier in the challenge. Once you’ve managed to take out the final Zombie the Challenge Door will open.
CLAMORED BY THE COMPULSIVE CLEANING WOMAN
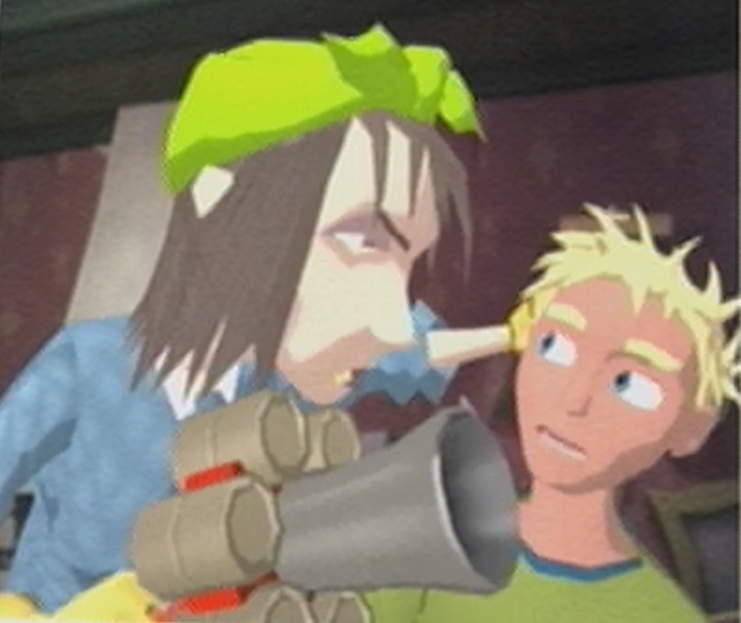
![]() As Cooper emerges into the Music Room he tries his best to keep quiet to avoid alerting any Ghoulies who might be near. Peering around the room cautiously, Cooper manages to spot something interesting on the floor; it looks like some sort of blunderbuss thats had its barrel decorated with soda pop cans. As Cooper reaches down to pick up the weapon however, a gloved hand reaches out and snatches it away! Before Cooper has the chance to react, he’s lifted to his feet painfully by his ear. Brought up to full height Cooper manages to see his captor; a sneering woman with yellowed teeth. “Oi! Are you the disrespectful young so-and-so that’s bin usin’ this thing ta make a sticky mess all over me clean floors?” The cleaning woman inquires as Cooper shakes his head in confusion “Oh… right then. Must’ve bin someone else. Sorry about that. But now you’re ‘ere, yer may as well take it with yer an’ throw it in the trash.” The cleaning woman says as she hands the gun over to Cooper.
As Cooper emerges into the Music Room he tries his best to keep quiet to avoid alerting any Ghoulies who might be near. Peering around the room cautiously, Cooper manages to spot something interesting on the floor; it looks like some sort of blunderbuss thats had its barrel decorated with soda pop cans. As Cooper reaches down to pick up the weapon however, a gloved hand reaches out and snatches it away! Before Cooper has the chance to react, he’s lifted to his feet painfully by his ear. Brought up to full height Cooper manages to see his captor; a sneering woman with yellowed teeth. “Oi! Are you the disrespectful young so-and-so that’s bin usin’ this thing ta make a sticky mess all over me clean floors?” The cleaning woman inquires as Cooper shakes his head in confusion “Oh… right then. Must’ve bin someone else. Sorry about that. But now you’re ‘ere, yer may as well take it with yer an’ throw it in the trash.” The cleaning woman says as she hands the gun over to Cooper.
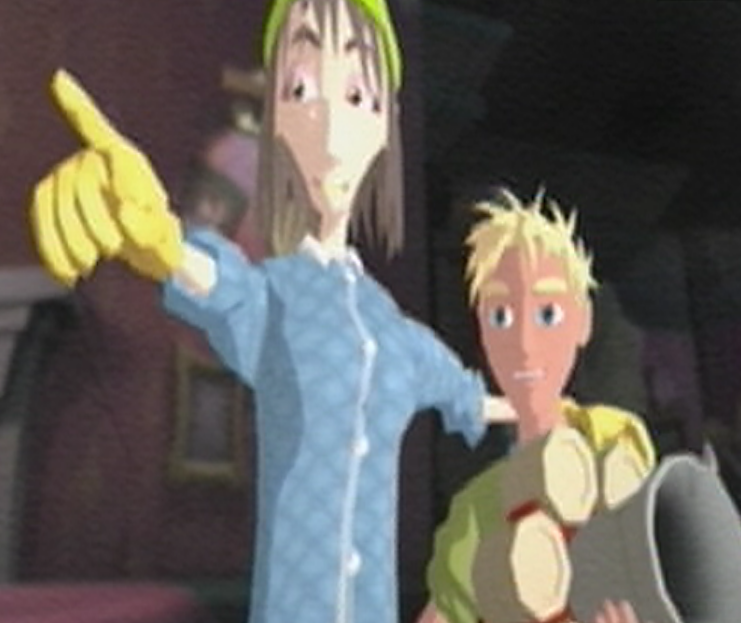
![]() “Disgustin’ thing, that.“, the Cleaning Woman nods toward the blunderbass as Cooper studies it with great interest. “Someone’s bin a-tinkerin’ with it ta make it fire soda pop cans! A right mess they make when they explode, let me tell yer!” Cooper spins the barrel around before asking about the Walled Garden. “What’s that, the Walled Garden yer say? Why, it’s just through here, innit?” the Cleaning Woman says as she points a helpful finger across the room. “Barbara Buffbrass is me name, by the way. Me friends call me Babs. You c’n call me Ms. Buffbrass. Cooper smiles up thankfully at Ms. Buffbrass before giving a nod to the opposite side of the room. Glancing down to his newly found Fizzy Grenade Soda Pop Gun, Cooper spins the revolving chamber once more before patiently waiting for Babs to leave the room. She isn’t going to like the aftermath of what will happen to her newly polished floors once he’s gotten through a thick wave of steadily approaching Ghoulies…
“Disgustin’ thing, that.“, the Cleaning Woman nods toward the blunderbass as Cooper studies it with great interest. “Someone’s bin a-tinkerin’ with it ta make it fire soda pop cans! A right mess they make when they explode, let me tell yer!” Cooper spins the barrel around before asking about the Walled Garden. “What’s that, the Walled Garden yer say? Why, it’s just through here, innit?” the Cleaning Woman says as she points a helpful finger across the room. “Barbara Buffbrass is me name, by the way. Me friends call me Babs. You c’n call me Ms. Buffbrass. Cooper smiles up thankfully at Ms. Buffbrass before giving a nod to the opposite side of the room. Glancing down to his newly found Fizzy Grenade Soda Pop Gun, Cooper spins the revolving chamber once more before patiently waiting for Babs to leave the room. She isn’t going to like the aftermath of what will happen to her newly polished floors once he’s gotten through a thick wave of steadily approaching Ghoulies…
MUSIC ROOM
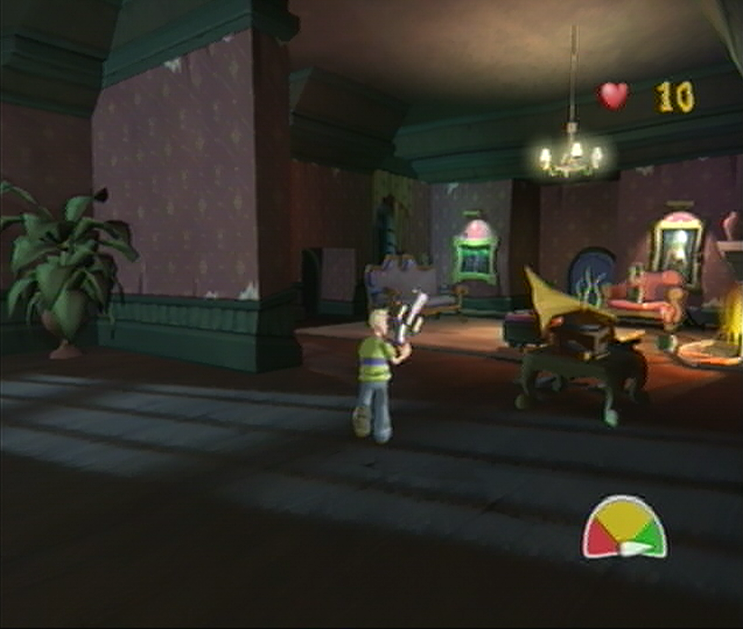
![]() You’ll find that controlling the Soda Pop Gun is quite similar to Ol’ Edna. Holding the Right Thumbstick will designate where you’d like to fire a soda pop can, whereas tapping it will instead allow you to swing it heartily when you’ve run out of ammo. Instead of darting for the door on the opposite of the Music Room straight off, let’s instead crack open the large guitar case on the floor directly ahead to unleash a Skeleton inside. You’ll only need a single shot to take him out and two subsequent hits to take out the Zombie that follows after. Once you’re finished with that, approach the second area of this room and you’ll spot a single Health Super Soup in front of the fireplace. Snatch it up quickly and then head toward the door where you’ll enter a Super Scary Shock Sequence. Thanks to the Health Soup if you fail this challenge you’ll have a single unit of health to make it through the door to the Walled Garden, which is preferable to using up one of your Times Fainted instead.
You’ll find that controlling the Soda Pop Gun is quite similar to Ol’ Edna. Holding the Right Thumbstick will designate where you’d like to fire a soda pop can, whereas tapping it will instead allow you to swing it heartily when you’ve run out of ammo. Instead of darting for the door on the opposite of the Music Room straight off, let’s instead crack open the large guitar case on the floor directly ahead to unleash a Skeleton inside. You’ll only need a single shot to take him out and two subsequent hits to take out the Zombie that follows after. Once you’re finished with that, approach the second area of this room and you’ll spot a single Health Super Soup in front of the fireplace. Snatch it up quickly and then head toward the door where you’ll enter a Super Scary Shock Sequence. Thanks to the Health Soup if you fail this challenge you’ll have a single unit of health to make it through the door to the Walled Garden, which is preferable to using up one of your Times Fainted instead.
WALLED GARDEN
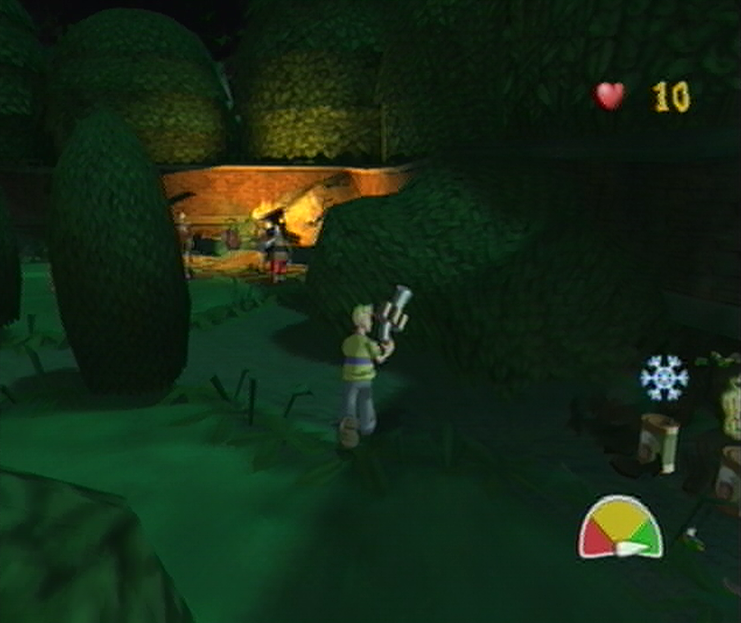
![]() Initially you’ll only be allotted a meager 5 Health as you step into the Walled Garden, so make sure that you take out the Flying Imp overhead with your Soda Pop gun before turning around on the spot to locate a 5 Health Tin inside one of the flower pots. Now that your health has been increased to a more manageable 10, you’ll need to work your way around the fountain in the center and avoid collecting the Dungweed just yet. If you’ve passed by completely undetected you’ll spot a great crack that goes down the perimeter wall next to an upturned bench as you approach it. While it’s quite difficult to see through the shadows, you should spot a collection of descending flower pots just to the left of this crack. Breaking all three open with your Soda Pop Gun will reveal a Super Weapons! Soup Tin as well as a Freeze Ghoulies! Soup Tin. Now that we’re finished with that we’ll sneak up on the Zombie Pirate by the Dungweed to the left and use one of our Fizzy Grenades to knock him over.
Initially you’ll only be allotted a meager 5 Health as you step into the Walled Garden, so make sure that you take out the Flying Imp overhead with your Soda Pop gun before turning around on the spot to locate a 5 Health Tin inside one of the flower pots. Now that your health has been increased to a more manageable 10, you’ll need to work your way around the fountain in the center and avoid collecting the Dungweed just yet. If you’ve passed by completely undetected you’ll spot a great crack that goes down the perimeter wall next to an upturned bench as you approach it. While it’s quite difficult to see through the shadows, you should spot a collection of descending flower pots just to the left of this crack. Breaking all three open with your Soda Pop Gun will reveal a Super Weapons! Soup Tin as well as a Freeze Ghoulies! Soup Tin. Now that we’re finished with that we’ll sneak up on the Zombie Pirate by the Dungweed to the left and use one of our Fizzy Grenades to knock him over.
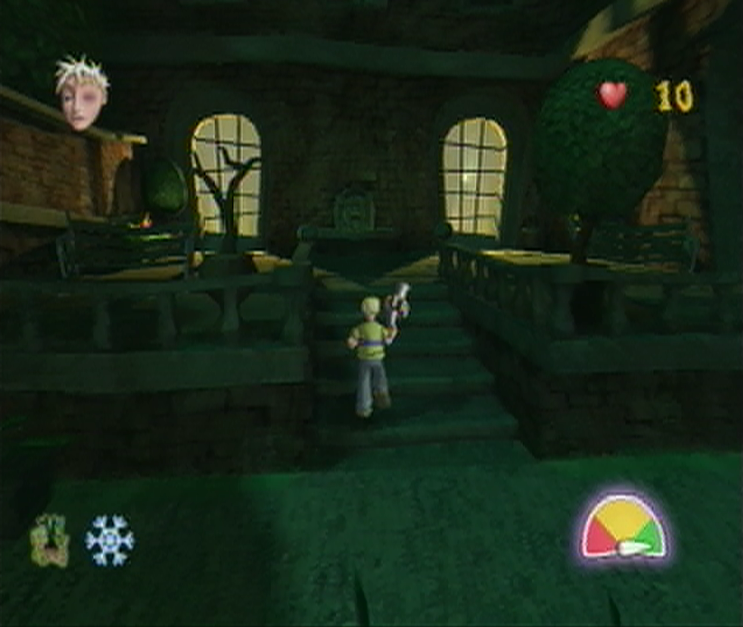
![]() In response to sticking up to their slave driver, the trio of Skeletons will turn on their master and become traitorous. While the Skeletons naturally make good friends, they make even better entries to our Ghoulies Defeated score, so before they’ve gotten a chance to properly revolt, take out all three and then move on to the Zombie Pirate afterwards. Once the coast is clear, retrieve the Dungweed from its spot in the Garden and you’ll start the challenge. You’ll need to head back immediately toward the Super Soups you’ve uncovered and grab the Freeze Ghoulies! Tin. From here it’s just a simple task of running up to the Challenge Door found on the stone porch directly across from the pots. You’ll only have a limited time before the Freeze Ghoulies! Tin wears off so make the most of it and you should reach the Challenge Door without issue. Once you arrive, use a Fizzy Grenade to take out the single frozen Ninja Imp at the doorway and then carry through to the Study.
In response to sticking up to their slave driver, the trio of Skeletons will turn on their master and become traitorous. While the Skeletons naturally make good friends, they make even better entries to our Ghoulies Defeated score, so before they’ve gotten a chance to properly revolt, take out all three and then move on to the Zombie Pirate afterwards. Once the coast is clear, retrieve the Dungweed from its spot in the Garden and you’ll start the challenge. You’ll need to head back immediately toward the Super Soups you’ve uncovered and grab the Freeze Ghoulies! Tin. From here it’s just a simple task of running up to the Challenge Door found on the stone porch directly across from the pots. You’ll only have a limited time before the Freeze Ghoulies! Tin wears off so make the most of it and you should reach the Challenge Door without issue. Once you arrive, use a Fizzy Grenade to take out the single frozen Ninja Imp at the doorway and then carry through to the Study.
Navigation:
Chapter 1: The Rescue
Chapter 2: The Restoration
-2-1: Ingress with Ingredients
-2-2: Eggs for cracking, Ghoulies for smacking
-2-3: Someone has a Bone to pick with you…
-2-4: Sugar, Spice and Dungweed
-2-5: A Curious Concoction
-2-6: Too many cooks spoil the broth
Chapter 3: The Riddle
Chapter 4: The Reckoning
Chapter 5: The Race
DEFENDING THE DELICIOUS DUNGWEED
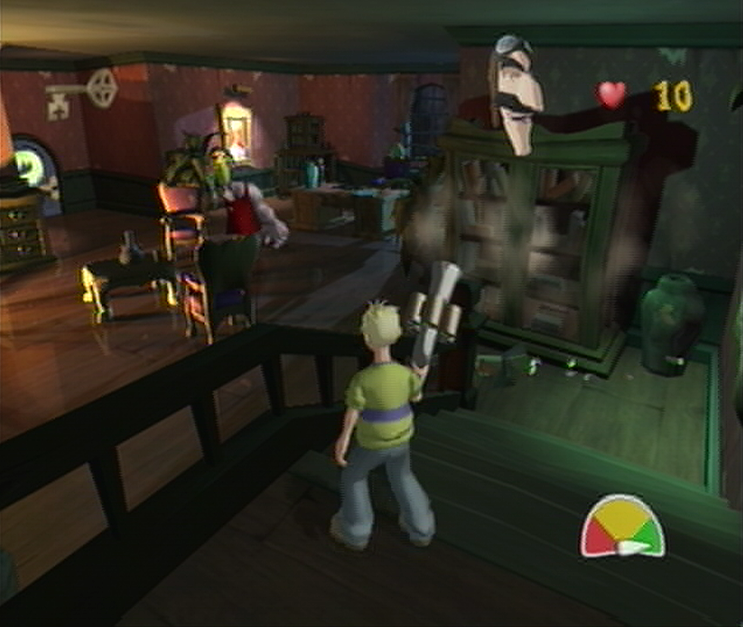
![]() The Study will allow you to brush up on a new breed of Ghouly, one of the most difficult to defeat and deadly to come across in your adventure; Jessie & Clyde. While it’s spin on Jekyll and Hyde may ring true, their dual personalities couldn’t be further from the truth as they’re both equally filled with rage. Luckily this new Ghouly will be fast asleep in the center of the Study, a perfect target for a dousing of Fizzy Grenades. Once you manage to wake up Jessie & Clyde, let your itchy trigger finger go wild; if this Ghouly gets close it’ll let out a roar equivalent to a Super Shock which will have you unable to fire a shot. Once you’ve taken care of it you’ll be tasked with finding the key hidden inside one of the Rare vases. Alternately, you can smash the safe found behind the large desk to find a Challenge Complete! Soup Tin. With the Challenge Door unlocked you’ll only have a few Ninja Imps to contend with that have invited themselves inside before making it back through to the Music Room.
The Study will allow you to brush up on a new breed of Ghouly, one of the most difficult to defeat and deadly to come across in your adventure; Jessie & Clyde. While it’s spin on Jekyll and Hyde may ring true, their dual personalities couldn’t be further from the truth as they’re both equally filled with rage. Luckily this new Ghouly will be fast asleep in the center of the Study, a perfect target for a dousing of Fizzy Grenades. Once you manage to wake up Jessie & Clyde, let your itchy trigger finger go wild; if this Ghouly gets close it’ll let out a roar equivalent to a Super Shock which will have you unable to fire a shot. Once you’ve taken care of it you’ll be tasked with finding the key hidden inside one of the Rare vases. Alternately, you can smash the safe found behind the large desk to find a Challenge Complete! Soup Tin. With the Challenge Door unlocked you’ll only have a few Ninja Imps to contend with that have invited themselves inside before making it back through to the Music Room.
MUSIC ROOM
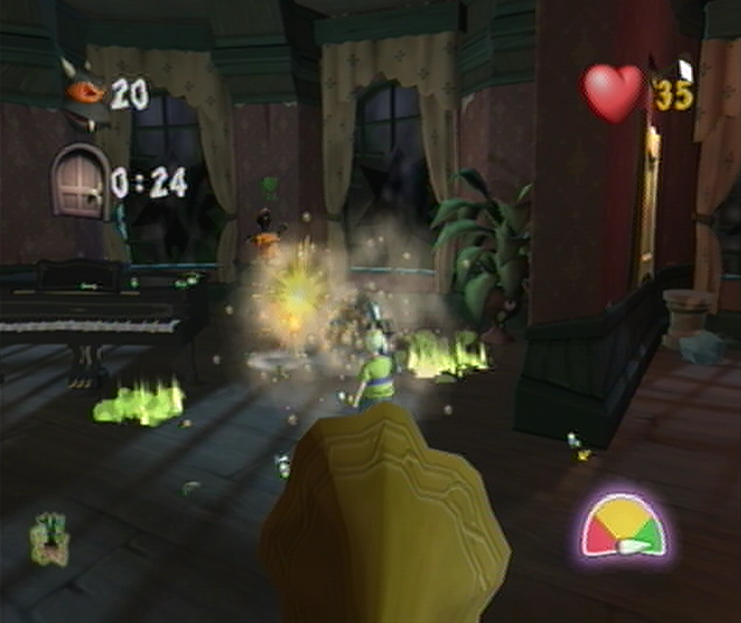
![]() Back inside the Music Room it would seem that we’ve nearly returned to Ma with the final ingredient! Don’t get too far ahead of yourself however, as this room is hands down the most challenging you’ll come across in this Chapter due to its deceptive exits. You’ll be tasked first with defeating 30 Ninja Imps and survive for 45 seconds, which will begin once you’ve walked into the main room. Your Soda Pop Gun should make things easier, make sure to take care of the groups of Imps at the windows before they have a chance to become larger and utilize the Super Weapons! Soup Tin on the couch next to the fireplace when times are tough. Once at least 30 Ninja Imps have been taken care of the Challenge Door will open invitingly. Do not approach the Challenge Door, otherwise you’ll start the next Challenge, instead you should notice a statue bust in front of the portrait of Ghoulhaven Hall in the corner; use your Soda Pop Gun to blast it off its podium.
Back inside the Music Room it would seem that we’ve nearly returned to Ma with the final ingredient! Don’t get too far ahead of yourself however, as this room is hands down the most challenging you’ll come across in this Chapter due to its deceptive exits. You’ll be tasked first with defeating 30 Ninja Imps and survive for 45 seconds, which will begin once you’ve walked into the main room. Your Soda Pop Gun should make things easier, make sure to take care of the groups of Imps at the windows before they have a chance to become larger and utilize the Super Weapons! Soup Tin on the couch next to the fireplace when times are tough. Once at least 30 Ninja Imps have been taken care of the Challenge Door will open invitingly. Do not approach the Challenge Door, otherwise you’ll start the next Challenge, instead you should notice a statue bust in front of the portrait of Ghoulhaven Hall in the corner; use your Soda Pop Gun to blast it off its podium.

![]() If you had left the podium standing you’d soon find a Cursed Mummy hiding inside which would have revealed itself as you went to leave, leaving you to try beating it into the fireplace unarmed unnecessarily. While we’re making it easy on ourselves, we might at well uncover a Challenge Complete! Soup Tin which can be found hidden inside a broken bust that lies on the ground just behind the couch that harbored the Super Weapons! Tin. Do your best to avoid picking it up and then work your way over to the Open Challenge Door where you’ll find Babs ready to confiscate your Soda Pop Gun. Just as you go to follow in her wake however, you’ll find a Hunchback bursting forth from the piano! As you turn around you’ll find the Hunchback taunting you, giving you plenty of time to run back into the area with the fireplace and picking up the Challenge Complete! Soup Tin. Once you’ve done so the Challenge Door will unlock allowing you to pass through unhindered.
If you had left the podium standing you’d soon find a Cursed Mummy hiding inside which would have revealed itself as you went to leave, leaving you to try beating it into the fireplace unarmed unnecessarily. While we’re making it easy on ourselves, we might at well uncover a Challenge Complete! Soup Tin which can be found hidden inside a broken bust that lies on the ground just behind the couch that harbored the Super Weapons! Tin. Do your best to avoid picking it up and then work your way over to the Open Challenge Door where you’ll find Babs ready to confiscate your Soda Pop Gun. Just as you go to follow in her wake however, you’ll find a Hunchback bursting forth from the piano! As you turn around you’ll find the Hunchback taunting you, giving you plenty of time to run back into the area with the fireplace and picking up the Challenge Complete! Soup Tin. Once you’ve done so the Challenge Door will unlock allowing you to pass through unhindered.
SITTING ROOM
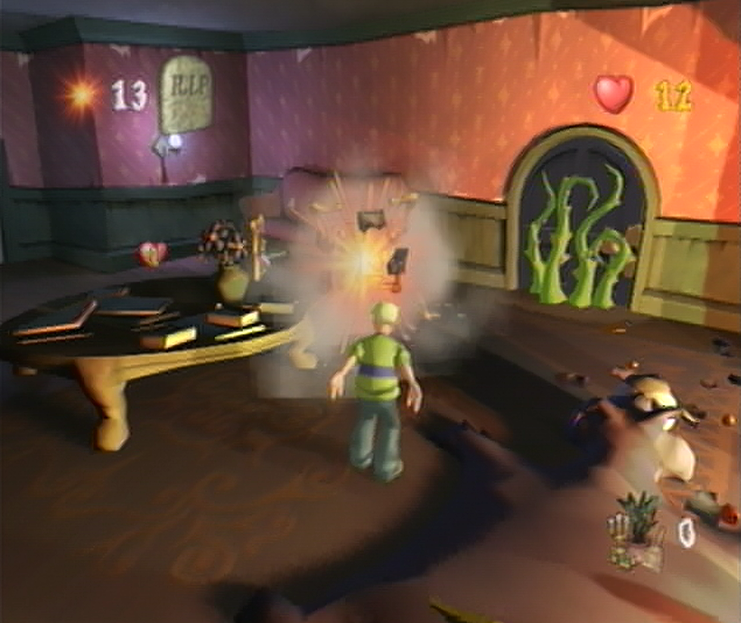
![]() While the Sitting Room isn’t going to offer up another “Next-One-Different Challenge” it will go about seeing if you can defeat all of the Ghoulies in the room by limiting your arsenal of attacks. In this case you’ll only be alloted 15 chances to use your attacks to defeat all of the Haunted Portraits, if you go over this boundary you can expect a visit from the Reaper. The most efficient way to clear this room is to use the objects found around the room to take out all of the Haunted Portraits. If you can, lure the Portraits around the room so that you can line them up with another Portrait on the wall. If you line it up just right you’ll end up taking out the Haunted Portrait on the floor as well as the Haunted Portrait that hasn’t exposed itself yet. Try your best to get all of the pursuing Portraits in a row so that a single attack will send a ripple through them all. You’ll only have 5 Haunted Portraits to defeat, so it shouldn’t be too difficult to maximize your attacks.
While the Sitting Room isn’t going to offer up another “Next-One-Different Challenge” it will go about seeing if you can defeat all of the Ghoulies in the room by limiting your arsenal of attacks. In this case you’ll only be alloted 15 chances to use your attacks to defeat all of the Haunted Portraits, if you go over this boundary you can expect a visit from the Reaper. The most efficient way to clear this room is to use the objects found around the room to take out all of the Haunted Portraits. If you can, lure the Portraits around the room so that you can line them up with another Portrait on the wall. If you line it up just right you’ll end up taking out the Haunted Portrait on the floor as well as the Haunted Portrait that hasn’t exposed itself yet. Try your best to get all of the pursuing Portraits in a row so that a single attack will send a ripple through them all. You’ll only have 5 Haunted Portraits to defeat, so it shouldn’t be too difficult to maximize your attacks.
CLOAK ROOM
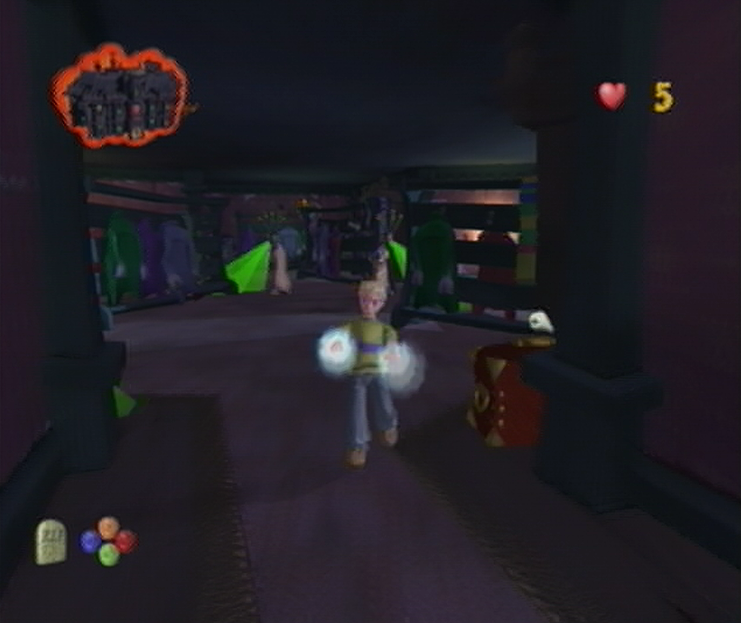
![]() Your return trip to the Cloak Room won’t see you sneaking through as stealthily as last time unfortunately, on the other hand however it shouldn’t cause you much trouble at all really. The only thing you’ll have to keep in mind during the trek is to avoid damaging the Hall, otherwise the Reaper will show up on the scene. From where you start off, whip around and you’ll spot a Shocker Blocker! Soup and One-Hit Wonder! Soup Tin in the window frame. Pick them both up and continue along the initial Corridor until an Imp bursts from the Trunk. Take it out in one hit, but be sure not to hit any part of the Hall in the process. Once you make your way into the main area of the Cloak Room, hang to the right and you’ll spot a mob of Medusas. Do your best to avoid their green glare, if you get caught the Shocker Blocker! Soup will have you covered, but do watch out for the Medusas lash attack. You should manage to spot the door ahead here, just continue through and you’ll have conquered the room.
Your return trip to the Cloak Room won’t see you sneaking through as stealthily as last time unfortunately, on the other hand however it shouldn’t cause you much trouble at all really. The only thing you’ll have to keep in mind during the trek is to avoid damaging the Hall, otherwise the Reaper will show up on the scene. From where you start off, whip around and you’ll spot a Shocker Blocker! Soup and One-Hit Wonder! Soup Tin in the window frame. Pick them both up and continue along the initial Corridor until an Imp bursts from the Trunk. Take it out in one hit, but be sure not to hit any part of the Hall in the process. Once you make your way into the main area of the Cloak Room, hang to the right and you’ll spot a mob of Medusas. Do your best to avoid their green glare, if you get caught the Shocker Blocker! Soup will have you covered, but do watch out for the Medusas lash attack. You should manage to spot the door ahead here, just continue through and you’ll have conquered the room.
GRAND HALLWAY
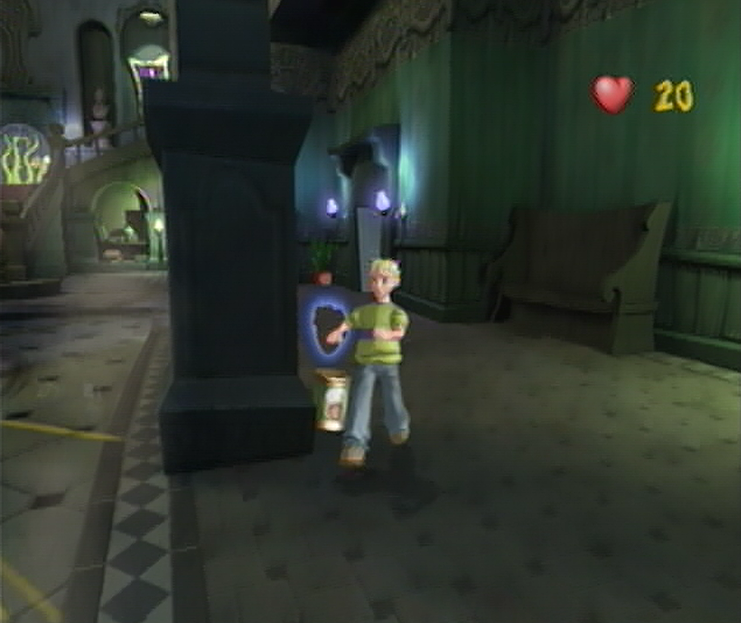
![]() Not far to go yet, well done! As you emerge in the Grand Hallway you’ll spot a duo of Skeletons doing a little cleaning, it’s a wonder they aren’t hanging around Babs Buffbrass. Nonetheless, they won’t take your appearance in stride and will immediately begin to give chase. Rather than heading toward the open Challenge Door on the opposite end of the hall, it’s better to scope out the area so that you don’t fall for the elaborate trap laid out here. Be sure to give yourself a good distance from the Skeleton cohorts and take note of the four large pillars that have been placed around this room. If you head toward the one to the right of the door – without getting too close to the exit, mind – you should manage to spot an Invisibility! Soup Tin hidden behind just out of view. Scoop up the Soup Tin and under your new guise head toward the Challenge Door where you’ll pass through completely undetected. Just a tad better than having to get in a brawl with another Haunted Door isn’t it?
Not far to go yet, well done! As you emerge in the Grand Hallway you’ll spot a duo of Skeletons doing a little cleaning, it’s a wonder they aren’t hanging around Babs Buffbrass. Nonetheless, they won’t take your appearance in stride and will immediately begin to give chase. Rather than heading toward the open Challenge Door on the opposite end of the hall, it’s better to scope out the area so that you don’t fall for the elaborate trap laid out here. Be sure to give yourself a good distance from the Skeleton cohorts and take note of the four large pillars that have been placed around this room. If you head toward the one to the right of the door – without getting too close to the exit, mind – you should manage to spot an Invisibility! Soup Tin hidden behind just out of view. Scoop up the Soup Tin and under your new guise head toward the Challenge Door where you’ll pass through completely undetected. Just a tad better than having to get in a brawl with another Haunted Door isn’t it?
KITCHEN
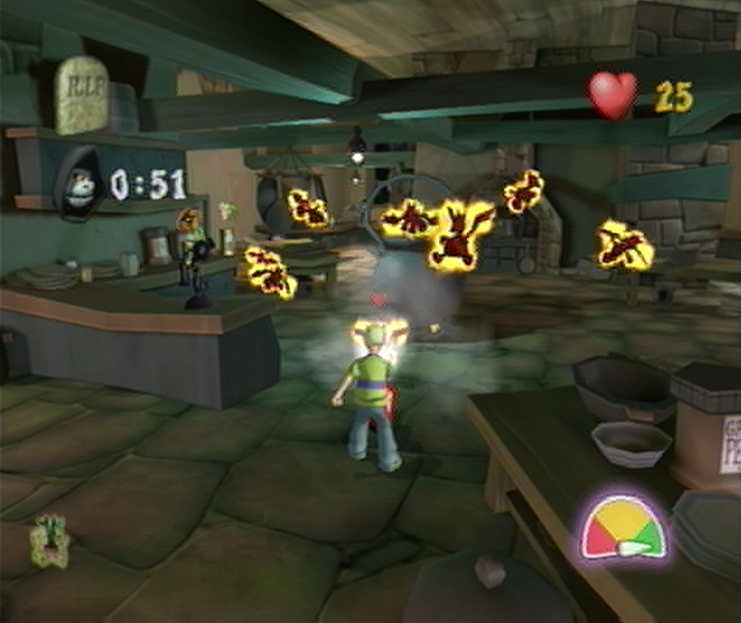
![]() Now that we’ve made a triumphant return to the Kitchen it would appear that Ma Soupswill is host to a second Fire Imp infestation that we’ve caught her with previously. Once you’ve retrieved the Fire Extinguisher from her side, you’ll be tasked with defeating all of the Fire Imps in 1 Minute and 30 Seconds! The first thing you’ll want to do is grab the Turbo Cooper! Soup Tin just in front of the Frrreezer and then use your added speed to take care of the cluster of Imps around Ma Soupswill. Once you’ve defeated all of the Fire Imps in the room you’ll find the next wave frothing forth from the Cauldron. Gather up the Super Weapons! Soup Tin while avoiding the unfavorable Soup in the center, leave the Turbo Cooper! Soup behind. Once you’ve gotten down to your last few Imps you’ll notice them beginning to flee making your job harder. Grab the Turbo Cooper! Soup Tin and chase them down with a steady blast from your extinguisher. Once you’ve finished we can get cooking!
Now that we’ve made a triumphant return to the Kitchen it would appear that Ma Soupswill is host to a second Fire Imp infestation that we’ve caught her with previously. Once you’ve retrieved the Fire Extinguisher from her side, you’ll be tasked with defeating all of the Fire Imps in 1 Minute and 30 Seconds! The first thing you’ll want to do is grab the Turbo Cooper! Soup Tin just in front of the Frrreezer and then use your added speed to take care of the cluster of Imps around Ma Soupswill. Once you’ve defeated all of the Fire Imps in the room you’ll find the next wave frothing forth from the Cauldron. Gather up the Super Weapons! Soup Tin while avoiding the unfavorable Soup in the center, leave the Turbo Cooper! Soup behind. Once you’ve gotten down to your last few Imps you’ll notice them beginning to flee making your job harder. Grab the Turbo Cooper! Soup Tin and chase them down with a steady blast from your extinguisher. Once you’ve finished we can get cooking!
A RECIPE FIT FOR A GHOULY

![]() As Cooper approaches the pot with his Dungweed, Ma Soupswill stirs the concoction vigorously, “This Dungweed sure is mighty fine!” Ma says as she turns her nose up from the rancid mix. “Now that we have all three ingredients, let’s mix ’em up in our little pot, here!” Cooper nods, dropping the plant into the broth as Ma continues to stir. Sure enough, the mix goes from ghoulish green to a more favorable brilliant pink as Cooper watches with amazement. “A pinch o’ salt an’ a sprinklin’ o’ pepper an’ that should do the trick!” Soupswill quips as she adds both condiments to the brew, which turns a luminescent blue. “This righteous concoction will make yer girlfriend right as rain!” Ma states as she uncorks a bottle and fills it with the potion. “Now get yerself down them stairs an’ sprinkle a few drops on ‘er pretty little face.“Great stuff! After a extensive run around the Hall for far flung ingredients we’re ready to return to Amber in the Archives and turn her back to normal!
As Cooper approaches the pot with his Dungweed, Ma Soupswill stirs the concoction vigorously, “This Dungweed sure is mighty fine!” Ma says as she turns her nose up from the rancid mix. “Now that we have all three ingredients, let’s mix ’em up in our little pot, here!” Cooper nods, dropping the plant into the broth as Ma continues to stir. Sure enough, the mix goes from ghoulish green to a more favorable brilliant pink as Cooper watches with amazement. “A pinch o’ salt an’ a sprinklin’ o’ pepper an’ that should do the trick!” Soupswill quips as she adds both condiments to the brew, which turns a luminescent blue. “This righteous concoction will make yer girlfriend right as rain!” Ma states as she uncorks a bottle and fills it with the potion. “Now get yerself down them stairs an’ sprinkle a few drops on ‘er pretty little face.“Great stuff! After a extensive run around the Hall for far flung ingredients we’re ready to return to Amber in the Archives and turn her back to normal!
Navigation:
Chapter 1: The Rescue
Chapter 2: The Restoration
-2-1: Ingress with Ingredients
-2-2: Eggs for cracking, Ghoulies for smacking
-2-3: Someone has a Bone to pick with you…
-2-4: Sugar, Spice and Dungweed
-2-5: A Curious Concoction
-2-6: Too many cooks spoil the broth
Chapter 3: The Riddle
Chapter 4: The Reckoning
Chapter 5: The Race
FROM THE POT COMES THE PLAN; THE PLAN GOES TO POT
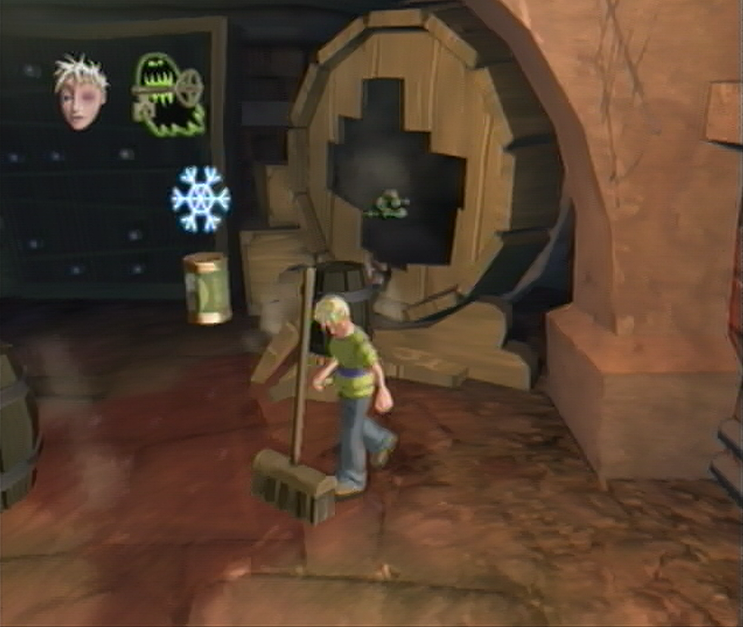
![]() The second you step foot into the Cellar the Challenge will begin straight away; you’ll have to find the key hidden inside one of the Ghoulies, but you’ll also have to avoid getting hit even once to get through unscathed. Luckily there aren’t any Ghoulies to go up against yet. From your starting position you’ll need to work your way around the boxes to your left and carry on until you spot the second 1881 barrel in the corner with quite a bit of spilled wine just in front of it. Crack it open with a flying kick and you’ll uncover a Freeze Ghoulies! Soup Tin – this next bit is rather timely – in one swift motion you’ll need to grab the Freeze Ghoulies! Soup Tin and continue following the wall toward the Challenge Door – without getting too close – and make sure you’re going not where you entered from but rather as if you were looking for the third 1881 barrel. Once you arrive in the area in front of the Challenge Door you’ll spot a red lightbulb and a Energy Boost! Soup Tin along the wall to your right.
The second you step foot into the Cellar the Challenge will begin straight away; you’ll have to find the key hidden inside one of the Ghoulies, but you’ll also have to avoid getting hit even once to get through unscathed. Luckily there aren’t any Ghoulies to go up against yet. From your starting position you’ll need to work your way around the boxes to your left and carry on until you spot the second 1881 barrel in the corner with quite a bit of spilled wine just in front of it. Crack it open with a flying kick and you’ll uncover a Freeze Ghoulies! Soup Tin – this next bit is rather timely – in one swift motion you’ll need to grab the Freeze Ghoulies! Soup Tin and continue following the wall toward the Challenge Door – without getting too close – and make sure you’re going not where you entered from but rather as if you were looking for the third 1881 barrel. Once you arrive in the area in front of the Challenge Door you’ll spot a red lightbulb and a Energy Boost! Soup Tin along the wall to your right.
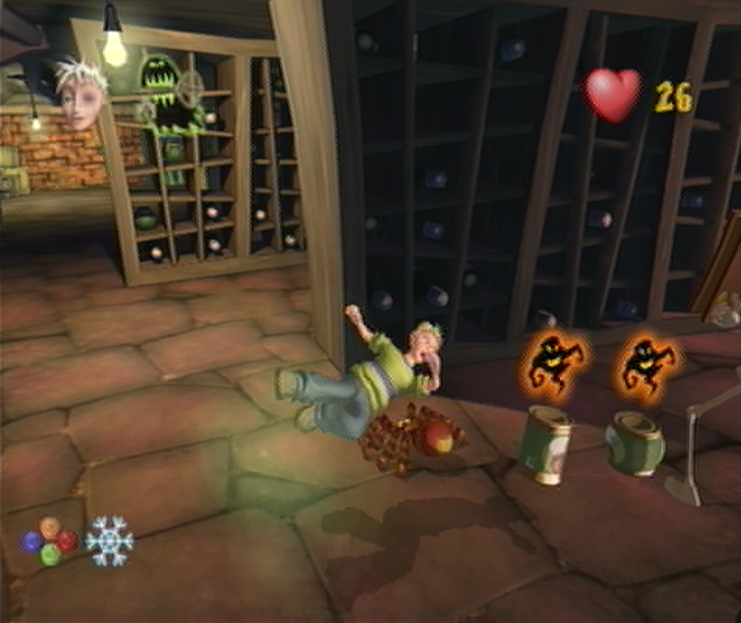
![]() As you carry along down this corridor – hopefully with your Freeze Ghoulies! Soup Tin still intact – you should manage to spot another 1881 barrel at the end of the row with a collection bucket underneath it. Crack it open rather quickly and you’ll find three unfavorable Soup Tins along with a Shocker Blocker! Super Soup with the most important element following suit; a single Glowing Spider that harbors the Ghouly Key inside of him. While this Ghouly is still frozen in his tracks, take him out and the key will be exposed once he’s defeated. Without the Freeze Ghoulies! Soup Tin this Spider can lead you around the Cellar as your time grows thin, leaving you to vulnerable for a hit from a Ghouly and ultimately a touch from the Reaper. Just as your Freeze Ghoulies! Soup Tin starts to wear thin, avoid the negative Soups and grab the Shocker Blocker! Soup Tin. While the Skeleton wielding the Book is likely on your tail, take care of him efficiently and then head to the now-open Challenge Door.
As you carry along down this corridor – hopefully with your Freeze Ghoulies! Soup Tin still intact – you should manage to spot another 1881 barrel at the end of the row with a collection bucket underneath it. Crack it open rather quickly and you’ll find three unfavorable Soup Tins along with a Shocker Blocker! Super Soup with the most important element following suit; a single Glowing Spider that harbors the Ghouly Key inside of him. While this Ghouly is still frozen in his tracks, take him out and the key will be exposed once he’s defeated. Without the Freeze Ghoulies! Soup Tin this Spider can lead you around the Cellar as your time grows thin, leaving you to vulnerable for a hit from a Ghouly and ultimately a touch from the Reaper. Just as your Freeze Ghoulies! Soup Tin starts to wear thin, avoid the negative Soups and grab the Shocker Blocker! Soup Tin. While the Skeleton wielding the Book is likely on your tail, take care of him efficiently and then head to the now-open Challenge Door.
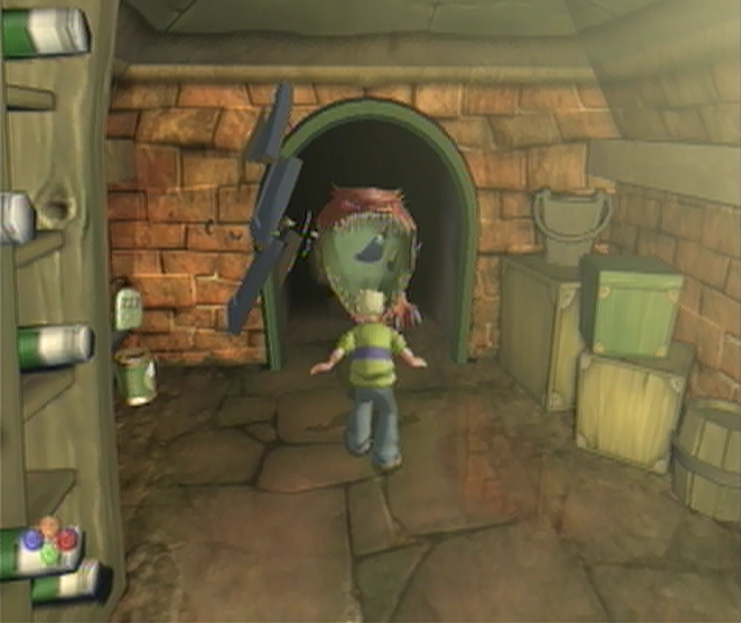
![]() As you approach the door your Shocker Blocker! Soup Tin will jump in to protect you against the Super Scary Shock waiting inside. Sit back and wait for the Challenge to solve and then get ready to increase your Ghoulies Defeated score, because we’re not finished just yet. Taking note of the One-Hit Wonder! Soup Tin to the left, ignore it for now and begin touring the Cellar and cracking open every 1881 barrel in a clockwise motion. Once you’ve managed that, rush back to the open Challenge Door and you’ll spot a collection of bottles atop a crate to the right. Grab the bottles and work your way to the One-Hit Wonder! Soup Tin referred to above. Once you turn around you should manage to confront all of the Ghoulies with a killer bottle like you’ve done to the Haunted Door the last time we were down here. Branch off to other objects once you’ve depleted your supply of bottles until all of the Ghoulies are defeated, then work your way back through the Challenge Door to the Archives.
As you approach the door your Shocker Blocker! Soup Tin will jump in to protect you against the Super Scary Shock waiting inside. Sit back and wait for the Challenge to solve and then get ready to increase your Ghoulies Defeated score, because we’re not finished just yet. Taking note of the One-Hit Wonder! Soup Tin to the left, ignore it for now and begin touring the Cellar and cracking open every 1881 barrel in a clockwise motion. Once you’ve managed that, rush back to the open Challenge Door and you’ll spot a collection of bottles atop a crate to the right. Grab the bottles and work your way to the One-Hit Wonder! Soup Tin referred to above. Once you turn around you should manage to confront all of the Ghoulies with a killer bottle like you’ve done to the Haunted Door the last time we were down here. Branch off to other objects once you’ve depleted your supply of bottles until all of the Ghoulies are defeated, then work your way back through the Challenge Door to the Archives.
CONCOCTION TO A CURE?
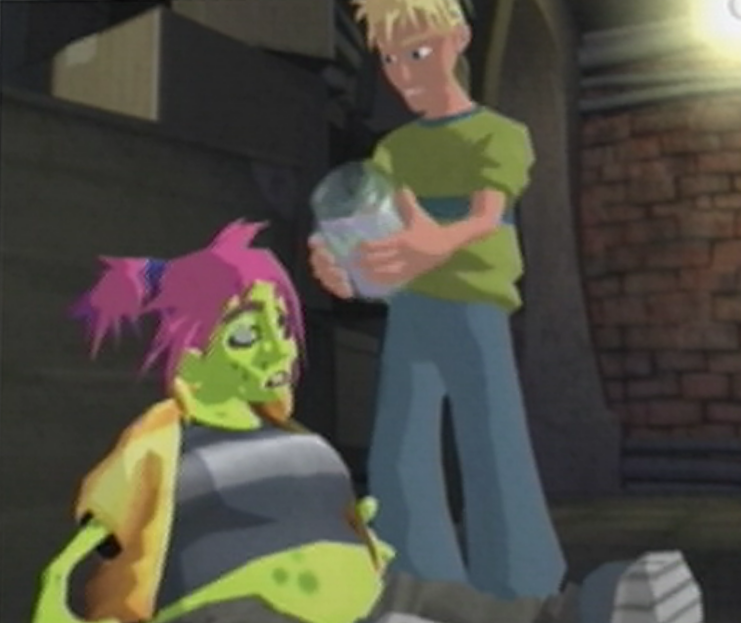
![]() Jar in hand, Cooper searches through the aisles of the Archives to come across Amber, depressed and slumped up against a nearby shelf. “Hey Amber! I’ve got a potion off the cook that should bring you back to your beautiful self!” Cooper unfastened the lid and stands over Amber, “I’ve just gotta spray a few drops over you…” Cooper tilts the jar over top of Ambers head where a thick glob gathers in the middle and hangs precariously over the edge. Meanwhile, back in the Kitchen Ma Soupswill examines her Pepper grinder to find something dangerously askew! A large X on the label reveals that the contents inside didn’t add quite the zest to the recipe that she was hoping for! The wrong ingredient! She’s given Cooper the wrong ingredient! Little can be done to remedy that fatal error however, as Cooper pours the concoctions contents all over Ambers face as he empties the jar. Withdrawing himself from Ambers side, Cooper stands back as his face turns ghostly white.
Jar in hand, Cooper searches through the aisles of the Archives to come across Amber, depressed and slumped up against a nearby shelf. “Hey Amber! I’ve got a potion off the cook that should bring you back to your beautiful self!” Cooper unfastened the lid and stands over Amber, “I’ve just gotta spray a few drops over you…” Cooper tilts the jar over top of Ambers head where a thick glob gathers in the middle and hangs precariously over the edge. Meanwhile, back in the Kitchen Ma Soupswill examines her Pepper grinder to find something dangerously askew! A large X on the label reveals that the contents inside didn’t add quite the zest to the recipe that she was hoping for! The wrong ingredient! She’s given Cooper the wrong ingredient! Little can be done to remedy that fatal error however, as Cooper pours the concoctions contents all over Ambers face as he empties the jar. Withdrawing himself from Ambers side, Cooper stands back as his face turns ghostly white.

![]() Without recourse, the concoction begins to set the transformation sequence into motion. In a dozen quick flashes Amber is left to the mercy of whatever the results of the clueless concoction might be. Soon a steady green smoke begins to steam off of Amber in heavy thick globs. Amber looks up toward Cooper with a look of utter contempt as she becomes enveloped entirely by the plumes of smog. Standing wide-eyed and slack jawed Cooper is frozen in fear watching as the ill-fated ingredients come together in a disastrous recipe. Absentmindedly Cooper drops the jar as the glass shatters against the cool Archives floor. The smoke begins to form a large whirling pillar in the center of the room as Amber is thrown round inside, her grunts and strains barely heard over the large claps of thunder that illuminate the room. A final explosion signifies the end of the transformation as a gigantic and monstrous-looking Ghouly Amber falls to the Archive floor. I don’t think she wants a kiss, Cooper…
Without recourse, the concoction begins to set the transformation sequence into motion. In a dozen quick flashes Amber is left to the mercy of whatever the results of the clueless concoction might be. Soon a steady green smoke begins to steam off of Amber in heavy thick globs. Amber looks up toward Cooper with a look of utter contempt as she becomes enveloped entirely by the plumes of smog. Standing wide-eyed and slack jawed Cooper is frozen in fear watching as the ill-fated ingredients come together in a disastrous recipe. Absentmindedly Cooper drops the jar as the glass shatters against the cool Archives floor. The smoke begins to form a large whirling pillar in the center of the room as Amber is thrown round inside, her grunts and strains barely heard over the large claps of thunder that illuminate the room. A final explosion signifies the end of the transformation as a gigantic and monstrous-looking Ghouly Amber falls to the Archive floor. I don’t think she wants a kiss, Cooper…
YE OLDE ARCHIVES
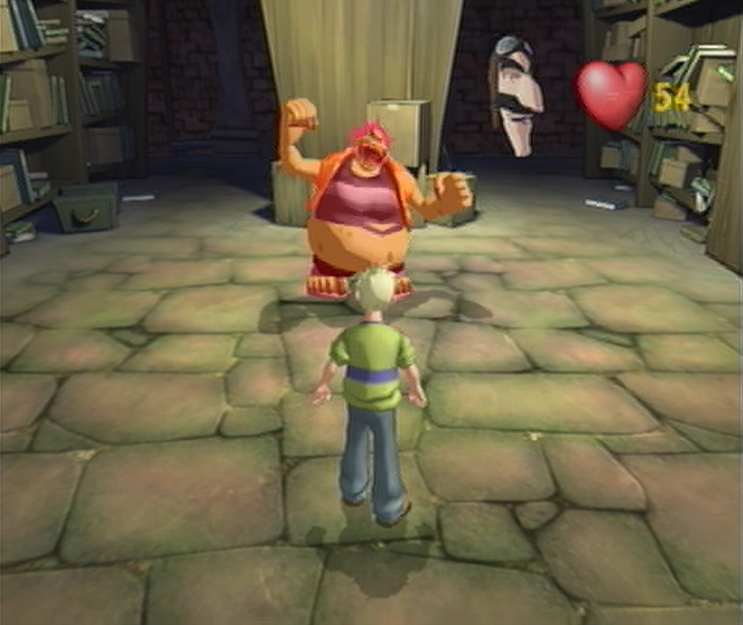
![]() Before you’re given a second to react you’ll soon find yourself in the midst of a battle, with your beloved on one side of the Archives and yourself the opposite in showdown style. Ogre-Amber is a force to be reckoned with; if you give her the chance you’ll find yourself on the receiving end of one of her powerful punches which take a fifth of your energy at 10 damage each! To make matters worse, Amber is also extremely fast in this form, leaving you struggling to set out any span of distance before she plays catch up. If she manages to knock you off your feet you’ll have very little time to react and in most cases Amber will continue laying on the damage before you can even compose yourself! Don’t let her daunting frame get to you too much though; there’s a rather easy way to drain her energy instead of your own… As the battle begins Amber will spend the first few seconds bellowing out a Ghoulish roar that renders herself invulnerable and leaves you some leeway to get your affairs in order.
Before you’re given a second to react you’ll soon find yourself in the midst of a battle, with your beloved on one side of the Archives and yourself the opposite in showdown style. Ogre-Amber is a force to be reckoned with; if you give her the chance you’ll find yourself on the receiving end of one of her powerful punches which take a fifth of your energy at 10 damage each! To make matters worse, Amber is also extremely fast in this form, leaving you struggling to set out any span of distance before she plays catch up. If she manages to knock you off your feet you’ll have very little time to react and in most cases Amber will continue laying on the damage before you can even compose yourself! Don’t let her daunting frame get to you too much though; there’s a rather easy way to drain her energy instead of your own… As the battle begins Amber will spend the first few seconds bellowing out a Ghoulish roar that renders herself invulnerable and leaves you some leeway to get your affairs in order.
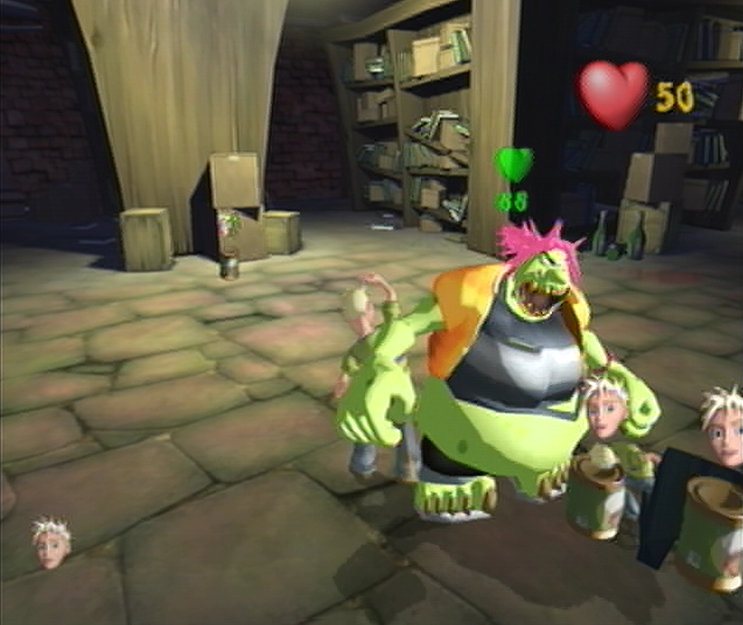
![]() Use these precious seconds to whip yourself around and you’ll manage to see a large green crate directly behind your starting position. Quickly smash the crate without picking up the Super Soups and then follow the route to the left along the bookcase corridor. Once you round the bend you should manage to spot a single cardboard box, pick it up and keep moving forward away from Amber. Once you spot her coming around the bend, take careful aim and send the box hurtling towards her to bring her health down to 70; a sight better than the previous 100. Continue down the corridor and then work your way back to the center of the room to find the three Miniature Cooper! tins. Release a single Mini-Cooper at a time and use the Super Cooper! Soup found at Ambers starting position to evade capture. Each Mini-Cooper has the potential to deliver 40 damage in a quick succession, if used proficiently you’ll have her defeated before reaching for a third tin!
Use these precious seconds to whip yourself around and you’ll manage to see a large green crate directly behind your starting position. Quickly smash the crate without picking up the Super Soups and then follow the route to the left along the bookcase corridor. Once you round the bend you should manage to spot a single cardboard box, pick it up and keep moving forward away from Amber. Once you spot her coming around the bend, take careful aim and send the box hurtling towards her to bring her health down to 70; a sight better than the previous 100. Continue down the corridor and then work your way back to the center of the room to find the three Miniature Cooper! tins. Release a single Mini-Cooper at a time and use the Super Cooper! Soup found at Ambers starting position to evade capture. Each Mini-Cooper has the potential to deliver 40 damage in a quick succession, if used proficiently you’ll have her defeated before reaching for a third tin!
RETURNING WITH A REMEDIED REMEDY
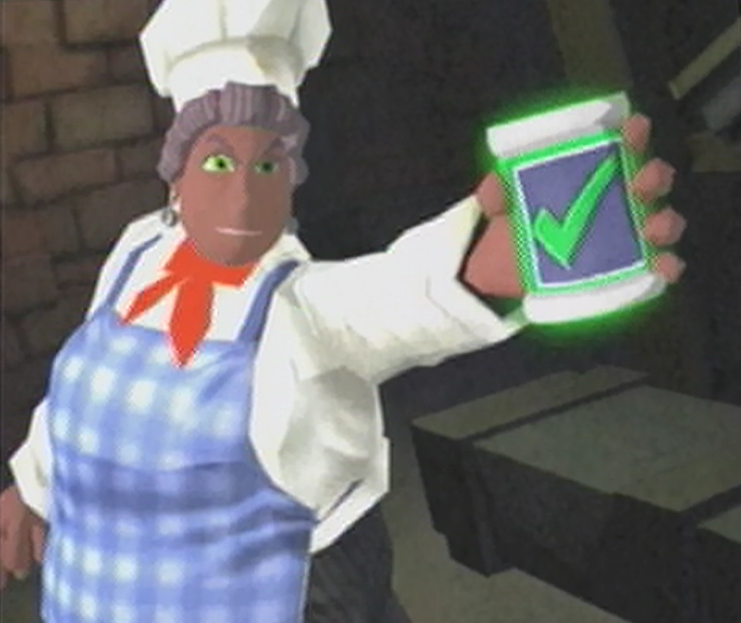
![]() As Amber lies on the ground dazed and confused, a triumphant Cooper washes his hands of the entire mix-up. Before he’s gotten a chance to celebrate however a stirring Amber delivers a stunning blow as she rises from the ground. Knocked back several meters, Cooper stares up to find Amber directly over top of him! She extends her arms toward the helpless lad as he cries out in vain. This looks like the end of our poor unlikely hero! Fortunately before the situation is given the chance to turn for the worse, Ma Soupswil bursts through the door holding a curious concoction which Amber notices immediately. Using this slight distraction to his advantage, Cooper eases his way out from between Ambers legs and watches the standoff from afar. “Keep away from ‘im, you fiend!” Ma shouts as she points a defiant finger at Amber, only to be returned with an Ogre-sized roar. Taking careful aim, Soupswil tosses the remedied remedy directly at Ambers’ face where it splatters on impact!
As Amber lies on the ground dazed and confused, a triumphant Cooper washes his hands of the entire mix-up. Before he’s gotten a chance to celebrate however a stirring Amber delivers a stunning blow as she rises from the ground. Knocked back several meters, Cooper stares up to find Amber directly over top of him! She extends her arms toward the helpless lad as he cries out in vain. This looks like the end of our poor unlikely hero! Fortunately before the situation is given the chance to turn for the worse, Ma Soupswil bursts through the door holding a curious concoction which Amber notices immediately. Using this slight distraction to his advantage, Cooper eases his way out from between Ambers legs and watches the standoff from afar. “Keep away from ‘im, you fiend!” Ma shouts as she points a defiant finger at Amber, only to be returned with an Ogre-sized roar. Taking careful aim, Soupswil tosses the remedied remedy directly at Ambers’ face where it splatters on impact!

![]() A dozen quick flashes zap around Ambers body just as before, rather than a Ghoulish green pillar of smog rising up however, Amber is enveloped in a thick pink fog that soon fills the Archives. With a brilliant flash and a deafening wallop the smoke dissipates, revealing a confused and cured Amber in the center of the action, looking herself over and clearly satisfied with what she’s seeing. Cooper runs over to Amber, finally glad to have her in his arms once more as the couple embrace. Cocking their heads to the side the couple leans in for a kiss, only to cop out at the last second and share a grateful hug instead. After their remedied reunion, Ma Soupswill steps up to apologize, “So sorry ’bout that, me dears. A slight mix up with me ingredients. Still, no real harm done!” Cooper rubs his head as Ma points toward the wall, “There be a door in that there bookcase! Up the stairs an’ back to the hallway. Yer must leave this ‘orrible place! Take care me darlin’s!” Right, let’s get on with it!
A dozen quick flashes zap around Ambers body just as before, rather than a Ghoulish green pillar of smog rising up however, Amber is enveloped in a thick pink fog that soon fills the Archives. With a brilliant flash and a deafening wallop the smoke dissipates, revealing a confused and cured Amber in the center of the action, looking herself over and clearly satisfied with what she’s seeing. Cooper runs over to Amber, finally glad to have her in his arms once more as the couple embrace. Cocking their heads to the side the couple leans in for a kiss, only to cop out at the last second and share a grateful hug instead. After their remedied reunion, Ma Soupswill steps up to apologize, “So sorry ’bout that, me dears. A slight mix up with me ingredients. Still, no real harm done!” Cooper rubs his head as Ma points toward the wall, “There be a door in that there bookcase! Up the stairs an’ back to the hallway. Yer must leave this ‘orrible place! Take care me darlin’s!” Right, let’s get on with it!
Optimal Super Scary Score Assessment:
Ghoulies Defeated: 380+ Ghoulies total. 280+ for this Chapter alone.
Time Taken: >1 Hour 15 minutes total play time. >55 minutes for this Chapter alone.
Navigation:
Chapter 1: The Rescue
Chapter 2: The Restoration
-2-1: Ingress with Ingredients
-2-2: Eggs for cracking, Ghoulies for smacking
-2-3: Someone has a Bone to pick with you…
-2-4: Sugar, Spice and Dungweed
-2-5: A Curious Concoction
-2-6: Too many cooks spoil the broth
Chapter 3: The Riddle
Chapter 4: The Reckoning
Chapter 5: The Race
RUNNING OUT A RECIPE FOR DISASTER
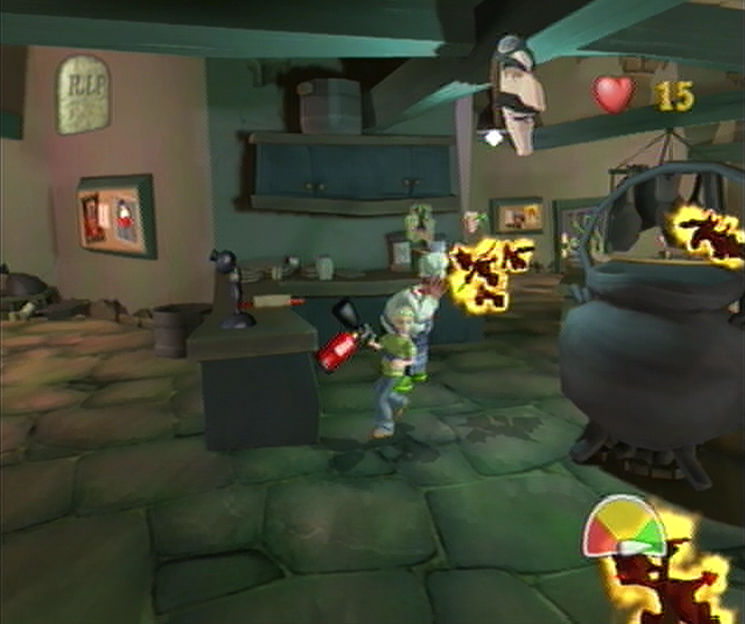
![]() As you ascend the large staircase to the Kitchen you’ll find nearly a dozen Fire Imps soaring around the place causing havoc; if you speak to Ma Soupswill cowering ahead she’ll supply you with a single Fire Extinguisher that you can use independently with the right control stick. Use the extinguisher to clear off the first few Imps before making your way over to the counter behind Ma Soupswill where you’ll manage to find a Turbo Cooper! and Super Weapons! Soup Tin; Grab them both and you’ll be able to clear out the room a lot quicker. Once the Kitchen has been saved the Challenge Door behind the counter will open allowing a Skeleton to enter, Ma Soupswill will tell you that you’ll need to obtain three far flung ingredients to concoct a special potion; the first ingredient being Glow-Worms found powering the Lighthouse. When you’re ready to go, make sure to avoid the Skeleton and travel around the back of the counter where you found the Super Soups to locate the exit.
As you ascend the large staircase to the Kitchen you’ll find nearly a dozen Fire Imps soaring around the place causing havoc; if you speak to Ma Soupswill cowering ahead she’ll supply you with a single Fire Extinguisher that you can use independently with the right control stick. Use the extinguisher to clear off the first few Imps before making your way over to the counter behind Ma Soupswill where you’ll manage to find a Turbo Cooper! and Super Weapons! Soup Tin; Grab them both and you’ll be able to clear out the room a lot quicker. Once the Kitchen has been saved the Challenge Door behind the counter will open allowing a Skeleton to enter, Ma Soupswill will tell you that you’ll need to obtain three far flung ingredients to concoct a special potion; the first ingredient being Glow-Worms found powering the Lighthouse. When you’re ready to go, make sure to avoid the Skeleton and travel around the back of the counter where you found the Super Soups to locate the exit.
SCULLERY
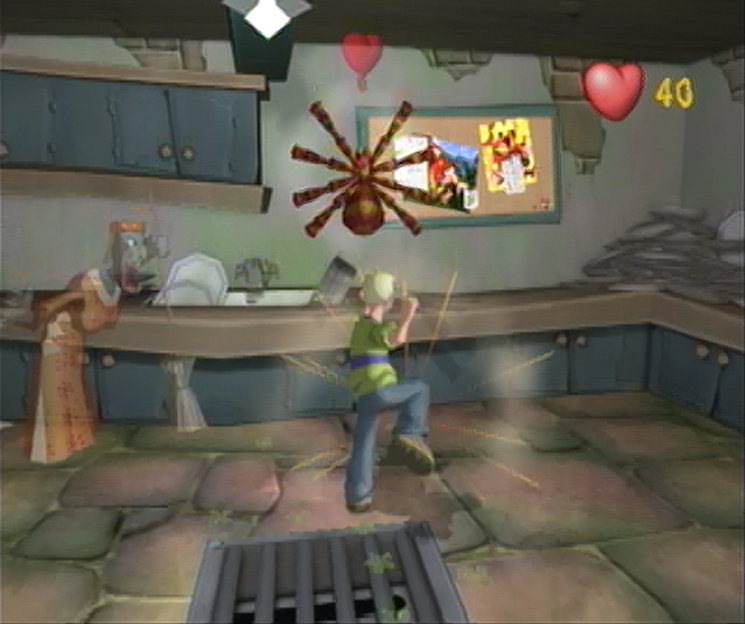
![]() Once you’ve found your way into the Scullery you’ll manage to spot a single Spider clinging to the bulletin board above the sink ahead. Normally we’d avoid this Ghouly outright, but since we’ll find ourselves in a time sensitive situation soon, it’s in our best interest to take it out so we can avoid unnecessary hindrance if we step through its web. Once you’ve coaxed the Spider to fall off the wall it will only take two hits to send it off for good, once you’ve done that, just travel toward the thin corridor with shelves along either side. Follow the shelves to its end and you’ll find an open Challenge Door waiting for you on the opposite side of the room. Attempt to travel through the doorway and you’ll meet the Zombie Ghouly unceremoniously as it breaks wind while stumbling through the exit. With a Zombie in the room the Challenge begins; you’ll have 25 seconds to defeat the Zombie, if you’re unable to do so within that time frame then you’ll get to meet the Grim Reaper.
Once you’ve found your way into the Scullery you’ll manage to spot a single Spider clinging to the bulletin board above the sink ahead. Normally we’d avoid this Ghouly outright, but since we’ll find ourselves in a time sensitive situation soon, it’s in our best interest to take it out so we can avoid unnecessary hindrance if we step through its web. Once you’ve coaxed the Spider to fall off the wall it will only take two hits to send it off for good, once you’ve done that, just travel toward the thin corridor with shelves along either side. Follow the shelves to its end and you’ll find an open Challenge Door waiting for you on the opposite side of the room. Attempt to travel through the doorway and you’ll meet the Zombie Ghouly unceremoniously as it breaks wind while stumbling through the exit. With a Zombie in the room the Challenge begins; you’ll have 25 seconds to defeat the Zombie, if you’re unable to do so within that time frame then you’ll get to meet the Grim Reaper.
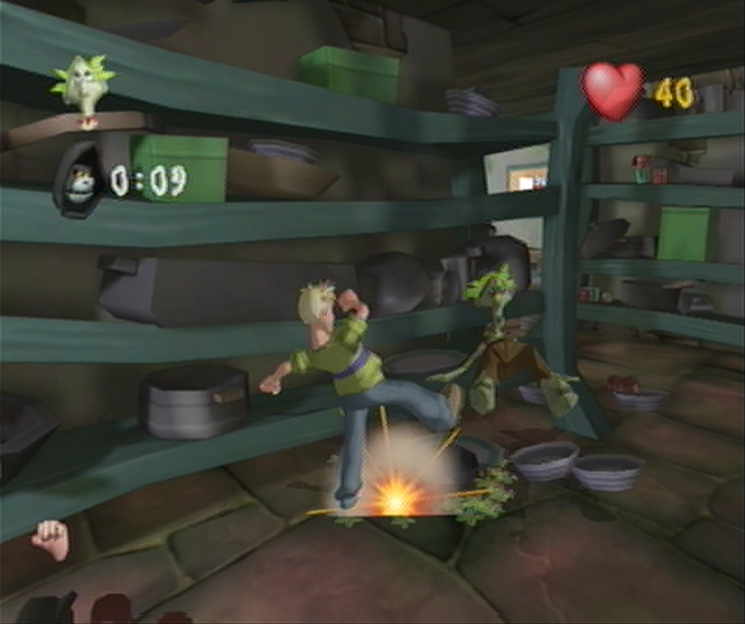
![]() A meeting with the Reaper is less than desired of course, as breaking of the Challenge rules does have its’ consequences. The Reaper will start off at the entrance of any room you cause him to appear in, wherein he’ll slowly approach your location with his finger outstretched. If you’re unable to escape the room or this touch of death before it comes in contact with Cooper, you’ll die instantly, meaning you’ll have to start the room over from the beginning, effectively restarting any challenges within in. Since we’ll want to naturally avoid this happening at all costs we’ll need to defeat the Zombie in a timely fashion. Start off by grabbing the Knockout Mania! Soup Tin found to the left of the Challenge Door and then pummel the Zombie into submission. Once you manage to knock him down keep on swinging; you’ll need to register 8 hits in total to take out this Undead annoyance. Once you’ve completed the Challenge just walk through the door the Zombie initially came through.
A meeting with the Reaper is less than desired of course, as breaking of the Challenge rules does have its’ consequences. The Reaper will start off at the entrance of any room you cause him to appear in, wherein he’ll slowly approach your location with his finger outstretched. If you’re unable to escape the room or this touch of death before it comes in contact with Cooper, you’ll die instantly, meaning you’ll have to start the room over from the beginning, effectively restarting any challenges within in. Since we’ll want to naturally avoid this happening at all costs we’ll need to defeat the Zombie in a timely fashion. Start off by grabbing the Knockout Mania! Soup Tin found to the left of the Challenge Door and then pummel the Zombie into submission. Once you manage to knock him down keep on swinging; you’ll need to register 8 hits in total to take out this Undead annoyance. Once you’ve completed the Challenge just walk through the door the Zombie initially came through.
LOWER CORRIDORS
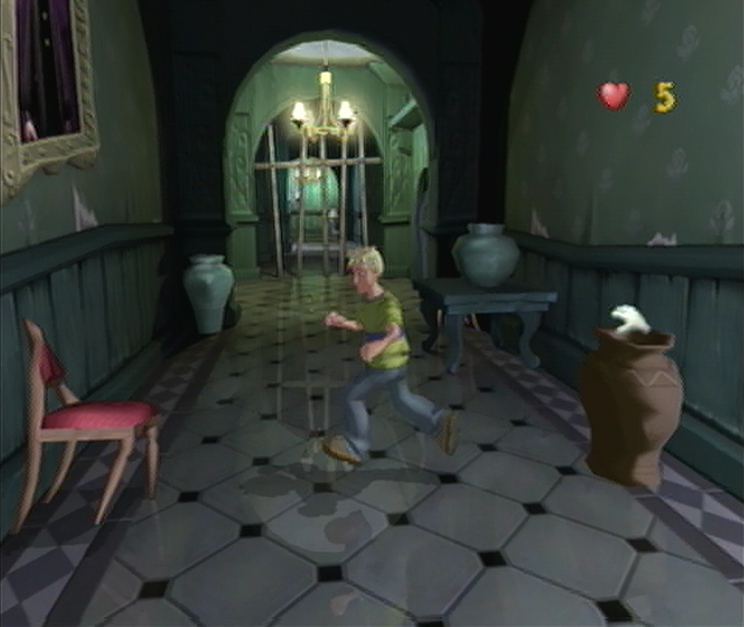
![]() In similar fashion to our last trek through the Lower Corridors we’ll have to be extra careful if we want to avoid an untimely demise, and the odds are definitely stacked against us with an extremely meager amount of health we’ve been offered up. Your main concern therefore is reaching the doorway on the other end of the hallway to the right. You’ll find two Haunted Chairs prepared to stop you from arriving at the doorway, but if you manage to keep a steady pace and avoid the chairs’ sweeping smacks altogether. You’ll be warranted a total of 3 hits from the Chairs to make your job a bit easier, and given the cramped quarters it should be easy enough to keep an eye on their current position from afar and react accordingly. Once you make it through to the end of the hall, travel through the doorway and you’ll manage to hear the thumping bass from the area beyond reverberating through the floor. Is there a Monster Mash in Ghoulhaven Hall?…
In similar fashion to our last trek through the Lower Corridors we’ll have to be extra careful if we want to avoid an untimely demise, and the odds are definitely stacked against us with an extremely meager amount of health we’ve been offered up. Your main concern therefore is reaching the doorway on the other end of the hallway to the right. You’ll find two Haunted Chairs prepared to stop you from arriving at the doorway, but if you manage to keep a steady pace and avoid the chairs’ sweeping smacks altogether. You’ll be warranted a total of 3 hits from the Chairs to make your job a bit easier, and given the cramped quarters it should be easy enough to keep an eye on their current position from afar and react accordingly. Once you make it through to the end of the hall, travel through the doorway and you’ll manage to hear the thumping bass from the area beyond reverberating through the floor. Is there a Monster Mash in Ghoulhaven Hall?…
EMBASSY BALLROOM
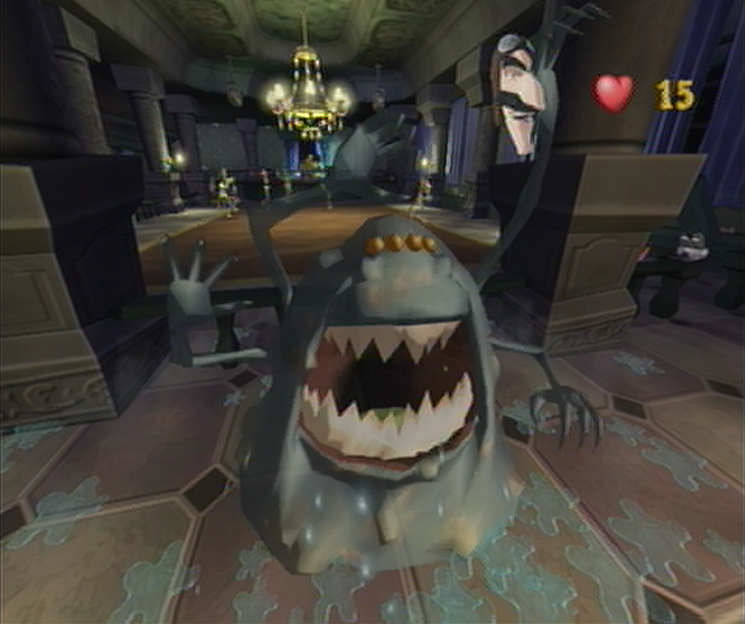
![]() Inside the Embassy Ballroom you’ll manage to answer that question, as the entire room is filled to the brim with Zoot suit Zombies, Sliding Skeletons and overseen by a Mummy DJ. Before you’ll have a chance to get into the club, you’ll have to get by the bouncer who can be found just above the entrance way ready to give you a Scary Shock. When you’re ready to bash some buttons venture on ahead past the curtain and you’ll trigger the Dropper to plop himself down as you solve the Scary Shock Sequence. Once you’ve finished the sequence without losing a bit of health we’ll be ready to tackle our next challenge; getting onto the dance floor. Currently you’ll notice that the floors rather full up with Ghoulies completely devoid of any sense of spatial awareness, if you were to venture on and come in contact with any of the dancing Ghoulies and throw off their groove, you’ll find that they change their tune and become hostile fairly quickly.
Inside the Embassy Ballroom you’ll manage to answer that question, as the entire room is filled to the brim with Zoot suit Zombies, Sliding Skeletons and overseen by a Mummy DJ. Before you’ll have a chance to get into the club, you’ll have to get by the bouncer who can be found just above the entrance way ready to give you a Scary Shock. When you’re ready to bash some buttons venture on ahead past the curtain and you’ll trigger the Dropper to plop himself down as you solve the Scary Shock Sequence. Once you’ve finished the sequence without losing a bit of health we’ll be ready to tackle our next challenge; getting onto the dance floor. Currently you’ll notice that the floors rather full up with Ghoulies completely devoid of any sense of spatial awareness, if you were to venture on and come in contact with any of the dancing Ghoulies and throw off their groove, you’ll find that they change their tune and become hostile fairly quickly.
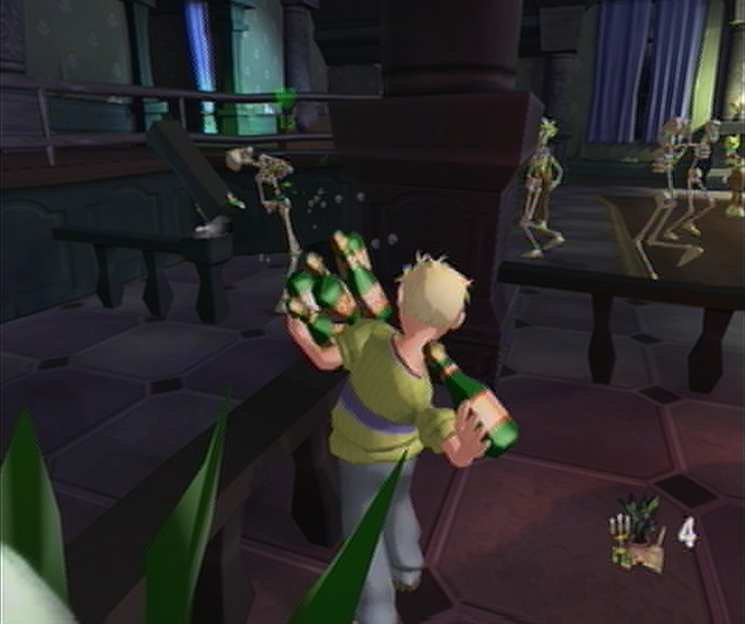
![]() To make matters worse you’ll be locked in the second you step onto the dance floor, so there’s no escaping when your dance partners want to have you for one more song. Luckily we’ll have ample time to prepare for the dance without venturing onto the floor. If you work your way to the left side of the room you’ll see that the perimeter extends to an area with a few tables and chairs set up on the outside. From here you’ll be able to grab the Health soup tins that will see you to the other side of the dance floor, but more importantly you’ll find a number of objects that you’ll be able to utilize against the dancers. The key target to hit is the Skeleton guarding the exit, found near the end of the farthest table closest to the Mummy DJ. Pick up the bottles here and use them to toss at the Skeleton; each time you come in contact with the bony bouncer you’ll take off 5 hitpoints for a total of 20 with 4 successful hits. If you run out of bottles there’s another pile waiting on the table.
To make matters worse you’ll be locked in the second you step onto the dance floor, so there’s no escaping when your dance partners want to have you for one more song. Luckily we’ll have ample time to prepare for the dance without venturing onto the floor. If you work your way to the left side of the room you’ll see that the perimeter extends to an area with a few tables and chairs set up on the outside. From here you’ll be able to grab the Health soup tins that will see you to the other side of the dance floor, but more importantly you’ll find a number of objects that you’ll be able to utilize against the dancers. The key target to hit is the Skeleton guarding the exit, found near the end of the farthest table closest to the Mummy DJ. Pick up the bottles here and use them to toss at the Skeleton; each time you come in contact with the bony bouncer you’ll take off 5 hitpoints for a total of 20 with 4 successful hits. If you run out of bottles there’s another pile waiting on the table.
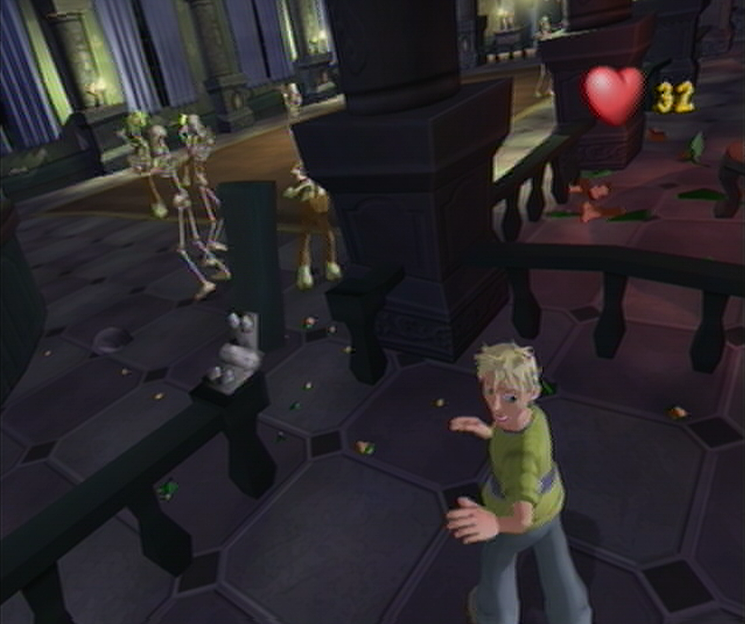
![]() Once you’ve managed to take him out though you’re free to use the Potted Plant in the corner here to try taking out the other dancers. Once you’re ready, work your way back around to where we met the Dropper and you’ll spot the entrance to the Dance Floor along with a large painting of Ghoulhaven Hall resting against the wall. Smash the painting and you’ll receive an extra 10 Health Points from the Super Soup to see you to the end, then walk through the entrance way to have the gate shut behind you. If you stick close to the wall and do your best to avoid the other dancers you should manage to make your way to the exit without any trouble at all. Once you’ve done so, walk through the exit and you’ll have conquered the Embassy Ballroom. Just one more challenge now: getting past the DJ. Climb the stairs to your right and then stick to the wall to locate the hallway that leads to the open challenge door. Follow it to its end without intervention from the DJ and you’re set!
Once you’ve managed to take him out though you’re free to use the Potted Plant in the corner here to try taking out the other dancers. Once you’re ready, work your way back around to where we met the Dropper and you’ll spot the entrance to the Dance Floor along with a large painting of Ghoulhaven Hall resting against the wall. Smash the painting and you’ll receive an extra 10 Health Points from the Super Soup to see you to the end, then walk through the entrance way to have the gate shut behind you. If you stick close to the wall and do your best to avoid the other dancers you should manage to make your way to the exit without any trouble at all. Once you’ve done so, walk through the exit and you’ll have conquered the Embassy Ballroom. Just one more challenge now: getting past the DJ. Climb the stairs to your right and then stick to the wall to locate the hallway that leads to the open challenge door. Follow it to its end without intervention from the DJ and you’re set!
CONSERVATORY
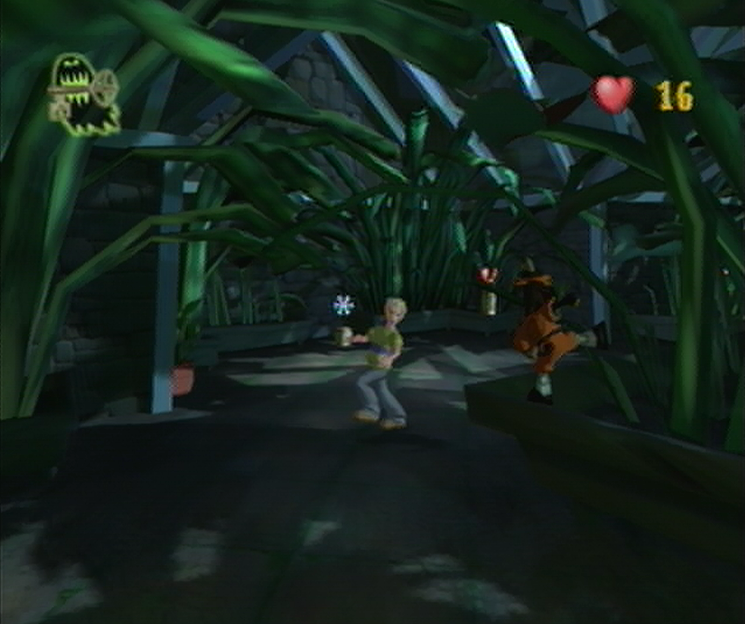
![]()
Now we’re making progress, and as a sure sign let’s get ready to meet our next breed of Ghouly! As you start off you should notice a patio table in this little enclosure; keep this location in mind, you’ll need to return here once the challenge begins. Once you’ve done that work your way out toward the main area to your left and you’ll meet the Ninja Imp! These little guys are nimble, so you’ll need to do your best to avoid getting swarmed, their main means of attack is a flying kick they execute in mid-air, you’ll have plenty of time to avoid it when it occurs however as they’ll freeze in the air before jetting forwards. Now that you’re on the floor you’ll need to work your way toward the exit which can be found straight through where the Ninja Imp starts from. Once there you should manage to spot the alluring challenge door, attempting to walk through it will allow a cascade of Ninja Imps to break through the glass ceiling and the challenge begins!
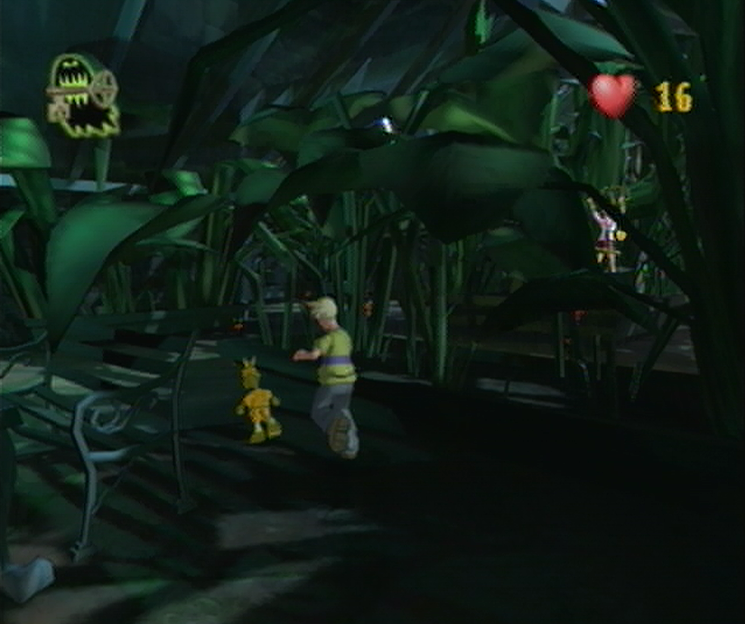
![]() This particular challenge requires you to locate the key inside one of the Ghoulies in the room, only exposing itself when that Ghouly is defeated. Given this scenario it can be very infuriating trying to pick through the Ninja Imps, but with some assistance you’ll manage to deal with this issue efficiently. Once the Ninja Imps have dropped from above, work your way back towards that patio table that you started off from, on your way you should manage to spot a Freeze Ghoulies Soup Tin – as evidenced by the snowflake hovering over the top – which allows you to freeze all the Ghoulies in the room for a limited time. Pick up the Soup Tin and then work your way back over to the patio table and you’ll find a Ninja Imp hiding behind it slowly flashing, meaning that its harboring the Ghouly key. Use your time to crank out some hits on the Ninja Imp and once the Tin wears off the challenge will complete. Avoid any interception as you make your way toward the exit and carry through.
This particular challenge requires you to locate the key inside one of the Ghoulies in the room, only exposing itself when that Ghouly is defeated. Given this scenario it can be very infuriating trying to pick through the Ninja Imps, but with some assistance you’ll manage to deal with this issue efficiently. Once the Ninja Imps have dropped from above, work your way back towards that patio table that you started off from, on your way you should manage to spot a Freeze Ghoulies Soup Tin – as evidenced by the snowflake hovering over the top – which allows you to freeze all the Ghoulies in the room for a limited time. Pick up the Soup Tin and then work your way back over to the patio table and you’ll find a Ninja Imp hiding behind it slowly flashing, meaning that its harboring the Ghouly key. Use your time to crank out some hits on the Ninja Imp and once the Tin wears off the challenge will complete. Avoid any interception as you make your way toward the exit and carry through.
PLAYING SECOND FIDDLE TO NONE

![]() Running across the hillside Cooper makes his way to the decrepit looking boathouse sitting on the shore of Ghoulhaven Hall. Inside he’ll manage to find the first ingredient needed to cure Amber of her affliction, if he can make it back out alive that is. Approaching the door Cooper reaches for the large brass knocker, only to have the door swing open unexpectedly as he does so. Peering into the darkness Cooper makes out a pair of beady eyes belonging to a towering figure on the other side. While running would certainly be the best option here, Coopers legs have other plans as they remain frozen in place as the daunting figure slowly makes its way to the light. Thankfully for Cooper the freaky figure doesn’t belong to one of the Ghoulies, but rather to a burly man with a wide smile. “Mow my meadow!” the bearded man exclaims, “You gave me a fright, young ‘un! I were busy adjustin’ my tackle in the Boathouse. I be ol’ Fiddlesworth, the groundskeeper!” Well, it’s nice to meet a friendly face at least…
Running across the hillside Cooper makes his way to the decrepit looking boathouse sitting on the shore of Ghoulhaven Hall. Inside he’ll manage to find the first ingredient needed to cure Amber of her affliction, if he can make it back out alive that is. Approaching the door Cooper reaches for the large brass knocker, only to have the door swing open unexpectedly as he does so. Peering into the darkness Cooper makes out a pair of beady eyes belonging to a towering figure on the other side. While running would certainly be the best option here, Coopers legs have other plans as they remain frozen in place as the daunting figure slowly makes its way to the light. Thankfully for Cooper the freaky figure doesn’t belong to one of the Ghoulies, but rather to a burly man with a wide smile. “Mow my meadow!” the bearded man exclaims, “You gave me a fright, young ‘un! I were busy adjustin’ my tackle in the Boathouse. I be ol’ Fiddlesworth, the groundskeeper!” Well, it’s nice to meet a friendly face at least…
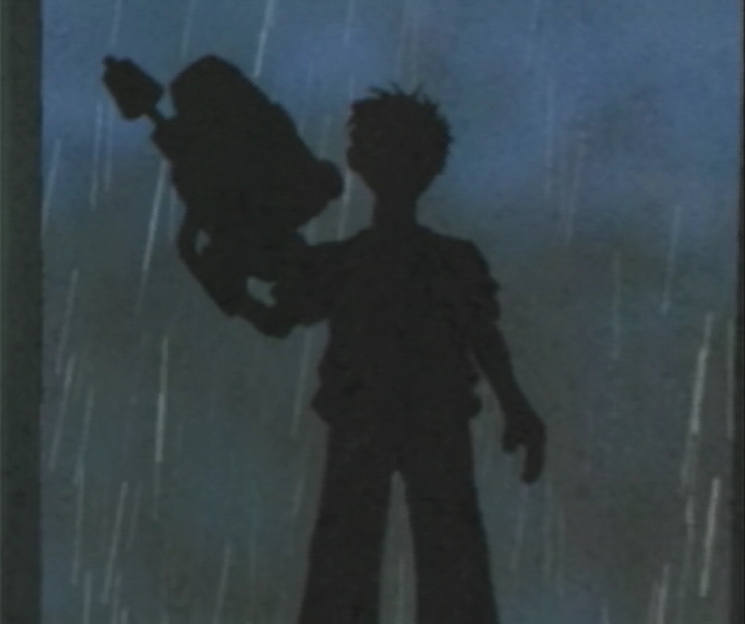
![]() “Where might you be headin’, lad?” Fiddlesworth says as he looks Cooper over. “Not through the Boathouse and out towards the ol’ Lighthouse, I ‘ope?” Before Cooper has a chance to reply Fiddlesworth draws a large water pistol from within the Boathouse and points it squarely at Coopers’ chest. “Best take this with yer. It be full o’ sacred water that them ‘orrors don’t like.” Fiddlesworth hands over the large water pistol as Cooper smiles up gratefully. While the water pistol wielding is a new field for Cooper, you’ll find it controls and preforms identical to the Fire Extinguisher previous; holding right thumbstick in the direction that you wish to attack will cause a stream of water to trail off from the pistol, whereas tapping the right thumbstick will have Cooper swing the pistol which can be especially effective if you’ve run out of water and need some crowd control. Remember to keep on eye on your supply; if you run the pistol dry it’ll take some time for it to refuel.
“Where might you be headin’, lad?” Fiddlesworth says as he looks Cooper over. “Not through the Boathouse and out towards the ol’ Lighthouse, I ‘ope?” Before Cooper has a chance to reply Fiddlesworth draws a large water pistol from within the Boathouse and points it squarely at Coopers’ chest. “Best take this with yer. It be full o’ sacred water that them ‘orrors don’t like.” Fiddlesworth hands over the large water pistol as Cooper smiles up gratefully. While the water pistol wielding is a new field for Cooper, you’ll find it controls and preforms identical to the Fire Extinguisher previous; holding right thumbstick in the direction that you wish to attack will cause a stream of water to trail off from the pistol, whereas tapping the right thumbstick will have Cooper swing the pistol which can be especially effective if you’ve run out of water and need some crowd control. Remember to keep on eye on your supply; if you run the pistol dry it’ll take some time for it to refuel.
BOATHOUSE
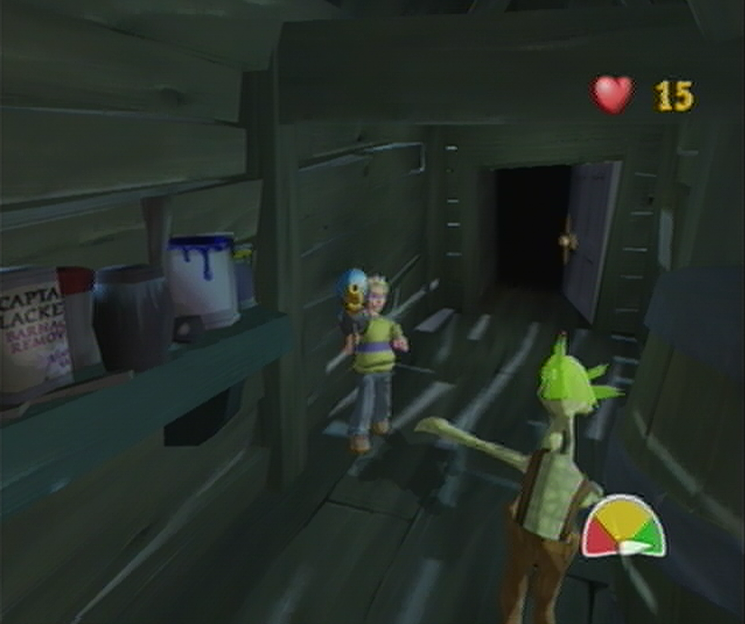
![]()
The Boathouse is great if you’ve got itchy trigger fingers, as there are two eligible Zombies inside that just beg for a dousing. Once you’ve managed to clear the Boathouse of both undead inhabitants, the chest in the center of the room will burst open, revealing another pair of Zombies, as well as a duo of Skeletons and Imps inside. You’ll want to make sure you deal with these Ghoulies as quickly as possible, as you’ll be given a strict time limit that you mustn’t let run out. Deal with the new duo of Zombies first with a strong stream from your Squirter, once you’ve done that it’s time to deal with the Skeletons and Imps, which unfortunately won’t go down quite so easily. Unlike the Zombies you’ve faced so far, you’ll find that the Water Squirter has no effect on the remaining enemies, so you’ll have to use its broadside to dish out the damage instead. Once you’ve managed to pummel them into the floor the challenge will finish and you’ll be granted entry into the next room.
LIGHTHOUSE STORE
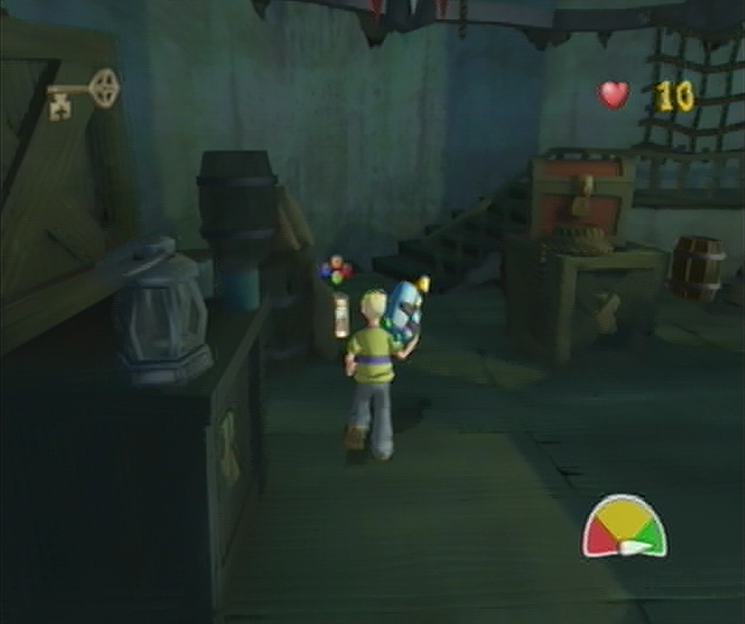
![]() As soon as you step into the Lighthouse Store you’ll get to meet a brand new Ghouly; the dreaded Medusa. Unlike the other Ghoulies, the Medusa won’t go chasing after you as soon as you’re put in the same room, instead it spends its time effectively patrolling a small area. The Medusa will use her vision as a green spotlight to keep watch directly ahead, if you step into this zone you’ll be forced to solve a Super Scary Shock sequence to escape unscathed. Luckily we won’t need to get too close to the Medusas to solve this rooms Challenge, which involves breaking the Rare Crates around the room to find the hidden Key to escape. Since you start out with a minimal amount of health it would be wise to locate the Shocker Blocker! Soup Tin in front of the staircase which will solve any Super Scary sequence automatically. Once you’ve found the key in the proper crate work your way up the stairs and then use your pistol to deal with the Zombie guarding the door. More water-based carnage!
As soon as you step into the Lighthouse Store you’ll get to meet a brand new Ghouly; the dreaded Medusa. Unlike the other Ghoulies, the Medusa won’t go chasing after you as soon as you’re put in the same room, instead it spends its time effectively patrolling a small area. The Medusa will use her vision as a green spotlight to keep watch directly ahead, if you step into this zone you’ll be forced to solve a Super Scary Shock sequence to escape unscathed. Luckily we won’t need to get too close to the Medusas to solve this rooms Challenge, which involves breaking the Rare Crates around the room to find the hidden Key to escape. Since you start out with a minimal amount of health it would be wise to locate the Shocker Blocker! Soup Tin in front of the staircase which will solve any Super Scary sequence automatically. Once you’ve found the key in the proper crate work your way up the stairs and then use your pistol to deal with the Zombie guarding the door. More water-based carnage!
LIGHTHOUSE LIVING QUARTERS
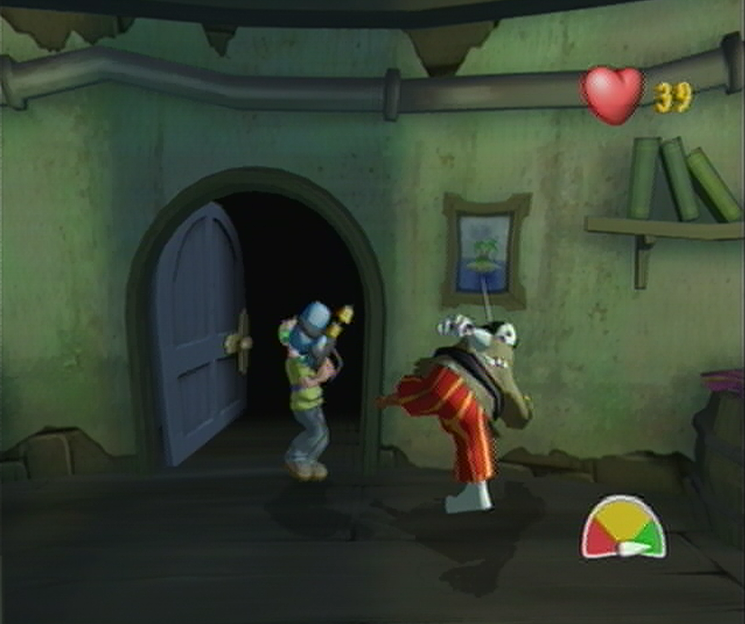
![]() You’ll manage to make quick work of this room thanks to a friendly feud. Not all Ghoulies get along with each other, which can benefit us greatly. If you manage to spot a Ghouly with a smiley face icon above their health it means they’ll do battle with any other Ghouly in the room before taking after you when the room becomes clear. These Traitorous Ghoulies will definitely help us later on when we need to rely on a distraction. Leave the Zombies to their own devices and pick up the 25 Health Soup Tin the proceed to the Haunted Television Set in front of the bathtub. Normally these Ghoulies can be a challenge, but the Water Pistol will deal with them beautifully. Once you’ve done that travel toward the open challenge door and you’ll meet another new entry to the Ghoulipedia; the Zombie Pirate! Luckily these undead seadogs can’t stand the water either, and a quick stream from your pistol will take care of this putrefied pirate so that you may travel through the Challenge Door.
You’ll manage to make quick work of this room thanks to a friendly feud. Not all Ghoulies get along with each other, which can benefit us greatly. If you manage to spot a Ghouly with a smiley face icon above their health it means they’ll do battle with any other Ghouly in the room before taking after you when the room becomes clear. These Traitorous Ghoulies will definitely help us later on when we need to rely on a distraction. Leave the Zombies to their own devices and pick up the 25 Health Soup Tin the proceed to the Haunted Television Set in front of the bathtub. Normally these Ghoulies can be a challenge, but the Water Pistol will deal with them beautifully. Once you’ve done that travel toward the open challenge door and you’ll meet another new entry to the Ghoulipedia; the Zombie Pirate! Luckily these undead seadogs can’t stand the water either, and a quick stream from your pistol will take care of this putrefied pirate so that you may travel through the Challenge Door.
LIGHTHOUSE LANTERN ROOM
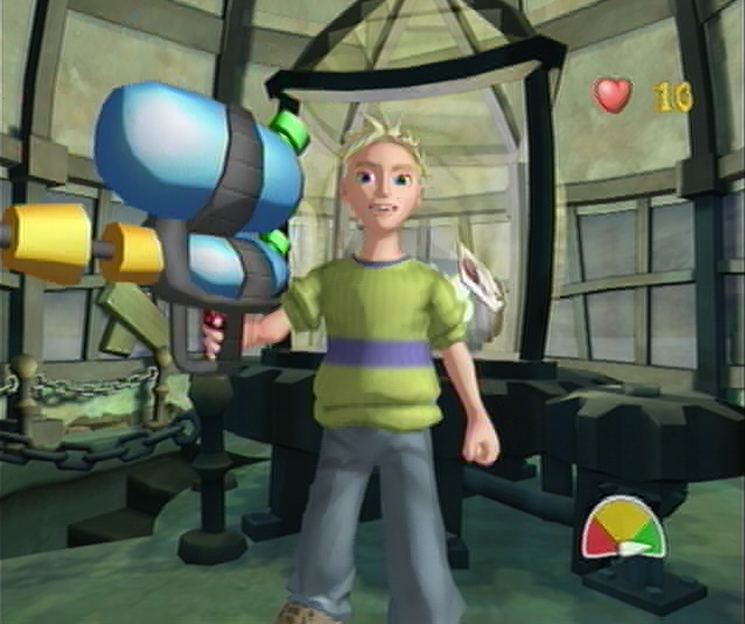
![]() Now that we’ve reached the pinnacle of our perilous Lighthouse search, we’ll manage to locate the Glow-worms needed as the first ingredient of Ma Soupswill’s Un-Ghoulifying Potion for Amber. From here it’s just a short trek up the stairs and a quick tour around the Lighthouse Lantern until you manage to locate an upright jar of Glow-worms handily labeled with a picture of Ma Soupswill. Once you’ve snatched up the first ingredient you’ll be tasked with returning it to the cook, but not before the challenge door slams shut letting in a single measly Imp at the base of the stairs. While this Imp is impervious to the lethal liquids contained in the water squirter, it’s still vulnerable to a solid whack from the water squirter itself, so once you’ve caught up with the Imp a nice crack to the chops with the squirter will send him flying, defeating him in a single hit. Now that you’re finished with that little distraction you’re free to make your way through the challenge door below.
Now that we’ve reached the pinnacle of our perilous Lighthouse search, we’ll manage to locate the Glow-worms needed as the first ingredient of Ma Soupswill’s Un-Ghoulifying Potion for Amber. From here it’s just a short trek up the stairs and a quick tour around the Lighthouse Lantern until you manage to locate an upright jar of Glow-worms handily labeled with a picture of Ma Soupswill. Once you’ve snatched up the first ingredient you’ll be tasked with returning it to the cook, but not before the challenge door slams shut letting in a single measly Imp at the base of the stairs. While this Imp is impervious to the lethal liquids contained in the water squirter, it’s still vulnerable to a solid whack from the water squirter itself, so once you’ve caught up with the Imp a nice crack to the chops with the squirter will send him flying, defeating him in a single hit. Now that you’re finished with that little distraction you’re free to make your way through the challenge door below.
Navigation:
Chapter 1: The Rescue
Chapter 2: The Restoration
Chapter 3: The Riddle
-3-1: Fetching up the First Verse
-3-2: Second Stanza in the Stables
-3-3: Well Versed in Backtracking
-3-4: Don’t Fear the Reaper
-3-5: Method to the Madness
-3-6: Requisite for a Reckoning
Chapter 4: The Reckoning
Chapter 5: The Race
CLEANING UP AFTER THE GHOULIES
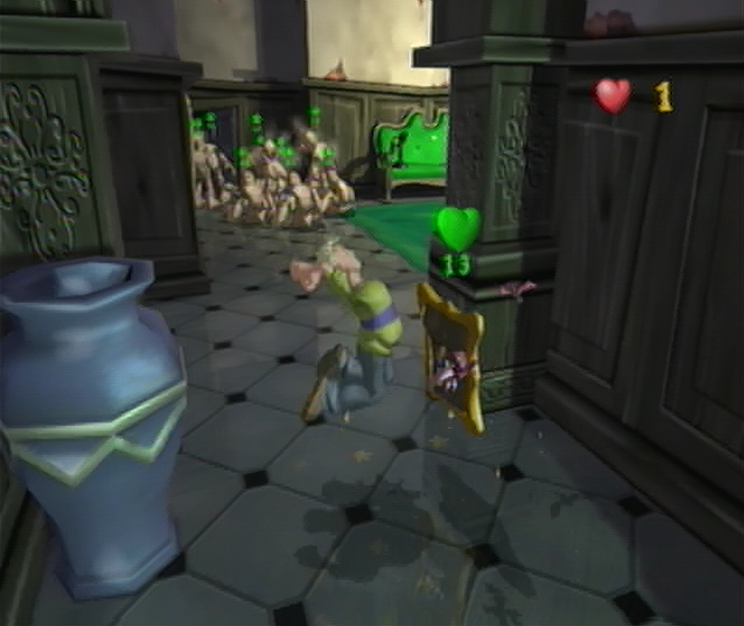
![]() The Upper Corridors will pit you against a rather sinister challenge: you’ll have to squeeze past a crowd of tight knit traitorous Ghoulies without getting hit, and given your current single unit of health this is much easier said than done. Before you can even begin to work out a strategy for that particular challenge however, you’ll have to survive through the narrow hall which harbors a duo of Haunted Portraits. From where you begin, turn to your immediate right and you’ll manage to spot a Portrait hanging on the wall. Use it against the first Haunted Portrait up ahead to your left to take it out in just two hits, saving the final swing to catch the next Haunted Portrait to the right of the vase by surprise before working it with your fists. Once you’ve done that, smash open the vase to find three Miniature Cooper! Soup Tins and then send them out to clear a path through the Mummies at the end of the Hall where you should manage to sneak by to the Challenge Door.
The Upper Corridors will pit you against a rather sinister challenge: you’ll have to squeeze past a crowd of tight knit traitorous Ghoulies without getting hit, and given your current single unit of health this is much easier said than done. Before you can even begin to work out a strategy for that particular challenge however, you’ll have to survive through the narrow hall which harbors a duo of Haunted Portraits. From where you begin, turn to your immediate right and you’ll manage to spot a Portrait hanging on the wall. Use it against the first Haunted Portrait up ahead to your left to take it out in just two hits, saving the final swing to catch the next Haunted Portrait to the right of the vase by surprise before working it with your fists. Once you’ve done that, smash open the vase to find three Miniature Cooper! Soup Tins and then send them out to clear a path through the Mummies at the end of the Hall where you should manage to sneak by to the Challenge Door.
BATHROOM
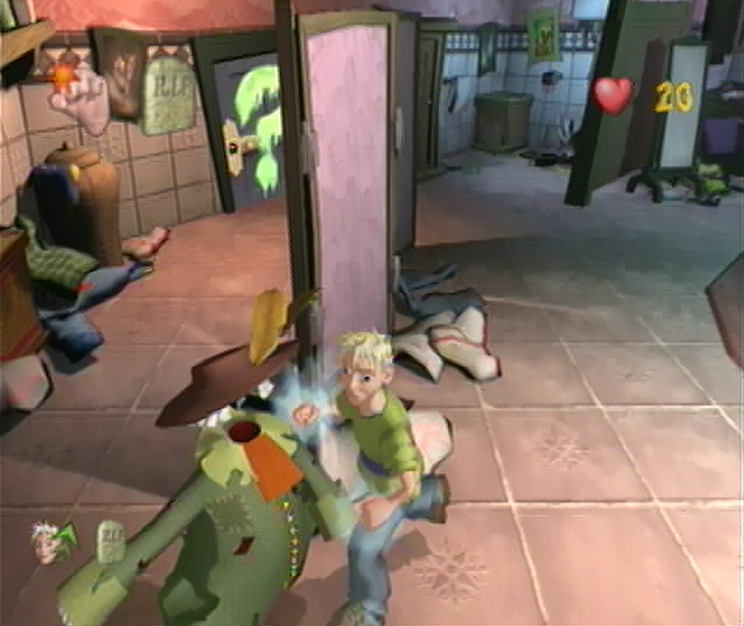
![]() The most important thing to avoid in the Bathroom is getting too close to the Challenge Door and starting the challenge too early, otherwise you’ll be given a bit of time to explore the room which we’ll use to pick off the Haunted Coats found in a heap around the room. From where you start off, turn around and break open the laundry hamper to find a One-Hit Wonder! and Turbo Cooper! Soup Tin inside. Pick up the Super Soups and then work your way past the laundry cart to the right where you’ll find and defeat the first Haunted Coat. Making sure to avoid getting too close to the challenge door, work your way to the toilet found to the right on the opposite side of the changing panels. Once you’ve done that, avoid crossing directly in front of the challenge door and instead work your way toward the bathtub in the center of the room, then go around the changing panel to the left to find the next Haunted Coat hidden behind the middle changing panel.
The most important thing to avoid in the Bathroom is getting too close to the Challenge Door and starting the challenge too early, otherwise you’ll be given a bit of time to explore the room which we’ll use to pick off the Haunted Coats found in a heap around the room. From where you start off, turn around and break open the laundry hamper to find a One-Hit Wonder! and Turbo Cooper! Soup Tin inside. Pick up the Super Soups and then work your way past the laundry cart to the right where you’ll find and defeat the first Haunted Coat. Making sure to avoid getting too close to the challenge door, work your way to the toilet found to the right on the opposite side of the changing panels. Once you’ve done that, avoid crossing directly in front of the challenge door and instead work your way toward the bathtub in the center of the room, then go around the changing panel to the left to find the next Haunted Coat hidden behind the middle changing panel.
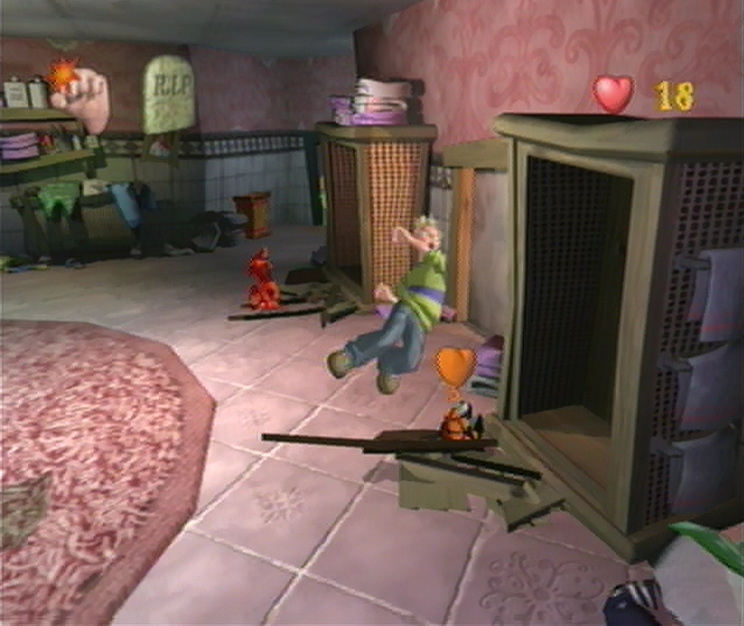
![]() Once you’ve taken care of the third Haunted Coat, work your way back to the bathtub once more and you’ll manage to spot the fourth coat wedged in between the shower and a wardrobe to the right. Take care of this Haunted Coat quickly, and then proceed to the shower for our final confrontation. Your power-ups will begin to wane here, so take out the final Haunted Coat quickly; the challenge for the Bathroom will start after you’ve done so. Once you’ve regained control, work your way back into the center of the room to deal with the Ninja Imps who are just starting their meditation. If you defeat these Imps now, you’ll take them out with just three hits, which can’t be done after they’ve grown. During this phase a few Skeletons will also join in, so be sure to watch out for the light bulb over their heads, as this indicates that they’ll start to grab commodities to fashion as weapons! Prevent them from acting on this thought with a few well timed blows and you’ll manage to sort them out.
Once you’ve taken care of the third Haunted Coat, work your way back to the bathtub once more and you’ll manage to spot the fourth coat wedged in between the shower and a wardrobe to the right. Take care of this Haunted Coat quickly, and then proceed to the shower for our final confrontation. Your power-ups will begin to wane here, so take out the final Haunted Coat quickly; the challenge for the Bathroom will start after you’ve done so. Once you’ve regained control, work your way back into the center of the room to deal with the Ninja Imps who are just starting their meditation. If you defeat these Imps now, you’ll take them out with just three hits, which can’t be done after they’ve grown. During this phase a few Skeletons will also join in, so be sure to watch out for the light bulb over their heads, as this indicates that they’ll start to grab commodities to fashion as weapons! Prevent them from acting on this thought with a few well timed blows and you’ll manage to sort them out.
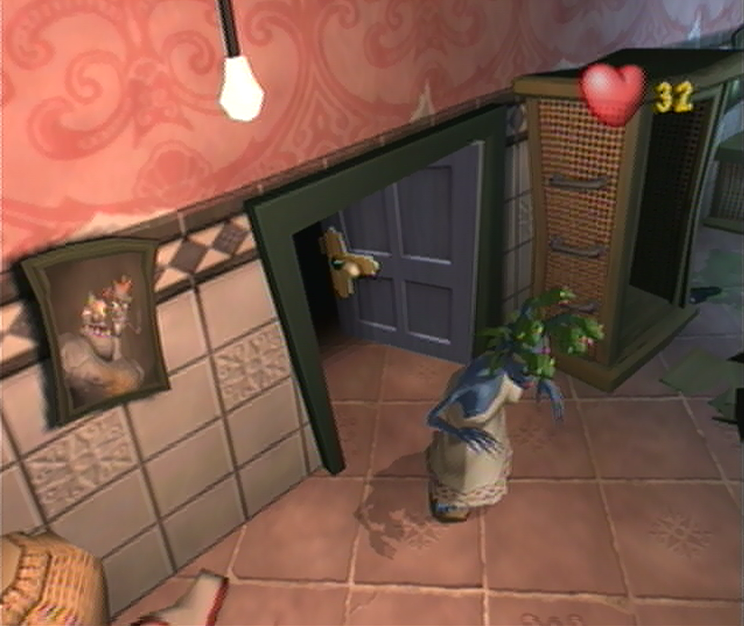
![]() If you find yourself overwhelmed, or you’ve taken a few beatings and your stamina is starting to linger, there are a few sure fire ways of turning things around. If your energy is getting too low, you can find a number of Energy Boost! Tins on the inside the closets dotting the perimeter once the Ninja Imps have burst forth from them. If you’re looking to get control over the Ghoulies you’ll find a trip towards the laundry hamper to the left of the Challenge Door will provide you with a Miniature Cooper! and Traitor Fever! Tin. Once you’ve managed to clear the room of all its inhabitants, the Challenge Door will unlock and a single Medusa will wander out, effectively guarding your only exit. From here, carry on back to where we took out our first Haunted Coat and you’ll manage to spot a standing mirror in front of the changing panels which harbors a Shocker Blocker! Tin inside. Once you’ve shattered the glass, pick up the Tin and use it to sneak past the Medusa.
If you find yourself overwhelmed, or you’ve taken a few beatings and your stamina is starting to linger, there are a few sure fire ways of turning things around. If your energy is getting too low, you can find a number of Energy Boost! Tins on the inside the closets dotting the perimeter once the Ninja Imps have burst forth from them. If you’re looking to get control over the Ghoulies you’ll find a trip towards the laundry hamper to the left of the Challenge Door will provide you with a Miniature Cooper! and Traitor Fever! Tin. Once you’ve managed to clear the room of all its inhabitants, the Challenge Door will unlock and a single Medusa will wander out, effectively guarding your only exit. From here, carry on back to where we took out our first Haunted Coat and you’ll manage to spot a standing mirror in front of the changing panels which harbors a Shocker Blocker! Tin inside. Once you’ve shattered the glass, pick up the Tin and use it to sneak past the Medusa.
SCHOOLROOM
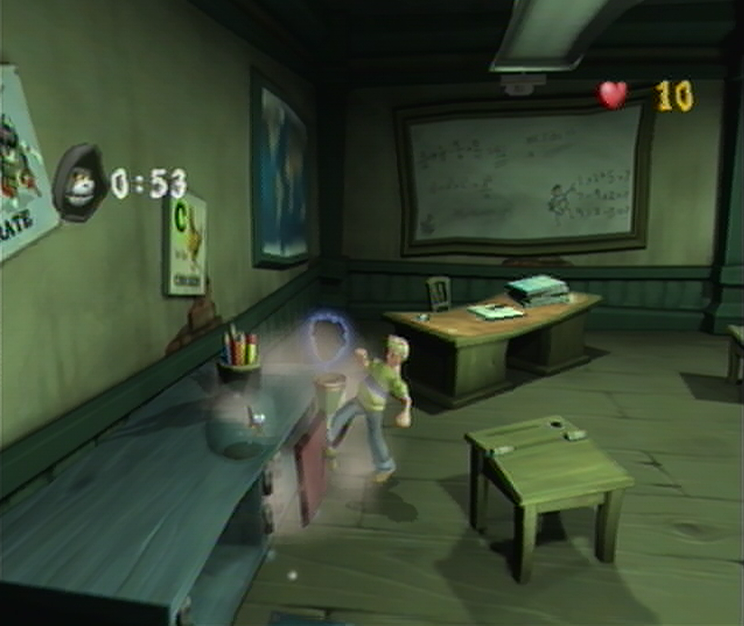
![]() Things aren’t shaping up too well for Cooper as he wanders into the Schoolroom, receiving a pathetic inkling of health that won’t see him past a single Medusa conflict and adhering to a strict time limit from the Reaper simply spells disaster. However, if you go about the proper strategy you’ll manage to skip class without any confrontation. From where you start off, venture on ahead and you’ll spot a small classroom area. If you look to your left you’ll manage to spot a small green shelving unit next to the wall with red doors harboring a globe and a fishbowl atop. Ignore the rules about keeping the place pristine and smash open the red drawer closest to the teachers desk; doing so will expose an Invisibility Tin. Since you’ve broken the rules, the Reaper will be summoned, but he can’t catch what he can’t see! Make your way past the first two Medusas through the bookish corridors, then work your way past the bulletin board to the exit and sneak by the watchful Reaper!
Things aren’t shaping up too well for Cooper as he wanders into the Schoolroom, receiving a pathetic inkling of health that won’t see him past a single Medusa conflict and adhering to a strict time limit from the Reaper simply spells disaster. However, if you go about the proper strategy you’ll manage to skip class without any confrontation. From where you start off, venture on ahead and you’ll spot a small classroom area. If you look to your left you’ll manage to spot a small green shelving unit next to the wall with red doors harboring a globe and a fishbowl atop. Ignore the rules about keeping the place pristine and smash open the red drawer closest to the teachers desk; doing so will expose an Invisibility Tin. Since you’ve broken the rules, the Reaper will be summoned, but he can’t catch what he can’t see! Make your way past the first two Medusas through the bookish corridors, then work your way past the bulletin board to the exit and sneak by the watchful Reaper!
INFIRMARY

![]() Luckily the Infirmary is the final room we’ll have to clear before granting ourselves a breath of fresh air in the Cottage Garden, stick around though, this will certainly massage your Ghoulies Defeated Score! Right, from where you start off you’ll manage to spot a trolley in the center of the room with a pile of bottles ontop. Grab these decanters first as to avoid destroying them too early and then start tossing them toward the Medusa in this area; you should manage to drain all her health with all 6 bottles without issue. With that out the way, return to the trolley and plant your foot in the center of it, doing so will expose a Freeze Ghoulies! Tin that we’ll leave alone for now. Now that everything is set up, it’s time to knock them down by speaking with Fiddlesworth in the middle of the ward here so that he’ll supply us with Little Willy’s Water Pistol once more. The second you’ve finished the challenge will begin, pitting you against all the Zombies you can handle in a single minute!
Luckily the Infirmary is the final room we’ll have to clear before granting ourselves a breath of fresh air in the Cottage Garden, stick around though, this will certainly massage your Ghoulies Defeated Score! Right, from where you start off you’ll manage to spot a trolley in the center of the room with a pile of bottles ontop. Grab these decanters first as to avoid destroying them too early and then start tossing them toward the Medusa in this area; you should manage to drain all her health with all 6 bottles without issue. With that out the way, return to the trolley and plant your foot in the center of it, doing so will expose a Freeze Ghoulies! Tin that we’ll leave alone for now. Now that everything is set up, it’s time to knock them down by speaking with Fiddlesworth in the middle of the ward here so that he’ll supply us with Little Willy’s Water Pistol once more. The second you’ve finished the challenge will begin, pitting you against all the Zombies you can handle in a single minute!
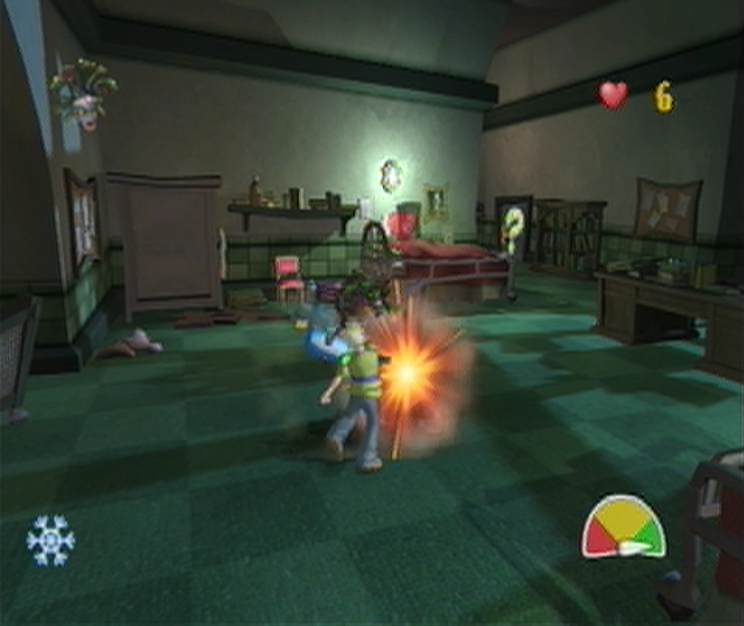
![]() Rather than rushing out to meet the undead, it’s wise to stay in the first area where you began and let the Zombies come to you. Be quick on the trigger when dealing with multiple Ghoulies; if you find yourself running low on water just hit the leftmost locker door behind the trolley in order to find a Super Weapons! Soup Tin inside. Once the time limit manages to finish and you’ve dealt with all of the Zombies, you’ll only have the Medusa in the next room to deal with to solve the challenge. To make matters easiest, let’s grab the Freeze Ghoulies! Soup Tin that we found on the Trolley and use the blunt of our Liquid Squirter to take our the Medusa with 3 swings. Once you’ve done that,just work your way toward the Challenge Door at the left side of the room and then use the squirter again to take out the duo of Frozen Haunted Chairs waiting for you. Now that you’ve managed to clear the room of all sickly Ghoulies, it’s time to leave the Infirmary and make our way to the Cottage Garden.
Rather than rushing out to meet the undead, it’s wise to stay in the first area where you began and let the Zombies come to you. Be quick on the trigger when dealing with multiple Ghoulies; if you find yourself running low on water just hit the leftmost locker door behind the trolley in order to find a Super Weapons! Soup Tin inside. Once the time limit manages to finish and you’ve dealt with all of the Zombies, you’ll only have the Medusa in the next room to deal with to solve the challenge. To make matters easiest, let’s grab the Freeze Ghoulies! Soup Tin that we found on the Trolley and use the blunt of our Liquid Squirter to take our the Medusa with 3 swings. Once you’ve done that,just work your way toward the Challenge Door at the left side of the room and then use the squirter again to take out the duo of Frozen Haunted Chairs waiting for you. Now that you’ve managed to clear the room of all sickly Ghoulies, it’s time to leave the Infirmary and make our way to the Cottage Garden.
DUNFIDDLIN COTTAGE GARDEN
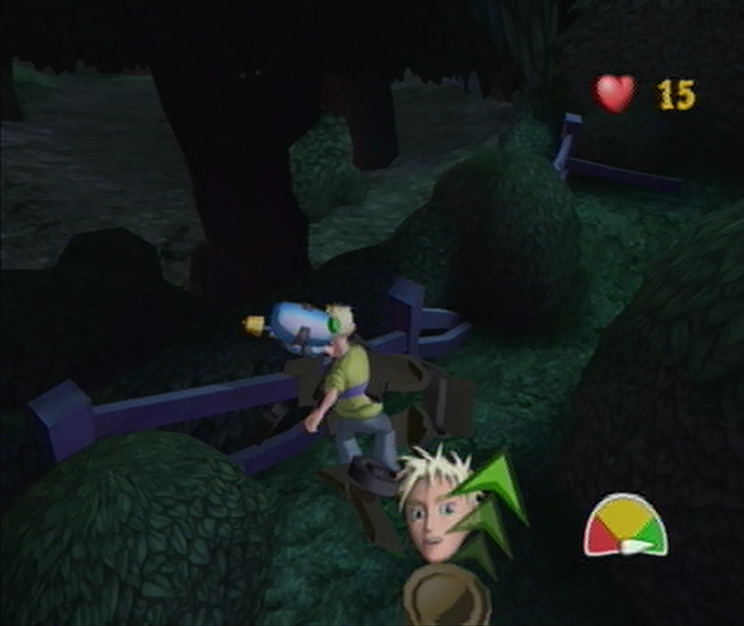
![]() Now that you’ve effectively treated the Zombies into increasing your Ghoulies Defeated score, it’s likely taken a toll on your patience, so we’ll ignore the Ghoulies here and instead attempt to dart through the Garden as quickly as possible to benefit our Time Taken score. From where you start off, let the duo of traitorous Zombies deal with eachother and venture off to the left where you’ll spot an upturned wheelbarrow behind a bush. Smash the wheelbarrow with your Water Pistol and you’ll find a Turbo Cooper! Soup Tin. Grab it and continue up the ascending Garden path ahead while ignoring any Ghouly that hops out of the bushes to hinder your progress. Once you’ve made it around the large Oak tree in the center you’ll spot a standing Coffin blocking the path as it begins to climb steadily. Do what you can to avoid getting too close to this new breed of Ghouly and approach Fiddlesworth at the foot of the Greenhouse and enter inside.
Now that you’ve effectively treated the Zombies into increasing your Ghoulies Defeated score, it’s likely taken a toll on your patience, so we’ll ignore the Ghoulies here and instead attempt to dart through the Garden as quickly as possible to benefit our Time Taken score. From where you start off, let the duo of traitorous Zombies deal with eachother and venture off to the left where you’ll spot an upturned wheelbarrow behind a bush. Smash the wheelbarrow with your Water Pistol and you’ll find a Turbo Cooper! Soup Tin. Grab it and continue up the ascending Garden path ahead while ignoring any Ghouly that hops out of the bushes to hinder your progress. Once you’ve made it around the large Oak tree in the center you’ll spot a standing Coffin blocking the path as it begins to climb steadily. Do what you can to avoid getting too close to this new breed of Ghouly and approach Fiddlesworth at the foot of the Greenhouse and enter inside.
GREENHOUSE
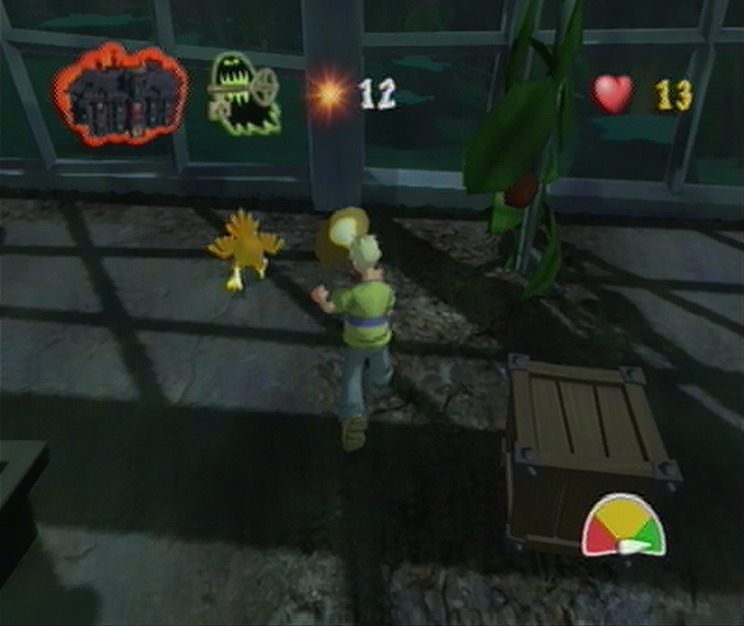
![]() Before you step into the center of the Greenhouse, turn around and you’ll spot a barrel in a corner next to the door; smash it open and you’ll uncover a Freeze Ghoulies! Tin – leave for the time being. Once you’re ready, walk into the main area and the challenge will begin, allowing you to spin around and pick up the tin before working your way through the frozen labyrinth. For the most efficient route, take an immediate left heading toward the challenge door and then take a right once you’ve managed to spot the first Vampire Chicken next to a crate. Carry on and you’ll find an open space with an alluring Energy Boost! Tin. Instead of picking it up, go around the perimeter to the left towards the corner. Once the maze permits, take another left and you’ll find yourself in front of the Challenge Door. Take one final left to spot a large crate in the labyrinth next to a glowing Vampire Chicken. Take out the Vampire Chicken using Ol’ Edna and then make a hasty escape before it’s too late!
Before you step into the center of the Greenhouse, turn around and you’ll spot a barrel in a corner next to the door; smash it open and you’ll uncover a Freeze Ghoulies! Tin – leave for the time being. Once you’re ready, walk into the main area and the challenge will begin, allowing you to spin around and pick up the tin before working your way through the frozen labyrinth. For the most efficient route, take an immediate left heading toward the challenge door and then take a right once you’ve managed to spot the first Vampire Chicken next to a crate. Carry on and you’ll find an open space with an alluring Energy Boost! Tin. Instead of picking it up, go around the perimeter to the left towards the corner. Once the maze permits, take another left and you’ll find yourself in front of the Challenge Door. Take one final left to spot a large crate in the labyrinth next to a glowing Vampire Chicken. Take out the Vampire Chicken using Ol’ Edna and then make a hasty escape before it’s too late!
POTTING ROOM
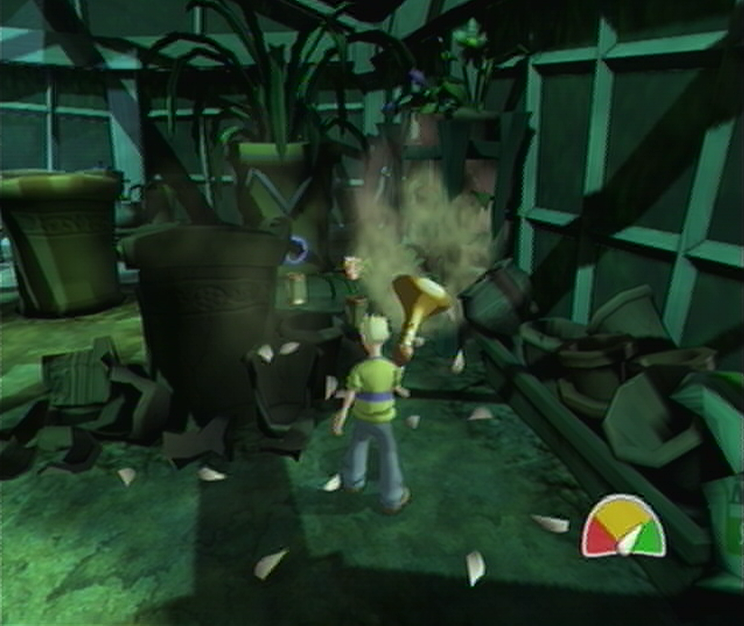
![]() The Potting Room is really going to test your mettle, and appropriately so as it houses the first piece of the illusive Baron Rhyme! Before you go running gingerly up to it however, let’s have a proper strategy in mind! As you start off, carry on forward until you’ve come across a shattered pot with a shelving unit just ahead on the right side of the room. Make quick work of it using Ol’ Edna and you’ll expose an Invisible Cooper! and Turbo Cooper! Soup Tins respectively, which we’ll leave by the wayside for the time being. Right, now we’ll just need to concern ourselves with walking blindly into an obvious trap by venturing forward and picking up the first piece of the Baron’s Rhyme between the two far tables. As soon as you’ve done that you’ll find yourself ambushed by a twin tag team of Vampires, Skeletons and Vampire Chickens from within the center of the room. Akin to the Sitting Room, this is largely a battle based on the “Next-one-different” scheme.
The Potting Room is really going to test your mettle, and appropriately so as it houses the first piece of the illusive Baron Rhyme! Before you go running gingerly up to it however, let’s have a proper strategy in mind! As you start off, carry on forward until you’ve come across a shattered pot with a shelving unit just ahead on the right side of the room. Make quick work of it using Ol’ Edna and you’ll expose an Invisible Cooper! and Turbo Cooper! Soup Tins respectively, which we’ll leave by the wayside for the time being. Right, now we’ll just need to concern ourselves with walking blindly into an obvious trap by venturing forward and picking up the first piece of the Baron’s Rhyme between the two far tables. As soon as you’ve done that you’ll find yourself ambushed by a twin tag team of Vampires, Skeletons and Vampire Chickens from within the center of the room. Akin to the Sitting Room, this is largely a battle based on the “Next-one-different” scheme.
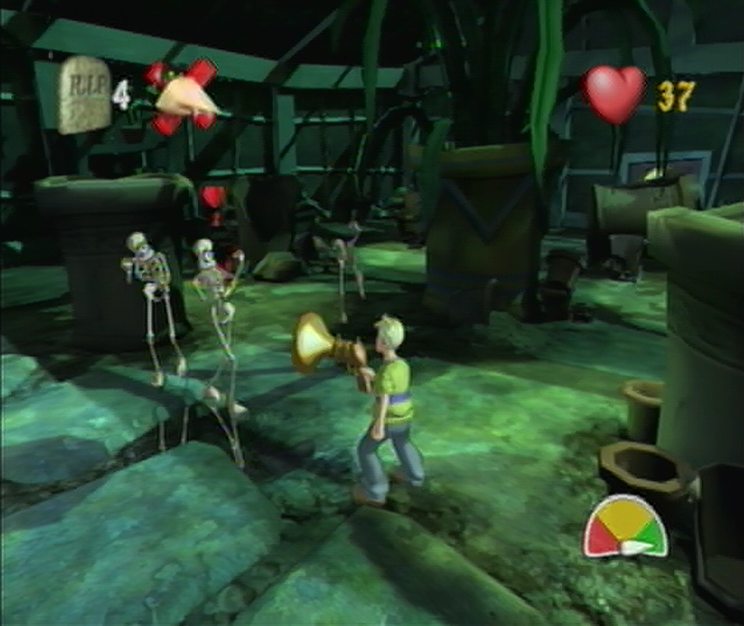
![]() Things aren’t quite evenly matched across the waves of Ghoulies either, as each breed will need special attention in order to ensure that you don’t accidentally knock off the same enemy twice. The Vampire Chickens will cause you the most trouble in this battle, as they only require one hit to defeat and you’ll find them getting in the way constantly. Skeletons are fairly easy to defeat as well, with four successful shots needed to take them out for good. The most difficult to defeat in this room is the newly found Vampire, as she’s got a sturdy Coffin door that she’ll use to defend herself with. You’ll have to approach her so that she opens her door – without getting hit, mind – and then land two successful shots of Garlic to take her down. Rush back to the Super Soups and grab only the Invisible Cooper! Tin. The order that you’ll need to follow is Vampire Chicken, Skeleton, Vampire, Vampire Chicken, Skeleton, and then Vampire to solve the challenge before you take out the remaining Skeleton twins.
Things aren’t quite evenly matched across the waves of Ghoulies either, as each breed will need special attention in order to ensure that you don’t accidentally knock off the same enemy twice. The Vampire Chickens will cause you the most trouble in this battle, as they only require one hit to defeat and you’ll find them getting in the way constantly. Skeletons are fairly easy to defeat as well, with four successful shots needed to take them out for good. The most difficult to defeat in this room is the newly found Vampire, as she’s got a sturdy Coffin door that she’ll use to defend herself with. You’ll have to approach her so that she opens her door – without getting hit, mind – and then land two successful shots of Garlic to take her down. Rush back to the Super Soups and grab only the Invisible Cooper! Tin. The order that you’ll need to follow is Vampire Chicken, Skeleton, Vampire, Vampire Chicken, Skeleton, and then Vampire to solve the challenge before you take out the remaining Skeleton twins.

![]() Before we turn in Ol’ Edna to Fiddlesworth, we’ll use her for one final task by smashing the pots just to the right of the Challenge Door to reveal a pair of Extra Time! Soup Tins. With that out of the way we’ll return to Fiddlesworth only to have the Baron send in a Hunchback from the ceiling. As soon as the battle begins we’ll have to grab both Extra Time! Soup Tins and make our way to the shelf to pick up the remaining Turbo Cooper! Tin. Once you’ve managed to bowl Hunchy over, it’s likely he’ll bend over and protect his face with both hands rather than defending with one. It won’t matter if you give him plenty of space in this state, instead just wail on him until he turns red and comes up swinging. Avoid getting in the way of his windmill maneuver and wait until he’s spun himself dizzy before laying it on thick. If you can’t manage to take out the Hunchback before the Reaper shows, just lead the him over to Hunchy and then make a quick escape when he’s managed his touch of death!
Before we turn in Ol’ Edna to Fiddlesworth, we’ll use her for one final task by smashing the pots just to the right of the Challenge Door to reveal a pair of Extra Time! Soup Tins. With that out of the way we’ll return to Fiddlesworth only to have the Baron send in a Hunchback from the ceiling. As soon as the battle begins we’ll have to grab both Extra Time! Soup Tins and make our way to the shelf to pick up the remaining Turbo Cooper! Tin. Once you’ve managed to bowl Hunchy over, it’s likely he’ll bend over and protect his face with both hands rather than defending with one. It won’t matter if you give him plenty of space in this state, instead just wail on him until he turns red and comes up swinging. Avoid getting in the way of his windmill maneuver and wait until he’s spun himself dizzy before laying it on thick. If you can’t manage to take out the Hunchback before the Reaper shows, just lead the him over to Hunchy and then make a quick escape when he’s managed his touch of death!
Navigation:
Chapter 1: The Rescue
Chapter 2: The Restoration
Chapter 3: The Riddle
-3-1: Fetching up the First Verse
-3-2: Second Stanza in the Stables
-3-3: Well Versed in Backtracking
-3-4: Don’t Fear the Reaper
-3-5: Method to the Madness
-3-6: Requisite for a Reckoning
Chapter 4: The Reckoning
Chapter 5: The Race
A STABLEHAND NEEDS A STABLE HAND
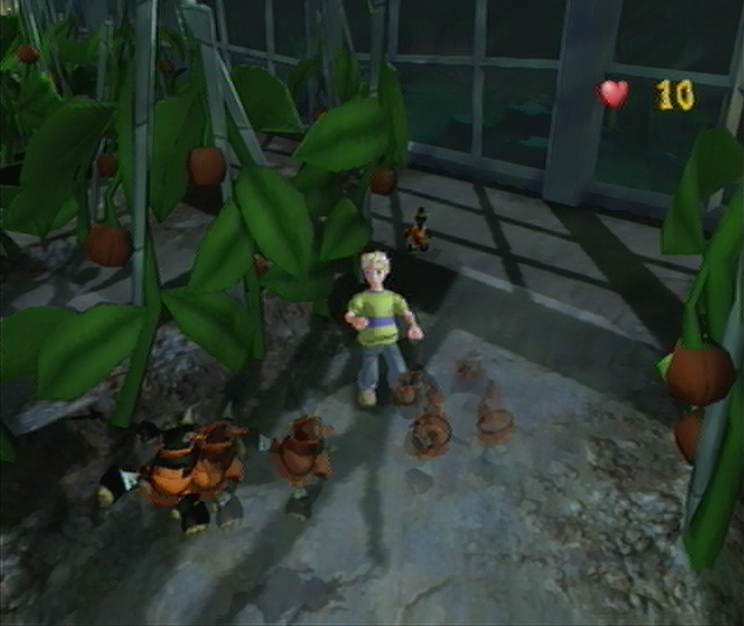
![]() Back in the Greenhouse you’ll be tasked with working your way through the maze once more, but this time your efforts are somewhat hindered as Ninja Imps smash through the glass to confront you at various stages throughout. You’ll find a few Energy Boost! Soup Tins scattered around, but only in feeble increments; you’ll have to really on your own nimble skill to escape the Ninja Imps here. The only bit of help you’ll find is collecting the Shocker Blocker! Tin found just before the large open area with a Scary Shock waiting underneath the soil. Regardless, you should manage to preserve your health if you find yourself amidst a brawl. Don’t get overwhelmed if you’re suddenly surrounded by Imps, a single kick is enough to send them into their dizzied state, so use this to give yourself more leeway as you plot your escape route while a few are temporarily paralyzed in this mode. Once you manage to make it through the onslaught just carry on through the open Challenge Door.
Back in the Greenhouse you’ll be tasked with working your way through the maze once more, but this time your efforts are somewhat hindered as Ninja Imps smash through the glass to confront you at various stages throughout. You’ll find a few Energy Boost! Soup Tins scattered around, but only in feeble increments; you’ll have to really on your own nimble skill to escape the Ninja Imps here. The only bit of help you’ll find is collecting the Shocker Blocker! Tin found just before the large open area with a Scary Shock waiting underneath the soil. Regardless, you should manage to preserve your health if you find yourself amidst a brawl. Don’t get overwhelmed if you’re suddenly surrounded by Imps, a single kick is enough to send them into their dizzied state, so use this to give yourself more leeway as you plot your escape route while a few are temporarily paralyzed in this mode. Once you manage to make it through the onslaught just carry on through the open Challenge Door.
DUNFIDDLIN COTTAGE GARDEN

![]() As you start off, work your way around the entrance of the greenhouse to the right and you’ll spot a troff leaning against the corner of Greenhouse. Work your way around this troff and you’ll discover a Turbo Cooper! Soup Tin, snatch it up quickly and we’ll begin our descent towards the Cottage on the opposite side of the Garden. Once you’ve managed to get nearer the large Oak tree you’ll spot a dozen Spiders or so waiting in the branches. Coax them out and then proceed to exterminate each one. You shouldn’t waste too much time traveling around the tree and having the Spiders plop down in the process. Once you’ve managed that, continue towards the gate that surrounds the Cottage and you’ll find a new Ghouly adversary; the volatile Worm! Working like a ticking time bomb, this Ghouly will come bounding after you ready to explode as indicated by the clock above its head. You’ll have to wait until at least 3 seconds remain before kicking it away where it’ll explode from afar.
As you start off, work your way around the entrance of the greenhouse to the right and you’ll spot a troff leaning against the corner of Greenhouse. Work your way around this troff and you’ll discover a Turbo Cooper! Soup Tin, snatch it up quickly and we’ll begin our descent towards the Cottage on the opposite side of the Garden. Once you’ve managed to get nearer the large Oak tree you’ll spot a dozen Spiders or so waiting in the branches. Coax them out and then proceed to exterminate each one. You shouldn’t waste too much time traveling around the tree and having the Spiders plop down in the process. Once you’ve managed that, continue towards the gate that surrounds the Cottage and you’ll find a new Ghouly adversary; the volatile Worm! Working like a ticking time bomb, this Ghouly will come bounding after you ready to explode as indicated by the clock above its head. You’ll have to wait until at least 3 seconds remain before kicking it away where it’ll explode from afar.
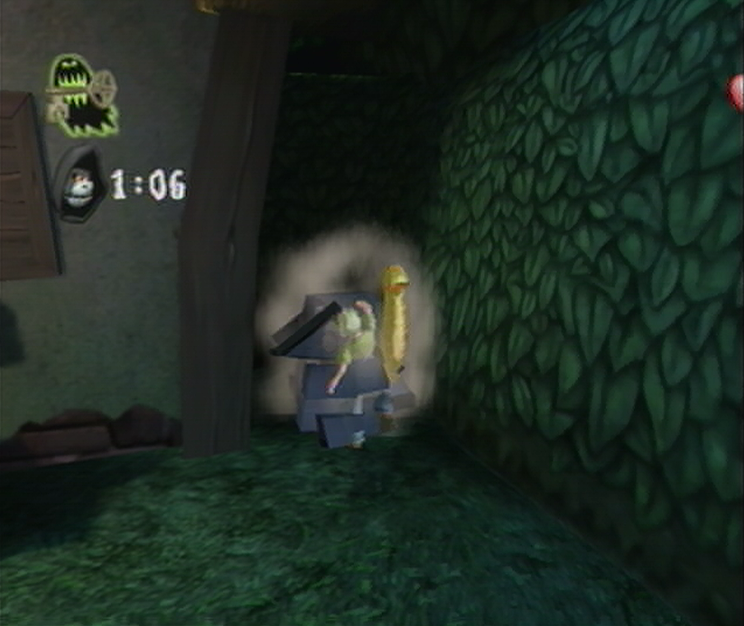
![]() If you give it too much recovery time and kick it before it reaches the final seconds, it’s likely that your kick won’t send it far enough for the timer to count down properly. Once you’ve managed to deal with the first Worm, it’s time to venture into the gate where you’ll meet the rest of the family, take a few jaunty steps toward the alluring Cottage door for the challenge to begin. This time you’ll be tasked with locating the correct Worm harboring the Ghouly Key and defeating it before 1 minute and 20 seconds winds down. Don’t panic as you scan the yard for the glowing Worm, as its craftily hidden and won’t bee in this assortment. Instead you should manage to spot a small pond on the right side of the yard, with a lone Honeycomb Hive tucked in between a large hedge and the Cottage itself ahead. Smash open the Hive and make quick work of the Glowing Worm inside to expose the Ghouly Key, which will solve the Challenge and grant you access to Dunfiddlin Cottage.
If you give it too much recovery time and kick it before it reaches the final seconds, it’s likely that your kick won’t send it far enough for the timer to count down properly. Once you’ve managed to deal with the first Worm, it’s time to venture into the gate where you’ll meet the rest of the family, take a few jaunty steps toward the alluring Cottage door for the challenge to begin. This time you’ll be tasked with locating the correct Worm harboring the Ghouly Key and defeating it before 1 minute and 20 seconds winds down. Don’t panic as you scan the yard for the glowing Worm, as its craftily hidden and won’t bee in this assortment. Instead you should manage to spot a small pond on the right side of the yard, with a lone Honeycomb Hive tucked in between a large hedge and the Cottage itself ahead. Smash open the Hive and make quick work of the Glowing Worm inside to expose the Ghouly Key, which will solve the Challenge and grant you access to Dunfiddlin Cottage.
DUNFIDDLIN COTTAGE
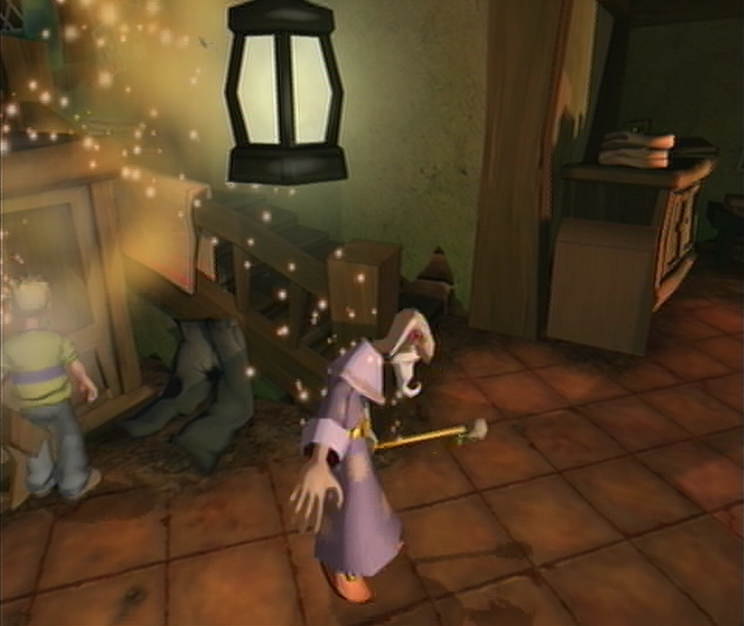
![]() From where you enter Dunfiddlin Cottage you’ll need to venture ahead to leave the Kitchen and enter the main living area. As you might have noticed from the lack of Ghoulies, this room harbors a Warlock that we’ll need to expose, though Fiddlesworth is somewhat a hoarder, so we have our work cut out for us. There are a number of places that the Warlock might find itself in, not limiting itself to the barrel and large chest to the right of this doorway, the cabinet wedged in between the staircases leading upstairs, the closet next to Fiddlesworths’ bed and the cabinet closest to the fireplace on the ground floor. If you manage to expose a few ill-placed Flying Imps in the process, deal with them quickly and continue searching. Once you’ve managed to expose the Warlock the Challenge will begin; you’ll have to deal with this manic magician using 20 hits or less! There are plenty of items at your disposal including the Television Set and chest of drawers upstairs that can be thrown from afar.
From where you enter Dunfiddlin Cottage you’ll need to venture ahead to leave the Kitchen and enter the main living area. As you might have noticed from the lack of Ghoulies, this room harbors a Warlock that we’ll need to expose, though Fiddlesworth is somewhat a hoarder, so we have our work cut out for us. There are a number of places that the Warlock might find itself in, not limiting itself to the barrel and large chest to the right of this doorway, the cabinet wedged in between the staircases leading upstairs, the closet next to Fiddlesworths’ bed and the cabinet closest to the fireplace on the ground floor. If you manage to expose a few ill-placed Flying Imps in the process, deal with them quickly and continue searching. Once you’ve managed to expose the Warlock the Challenge will begin; you’ll have to deal with this manic magician using 20 hits or less! There are plenty of items at your disposal including the Television Set and chest of drawers upstairs that can be thrown from afar.
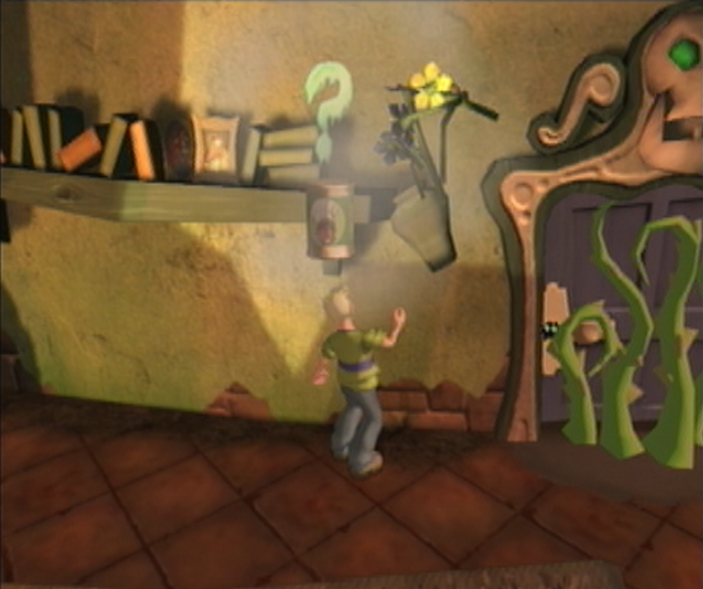
![]() You’ll have to intervene with your own fists as well, so either wait until the Warlock has finished his casting to work your way over to him before he disappears, or confront him as soon as he’s teleported to a location that’s too close for comfort. There’s also an Invisibility! Soup Tin located in a crate underneath the window to the Kitchen that can be used to sneak up on the Warlock, as well as a Knock Down Mania! Tin in a crate between the pink couch and wooden table in the center of the room. Once the Warlock is defeated the challenge will solve, but another waits us before we can exit the Cottage, so don’t attempt to leave just yet. Instead, venture back toward the fireplace and you should manage to spot a single cluttered shelf to the right, next to a curious looking door with a Skeletons’ face overhead. Approach this shelf and uppercut the rightmost area to smash open a flower pot to expose a Challenge Complete! Soup Tin that we’ll leave behind.
You’ll have to intervene with your own fists as well, so either wait until the Warlock has finished his casting to work your way over to him before he disappears, or confront him as soon as he’s teleported to a location that’s too close for comfort. There’s also an Invisibility! Soup Tin located in a crate underneath the window to the Kitchen that can be used to sneak up on the Warlock, as well as a Knock Down Mania! Tin in a crate between the pink couch and wooden table in the center of the room. Once the Warlock is defeated the challenge will solve, but another waits us before we can exit the Cottage, so don’t attempt to leave just yet. Instead, venture back toward the fireplace and you should manage to spot a single cluttered shelf to the right, next to a curious looking door with a Skeletons’ face overhead. Approach this shelf and uppercut the rightmost area to smash open a flower pot to expose a Challenge Complete! Soup Tin that we’ll leave behind.
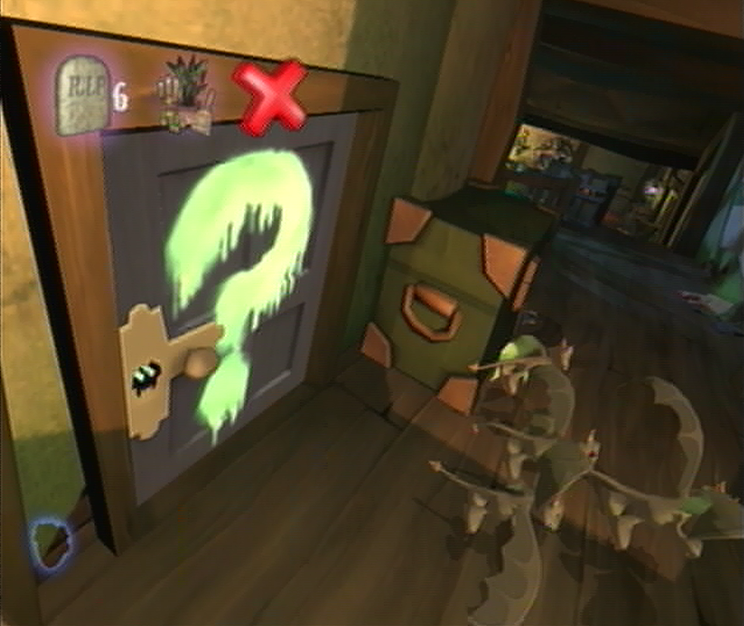
![]() Now that we’re ready to make extremely quick work of our new-found challenge, it’s time to get things started. From the cluttered shelf, work your way up either of the dual staircases to ascend toward Fiddlesworths’ resting area and ultimately through the thin hallway towards the alluring open Challenge Door. Once you’ve gotten close enough, four Flying Imps will roll out from within as the door slams behind them. For the purposes of this Challenge you’ll have to defeat at least 6 Ghoulies using Weapons only, a difficult prospect given our latest developments with the Warlock. Rather than scouring the floor for unused weapons, we’ll be tasked with returning to the thin shelf on the ground level and acquiring the Challenge Complete! Soup Tin to do away with the unnecessary expectations. While the challenge has been solved, the Ghoulies are still just as lively, so you’ll have to do your best to avoid taking any damage while working your way back up through the open Challenge Door.
Now that we’re ready to make extremely quick work of our new-found challenge, it’s time to get things started. From the cluttered shelf, work your way up either of the dual staircases to ascend toward Fiddlesworths’ resting area and ultimately through the thin hallway towards the alluring open Challenge Door. Once you’ve gotten close enough, four Flying Imps will roll out from within as the door slams behind them. For the purposes of this Challenge you’ll have to defeat at least 6 Ghoulies using Weapons only, a difficult prospect given our latest developments with the Warlock. Rather than scouring the floor for unused weapons, we’ll be tasked with returning to the thin shelf on the ground level and acquiring the Challenge Complete! Soup Tin to do away with the unnecessary expectations. While the challenge has been solved, the Ghoulies are still just as lively, so you’ll have to do your best to avoid taking any damage while working your way back up through the open Challenge Door.
WORKSHOP
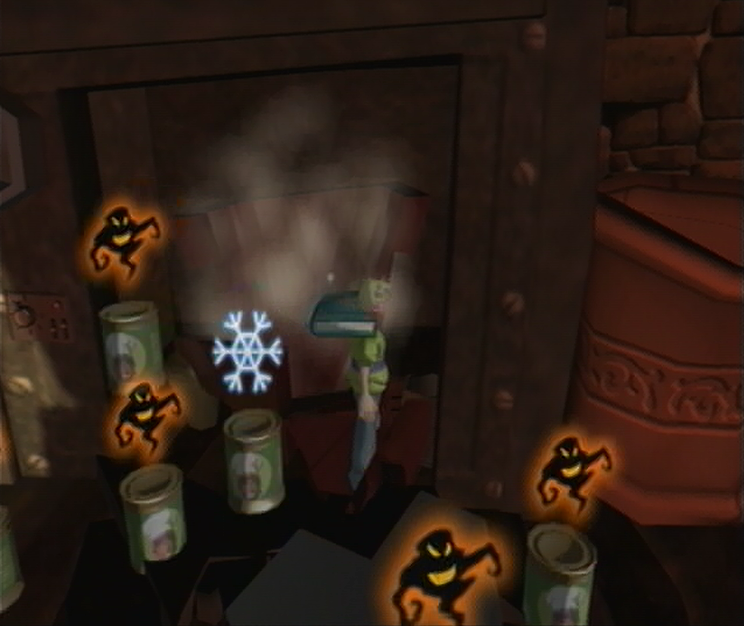
![]() To save ourselves the trouble later on, we’ll start out in the Workshop by grabbing the large Egyptian Urn to the left and cast it into the fire, doing so will take care of the Cursed Mummy hiding inside as well as add to our Ghoulies Defeated Score without a drawn out confrontation. Next, we’ll work our way to the right and break open the large Kiln door as well as the large pot inside to find a Freeze Ghoulies! Soup Tin amongst a flood of Unfavorable Soups. Avoid picking any of the Tins up and work your way around the large fire in the center of the room to the right in order to cast our final Egyptian Urn into the fire which can be found against a large pot next to the second mouth. If there’s any time remaining it would be wise to start cracking open the Rare branded pottery around the Workshop to expose a few Tins of Miniature Cooper! Soups, but otherwise there isn’t much to work with before the Challenge Door slams shut and you’ve found yourself with several Skeletons to contend with!
To save ourselves the trouble later on, we’ll start out in the Workshop by grabbing the large Egyptian Urn to the left and cast it into the fire, doing so will take care of the Cursed Mummy hiding inside as well as add to our Ghoulies Defeated Score without a drawn out confrontation. Next, we’ll work our way to the right and break open the large Kiln door as well as the large pot inside to find a Freeze Ghoulies! Soup Tin amongst a flood of Unfavorable Soups. Avoid picking any of the Tins up and work your way around the large fire in the center of the room to the right in order to cast our final Egyptian Urn into the fire which can be found against a large pot next to the second mouth. If there’s any time remaining it would be wise to start cracking open the Rare branded pottery around the Workshop to expose a few Tins of Miniature Cooper! Soups, but otherwise there isn’t much to work with before the Challenge Door slams shut and you’ve found yourself with several Skeletons to contend with!
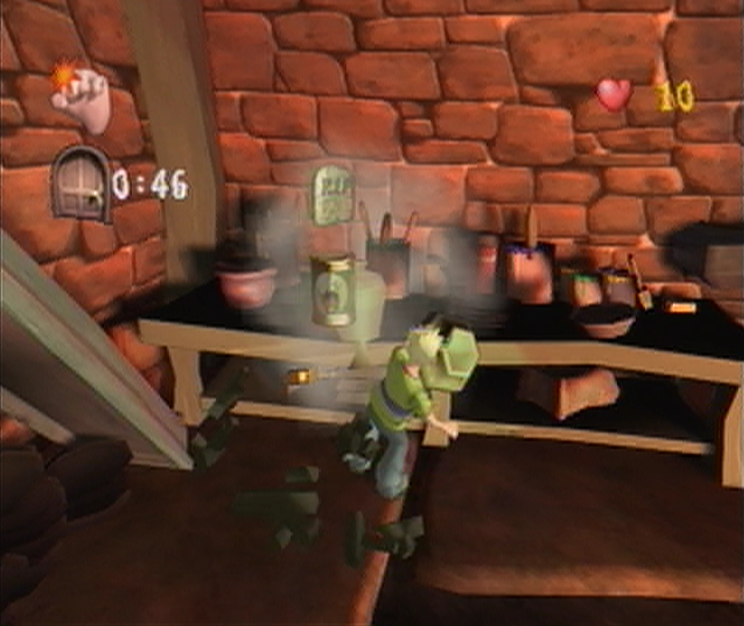
![]() We’ll need to work quickly to ensure that the Skeletons don’t get any “bright ideas” to start grabbing weaponry around the Workshop, so we’ll approach the workbench in the corner of the room across from the Kiln and to the left. Smash open the two slightly green bits of pottery on the left side of the table to expose a One-Hit Wonder! Soup Tin and crack open the Rare branded pots around the room as you lap around the central fire. Avoid the Unfavorable Soups and once you’ve made your way back, pick up the One-Hit Wonder! Soup Tin and start taking out the Skeletons! Be sure to target the Skeletons brandishing weaponry, but remain unbiased as you break bones throughout. Once the One-Hit Wonder! dissipates, work your way towards the Freeze Ghoulies! Tin while picking up Miniature Cooper! Soups along the way. Once the Skeletons have been frozen, activate the rest of the Miniature Coopers and make your escape once the clock winds down.
We’ll need to work quickly to ensure that the Skeletons don’t get any “bright ideas” to start grabbing weaponry around the Workshop, so we’ll approach the workbench in the corner of the room across from the Kiln and to the left. Smash open the two slightly green bits of pottery on the left side of the table to expose a One-Hit Wonder! Soup Tin and crack open the Rare branded pots around the room as you lap around the central fire. Avoid the Unfavorable Soups and once you’ve made your way back, pick up the One-Hit Wonder! Soup Tin and start taking out the Skeletons! Be sure to target the Skeletons brandishing weaponry, but remain unbiased as you break bones throughout. Once the One-Hit Wonder! dissipates, work your way towards the Freeze Ghoulies! Tin while picking up Miniature Cooper! Soups along the way. Once the Skeletons have been frozen, activate the rest of the Miniature Coopers and make your escape once the clock winds down.
FARMYARD

![]() You’ve got quite the heady task ahead as you emerge into the Farmyard, as you’ll be tasked with defeating a Jessie N’ Clyde trio with only 10 health alloted. Before you go pounding on the Workshop door to be let back in however, there’s a bit of a trick to dealing with these massive monsters. If you approach a Jessie N’ Clyde from where you stand, you’ll have the dual duo chase you about until they catch up. If you back up and place yourself behind the crumbly wall however, the duo will be unable to pass through and will forget about the entire incident, allowing you to venture back through and deal some more damage before hiding away like a coward. To get things started you’ll have to effectively lure your first Jessie N’ Clyde over and overstep its boundaries so that it turns around, then sneak up on it and start flailing away to take a good chip off its total energy. Once you’ve knocked the Jessie N’ Clyde to the ground, run back to your save haven and repeat the process over again.
You’ve got quite the heady task ahead as you emerge into the Farmyard, as you’ll be tasked with defeating a Jessie N’ Clyde trio with only 10 health alloted. Before you go pounding on the Workshop door to be let back in however, there’s a bit of a trick to dealing with these massive monsters. If you approach a Jessie N’ Clyde from where you stand, you’ll have the dual duo chase you about until they catch up. If you back up and place yourself behind the crumbly wall however, the duo will be unable to pass through and will forget about the entire incident, allowing you to venture back through and deal some more damage before hiding away like a coward. To get things started you’ll have to effectively lure your first Jessie N’ Clyde over and overstep its boundaries so that it turns around, then sneak up on it and start flailing away to take a good chip off its total energy. Once you’ve knocked the Jessie N’ Clyde to the ground, run back to your save haven and repeat the process over again.
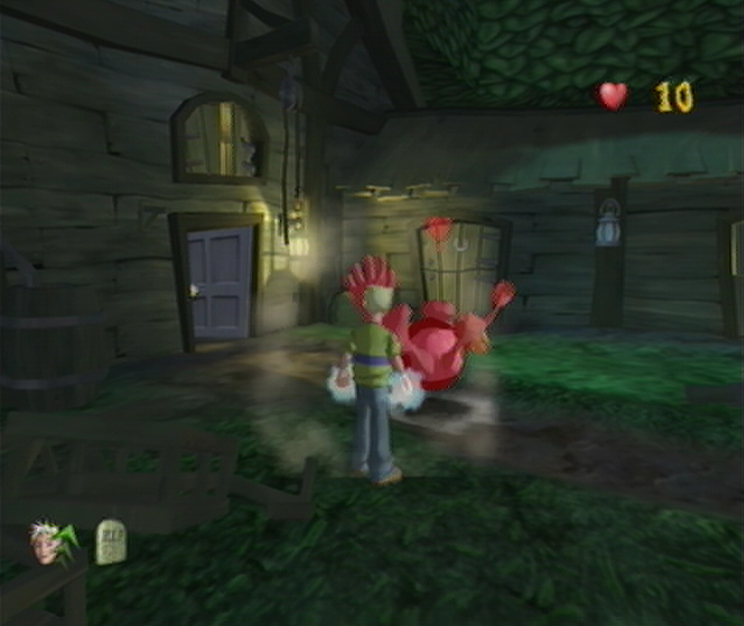
![]() You should manage to squeeze in about 20 points of damage with each confrontation; 10 will be dedicated to your initial punches and the other 10 will be dealt from your finishing move once you’ve put it in a dizzied state, which means that each Jessie N’ Clyde will need to be lured five times. Once you’ve managed to defeat the first Jessie N’ Clyde, and repeat this strategy on the second, you should manage to spot a wooden Harvester next to a wheel to the left in front of a vined Challenge Door where the second Jessie N’ Clyde was patrolling. Smash open the Harvester and you’ll find a One-Hit Wonder Tin inside which you’ll collect immediately before heading down the path ahead and spotting a single barrel next to a collection of hay bales to the right. Pick up the barrel once you have the One-Hit Wonder! Soup and cast it toward the final Jessie N’ Clyde. With any luck you should manage to bowl it over, allowing you to pass through the Challenge Door unhindered.
You should manage to squeeze in about 20 points of damage with each confrontation; 10 will be dedicated to your initial punches and the other 10 will be dealt from your finishing move once you’ve put it in a dizzied state, which means that each Jessie N’ Clyde will need to be lured five times. Once you’ve managed to defeat the first Jessie N’ Clyde, and repeat this strategy on the second, you should manage to spot a wooden Harvester next to a wheel to the left in front of a vined Challenge Door where the second Jessie N’ Clyde was patrolling. Smash open the Harvester and you’ll find a One-Hit Wonder Tin inside which you’ll collect immediately before heading down the path ahead and spotting a single barrel next to a collection of hay bales to the right. Pick up the barrel once you have the One-Hit Wonder! Soup and cast it toward the final Jessie N’ Clyde. With any luck you should manage to bowl it over, allowing you to pass through the Challenge Door unhindered.
FOUNDRY
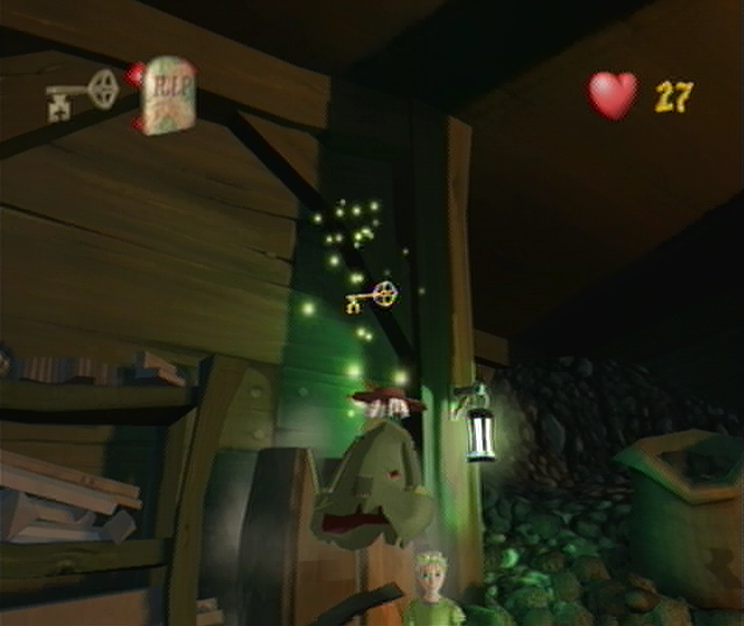
![]() This room can be especially difficult, given that the rules prohibit you from defeating any Ghoulies, even if you happen to unearth them while you search for the Key you’ll have to remain pacifistic to avoid summoning the Reaper. To start out, we’ll need to approach the Challenge Door but avoiding getting too close in order to break open the two crates that sit near the exit. In doing so you’ll expose a single 10 Energy Boost! Tin and a Traitor Fever! Soup. Once you’ve managed that, we’ll turn around and explore the floor to find the Key hidden inside one of the Rare branded items around the room, which can be found in plenty supply. If you happen to unearth the key after the destruction of your first Rare item, you’ll have to expose a Ghouly by breaking one of the other Rare items and then carry on towards the Challenge Door with your Ghouly in tow. Once you’ve gotten close enough, approach the Challenge Door and you’ll expose the Haunted Door that was hiding all along!
This room can be especially difficult, given that the rules prohibit you from defeating any Ghoulies, even if you happen to unearth them while you search for the Key you’ll have to remain pacifistic to avoid summoning the Reaper. To start out, we’ll need to approach the Challenge Door but avoiding getting too close in order to break open the two crates that sit near the exit. In doing so you’ll expose a single 10 Energy Boost! Tin and a Traitor Fever! Soup. Once you’ve managed that, we’ll turn around and explore the floor to find the Key hidden inside one of the Rare branded items around the room, which can be found in plenty supply. If you happen to unearth the key after the destruction of your first Rare item, you’ll have to expose a Ghouly by breaking one of the other Rare items and then carry on towards the Challenge Door with your Ghouly in tow. Once you’ve gotten close enough, approach the Challenge Door and you’ll expose the Haunted Door that was hiding all along!
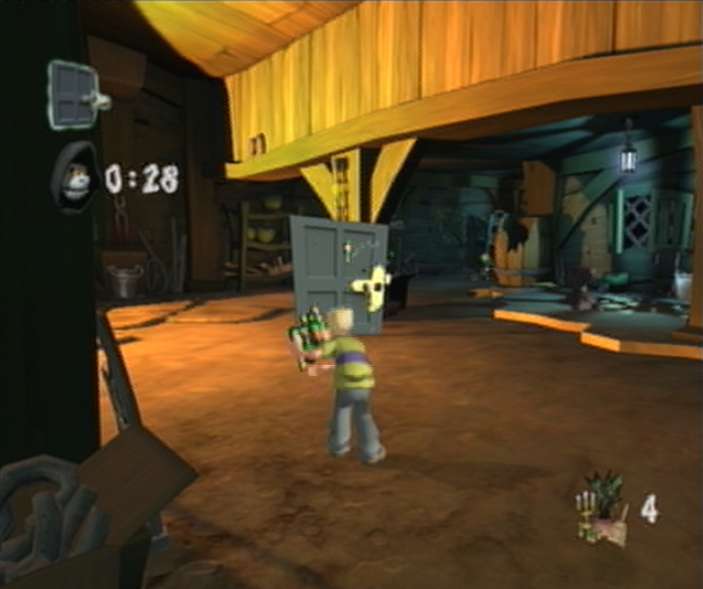
![]() Before the Haunted Door has a chance to catch up with you, run back towards the exposed Super Soups and collect them all. This will refill your Energy if you’ve had any difficulty in luring over your Ghouly adversary, and have them start fighting the Haunted Door once they’ve caught the fever. After you’ve managed this, turn around and grab the large metal keg next to the crates and toss it into the ensuing battle in order to take a healthy chunk out of the Haunted Doors energy. Head back towards the main area and you’ll spot a pillar to the left of the large fireplace; behind it you’ll find a collection of decanters and paint cans that you can use to keep the Haunted Door at bay. It’s likely that the Traior Fever has run its course, or your Ghouly adversary has seen its end, so it’s best to deal with the Haunted Door quickly here as it has its sights firmly on Cooper. Once you’ve defeated the Haunted Door, it’s just a short trek through the real Challenge Door.
Before the Haunted Door has a chance to catch up with you, run back towards the exposed Super Soups and collect them all. This will refill your Energy if you’ve had any difficulty in luring over your Ghouly adversary, and have them start fighting the Haunted Door once they’ve caught the fever. After you’ve managed this, turn around and grab the large metal keg next to the crates and toss it into the ensuing battle in order to take a healthy chunk out of the Haunted Doors energy. Head back towards the main area and you’ll spot a pillar to the left of the large fireplace; behind it you’ll find a collection of decanters and paint cans that you can use to keep the Haunted Door at bay. It’s likely that the Traior Fever has run its course, or your Ghouly adversary has seen its end, so it’s best to deal with the Haunted Door quickly here as it has its sights firmly on Cooper. Once you’ve defeated the Haunted Door, it’s just a short trek through the real Challenge Door.
STABLES
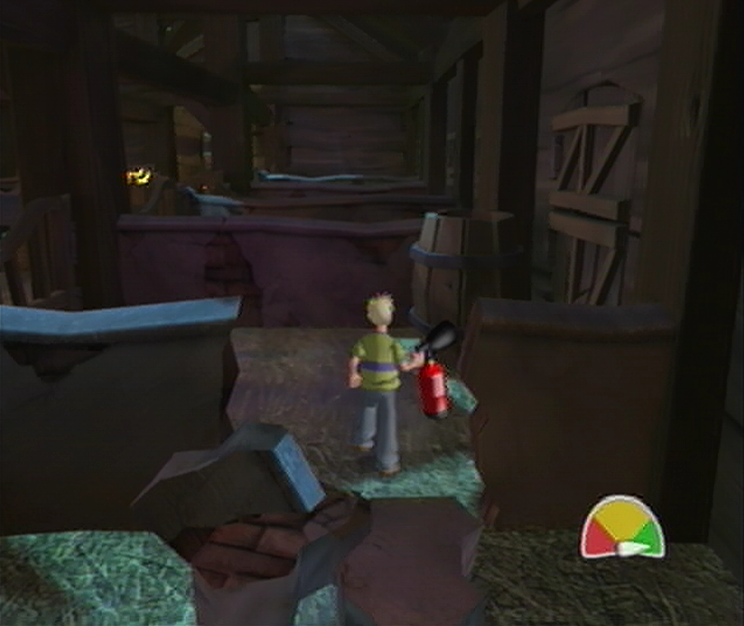
![]() As you start off, smash open the barrel to the left to expose a Fire Imp and a Shocker Blocker! Soup Tin and then work your way ahead to Mr. Ribs before the Imp has a chance to attack. Once you’ve gotten the Fire Extinguisher off of Ma’s assistant, we’ll turn back around and use it to make quick work of the Fire Imp before snatching up the Shocker Blocker and entering the rightmost stable. Using your Extinguisher, you’ll have to swing at the large crack found in the wall of the first Stable to send it crumbling, effectively creating a makeshift entrance that we’ll use to carry on to the second Stable. Before we get too carried away however, we’ll want to swing at the barrel in the second stall to expose the Fire Imp hiding inside and then deal with it quickly using the Extinguisher before breaking the next wall to the third Stable. This time the walls won’t crumble underneath the raw power of your Extinguisher, so you’ll have to break down the Stable door instead to enter the alleyway.
As you start off, smash open the barrel to the left to expose a Fire Imp and a Shocker Blocker! Soup Tin and then work your way ahead to Mr. Ribs before the Imp has a chance to attack. Once you’ve gotten the Fire Extinguisher off of Ma’s assistant, we’ll turn back around and use it to make quick work of the Fire Imp before snatching up the Shocker Blocker and entering the rightmost stable. Using your Extinguisher, you’ll have to swing at the large crack found in the wall of the first Stable to send it crumbling, effectively creating a makeshift entrance that we’ll use to carry on to the second Stable. Before we get too carried away however, we’ll want to swing at the barrel in the second stall to expose the Fire Imp hiding inside and then deal with it quickly using the Extinguisher before breaking the next wall to the third Stable. This time the walls won’t crumble underneath the raw power of your Extinguisher, so you’ll have to break down the Stable door instead to enter the alleyway.

![]() Take out Fire Imp overhead in this area, and then break open the barrel that blocks off the entire area just to the right of the stable door. After you’ve done that, smash open the large blue crate to the left and defeat the final Fire Imp in this area. Break open the stable door after the crate and you’ll find yourself on the opposite end in the first stable. Break through the weak spot of the stable wall found nearest the door, and you’ll find the next soft spot in the center of the next stable wall. Once you’re into the third stable, break open the large barrel and take care of the Fire Imp hidden inside. After breaking through one more stable wall, crack open the stable door in this area and take care of the aimless Imp flying about before heading into the stable directly across the way and cracking open the large blue crate for another Imp. Not too far to go now; locate the soft spot back near the stable door and pass through into the next stall where you’ll find the weak spot in the center.
Take out Fire Imp overhead in this area, and then break open the barrel that blocks off the entire area just to the right of the stable door. After you’ve done that, smash open the large blue crate to the left and defeat the final Fire Imp in this area. Break open the stable door after the crate and you’ll find yourself on the opposite end in the first stable. Break through the weak spot of the stable wall found nearest the door, and you’ll find the next soft spot in the center of the next stable wall. Once you’re into the third stable, break open the large barrel and take care of the Fire Imp hidden inside. After breaking through one more stable wall, crack open the stable door in this area and take care of the aimless Imp flying about before heading into the stable directly across the way and cracking open the large blue crate for another Imp. Not too far to go now; locate the soft spot back near the stable door and pass through into the next stall where you’ll find the weak spot in the center.
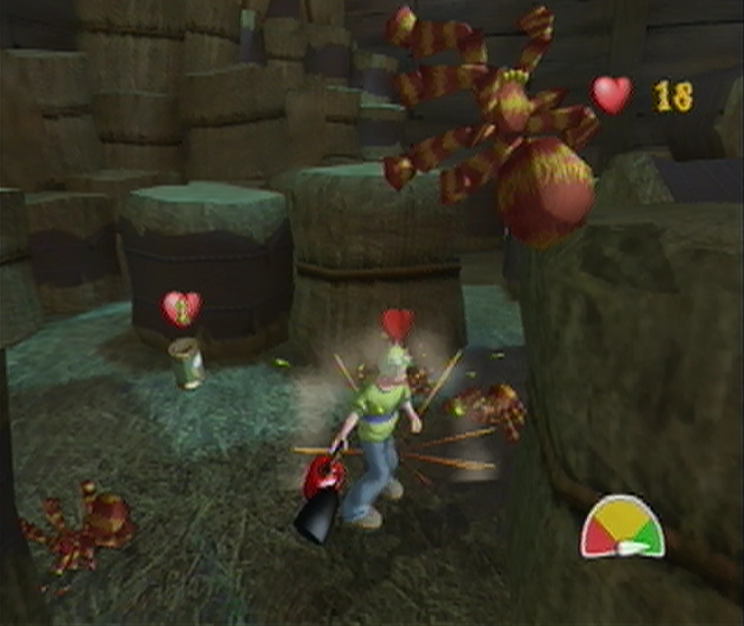
![]() Once you’ve made it through, locate and destroy the stable door in front of the fallen ceiling beam and then take care of the final Imp in this central alley. Find your way to the last leg of your journey by breaking the final stable door down on the opposite side of the alley. From here it’s just a matter of tackling down the weak center wall of this area and then extinguishing the last Imp found inside the barrel located in the corner. Now that we’ve finished up with that bit of leg work, we’re ready to carry on through the pillars of hay ahead, but not before we take care of the Spider waiting in the awning overhead and then have our Shocker Blocker! Tin protect us as a Dropper plops down from the ceiling. Once you’ve managed to slug all of the Spiders with your extinguisher to benefit your Ghoulies Defeated Score you’ll have the fruits of your labor tacked up on the wall ahead; the second bit of the Baron’s Rhyme! Approach it quickly and then get ready to leg it back to the entrance!
Once you’ve made it through, locate and destroy the stable door in front of the fallen ceiling beam and then take care of the final Imp in this central alley. Find your way to the last leg of your journey by breaking the final stable door down on the opposite side of the alley. From here it’s just a matter of tackling down the weak center wall of this area and then extinguishing the last Imp found inside the barrel located in the corner. Now that we’ve finished up with that bit of leg work, we’re ready to carry on through the pillars of hay ahead, but not before we take care of the Spider waiting in the awning overhead and then have our Shocker Blocker! Tin protect us as a Dropper plops down from the ceiling. Once you’ve managed to slug all of the Spiders with your extinguisher to benefit your Ghoulies Defeated Score you’ll have the fruits of your labor tacked up on the wall ahead; the second bit of the Baron’s Rhyme! Approach it quickly and then get ready to leg it back to the entrance!
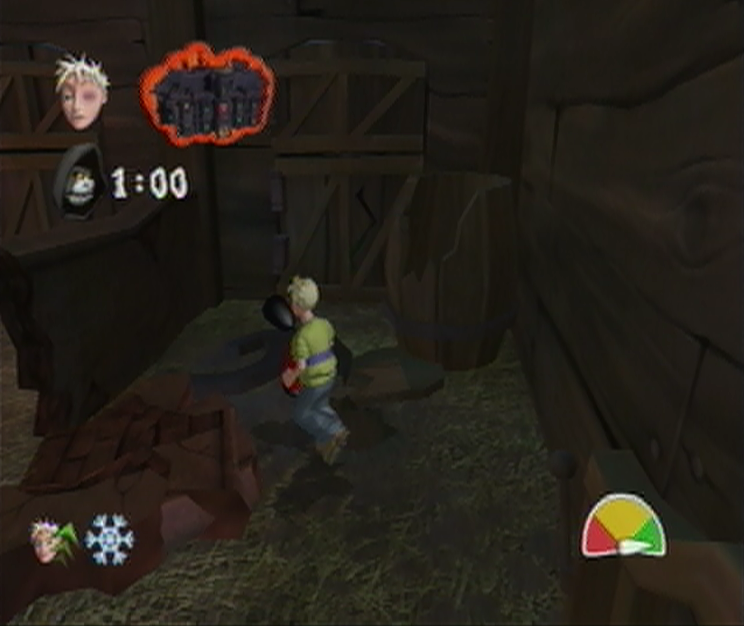
![]() Thanks to our compulsive trek through the Stables the first time, we won’t bump into any surprises on the way back, especially when they lead to a visit from the Reaper. From your current position, follow the wall to your right to locate and acquire a Freeze Ghoulies! Tin as well as a Turbo Cooper! Tin. Now it’s just a simple manner of retracing your steps through the Stables until you’ve emerged back at the entrance. If you’re especially quick, the Freeze Ghoulies and Turbo Cooper should have you covered until you’ve moved through three quarters of the Stable maze where you’ll have to deal with a Fire Imp that’s made it from the entrance of the room. Manage to complete the labyrinth soon after and you’ll confront the final duo of Fire Imps back where we met Mr. Ribs with the Extinguisher. With the Stables complete and time to spare we’ll duck out this room back through the Challenge Door where we’re sure to find a most difficult scenario waiting for us in the Foundry…
Thanks to our compulsive trek through the Stables the first time, we won’t bump into any surprises on the way back, especially when they lead to a visit from the Reaper. From your current position, follow the wall to your right to locate and acquire a Freeze Ghoulies! Tin as well as a Turbo Cooper! Tin. Now it’s just a simple manner of retracing your steps through the Stables until you’ve emerged back at the entrance. If you’re especially quick, the Freeze Ghoulies and Turbo Cooper should have you covered until you’ve moved through three quarters of the Stable maze where you’ll have to deal with a Fire Imp that’s made it from the entrance of the room. Manage to complete the labyrinth soon after and you’ll confront the final duo of Fire Imps back where we met Mr. Ribs with the Extinguisher. With the Stables complete and time to spare we’ll duck out this room back through the Challenge Door where we’re sure to find a most difficult scenario waiting for us in the Foundry…
Navigation:
Chapter 1: The Rescue
Chapter 2: The Restoration
Chapter 3: The Riddle
-3-1: Fetching up the First Verse
-3-2: Second Stanza in the Stables
-3-3: Well Versed in Backtracking
-3-4: Don’t Fear the Reaper
-3-5: Method to the Madness
-3-6: Requisite for a Reckoning
Chapter 4: The Reckoning
Chapter 5: The Race
BRINGING THE RHYME BACK IN TIME
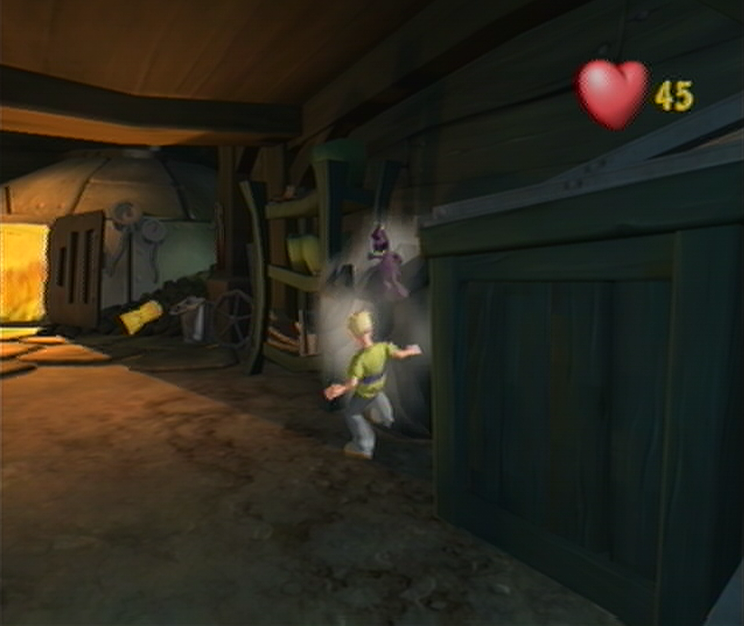
![]() Once we’ve managed to return to the Foundary we’ll have a rendezvous with Mr. Ribs to take the Fire Extinguisher off of our hands. While the room is presently filled with Ghoulies, you’ll find that they have no interest in Cooper in the slightest. Luckily we’ll manage to use this to our advantage as we prepare ourselves for the monumental challenge ahead. From where you met up with Mr. Ribs, follow the wall to the right and rip into the bag of coal to expose a single Imp inside. With our new Ghouly in tow, travel toward the Fireplace on the far end of the room and knock the Mummy closest into the flames. After you’ve managed that you’ll find that a Skeleton has taken its place, though it isn’t about to stand idly by. Avoid getting smacked about by the Skeleton and Imp and work on slamming a second Mummy into the flames which will in turn offer up a second Skeleton. Now that we’re ready to begin, we’ll rush towards the open Challenge Door on the opposite side of the room.
Once we’ve managed to return to the Foundary we’ll have a rendezvous with Mr. Ribs to take the Fire Extinguisher off of our hands. While the room is presently filled with Ghoulies, you’ll find that they have no interest in Cooper in the slightest. Luckily we’ll manage to use this to our advantage as we prepare ourselves for the monumental challenge ahead. From where you met up with Mr. Ribs, follow the wall to the right and rip into the bag of coal to expose a single Imp inside. With our new Ghouly in tow, travel toward the Fireplace on the far end of the room and knock the Mummy closest into the flames. After you’ve managed that you’ll find that a Skeleton has taken its place, though it isn’t about to stand idly by. Avoid getting smacked about by the Skeleton and Imp and work on slamming a second Mummy into the flames which will in turn offer up a second Skeleton. Now that we’re ready to begin, we’ll rush towards the open Challenge Door on the opposite side of the room.
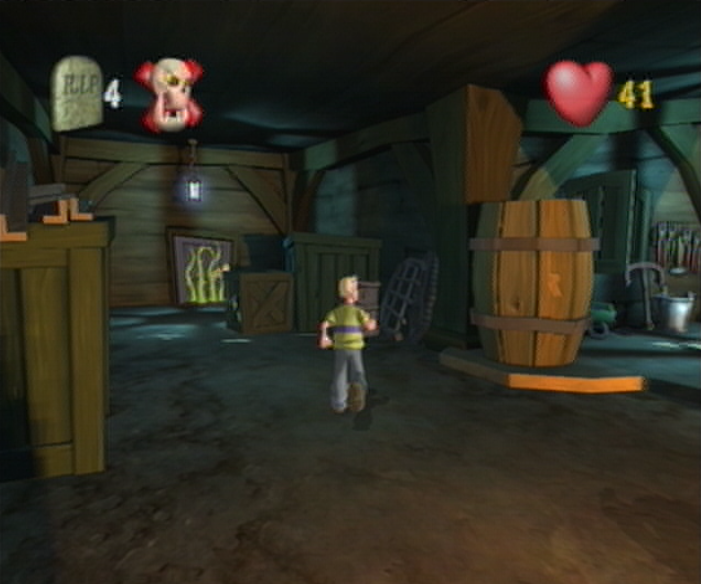
![]() Once you manage to get close enough, the Challenge Door will slam in protest and you’ll start one of the most difficult “Next-one-different” challenges thus far. Luckily we’ve managed to bring along a few cohorts that will make things much easier. Once you’ve regained control, seek out the single Imp and defeat it before the Skeletons have a chance to intervene. Now that you’re prohibited from defeating a second Imp, work away on one of the two Skeletons you’ve managed to lure over before taking a swing at the crate on the right side of the wall to expose a second Imp and an Energy Boost! Tin for 5 health. Avoid taking damage from the remaining Skeleton or any Mummies, and take out the Imp quickly before turning your sights on the Skeleton you’ve left over. With that out of the way we’ll only have two Ghoulies to defeat before the Challenge is solved! Avoid getting pummeled by the Mummies and venture out towards the area that you initially came through.
Once you manage to get close enough, the Challenge Door will slam in protest and you’ll start one of the most difficult “Next-one-different” challenges thus far. Luckily we’ve managed to bring along a few cohorts that will make things much easier. Once you’ve regained control, seek out the single Imp and defeat it before the Skeletons have a chance to intervene. Now that you’re prohibited from defeating a second Imp, work away on one of the two Skeletons you’ve managed to lure over before taking a swing at the crate on the right side of the wall to expose a second Imp and an Energy Boost! Tin for 5 health. Avoid taking damage from the remaining Skeleton or any Mummies, and take out the Imp quickly before turning your sights on the Skeleton you’ve left over. With that out of the way we’ll only have two Ghoulies to defeat before the Challenge is solved! Avoid getting pummeled by the Mummies and venture out towards the area that you initially came through.
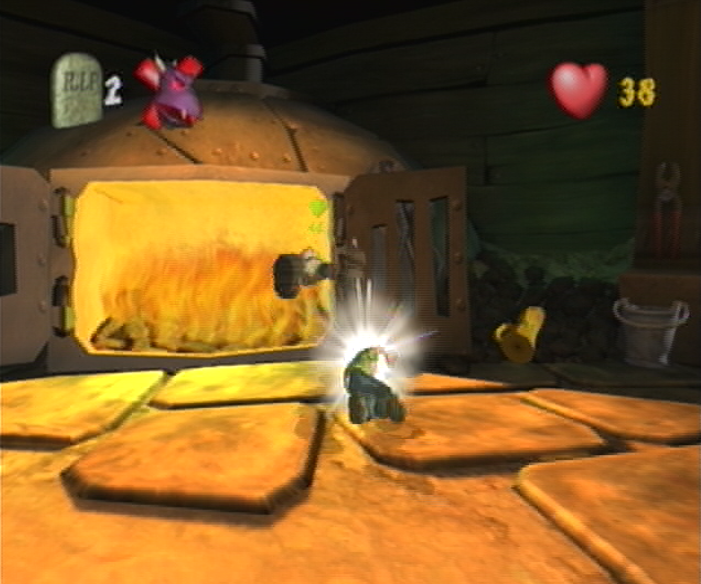
![]() Before you swing around the corner to the vined Challenge Door, you’ll find a large Rare branded barrel to the right. Smash the barrel open whilst avoiding the pursuing Mummies to expose our last Imp that we’ll be able to use for the purpose of this challenge. Once you’ve managed to defeat him we’ll be forced to do battle with the only remaining Ghoulies left in the room; the hoard of pursuing Mummies. You’ll have to do your best in luring them over to the large fireplace at the far end of the room, once you’ve done so it’s just a matter of picking your favorite – or in this case, least favorite – and punting them in to stoke the licking flames of the fireplace. Now that we’ve managed to bring our counter down to 0, the Challenge will complete and the Challenge Door will open, allowing us to pass through unhindered. Be sure to avoid getting too wrapped up with your Mummified cohorts and sprint back towards the now open Challenge Door to find yourself back in the Farmyard.
Before you swing around the corner to the vined Challenge Door, you’ll find a large Rare branded barrel to the right. Smash the barrel open whilst avoiding the pursuing Mummies to expose our last Imp that we’ll be able to use for the purpose of this challenge. Once you’ve managed to defeat him we’ll be forced to do battle with the only remaining Ghoulies left in the room; the hoard of pursuing Mummies. You’ll have to do your best in luring them over to the large fireplace at the far end of the room, once you’ve done so it’s just a matter of picking your favorite – or in this case, least favorite – and punting them in to stoke the licking flames of the fireplace. Now that we’ve managed to bring our counter down to 0, the Challenge will complete and the Challenge Door will open, allowing us to pass through unhindered. Be sure to avoid getting too wrapped up with your Mummified cohorts and sprint back towards the now open Challenge Door to find yourself back in the Farmyard.
FARMYARD
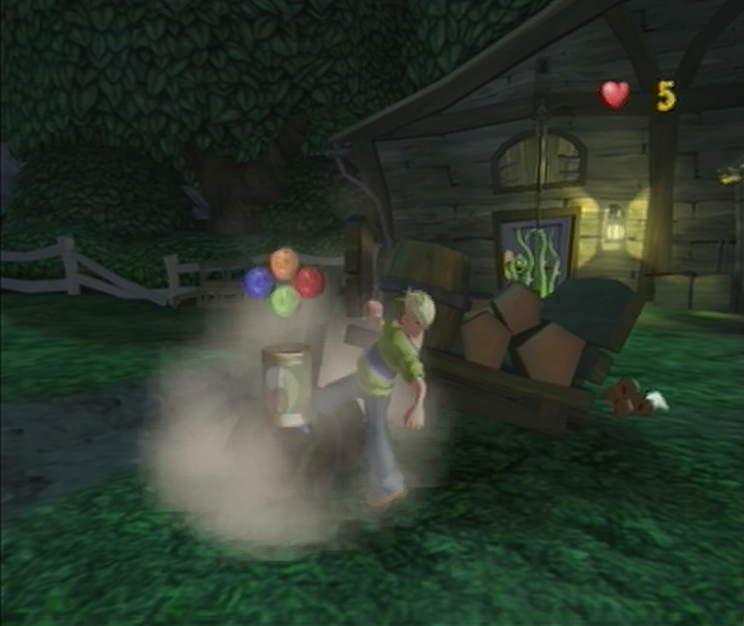
![]() You’ll have to tread carefully here, as Scary Shocks have been planted throughout the Farmyard. Failing a single one will ultimately lead to untimely demise, so it’s best to seek out the Shocker Blocker! Tin that’s been craftily hidden here. From where you start off, you should manage to spot a busted cart in the center of the yard. You’ll need to get yourself in front of this cart without straying too far off of the beaten path or you’ll risk putting yourself in a Shock sequence. Line yourself up with the rear of the cart and then travel in a straight line. Once you’ve arrived behind the cart, hug the edge and work your way around to the right side where you’ll spot a collection of potatoes; work your way around them to the front to a lone barrel. A swift kick will send a Shocker Blocker! Soup Tin onto the ground – pick it up as quickly as possible and then carry on to your immediate right to locate the Challenge Door, just beyond the path paved with unfavorable Soups.
You’ll have to tread carefully here, as Scary Shocks have been planted throughout the Farmyard. Failing a single one will ultimately lead to untimely demise, so it’s best to seek out the Shocker Blocker! Tin that’s been craftily hidden here. From where you start off, you should manage to spot a busted cart in the center of the yard. You’ll need to get yourself in front of this cart without straying too far off of the beaten path or you’ll risk putting yourself in a Shock sequence. Line yourself up with the rear of the cart and then travel in a straight line. Once you’ve arrived behind the cart, hug the edge and work your way around to the right side where you’ll spot a collection of potatoes; work your way around them to the front to a lone barrel. A swift kick will send a Shocker Blocker! Soup Tin onto the ground – pick it up as quickly as possible and then carry on to your immediate right to locate the Challenge Door, just beyond the path paved with unfavorable Soups.
WOOD SHED
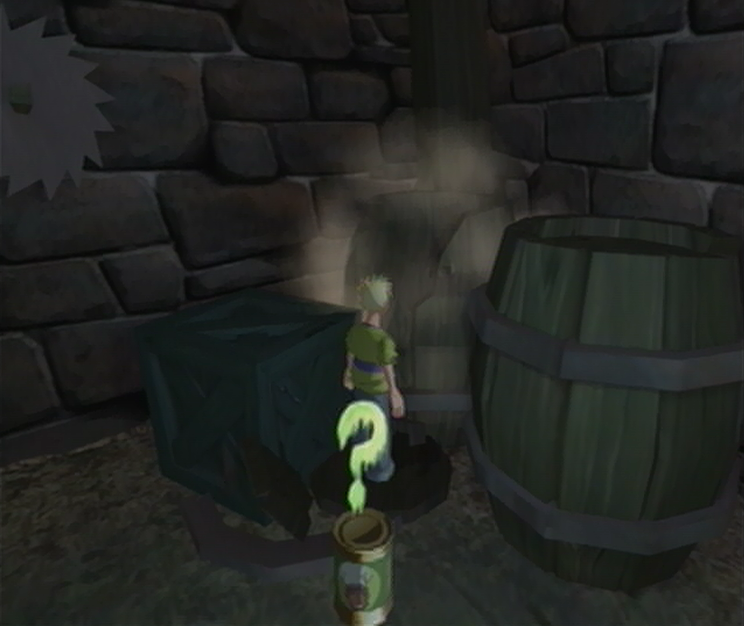
![]() From the entrance of the Wood Shed, head to the left to spot a lone stump in the entranceway leading to a Medusa. Hoist the stump over your head and cast it toward the Medusa in order to bowl her over. Once you’ve managed that, follow the table saw to the right to locate a second stump; grab it as well and hurl it toward the Medusa to send her out in style. Now that the coast is clear, continue to the right and you should spot two barrels and a crate in the corner of this area; smash open the barrel next to the crate and you’ll reveal a Challenge Complete! Soup Tin. Ignore it for now but do remember its location as you continue onward. Once you reach the area where the first Medusa was patrolling you’ll find a large barrel under the shade of a tree; smashing it open will expose a Shocker Blocker! Soup Tin. Take the Shocker Blocker! Tin along with the lone stump underneath the tree and use it to take out the Medusa found around the bend.
From the entrance of the Wood Shed, head to the left to spot a lone stump in the entranceway leading to a Medusa. Hoist the stump over your head and cast it toward the Medusa in order to bowl her over. Once you’ve managed that, follow the table saw to the right to locate a second stump; grab it as well and hurl it toward the Medusa to send her out in style. Now that the coast is clear, continue to the right and you should spot two barrels and a crate in the corner of this area; smash open the barrel next to the crate and you’ll reveal a Challenge Complete! Soup Tin. Ignore it for now but do remember its location as you continue onward. Once you reach the area where the first Medusa was patrolling you’ll find a large barrel under the shade of a tree; smashing it open will expose a Shocker Blocker! Soup Tin. Take the Shocker Blocker! Tin along with the lone stump underneath the tree and use it to take out the Medusa found around the bend.
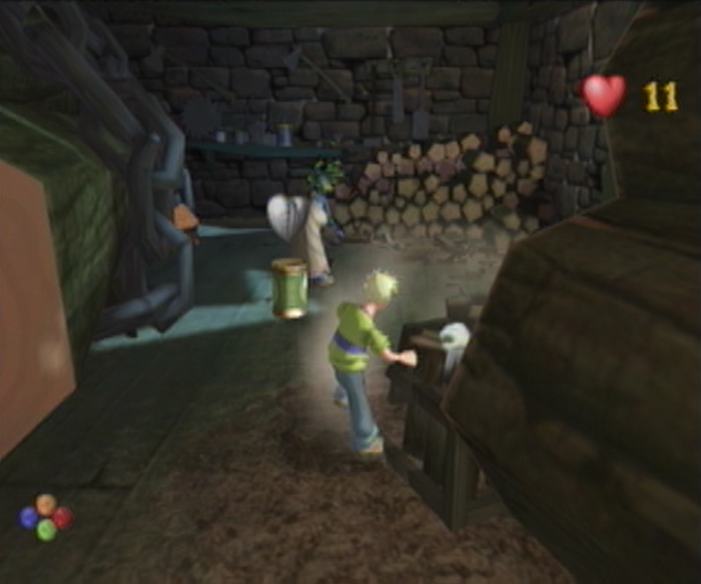
![]() While she’s down, use this time to grab a second stump found to the right behind the fallen ceiling beam to rid her from the Wood Shed. Now that we’re out of stumps, it’s time to move onto the barrels in this area to take out the third Medusa just ahead. Before we do so however, we’ll smash the bundling of logs to the right to acquire an Invisibility! Soup Tin. This will come in handy as each hit with the barrel to the Medusa will have one of her protective Worms sent after you! The best course of action is to quickly toss both barrels and then take care of the Worms by kicking them far away as their timers wind down. You’ll find your next stump in the corner where the Medusa once patrolled and use it to take out the final Medusa in the thin corridor ahead. After you’ve tossed your stump, you’ll have to grab one of the Crates behind you to use next, though you’ll have to deal with the explosive aftermath of having another Worm tossed at you as well.
While she’s down, use this time to grab a second stump found to the right behind the fallen ceiling beam to rid her from the Wood Shed. Now that we’re out of stumps, it’s time to move onto the barrels in this area to take out the third Medusa just ahead. Before we do so however, we’ll smash the bundling of logs to the right to acquire an Invisibility! Soup Tin. This will come in handy as each hit with the barrel to the Medusa will have one of her protective Worms sent after you! The best course of action is to quickly toss both barrels and then take care of the Worms by kicking them far away as their timers wind down. You’ll find your next stump in the corner where the Medusa once patrolled and use it to take out the final Medusa in the thin corridor ahead. After you’ve tossed your stump, you’ll have to grab one of the Crates behind you to use next, though you’ll have to deal with the explosive aftermath of having another Worm tossed at you as well.

![]() Now that we’ve managed to clear a pathway, we’ll continue along towards Fiddlesworth who happens to be spying on a Medusa from behind a beam. “Buy my Beef!“, the Groundskeeper whispers to himself, “I wonder if she likes ‘airy backs…”. A shiver from behind lets him know he’s not alone. “Oh, ‘ello lad!” Fiddlesworth says as he turns to his unseen guest, “Just, er, keepin’ an eye on me wood. Ho ho!“. Cooper cocks his head to the side as Fiddlesworth shifts his eyes, “Well it all looks in order! Bye for now!“. Fiddlesworth darts away, leaving behind Ol’ Edna, which Cooper snatches up. After making short work of the Vampire ahead, we’ll make a beeline for the exit, only for the challenge to start when we get too close. Rather than toiling away at the challenge at hand, we’ll retrace our steps until we’ve arrived back at the Challenge Complete! Soup Tin. Now that you’ve managed that, you’re free to come back and deal with the Vampire Chickens on your own terms and then make an exit.
Now that we’ve managed to clear a pathway, we’ll continue along towards Fiddlesworth who happens to be spying on a Medusa from behind a beam. “Buy my Beef!“, the Groundskeeper whispers to himself, “I wonder if she likes ‘airy backs…”. A shiver from behind lets him know he’s not alone. “Oh, ‘ello lad!” Fiddlesworth says as he turns to his unseen guest, “Just, er, keepin’ an eye on me wood. Ho ho!“. Cooper cocks his head to the side as Fiddlesworth shifts his eyes, “Well it all looks in order! Bye for now!“. Fiddlesworth darts away, leaving behind Ol’ Edna, which Cooper snatches up. After making short work of the Vampire ahead, we’ll make a beeline for the exit, only for the challenge to start when we get too close. Rather than toiling away at the challenge at hand, we’ll retrace our steps until we’ve arrived back at the Challenge Complete! Soup Tin. Now that you’ve managed that, you’re free to come back and deal with the Vampire Chickens on your own terms and then make an exit.
GARBAGE YARD

![]() You can take advantage of the short time prior to the challenge starting by approaching the nearest chair and breaking it the second you’ve picked it up. There you are; an extra Ghouly that you won’t have to deal with. As you make your way to the center of the Garbage Yard the challenge will begin, bringing with it one of the most hypocritical rules of the entire game; one rule states that you’re not allowed to use any weapons, while the other states that you’ll have to use weapons only to defeat the Ghoulies. This sounds tricky doesn’t it? Don’t worry about it too much though, as there’s a simple way of having the challenge play right into your hands. First, you’ll have to move to the left side of the Garbage Yard where you’ll spot a broom, an upturned chair and a garbage bin. Break the chair and then smash the crate to the left to expose a Miniature Cooper! Tin. Follow the Mini-Cooper until he passes the second chair that we left alone, and then take the time to destroy it properly.
You can take advantage of the short time prior to the challenge starting by approaching the nearest chair and breaking it the second you’ve picked it up. There you are; an extra Ghouly that you won’t have to deal with. As you make your way to the center of the Garbage Yard the challenge will begin, bringing with it one of the most hypocritical rules of the entire game; one rule states that you’re not allowed to use any weapons, while the other states that you’ll have to use weapons only to defeat the Ghoulies. This sounds tricky doesn’t it? Don’t worry about it too much though, as there’s a simple way of having the challenge play right into your hands. First, you’ll have to move to the left side of the Garbage Yard where you’ll spot a broom, an upturned chair and a garbage bin. Break the chair and then smash the crate to the left to expose a Miniature Cooper! Tin. Follow the Mini-Cooper until he passes the second chair that we left alone, and then take the time to destroy it properly.
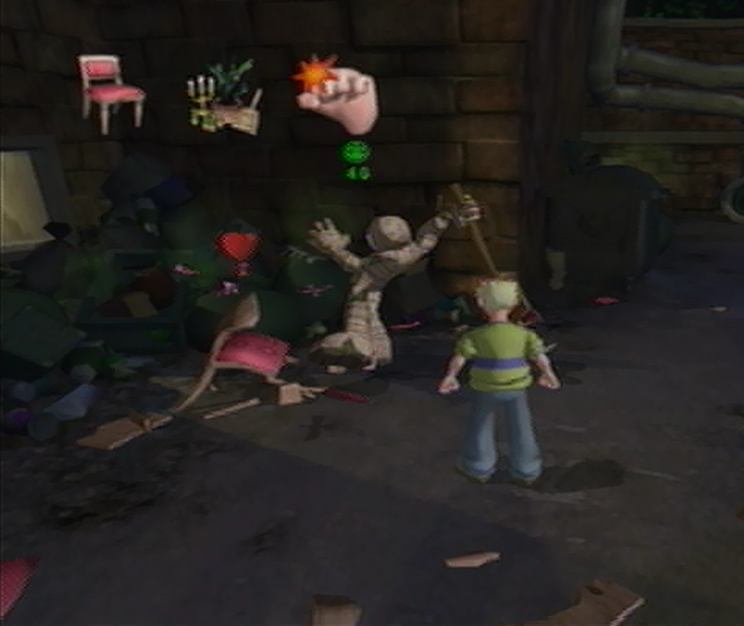
![]() Once you’ve managed that, you’ll spot an area to your left with a large window and two more dormant chairs; enter the area and destroy the chairs before putting a fist through the window and exposing a Traitor Fever! Soup Tin. Pick it up immediately. Hopefully this will take out a majority of the chairs, an effort you can encourage by wandering around the Garbage Yard while the chairs are distracted with one another and destroying inanimate chairs manually. If you’re left with two or more chairs by the end, you’ll have cause the chairs to defeat each other by playing Matador and having them slide into one another. When a single chair remains you’ll have a traitorous Mummy jump into action from one of the dumpsters. Since defeating the chair on your own would be breaking the rules, we’ll let our new friend do the work for us. Once the Mummy has managed to defeat the Haunted Chair, you’ll need to work your way up to the Challenge Door and escape!
Once you’ve managed that, you’ll spot an area to your left with a large window and two more dormant chairs; enter the area and destroy the chairs before putting a fist through the window and exposing a Traitor Fever! Soup Tin. Pick it up immediately. Hopefully this will take out a majority of the chairs, an effort you can encourage by wandering around the Garbage Yard while the chairs are distracted with one another and destroying inanimate chairs manually. If you’re left with two or more chairs by the end, you’ll have cause the chairs to defeat each other by playing Matador and having them slide into one another. When a single chair remains you’ll have a traitorous Mummy jump into action from one of the dumpsters. Since defeating the chair on your own would be breaking the rules, we’ll let our new friend do the work for us. Once the Mummy has managed to defeat the Haunted Chair, you’ll need to work your way up to the Challenge Door and escape!
FRRRREEZER
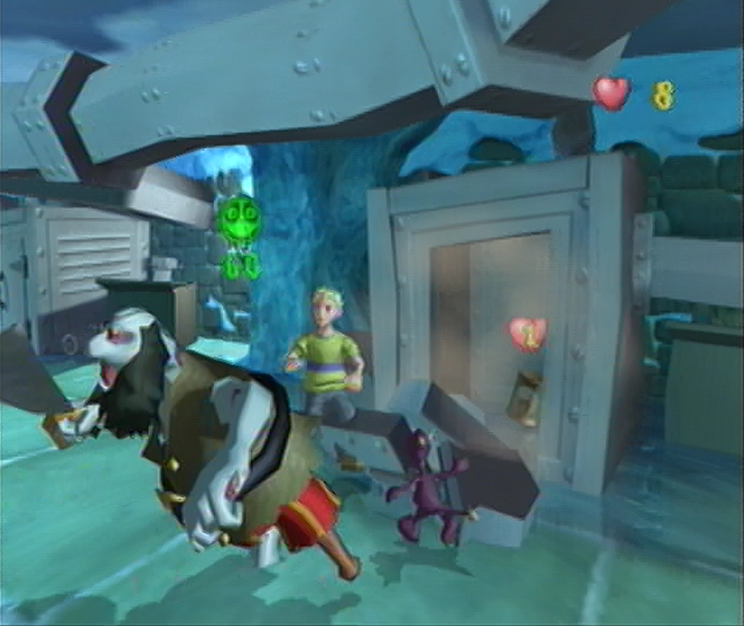
![]() As you start off in the Frrrreezer, you’ll need to ignore the Imps altogether and instead hug the right wall until you come up to the first Freezer door. Once you’ve arrived, smashing it open to reveal the traitorous Zombie Pirate inside, and carrying on ahead just a little further will begin the challenge proper. For this room, you’ll be expected to defeat 8 Ghoulies that have popped out from the central freezer using only 10 hits, which is impossible left to our own devices. Luckily there’s a number of traitorous Ghoulies found in the Freezers dotting the perimeter, so give yourself some distance and break down the doors. You’ll manage to find a Mummy in the next Freezer ahead, with a second Zombie Pirate in the Freezer after that. From here it’s just a matter of circling the room and avoiding the Ghoulies that your temporary friends are trying to take care of. You can deal with the Imps yourself if they’re still kicking, just don’t go out of your way to do so or you’ll risk getting hit.
As you start off in the Frrrreezer, you’ll need to ignore the Imps altogether and instead hug the right wall until you come up to the first Freezer door. Once you’ve arrived, smashing it open to reveal the traitorous Zombie Pirate inside, and carrying on ahead just a little further will begin the challenge proper. For this room, you’ll be expected to defeat 8 Ghoulies that have popped out from the central freezer using only 10 hits, which is impossible left to our own devices. Luckily there’s a number of traitorous Ghoulies found in the Freezers dotting the perimeter, so give yourself some distance and break down the doors. You’ll manage to find a Mummy in the next Freezer ahead, with a second Zombie Pirate in the Freezer after that. From here it’s just a matter of circling the room and avoiding the Ghoulies that your temporary friends are trying to take care of. You can deal with the Imps yourself if they’re still kicking, just don’t go out of your way to do so or you’ll risk getting hit.
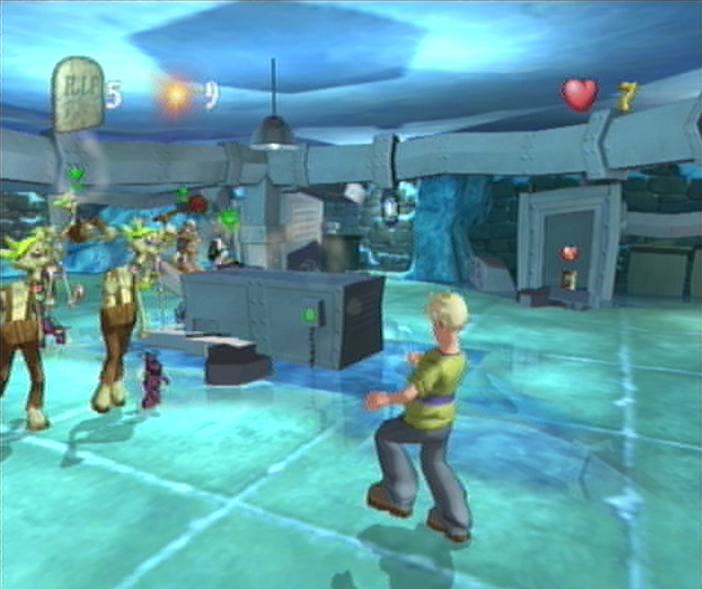
![]() If you find yourself taking a little more damage then you’d like, there’s plenty of Energy Boost! Soup Tins found inside the freezers that aren’t occupied by Traitorous Ghoulies or frosty weaponry, just make sure to give yourself enough space from the Ghoulies so that you don’t trap yourself inside. If you happen to spot the Challenge Door during one of your rotations, it would do you well to approach the Challenge Door in order to expose the Super Scary Shock that waits for you while you’ve got some distance between the Ghoulies; better to do that now when you’re in control than later when you’re looking for a desperate exit and don’t have the time to turn. Smashing the large chunk of ice to the right of the Challenge Door while you’re here will reveal an Invulnerability! Soup Tin that you’re free to use to last through this challenge if you’d like. Once your Ghoulish cohorts manage to take care of at least eight of their fellow Ghoulies you’ll want to make a rush for the Challenge Door.
If you find yourself taking a little more damage then you’d like, there’s plenty of Energy Boost! Soup Tins found inside the freezers that aren’t occupied by Traitorous Ghoulies or frosty weaponry, just make sure to give yourself enough space from the Ghoulies so that you don’t trap yourself inside. If you happen to spot the Challenge Door during one of your rotations, it would do you well to approach the Challenge Door in order to expose the Super Scary Shock that waits for you while you’ve got some distance between the Ghoulies; better to do that now when you’re in control than later when you’re looking for a desperate exit and don’t have the time to turn. Smashing the large chunk of ice to the right of the Challenge Door while you’re here will reveal an Invulnerability! Soup Tin that you’re free to use to last through this challenge if you’d like. Once your Ghoulish cohorts manage to take care of at least eight of their fellow Ghoulies you’ll want to make a rush for the Challenge Door.
KITCHEN
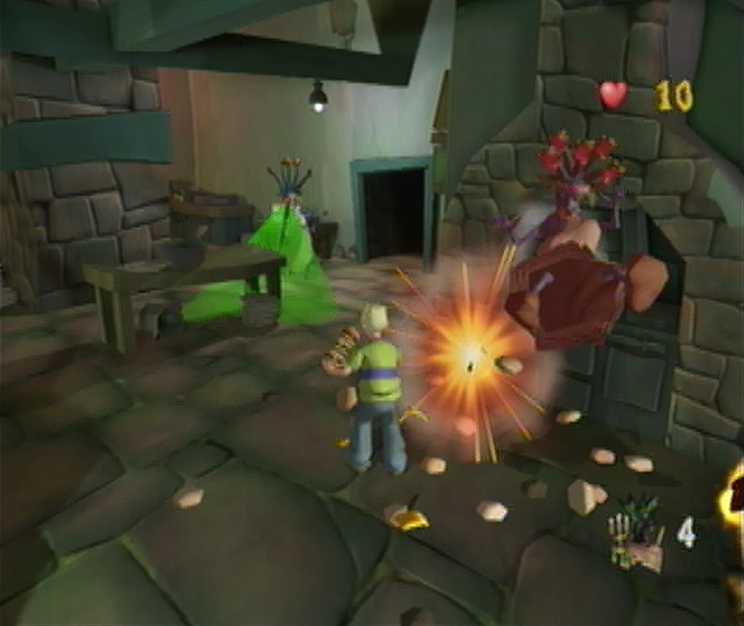
![]() Right, it’s a bit of a safehaven in the Kitchen, well, as much as it could be with patrolling Medusas anyway. Let’s take advantage of this situation and defeat them while we’re here to benefit our Ghoulies Defeated Score. The first Medusa isn’t too difficult to handle; her gaze is fixated on the floor as she revolves around, so it’s quite simple to sneak up while her back is turned and lay it on thick. Once you’ve knocked her down once you’ll have to back off and wait for her to resume her post until you’ve got the chance to sneak in a second time. After taking care of her, it’s time to grab a snack, in this case we’ll snatch up the collection of burgers that we used to beat Mr. Ribs into submission and carry them past the cauldron to the Super Weapons! and Turbo Cooper! Soup tins found on the counter. Now that we’ve got an untapped supply of burgers, we can take care of the last two Medusas rather quickly before making our way through the Challenge Door to the Laundry.
Right, it’s a bit of a safehaven in the Kitchen, well, as much as it could be with patrolling Medusas anyway. Let’s take advantage of this situation and defeat them while we’re here to benefit our Ghoulies Defeated Score. The first Medusa isn’t too difficult to handle; her gaze is fixated on the floor as she revolves around, so it’s quite simple to sneak up while her back is turned and lay it on thick. Once you’ve knocked her down once you’ll have to back off and wait for her to resume her post until you’ve got the chance to sneak in a second time. After taking care of her, it’s time to grab a snack, in this case we’ll snatch up the collection of burgers that we used to beat Mr. Ribs into submission and carry them past the cauldron to the Super Weapons! and Turbo Cooper! Soup tins found on the counter. Now that we’ve got an untapped supply of burgers, we can take care of the last two Medusas rather quickly before making our way through the Challenge Door to the Laundry.
Navigation:
Chapter 1: The Rescue
Chapter 2: The Restoration
Chapter 3: The Riddle
-3-1: Fetching up the First Verse
-3-2: Second Stanza in the Stables
-3-3: Well Versed in Backtracking
-3-4: Don’t Fear the Reaper
-3-5: Method to the Madness
-3-6: Requisite for a Reckoning
Chapter 4: The Reckoning
Chapter 5: The Race
CHEATING DEATH AND AVOIDING A GRIM FATE
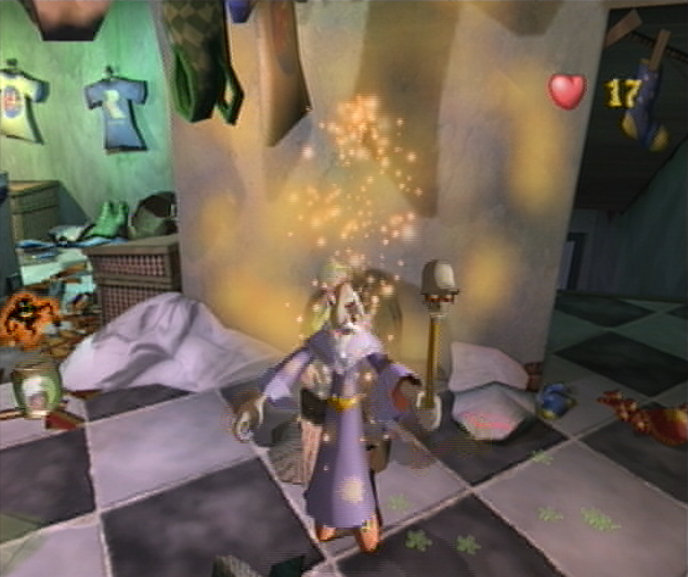
![]() Right, the following rooms can be particularity difficult in that you’ll be constantly evading the Grim Reaper, and the Laundry Room is no different. The challenge for this room will have you seeking out a Warlock and then defeating him without taking a single instance of damage, which can be quite tricky. From where you start off, ignore the hampers located at the bottom of the stairs in this area and instead ascend toward the main Laundry room, from here we’ll make our way to the rows of Washing Machines in the center. You’ll need all the help you can get here, and fortunately you’ll manage to find several Super Soups inside each Washing Machine, which can be coaxed out with a quick kick to their respective doors. We’ll leave the newly discovered Super Soups by the wayside and start breaking the hampers around the room in hopes of revealing the Warlock. If you stumble across any other Ghouly be sure to deal with them quickly before moving on to the next hamper.
Right, the following rooms can be particularity difficult in that you’ll be constantly evading the Grim Reaper, and the Laundry Room is no different. The challenge for this room will have you seeking out a Warlock and then defeating him without taking a single instance of damage, which can be quite tricky. From where you start off, ignore the hampers located at the bottom of the stairs in this area and instead ascend toward the main Laundry room, from here we’ll make our way to the rows of Washing Machines in the center. You’ll need all the help you can get here, and fortunately you’ll manage to find several Super Soups inside each Washing Machine, which can be coaxed out with a quick kick to their respective doors. We’ll leave the newly discovered Super Soups by the wayside and start breaking the hampers around the room in hopes of revealing the Warlock. If you stumble across any other Ghouly be sure to deal with them quickly before moving on to the next hamper.
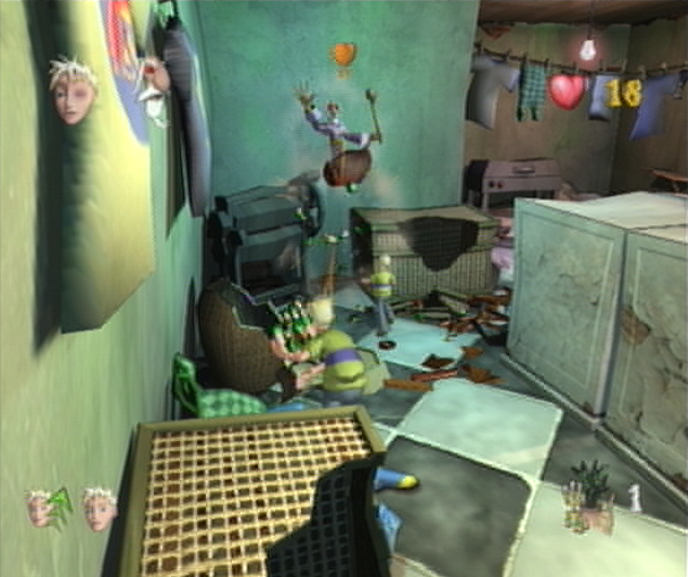
![]() Once you’ve managed to expose the Warlock, make a beeline for the Turbo Cooper! and Miniature Cooper! Tins, all while keeping an eye out for any stray spells that pose a threat. Use your increased speed to rush the Warlock as soon as he’s appeared; you’ll really need to judge your distance properly, as giving the Warlock too much time to react will have you on the receiving end of a spell. Don’t hog the Warlock all to yourself either, it’s a good plan to send in your minions by picking up the Miniature Cooper! Tins where you won’t risk getting hit yourself. If you can manage to get a breath in during this insanity, head towards the long laundry hamper to the right of the Challenge door. Sink your foot into the side of the hamper and your efforts will be rewarded with a collection of bottles and toilet paper that spill out onto the ground ahead, which you can use to make quick work of the Warlock. Once that’s managed, carry on through the exit.
Once you’ve managed to expose the Warlock, make a beeline for the Turbo Cooper! and Miniature Cooper! Tins, all while keeping an eye out for any stray spells that pose a threat. Use your increased speed to rush the Warlock as soon as he’s appeared; you’ll really need to judge your distance properly, as giving the Warlock too much time to react will have you on the receiving end of a spell. Don’t hog the Warlock all to yourself either, it’s a good plan to send in your minions by picking up the Miniature Cooper! Tins where you won’t risk getting hit yourself. If you can manage to get a breath in during this insanity, head towards the long laundry hamper to the right of the Challenge door. Sink your foot into the side of the hamper and your efforts will be rewarded with a collection of bottles and toilet paper that spill out onto the ground ahead, which you can use to make quick work of the Warlock. Once that’s managed, carry on through the exit.
SERVANTS’ DORMITORIES
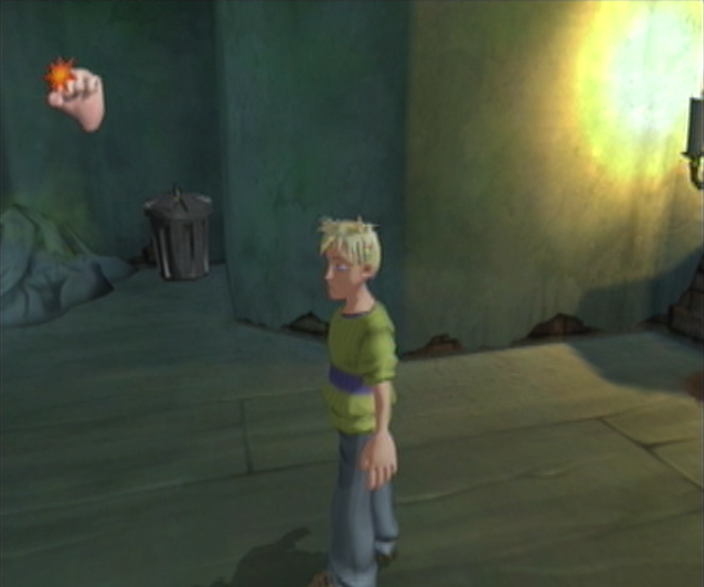
![]() The Servant’s Dormitories is arguably the most difficult room in all of Grabbed by the Ghoulies, and for good reason as well; the large spanning section of Ghoulhaven Hall features an abundance of Ghoulies including three separate Jessie N’ Clydes. If you run into the action blindly, it’s likely that you’ll send a running total of your Times Fainted as you’ll only be alloted 20 health, which the Jessie N’ Clydes can polish off in four throws. Instead, we’ll need to have stealthiness a prerogative – and what better way to slip through the cracks than grabbing an Invisibility! Tin straight off? If you focus your attention to your immediate right, you should notice a single trashcan inside an alcove. You’ll have to trust us that there’s an Invisibility Tin! inside, but for the time being you’ll have to hoist it over your shoulders and carry it through the Servants Dormitories until you’re ready to use it. You’ll come across your first obstacle ahead; a single Jessie N’ Clyde traipsing about the area.
The Servant’s Dormitories is arguably the most difficult room in all of Grabbed by the Ghoulies, and for good reason as well; the large spanning section of Ghoulhaven Hall features an abundance of Ghoulies including three separate Jessie N’ Clydes. If you run into the action blindly, it’s likely that you’ll send a running total of your Times Fainted as you’ll only be alloted 20 health, which the Jessie N’ Clydes can polish off in four throws. Instead, we’ll need to have stealthiness a prerogative – and what better way to slip through the cracks than grabbing an Invisibility! Tin straight off? If you focus your attention to your immediate right, you should notice a single trashcan inside an alcove. You’ll have to trust us that there’s an Invisibility Tin! inside, but for the time being you’ll have to hoist it over your shoulders and carry it through the Servants Dormitories until you’re ready to use it. You’ll come across your first obstacle ahead; a single Jessie N’ Clyde traipsing about the area.
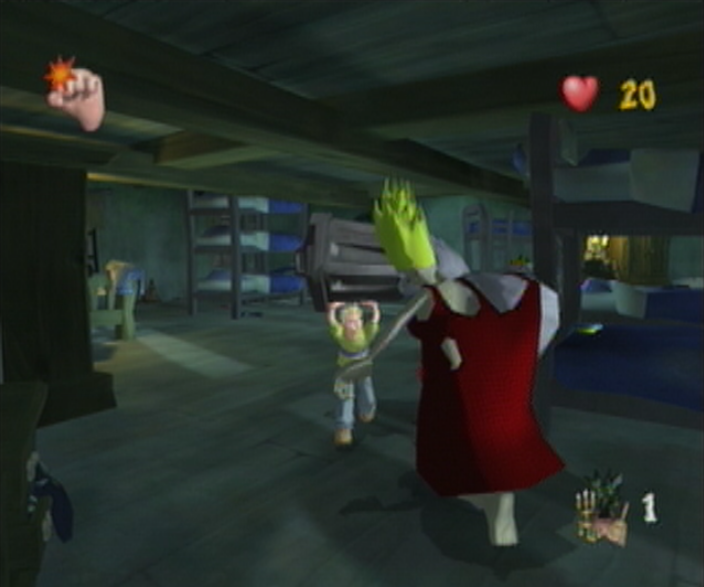
![]() You’ll have to plan your route so that you manage to catch the Jessie N’ Clyde by surprise as you charge by, otherwise there’s a higher chance of being grabbed by this Ghouly. Try to plan it so that the Jessie N’ Clyde is far enough away that you’ll manage to escape the vicinity before it has time to react. So long as you manage to keep sprinting at full speed you’ll manage to pass it every time – don’t slow up for a second! Once you’ve managed that have to take a wide berth when you pass the closet in the tiny area ahead, and get nearest the red chest rather than the green to avoid startling Cooper. A Jessie N’ Clyde waits for us on the next floor, so we’ll ascend the stairs and do our best to avoid a confrontation; watch out for the Haunted Portrait around the table as you veer off to the right and then make your way past the tables and up the final set of stairs. Herein lies our last challenge, avoiding just one last Jessie N’ Clyde in these cramped quarters and then making our escape!
You’ll have to plan your route so that you manage to catch the Jessie N’ Clyde by surprise as you charge by, otherwise there’s a higher chance of being grabbed by this Ghouly. Try to plan it so that the Jessie N’ Clyde is far enough away that you’ll manage to escape the vicinity before it has time to react. So long as you manage to keep sprinting at full speed you’ll manage to pass it every time – don’t slow up for a second! Once you’ve managed that have to take a wide berth when you pass the closet in the tiny area ahead, and get nearest the red chest rather than the green to avoid startling Cooper. A Jessie N’ Clyde waits for us on the next floor, so we’ll ascend the stairs and do our best to avoid a confrontation; watch out for the Haunted Portrait around the table as you veer off to the right and then make your way past the tables and up the final set of stairs. Herein lies our last challenge, avoiding just one last Jessie N’ Clyde in these cramped quarters and then making our escape!
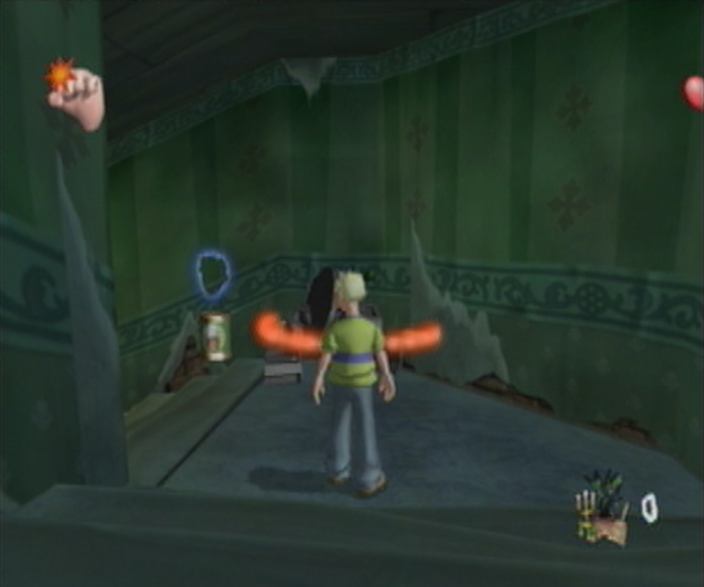
![]() The stairways leading up to their respective areas can work quite well as boundaries to keep the Jessie N Clydes at bay; if you carry on up the stairs as you’re pursued you’ll find it works similar to the trick we exploited back in the Farm Yard. Once you’re ready to explore further, wait until the next Jessie N Clyde is out of sight before venturing toward the bunk beds. If you snap your attention to the immediate left here you should spot a changing room panel that divides the room ahead, which is likely where your Jessie N Clyde will be found. Luckily we won’t have to pass through the center, as there’s a thin gap between the changing panel and the wall to the right which you can find by squeezing between the changing room panel and the triple bunk bed that scrapes the roof. Carry on to the right from here and then toss the trashcan against the wall up ahead. Without getting too close to the Challenge Door, pick up the Invisibility! Tin and then make your daring escape!
The stairways leading up to their respective areas can work quite well as boundaries to keep the Jessie N Clydes at bay; if you carry on up the stairs as you’re pursued you’ll find it works similar to the trick we exploited back in the Farm Yard. Once you’re ready to explore further, wait until the next Jessie N Clyde is out of sight before venturing toward the bunk beds. If you snap your attention to the immediate left here you should spot a changing room panel that divides the room ahead, which is likely where your Jessie N Clyde will be found. Luckily we won’t have to pass through the center, as there’s a thin gap between the changing panel and the wall to the right which you can find by squeezing between the changing room panel and the triple bunk bed that scrapes the roof. Carry on to the right from here and then toss the trashcan against the wall up ahead. Without getting too close to the Challenge Door, pick up the Invisibility! Tin and then make your daring escape!
SERVANTS’ BATHROOM
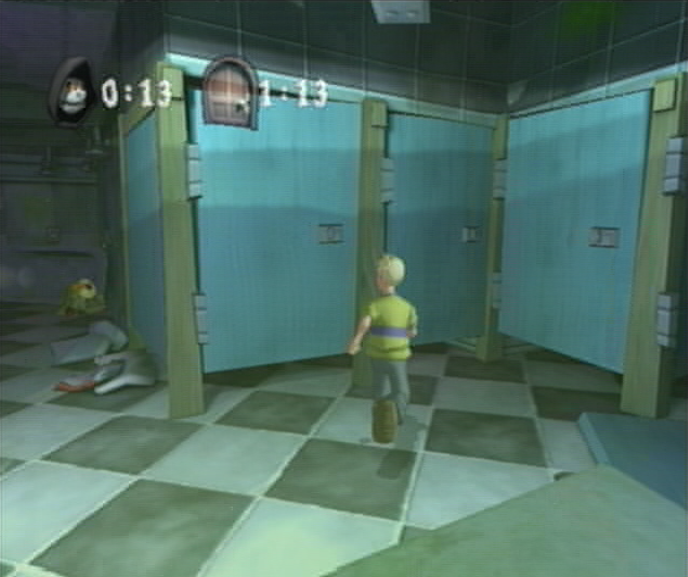
![]() I hope you’ve had a chance to catch your breath, as this next challenge might see Coopers’ last. The second you’ve walked into the Servants’ Bathroom you’ll have to wait out the clock for a minute and twenty seconds, while the Reaper will automatically show up in 20. For an entire minute you’ll be forced into avoiding the Reaper in these cramped quarters and hope that the challenges time runs out before Coopers does! We’ll have to work fast to make the most out of our time, so let’s start off like a flash past the Laundry trolley and toward the vending machine to the right where we’ll manage to locate a set of bathroom stall doors just after. Break open the second door to expose a spanning hallway that leads to the Challenge Door, and then venture in just a bit to trigger the Scary Shock event and then back up. Head over to the final stall on the far right and smash it open to reveal a Turbo Cooper! Soup Tin and snatch it up quick as your time should be nearly finished!
I hope you’ve had a chance to catch your breath, as this next challenge might see Coopers’ last. The second you’ve walked into the Servants’ Bathroom you’ll have to wait out the clock for a minute and twenty seconds, while the Reaper will automatically show up in 20. For an entire minute you’ll be forced into avoiding the Reaper in these cramped quarters and hope that the challenges time runs out before Coopers does! We’ll have to work fast to make the most out of our time, so let’s start off like a flash past the Laundry trolley and toward the vending machine to the right where we’ll manage to locate a set of bathroom stall doors just after. Break open the second door to expose a spanning hallway that leads to the Challenge Door, and then venture in just a bit to trigger the Scary Shock event and then back up. Head over to the final stall on the far right and smash it open to reveal a Turbo Cooper! Soup Tin and snatch it up quick as your time should be nearly finished!
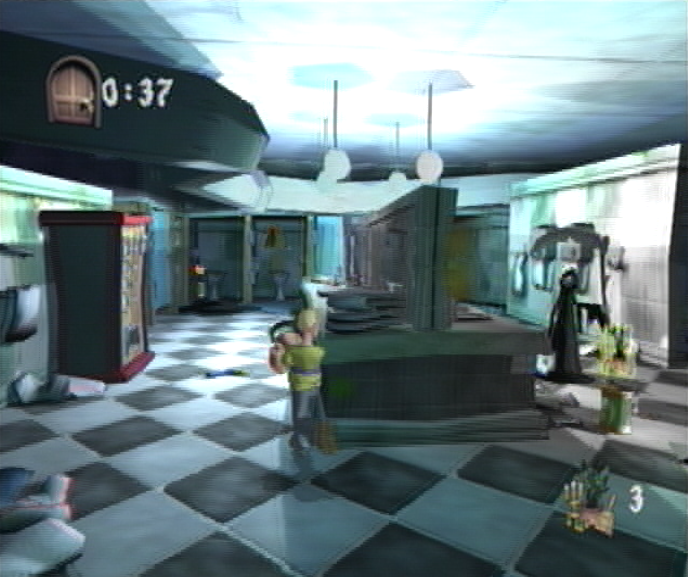
![]() With your last dwindling seconds, rush into the stall to the left with the door left ajar and grab one of the toilet paper roll piles off of the floor. For Cooper the bell tolls, signifying the appearance of the Grim Reaper who should manage to slide into view from where we started from. You’ll obviously want to avoid getting too close here, but take note of the Reapers gray aura that surrounds him; you’ll have to use this in order to keep track of him. The sink in the center will work wonders for giving Ol’ Grim the runaround which we’ll use to chip away at the minute of limbo. The Reaper can and will turn around while he’s chasing you around the sink, so take note which end his gray aura seems to be dwelling on; the worst scenario is rounding the corner blind and then bumping right into an extended finger. After you’ve lapped the sink a few times, you should manage to spot a large wardrobe from where we started which we’ll break open with a single roll of toilet paper.
With your last dwindling seconds, rush into the stall to the left with the door left ajar and grab one of the toilet paper roll piles off of the floor. For Cooper the bell tolls, signifying the appearance of the Grim Reaper who should manage to slide into view from where we started from. You’ll obviously want to avoid getting too close here, but take note of the Reapers gray aura that surrounds him; you’ll have to use this in order to keep track of him. The sink in the center will work wonders for giving Ol’ Grim the runaround which we’ll use to chip away at the minute of limbo. The Reaper can and will turn around while he’s chasing you around the sink, so take note which end his gray aura seems to be dwelling on; the worst scenario is rounding the corner blind and then bumping right into an extended finger. After you’ve lapped the sink a few times, you should manage to spot a large wardrobe from where we started which we’ll break open with a single roll of toilet paper.
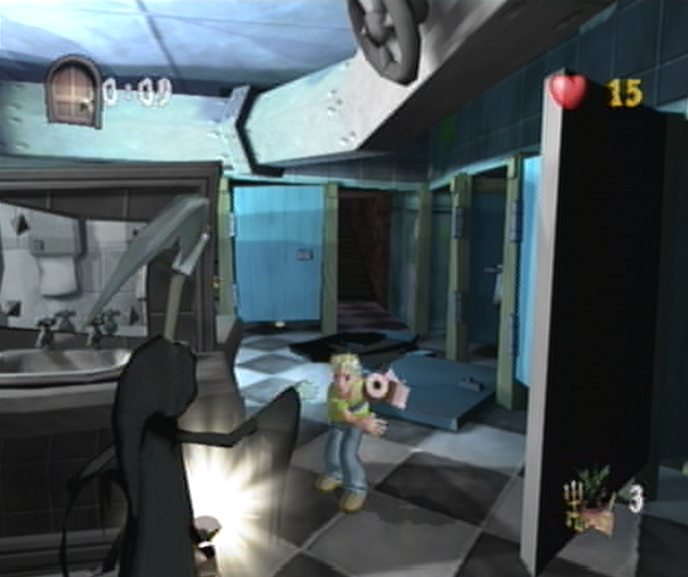
![]() We’ll leave our newly discovered Super Weapons! Tin by the wayside for the time being as we make our way back around the sink to waste a little bit more time off our clock. Once you’ve arrived back at the Super Weapons! Tin, pick it up quick-like and then start lobbing a few towards the Reaper. You don’t have to spam the entire pile; just manage to toss a single roll every few seconds to keep the Reaper in check while you try to make your way towards the Challenge Door stall. If you’ve kept up a steady stream of bog roll, the Super Weapons! Tin should see you to around 10 seconds or so, which is enough time to waste the rest of our Toilet Paper and venture into the second stall towards the challenge door. Once you’ve blocked yourself into the stall, there’s no turning back – it’s a good thing we dealt with that Scary Shock – so sprint up the stairs and you’ll find a Dizzy Reaper! Soup Tin for good measure. Send the Reaper spinning and rush through the door ahead.
We’ll leave our newly discovered Super Weapons! Tin by the wayside for the time being as we make our way back around the sink to waste a little bit more time off our clock. Once you’ve arrived back at the Super Weapons! Tin, pick it up quick-like and then start lobbing a few towards the Reaper. You don’t have to spam the entire pile; just manage to toss a single roll every few seconds to keep the Reaper in check while you try to make your way towards the Challenge Door stall. If you’ve kept up a steady stream of bog roll, the Super Weapons! Tin should see you to around 10 seconds or so, which is enough time to waste the rest of our Toilet Paper and venture into the second stall towards the challenge door. Once you’ve blocked yourself into the stall, there’s no turning back – it’s a good thing we dealt with that Scary Shock – so sprint up the stairs and you’ll find a Dizzy Reaper! Soup Tin for good measure. Send the Reaper spinning and rush through the door ahead.
ATTIC

![]() To the top of the Hall and the climax of the Reaper challenges will see you to the Attic, where you’ll have to avoid an ever persistent Grim whilst finding an exit once more. From where you start off you’ll spot a wicker basket to your left, kick it open and you’ll expose a single Shocker Blocker! Soup Tin. Once you’ve managed to pick it up, ascend the steps ahead and you’ll find Babs Buffbrass with the Soda Pop Gun in hand. “That stuck-up old Mr. Crivens said I was to give yer this thing back.” Babs says gesturing towards the Soda Pop gun, “He seemed t’think yer’d need it.” Too right you are, Buffbrass! Once we’ve acquired our weapon once more we’ll carry on ahead where a Super Scary Shock will burst forth from the Washing Machine; let the Shocker Blocker take care of it and then use your Soda Pop Grenades to take out the Haunted Television Set ahead. If your shot misses the wicker basket next to the Television, crack it open and you’ll find a Super Weapons! Tin inside.
To the top of the Hall and the climax of the Reaper challenges will see you to the Attic, where you’ll have to avoid an ever persistent Grim whilst finding an exit once more. From where you start off you’ll spot a wicker basket to your left, kick it open and you’ll expose a single Shocker Blocker! Soup Tin. Once you’ve managed to pick it up, ascend the steps ahead and you’ll find Babs Buffbrass with the Soda Pop Gun in hand. “That stuck-up old Mr. Crivens said I was to give yer this thing back.” Babs says gesturing towards the Soda Pop gun, “He seemed t’think yer’d need it.” Too right you are, Buffbrass! Once we’ve acquired our weapon once more we’ll carry on ahead where a Super Scary Shock will burst forth from the Washing Machine; let the Shocker Blocker take care of it and then use your Soda Pop Grenades to take out the Haunted Television Set ahead. If your shot misses the wicker basket next to the Television, crack it open and you’ll find a Super Weapons! Tin inside.
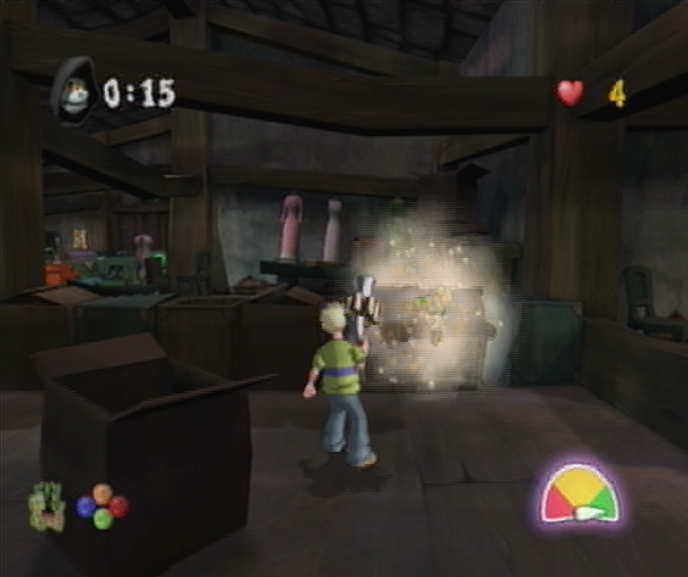
![]() Continue through the broken ceiling beam to its end and then turn right and you’ll find a Haunted Chair blocking your path. A single shot from your Soda is all you’ll need to take out this Ghouly, and another to break open the blue crate harboring a Flying Imp inside. Now that we’ve cleared a path, we’ll make our way through to the next area where you’ll spot a light purple treasure chest. Break this treasure chest only and work your way through to the next area where you’ll find a Haunted Portrait waiting for you on the opposite side. Take care of it quickly with your Soda Pop gun and then carry on towards a sewing machine in the center of the room to find a Haunted Television Set ahead which we’ll take out in two shots. We’re nearly finished yet, and not a moment too soon, as the Reaper will likely be summoned at this point. It won’t take him very long to play catch up, though he can be kept at bay most effectively with a shot or two from your Soda Pop gun if things get tight.
Continue through the broken ceiling beam to its end and then turn right and you’ll find a Haunted Chair blocking your path. A single shot from your Soda is all you’ll need to take out this Ghouly, and another to break open the blue crate harboring a Flying Imp inside. Now that we’ve cleared a path, we’ll make our way through to the next area where you’ll spot a light purple treasure chest. Break this treasure chest only and work your way through to the next area where you’ll find a Haunted Portrait waiting for you on the opposite side. Take care of it quickly with your Soda Pop gun and then carry on towards a sewing machine in the center of the room to find a Haunted Television Set ahead which we’ll take out in two shots. We’re nearly finished yet, and not a moment too soon, as the Reaper will likely be summoned at this point. It won’t take him very long to play catch up, though he can be kept at bay most effectively with a shot or two from your Soda Pop gun if things get tight.
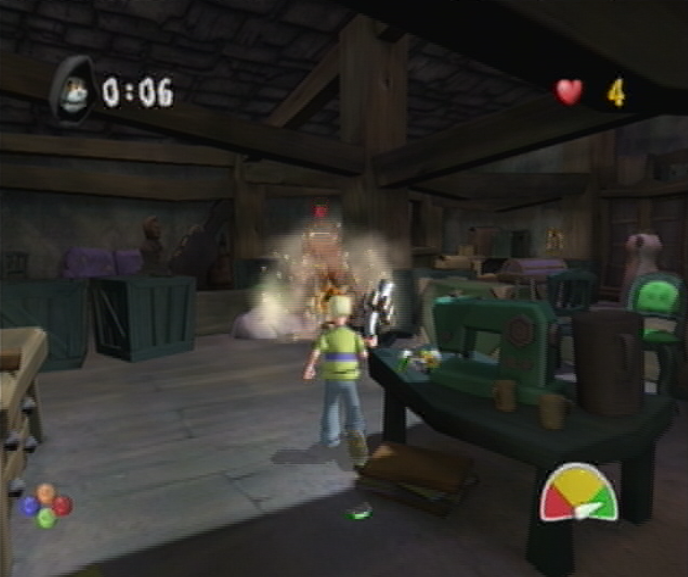
![]() Just ahead of the sewing machine you should manage to spot a pair of blue crates on the left hand side obstructing your path. Take them both out with your Soda Pop gun and then before you get too far ahead of yourself, turn to your immediate left as soon as you pass the two blue crates to take out the Haunted Chair. Carry on through this area and destroy the chest blocking your path to reveal another Flying Imp. Once you’ve managed defeat it, you’ll find yourself in the final stretch leading towards the Challenge Door. Before you step beyond the boundaries of this area, turn to the right and take out the final Haunted Television Set. While the Reaper is likely on your tail at this point, so it’s best to fire two shots towards the twin Grand Father Clocks up ahead to expose two Flying Imps before they have a chance to pop out and start leeching away at your minuscule bit of health. They’ll only require a single shot each, so you should manage it on the initial hit.
Just ahead of the sewing machine you should manage to spot a pair of blue crates on the left hand side obstructing your path. Take them both out with your Soda Pop gun and then before you get too far ahead of yourself, turn to your immediate left as soon as you pass the two blue crates to take out the Haunted Chair. Carry on through this area and destroy the chest blocking your path to reveal another Flying Imp. Once you’ve managed defeat it, you’ll find yourself in the final stretch leading towards the Challenge Door. Before you step beyond the boundaries of this area, turn to the right and take out the final Haunted Television Set. While the Reaper is likely on your tail at this point, so it’s best to fire two shots towards the twin Grand Father Clocks up ahead to expose two Flying Imps before they have a chance to pop out and start leeching away at your minuscule bit of health. They’ll only require a single shot each, so you should manage it on the initial hit.
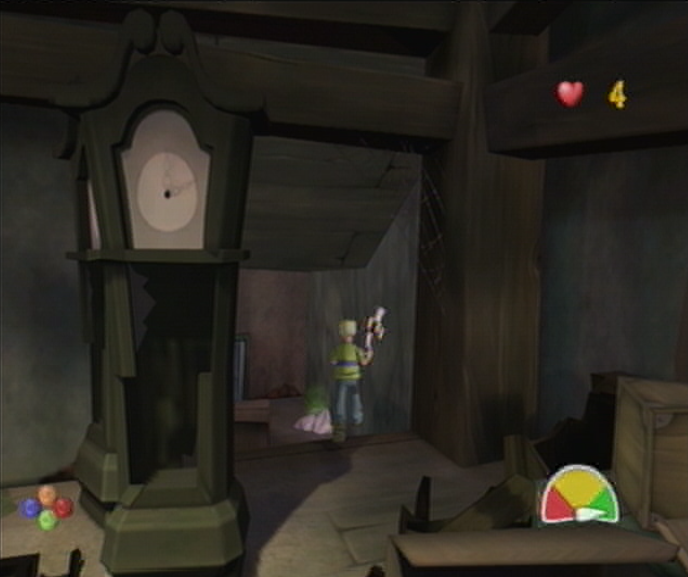
![]() Once you’ve managed to take care of both Flying Imps with your Soda Pop gun, it’s time to stray away from the path and find our deceptive exit! While the Attic continues to trail off to the right, you’ll find that following the route presented will take you in a massive circle once you’ve been lead back through to the sewing machine. Rather than wasting our time and letting the Reaper have a decent shot at following our destructive wake, let’s investigate the area behind the two grandfather clocks. Once you’ve gotten yourself in the correct vantage point you should manage to spot a final hallway leading to the Challenge Door, which has been hidden craftily out of view. From here, descend the set of stairs and then deal with the Haunted Portrait to the left with your Soda Pop gun. Once you’ve managed that, make a beeline towards the Challenge Door where a final Super Scary Shock sequence waits for us. Luckily our Shocker Blocker! Tin will take care of the button mashing for us.
Once you’ve managed to take care of both Flying Imps with your Soda Pop gun, it’s time to stray away from the path and find our deceptive exit! While the Attic continues to trail off to the right, you’ll find that following the route presented will take you in a massive circle once you’ve been lead back through to the sewing machine. Rather than wasting our time and letting the Reaper have a decent shot at following our destructive wake, let’s investigate the area behind the two grandfather clocks. Once you’ve gotten yourself in the correct vantage point you should manage to spot a final hallway leading to the Challenge Door, which has been hidden craftily out of view. From here, descend the set of stairs and then deal with the Haunted Portrait to the left with your Soda Pop gun. Once you’ve managed that, make a beeline towards the Challenge Door where a final Super Scary Shock sequence waits for us. Luckily our Shocker Blocker! Tin will take care of the button mashing for us.
Navigation:
Chapter 1: The Rescue
Chapter 2: The Restoration
Chapter 3: The Riddle
-3-1: Fetching up the First Verse
-3-2: Second Stanza in the Stables
-3-3: Well Versed in Backtracking
-3-4: Don’t Fear the Reaper
-3-5: Method to the Madness
-3-6: Requisite for a Reckoning
Chapter 4: The Reckoning
Chapter 5: The Race
THE DERANGED DOCTOR WILL SEE YOU NOW…
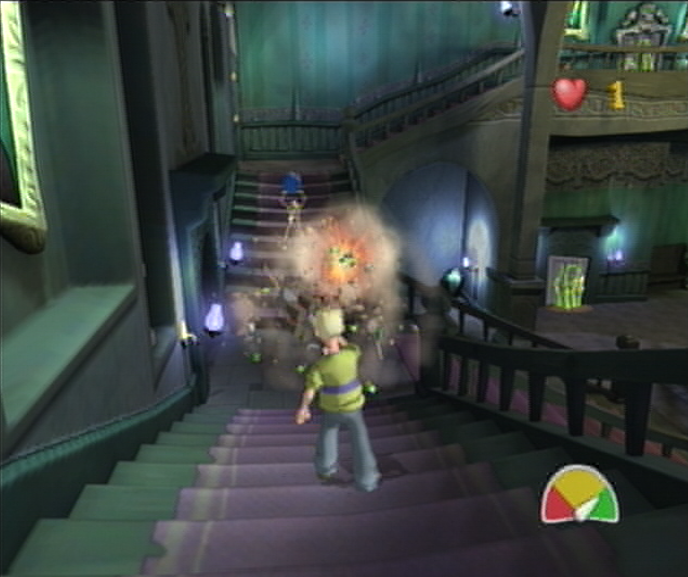
![]() With the events in the Attic behind us, we can get back on track to collecting the final part of the rhyme, which if you can recall, Crivens said was behind held inside Dr. Krackpots’ Ghouly-making Laboratory. Luckily our latest brush in with the Grim Reaper has seen us to the Grand Hallway where the Lab is a stones throw away, though the journey is hindered somewhat by the trio of Skeletons that have made an impromptu entrance on the opposite end of the Hall. From where you start off, descend the first set of steps and then stand where it levels off in front of the barred door. You’ll need to pick off the Skeletons with your Soda Pop gun from afar, they’ll go down easily enough with a single hit, but given your current health the same rules apply to you as well. It can be a little difficult to aim downward here, so keep your finger on the trigger until you send the Skeletons into pieces. Once you’ve managed to defeat the trio, we’ll carry on into the central doorway to the left.
With the events in the Attic behind us, we can get back on track to collecting the final part of the rhyme, which if you can recall, Crivens said was behind held inside Dr. Krackpots’ Ghouly-making Laboratory. Luckily our latest brush in with the Grim Reaper has seen us to the Grand Hallway where the Lab is a stones throw away, though the journey is hindered somewhat by the trio of Skeletons that have made an impromptu entrance on the opposite end of the Hall. From where you start off, descend the first set of steps and then stand where it levels off in front of the barred door. You’ll need to pick off the Skeletons with your Soda Pop gun from afar, they’ll go down easily enough with a single hit, but given your current health the same rules apply to you as well. It can be a little difficult to aim downward here, so keep your finger on the trigger until you send the Skeletons into pieces. Once you’ve managed to defeat the trio, we’ll carry on into the central doorway to the left.
EXPERIMENTS CHAMBER
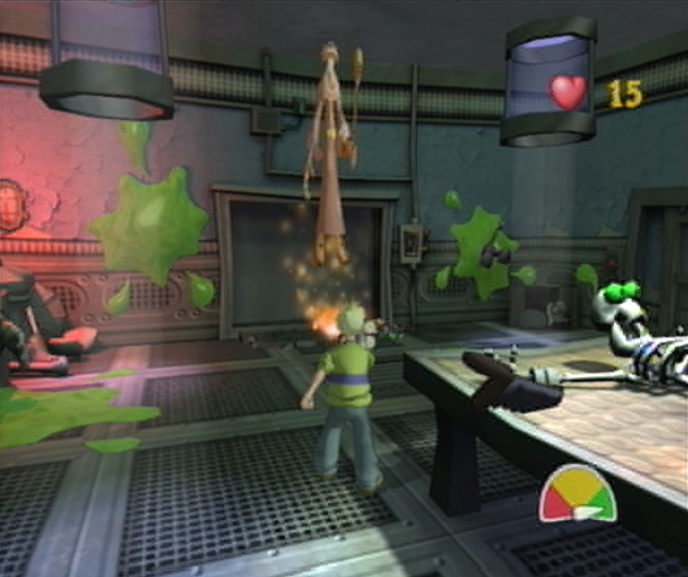
![]() The Experiments Chamber is host to yet another hidden Warlock, who has taken to hiding in the large section of lockers on the opposite side of the room. Fire a well placed shot over to the lockers and you’ll expose your Warlock. Since you’ll only be allotted a few seconds to defeat the Warlock, there’s a little trick you can exploit to be quick on the draw. There are only three places that the Warlock can appear; one being inside the windowed control room, the second being just outside the window next to a medical trolley, and finally from where you started from in front of the door to the Grand Hallway. Pay close attention to the scene that plays when the Challenge presents itself and you’ll see that the angle focuses on the inside of the control booth and the medical trolley. If the Warlock isn’t in either of these areas, it means he’s standing at the Grand Hallway door. Once you’ve regained control, spin around to the Warlocks position and take him out with two quick shots.
The Experiments Chamber is host to yet another hidden Warlock, who has taken to hiding in the large section of lockers on the opposite side of the room. Fire a well placed shot over to the lockers and you’ll expose your Warlock. Since you’ll only be allotted a few seconds to defeat the Warlock, there’s a little trick you can exploit to be quick on the draw. There are only three places that the Warlock can appear; one being inside the windowed control room, the second being just outside the window next to a medical trolley, and finally from where you started from in front of the door to the Grand Hallway. Pay close attention to the scene that plays when the Challenge presents itself and you’ll see that the angle focuses on the inside of the control booth and the medical trolley. If the Warlock isn’t in either of these areas, it means he’s standing at the Grand Hallway door. Once you’ve regained control, spin around to the Warlocks position and take him out with two quick shots.
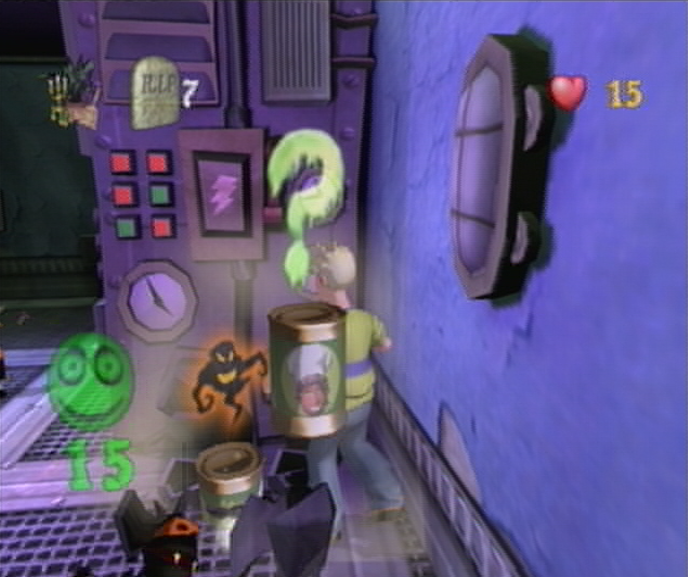
![]() After you’ve managed to defeat the Warlock, the Challenge Door will unlock inside the control booth as Babs Buffbrass shambles through the frame. Make your way through the entrance of the control booth and then approach Babs to get a stern talking-to. “That’s quite enough mess yer’ve made in ‘ere!“, The housekeeper trills as she takes in the damage before settling on your Soda Pop gun. “I don’t care what that Mr. Crivens says no more, I’m takin’ that thing back! Gimme it!”. Without a weapon we’ll have to carry on through the Challenge Door ahead, to which the door will slam in defiance, tasking us with a second more difficult challenge. Rather than defeating eight needless Ghoulies however, you’ll find a quicker solution if you turn around towards an Unfavorable Soup Tin in front of the large machine. Work your way around the Tin and kick in the piping closest to the wall to reveal a hidden Challenge Solved! Soup Tin. Collect it and then escape through the open Challenge Door.
After you’ve managed to defeat the Warlock, the Challenge Door will unlock inside the control booth as Babs Buffbrass shambles through the frame. Make your way through the entrance of the control booth and then approach Babs to get a stern talking-to. “That’s quite enough mess yer’ve made in ‘ere!“, The housekeeper trills as she takes in the damage before settling on your Soda Pop gun. “I don’t care what that Mr. Crivens says no more, I’m takin’ that thing back! Gimme it!”. Without a weapon we’ll have to carry on through the Challenge Door ahead, to which the door will slam in defiance, tasking us with a second more difficult challenge. Rather than defeating eight needless Ghoulies however, you’ll find a quicker solution if you turn around towards an Unfavorable Soup Tin in front of the large machine. Work your way around the Tin and kick in the piping closest to the wall to reveal a hidden Challenge Solved! Soup Tin. Collect it and then escape through the open Challenge Door.
DR. KRACKPOTS’ CRACK SHOT BACKFIRES
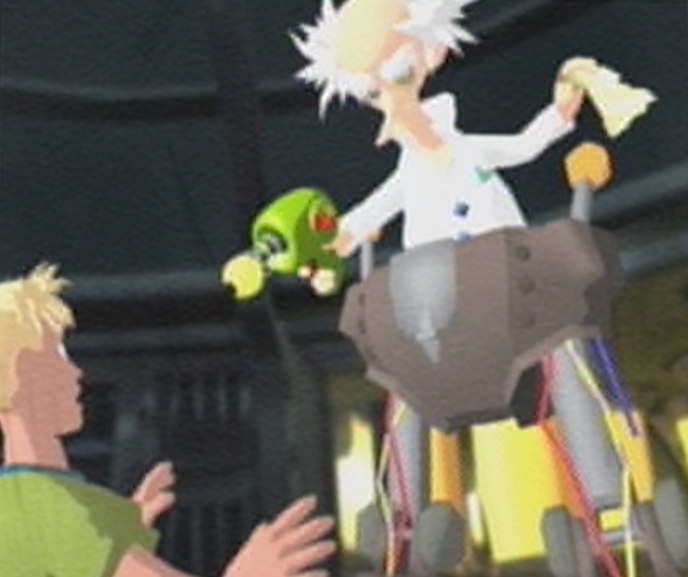
![]() Creeping around the large frothing test tubes, Cooper works his way into the dormant laboratory that supposedly houses the final piece of the sought-after rhyme. Before he’s gotten a chance to look around however, a large pair of robotic legs drop from the ceiling, catching Cooper by surprise. “Looking for this, are you little man?” Krackpot jeers as he holds the final piece of the Riddle above his head, “C’mon, take it then! I haven’t got all day!” As Krackpot waves the Riddle tauntingly out of reach, Cooper edges as close as possible before making a desperate jump, which fails to meet its mark as the poor lad drops to the floor below. As Cooper picks himself up, Krackpot quickly draws his Ghoulification Ray and takes aim, “This is all you’ll be getting from me!” the Doctor sneers as he cranks the Ghouly meter to full power, threatening to turn Cooper into an Ogre like Amber! In a last-ditch effort Cooper attempts to block the barrel with his finger as he braces for impact…
Creeping around the large frothing test tubes, Cooper works his way into the dormant laboratory that supposedly houses the final piece of the sought-after rhyme. Before he’s gotten a chance to look around however, a large pair of robotic legs drop from the ceiling, catching Cooper by surprise. “Looking for this, are you little man?” Krackpot jeers as he holds the final piece of the Riddle above his head, “C’mon, take it then! I haven’t got all day!” As Krackpot waves the Riddle tauntingly out of reach, Cooper edges as close as possible before making a desperate jump, which fails to meet its mark as the poor lad drops to the floor below. As Cooper picks himself up, Krackpot quickly draws his Ghoulification Ray and takes aim, “This is all you’ll be getting from me!” the Doctor sneers as he cranks the Ghouly meter to full power, threatening to turn Cooper into an Ogre like Amber! In a last-ditch effort Cooper attempts to block the barrel with his finger as he braces for impact…
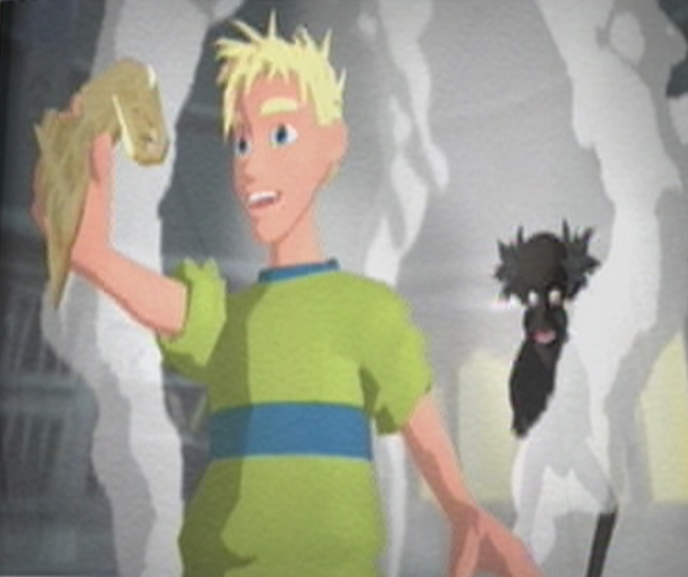
![]() As Krackpot squeezes the trigger to his Ghoulification Ray, Coopers finger effectively blocks the firing mechanism, and as a result the deafening explosion fills the laboratory with a brilliant white light. As the smoke settles it becomes clear that the damage wasn’t restricted to just the Ghoulification chamber, as a pantsless Dr. Krackpot has found himself amongst a pile of what used to be his robotic legs. “What the…!?“, Krackpot begins as he tries to take it all in, “That’s quite a design flaw! Er, back to the drawing board, methinks!!” As an unscathed Cooper stands dauntingly above the the frame of the charred Doctor, their vision settles on the final piece of the Riddle, which has remained miraculously unaffected by the explosion. “Here boy, take the paper! It’s the least of my worries! Just don’t tell anyone what happened!” Cooper snatches the page from Krackpots hand as the ashamed quack slinks off without his dignity. That’s it, the Riddle is complete once more!
As Krackpot squeezes the trigger to his Ghoulification Ray, Coopers finger effectively blocks the firing mechanism, and as a result the deafening explosion fills the laboratory with a brilliant white light. As the smoke settles it becomes clear that the damage wasn’t restricted to just the Ghoulification chamber, as a pantsless Dr. Krackpot has found himself amongst a pile of what used to be his robotic legs. “What the…!?“, Krackpot begins as he tries to take it all in, “That’s quite a design flaw! Er, back to the drawing board, methinks!!” As an unscathed Cooper stands dauntingly above the the frame of the charred Doctor, their vision settles on the final piece of the Riddle, which has remained miraculously unaffected by the explosion. “Here boy, take the paper! It’s the least of my worries! Just don’t tell anyone what happened!” Cooper snatches the page from Krackpots hand as the ashamed quack slinks off without his dignity. That’s it, the Riddle is complete once more!
KRACKPOT’S LAB
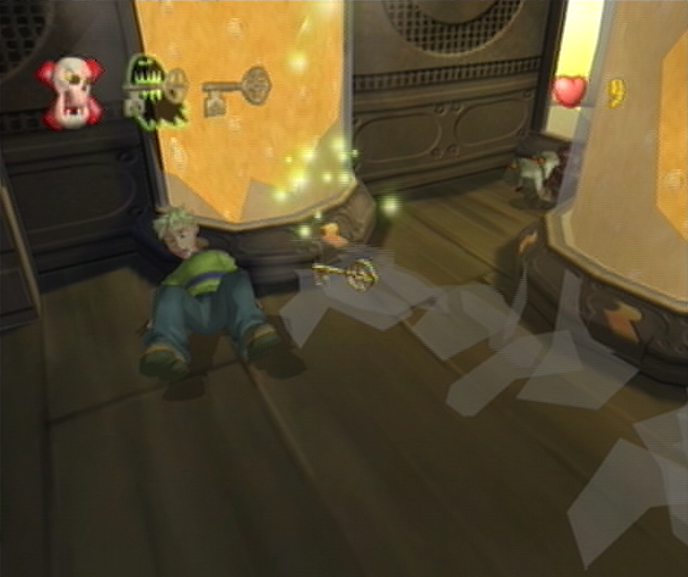
![]() Unfortunately we’re still left to contend with the challenge found in Krackpot’s Lab before making our escape, and it’s quite a difficult one at that. Three Jessie N’ Clydes will be roaming the floor, and so long as you don’t accidentally wake them up you shouldn’t have to deal with them at all. Adding onto the challenge, you’ll be tasked with finding two keys that are hidden in the room; one inside a Ghouly and the other inside one of the frothing tubes at in front of the Challenge Door. As you start off, spin around on the spot and you’ll spot the tubes directly behind you, you’ll have to crack open each tube individually; if you expose any Worms in the process you’ll have to deal with them before looking in another tube. Once you’ve managed to find the proper tube harboring the key we’ll carry out onto the floor and follow the caged wall to the right. Once you’ve reached the halfway point you’ll should spot an open iron door in front of a control panel on wheels.
Unfortunately we’re still left to contend with the challenge found in Krackpot’s Lab before making our escape, and it’s quite a difficult one at that. Three Jessie N’ Clydes will be roaming the floor, and so long as you don’t accidentally wake them up you shouldn’t have to deal with them at all. Adding onto the challenge, you’ll be tasked with finding two keys that are hidden in the room; one inside a Ghouly and the other inside one of the frothing tubes at in front of the Challenge Door. As you start off, spin around on the spot and you’ll spot the tubes directly behind you, you’ll have to crack open each tube individually; if you expose any Worms in the process you’ll have to deal with them before looking in another tube. Once you’ve managed to find the proper tube harboring the key we’ll carry out onto the floor and follow the caged wall to the right. Once you’ve reached the halfway point you’ll should spot an open iron door in front of a control panel on wheels.

![]() Inside the straw laden cage, you should manage to spot a large wooden crate directly across from a toilet. If you investigate behind this crate you’ll find a spot where the bars have been pried open, granting us access to a Traitor Fever! and Invulnerability! Soup Tin. Let’s scoop them up quickly and then work our way back out to the front of the cage. Now that you’re back in the main chamber, you should manage to spot number of small cages and a bookshelf next to the entrance of the bathroom. Kicking in the thinnest cage door closest to the bathroom will expose a Skeleton that will want to join the traitorous fray, cut him off at the pass and start chipping away at his energy as quickly as possible. As you might possibly be aware from the leftmost icon at the top of your screen, defeating any Skeletons is against the rules, but if you hope to escape Krackpot’s Lab we’ll require assistance from the Grim Reaper himself, who we’ve just spent the last few rooms trying to avoid.
Inside the straw laden cage, you should manage to spot a large wooden crate directly across from a toilet. If you investigate behind this crate you’ll find a spot where the bars have been pried open, granting us access to a Traitor Fever! and Invulnerability! Soup Tin. Let’s scoop them up quickly and then work our way back out to the front of the cage. Now that you’re back in the main chamber, you should manage to spot number of small cages and a bookshelf next to the entrance of the bathroom. Kicking in the thinnest cage door closest to the bathroom will expose a Skeleton that will want to join the traitorous fray, cut him off at the pass and start chipping away at his energy as quickly as possible. As you might possibly be aware from the leftmost icon at the top of your screen, defeating any Skeletons is against the rules, but if you hope to escape Krackpot’s Lab we’ll require assistance from the Grim Reaper himself, who we’ve just spent the last few rooms trying to avoid.
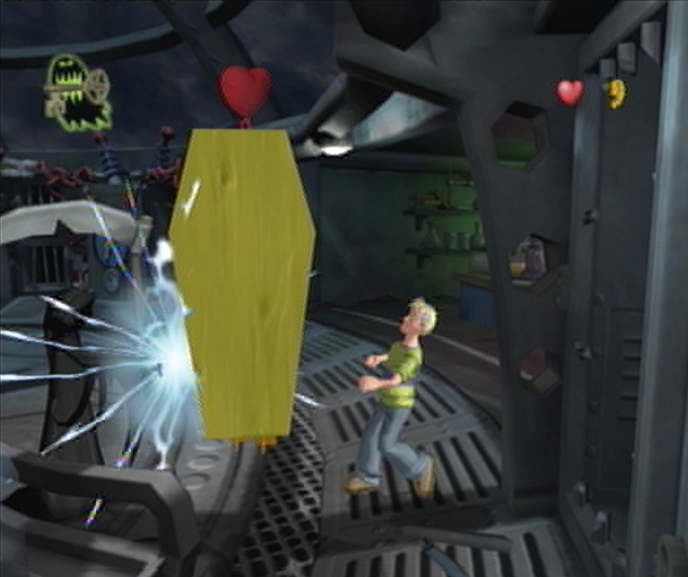
![]() After you’ve managed to defeat the Skeleton you’ll hear the tell-tale toll of the Reapers arrival. If you spin around on the spot from where you uncovered the Skeleton initially you’ll spot an area just across the room that houses a large table cluttered with scientific equipment. You’ll need to rush over to this spot and then break open another thin cage that can be found just to the right of this room, just around the corner from the Periodic Table of the Elements chart. Doing so will uncover the Vampire we’ll need to defeat for the Ghouly Key. Unfortunately without Ol’ Edna by our side, we have no way of getting through the Vampire’s coffin; that’s what the Reaper is for! If you can, try and keep the Vampire still by initiating an attack first and then hiding behind the coffin so that the Reaper raises his hand and touches petrified wood. Once the Vampire is defeated, avoid the Reaper and make your way to where we found the Worms to escape through the Challenge Door.
After you’ve managed to defeat the Skeleton you’ll hear the tell-tale toll of the Reapers arrival. If you spin around on the spot from where you uncovered the Skeleton initially you’ll spot an area just across the room that houses a large table cluttered with scientific equipment. You’ll need to rush over to this spot and then break open another thin cage that can be found just to the right of this room, just around the corner from the Periodic Table of the Elements chart. Doing so will uncover the Vampire we’ll need to defeat for the Ghouly Key. Unfortunately without Ol’ Edna by our side, we have no way of getting through the Vampire’s coffin; that’s what the Reaper is for! If you can, try and keep the Vampire still by initiating an attack first and then hiding behind the coffin so that the Reaper raises his hand and touches petrified wood. Once the Vampire is defeated, avoid the Reaper and make your way to where we found the Worms to escape through the Challenge Door.
EXPERIMENTS CHAMBER
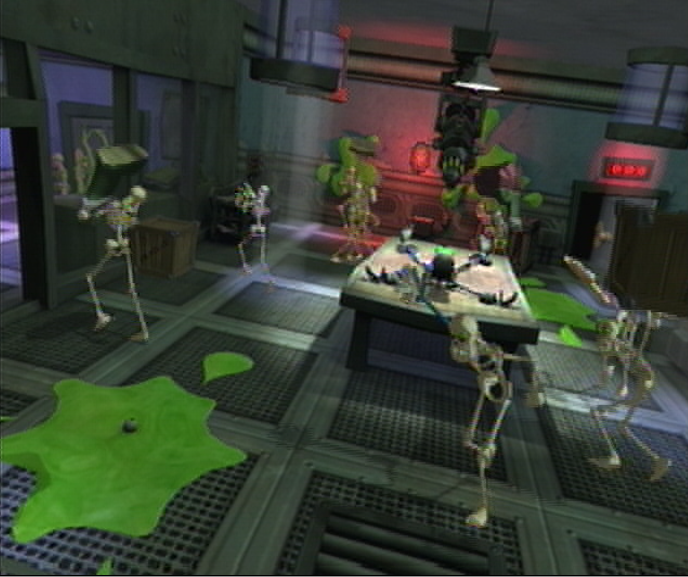
![]() Now that you’ve left the Laboratory behind, it’s time to get on track with reading the restored rhyme aloud and begin the reckoning with Baron Von Ghoul himself. Unfortunately, the Experiments Chamber has become overrun with a gangly gang of Skeletons, each wielding their own unique weapon for some revenge against Cooper. Since you’ve only started off in the Experiments Chamber with 10 health, it would be foolish to wander out on the floor unarmed to start fighting back or risking an escape, as doing so will jeopardize your Times Fainted standing, something you’ll want to avoid so near to the end of the game. Instead, you’ll have to stick back in the control room where you’ll view the action from afar, protected from a thick pane of glass. If you’d like, you can increase your energy by 5 if you wander to the rear of the machine closest to the Challenge Door and kick in the vent that housed our Challenge Solved! Soup Tin the last time we came through here.
Now that you’ve left the Laboratory behind, it’s time to get on track with reading the restored rhyme aloud and begin the reckoning with Baron Von Ghoul himself. Unfortunately, the Experiments Chamber has become overrun with a gangly gang of Skeletons, each wielding their own unique weapon for some revenge against Cooper. Since you’ve only started off in the Experiments Chamber with 10 health, it would be foolish to wander out on the floor unarmed to start fighting back or risking an escape, as doing so will jeopardize your Times Fainted standing, something you’ll want to avoid so near to the end of the game. Instead, you’ll have to stick back in the control room where you’ll view the action from afar, protected from a thick pane of glass. If you’d like, you can increase your energy by 5 if you wander to the rear of the machine closest to the Challenge Door and kick in the vent that housed our Challenge Solved! Soup Tin the last time we came through here.
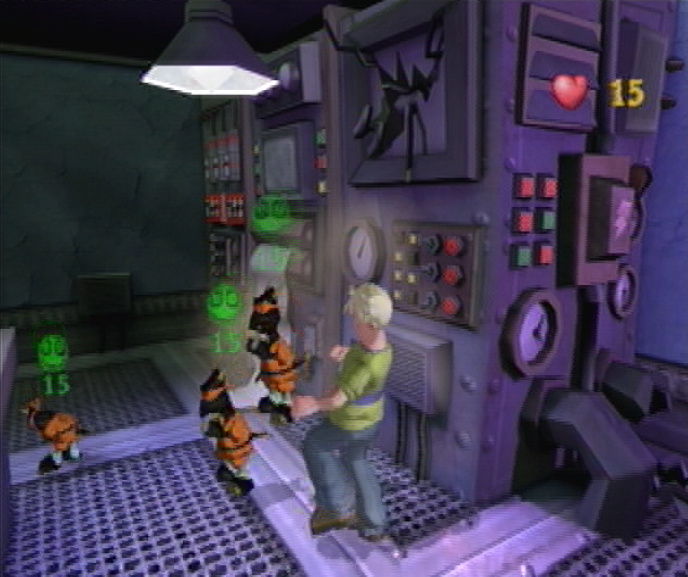
![]() While we’re in the habit of smashing in the Control Room machine, you’ll find the solution to the current problem at hand on the front panel. Without getting too close to the doorway, approach the corner of the machine and you should spot a broken television screen with a clock directly underneath it. Deliver a swift kick to the ventilation shaft just below this clock and you’ll unleash a trio of Traitorous Ninja Imps – just what we need to clear out the room! Once the Ninja Imps have run out, you’re free to watch from the Control Room as they take the room back. You’ll need to exhibit real patience for this room; if you run out too early you’ll be dealt with rather quickly, so just sit back, grab a stool in case you get some unwanted intruders from the doorway, and wait it out. Once the Ninja Imps have reduced the ranks to at least two Skeletons without any throwable weapons, you’ll want to keep the Imps on your side before they turn and run towards the exit.
While we’re in the habit of smashing in the Control Room machine, you’ll find the solution to the current problem at hand on the front panel. Without getting too close to the doorway, approach the corner of the machine and you should spot a broken television screen with a clock directly underneath it. Deliver a swift kick to the ventilation shaft just below this clock and you’ll unleash a trio of Traitorous Ninja Imps – just what we need to clear out the room! Once the Ninja Imps have run out, you’re free to watch from the Control Room as they take the room back. You’ll need to exhibit real patience for this room; if you run out too early you’ll be dealt with rather quickly, so just sit back, grab a stool in case you get some unwanted intruders from the doorway, and wait it out. Once the Ninja Imps have reduced the ranks to at least two Skeletons without any throwable weapons, you’ll want to keep the Imps on your side before they turn and run towards the exit.
Navigation:
Chapter 1: The Rescue
Chapter 2: The Restoration
Chapter 3: The Riddle
-3-1: Fetching up the First Verse
-3-2: Second Stanza in the Stables
-3-3: Well Versed in Backtracking
-3-4: Don’t Fear the Reaper
-3-5: Method to the Madness
-3-6: Requisite for a Reckoning
Chapter 4: The Reckoning
Chapter 5: The Race
RIDDING THE VINES BY READING THE RHYMES
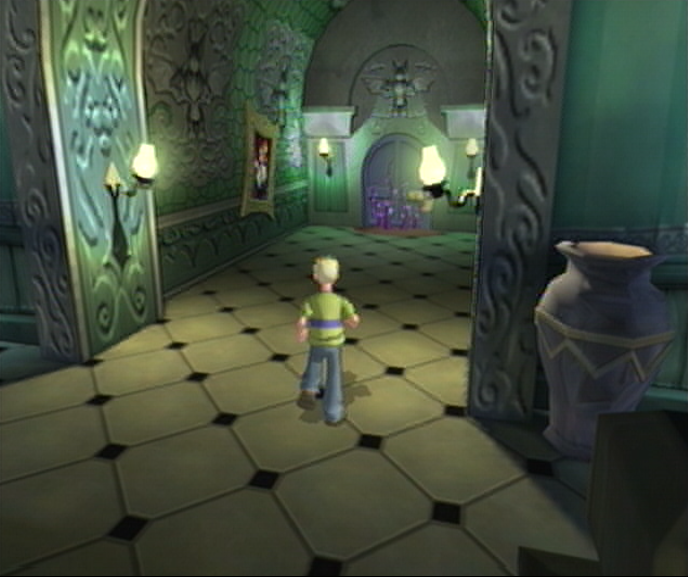
![]() Once you’ve managed to re-emerge in the Grand Hallway with the Barons rhyme intact, we’ll work our way to delivering it as intended. Crivens provides us some insight on the path ahead, “Well, you’re almost there, Sir! There’s the door to my master’s quarters. Now approach it and read the verse aloud!” Descending to the main floor is clearly out of the question, as it’s been roped off, so the only way to go is up. From where you start off in front of the Experiments Chamber door, head up the staircase to your right until you’ve leveled off at the top floor. This floor houses the Challenge Door leading to the Baron’s Quarters, which can be found at the end of this lengthy banister directly across from Dr. Krackpot’s Lab. Once you’ve reached the end, it’s just a simple matter of carrying on down the elaborate corridor towards the curious looking Challenge Door shrouded with purple vines to have Cooper begin reading the rhyme.
Once you’ve managed to re-emerge in the Grand Hallway with the Barons rhyme intact, we’ll work our way to delivering it as intended. Crivens provides us some insight on the path ahead, “Well, you’re almost there, Sir! There’s the door to my master’s quarters. Now approach it and read the verse aloud!” Descending to the main floor is clearly out of the question, as it’s been roped off, so the only way to go is up. From where you start off in front of the Experiments Chamber door, head up the staircase to your right until you’ve leveled off at the top floor. This floor houses the Challenge Door leading to the Baron’s Quarters, which can be found at the end of this lengthy banister directly across from Dr. Krackpot’s Lab. Once you’ve reached the end, it’s just a simple matter of carrying on down the elaborate corridor towards the curious looking Challenge Door shrouded with purple vines to have Cooper begin reading the rhyme.
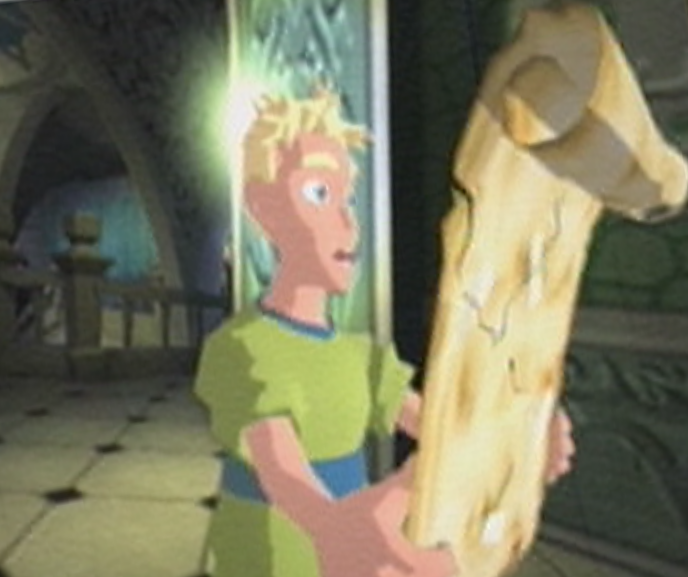
![]() Unfurling the parchment, Cooper clears his throat as he looks uneasily from the Challenge Door to the rhyme. “In my room I do hide a surprise.“, he begins, “But the secret’s for nobody’s eyes…” The Baron’s Door begins beating against its frame, as if something on the other end is protesting to get out. As the purple vines retreat from their spot on the outside of the door, a shaken Cooper draws his eyes away from the spectacle to continue reading. “Check the flaps, a-okay! Spin the prop, chocks away…” As the beating becomes more pronounced, thick black smoke begins seeping out from underneath the door and around its frame before a great crack of lighting is heard from beyond. Cooper stares in amazement before retreating back towards the parchment, which contains our final verse that we received from Dr. Krackpot. “Faster down the runway we go. Let’s take to the skies, tally-bally-ho!” With the reading finished, Cooper draws his full attention to the Baron’s Door.
Unfurling the parchment, Cooper clears his throat as he looks uneasily from the Challenge Door to the rhyme. “In my room I do hide a surprise.“, he begins, “But the secret’s for nobody’s eyes…” The Baron’s Door begins beating against its frame, as if something on the other end is protesting to get out. As the purple vines retreat from their spot on the outside of the door, a shaken Cooper draws his eyes away from the spectacle to continue reading. “Check the flaps, a-okay! Spin the prop, chocks away…” As the beating becomes more pronounced, thick black smoke begins seeping out from underneath the door and around its frame before a great crack of lighting is heard from beyond. Cooper stares in amazement before retreating back towards the parchment, which contains our final verse that we received from Dr. Krackpot. “Faster down the runway we go. Let’s take to the skies, tally-bally-ho!” With the reading finished, Cooper draws his full attention to the Baron’s Door.

![]() Quickening its pace, the Challenge Door continues to slam against its frame reaching a climax that seems to shake Ghoulhaven Hall itself. The thick smoke continues to pour out in heavier dollops as the knocking continues to add strain to the hinges! As the action accelerates, a glowing purple outline begins to encircle the edges of the door, filling the area with a brilliant aura of blinding light. Squinting to see the outcome, Cooper watches as the door comes very close to opening several times before a deafening wallop fills the air, silencing any other sounds in its wake. After using the rhyme like a shield, Cooper peers over nervously as the smoke clears from the area and the Barons Door is left ajar, showing little sign of the struggle seen seconds prior. Hardly able to contain his excitement, Cooper beams with pride at the result as he strides over to the Challenge Door. If only things were that simple Cooper, the Baron isn’t going to let you into his quarters that easily!
Quickening its pace, the Challenge Door continues to slam against its frame reaching a climax that seems to shake Ghoulhaven Hall itself. The thick smoke continues to pour out in heavier dollops as the knocking continues to add strain to the hinges! As the action accelerates, a glowing purple outline begins to encircle the edges of the door, filling the area with a brilliant aura of blinding light. Squinting to see the outcome, Cooper watches as the door comes very close to opening several times before a deafening wallop fills the air, silencing any other sounds in its wake. After using the rhyme like a shield, Cooper peers over nervously as the smoke clears from the area and the Barons Door is left ajar, showing little sign of the struggle seen seconds prior. Hardly able to contain his excitement, Cooper beams with pride at the result as he strides over to the Challenge Door. If only things were that simple Cooper, the Baron isn’t going to let you into his quarters that easily!
BEARING IT ALL EN ROUTE TO THE BARON’S QUARTERS

![]() You’ll have to brave one last challenge before you can progress into the Baron’s Quarters, and if you don’t know what to do straight off you’ll be left at the mercy of the Grim Reaper for even a moments reflection. While the open Challenge Door certainly looks alluring ahead, you’ll find that the sinister chortling that can be heard in the corridor belongs to a Super Scary Shock sequence that we’ll have to brave first. Before carrying on however, you’ll need to take note of a decorative vase to the right – smash it open and you’ll find a short ladder, a smaller vase and an Unfavorable Soup Tin waiting inside. While our newfound weapons will provide us an ample means of attack, we’ll have to deal with the Super Scary Shock sequence first so that our items aren’t wasted when Cooper is hoisted into the air by the gnarled hand from below. Once you’re ready, continue ahead into the clutches of the Super Scary Shock sequence to get it out of the way early.
You’ll have to brave one last challenge before you can progress into the Baron’s Quarters, and if you don’t know what to do straight off you’ll be left at the mercy of the Grim Reaper for even a moments reflection. While the open Challenge Door certainly looks alluring ahead, you’ll find that the sinister chortling that can be heard in the corridor belongs to a Super Scary Shock sequence that we’ll have to brave first. Before carrying on however, you’ll need to take note of a decorative vase to the right – smash it open and you’ll find a short ladder, a smaller vase and an Unfavorable Soup Tin waiting inside. While our newfound weapons will provide us an ample means of attack, we’ll have to deal with the Super Scary Shock sequence first so that our items aren’t wasted when Cooper is hoisted into the air by the gnarled hand from below. Once you’re ready, continue ahead into the clutches of the Super Scary Shock sequence to get it out of the way early.

![]() You won’t have any help from a Shocker Blocker! Soup Tin when you put yourself up into the Shock sequence, so be sure to slam the buttons as quickly and accurately as possible to get away unscathed. If you can’t get to all of the buttons in time your health will be halfed after losing 10 units of energy, though it’s not the end of the world as this challenge won’t have you confronting any offensive Ghoulies close up. Once you’ve managed to survive the sequence, we’ll have to only take a few jaunty steps towards the doorway to the Barons Quarters to find our next challenge awaiting us; defeat the Haunted Door that’s just popped off of its hinges using only 10 hits or less! There’s no sense hammering it away with your fists, as this will only waste your available chances to get some heavy blows in. Before the Haunted Door can cover too much ground you’ll be tasked with heading back toward your destroyed vase and hurling the smaller version you uncovered towards it.
You won’t have any help from a Shocker Blocker! Soup Tin when you put yourself up into the Shock sequence, so be sure to slam the buttons as quickly and accurately as possible to get away unscathed. If you can’t get to all of the buttons in time your health will be halfed after losing 10 units of energy, though it’s not the end of the world as this challenge won’t have you confronting any offensive Ghoulies close up. Once you’ve managed to survive the sequence, we’ll have to only take a few jaunty steps towards the doorway to the Barons Quarters to find our next challenge awaiting us; defeat the Haunted Door that’s just popped off of its hinges using only 10 hits or less! There’s no sense hammering it away with your fists, as this will only waste your available chances to get some heavy blows in. Before the Haunted Door can cover too much ground you’ll be tasked with heading back toward your destroyed vase and hurling the smaller version you uncovered towards it.
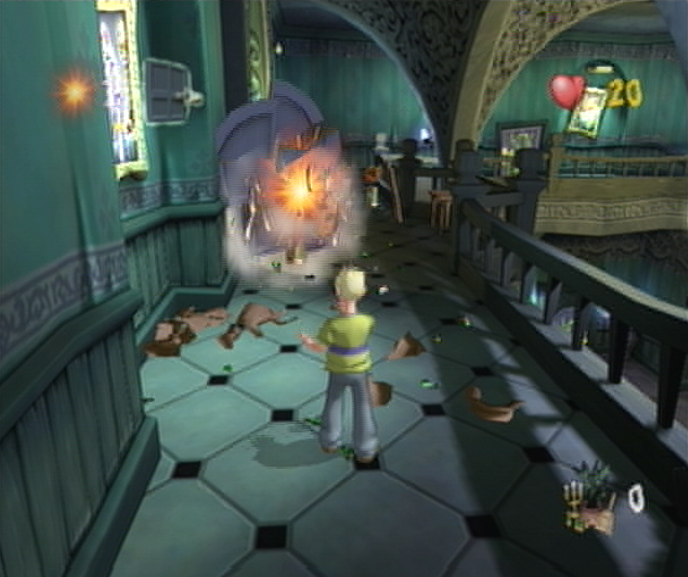
![]() Once you’ve made your mark successfully, the Haunted Door will be knocked backwards to the floor, allowing you some leeway to make a quick escape. In this case we’ll sprint over to the right on the side that didn’t have a vase to break and then carry on this route around the corner until we’ve made it to the vined Challenge Door that features a Skeletons face overhead. You should manage to spot a light blue vase to the right side of the door, break it open to reveal a smaller vase, a collection of bottles and an Unfavorable Soup Tin. Grab the small vase off of the ground first, and do what you can to avoid accidentally picking up the Unfavorable Soup Tin. Once you’ve gotten close enough to the Haunted Door, cast the small vase at its frame and then head back to the Skeleton Door once you’ve made contact. You should have just enough hits to polish it off with the remaining bottles, which will cause the door to explode once you’ve landed the sixth bottle.
Once you’ve made your mark successfully, the Haunted Door will be knocked backwards to the floor, allowing you some leeway to make a quick escape. In this case we’ll sprint over to the right on the side that didn’t have a vase to break and then carry on this route around the corner until we’ve made it to the vined Challenge Door that features a Skeletons face overhead. You should manage to spot a light blue vase to the right side of the door, break it open to reveal a smaller vase, a collection of bottles and an Unfavorable Soup Tin. Grab the small vase off of the ground first, and do what you can to avoid accidentally picking up the Unfavorable Soup Tin. Once you’ve gotten close enough to the Haunted Door, cast the small vase at its frame and then head back to the Skeleton Door once you’ve made contact. You should have just enough hits to polish it off with the remaining bottles, which will cause the door to explode once you’ve landed the sixth bottle.
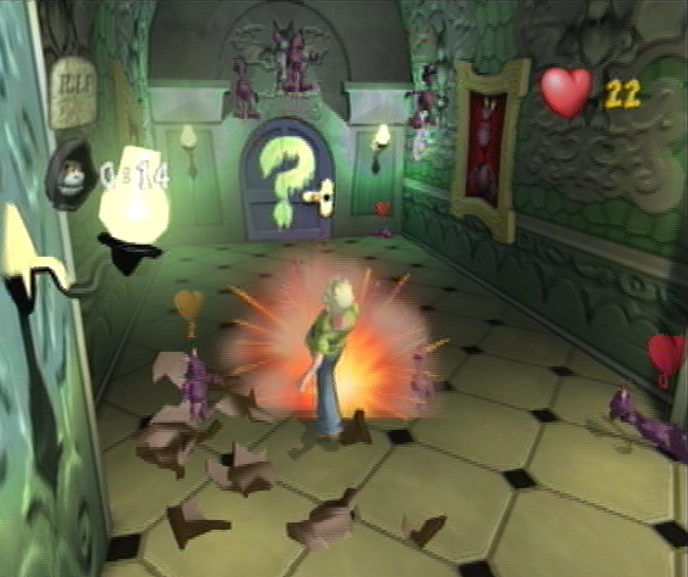
![]() While the Challenge Door will swing open once the Haunted Door is defeated, it’s too early to celebrate just yet. A flood of Imps pass into the Grand Hallway from the Baron’s Quarters and you’ll be tasked with defeating the lot in meager twenty seconds! Hopefully dealing with the door hasn’t led you too far away, as you’ll have to make your way back before the Imps have a chance to disperse. You’ll want to try and keep the entire group isolated in one area, preferably in the corridor hosting the Barons Door for easier access. After you’ve dealt with the masses the last few Imps will attempt to escape; keep on their tails and deal with them before the Reaper shows. They should remain manageable even if he does, so keep pressing on. Once you’ve done that it’s a simple matter of braving a single Super Scary Shock challenge at the Barons Door, which if you’ve grabbed the 5 Energy Soup from the Haunted Door should have you surviving regardless.
While the Challenge Door will swing open once the Haunted Door is defeated, it’s too early to celebrate just yet. A flood of Imps pass into the Grand Hallway from the Baron’s Quarters and you’ll be tasked with defeating the lot in meager twenty seconds! Hopefully dealing with the door hasn’t led you too far away, as you’ll have to make your way back before the Imps have a chance to disperse. You’ll want to try and keep the entire group isolated in one area, preferably in the corridor hosting the Barons Door for easier access. After you’ve dealt with the masses the last few Imps will attempt to escape; keep on their tails and deal with them before the Reaper shows. They should remain manageable even if he does, so keep pressing on. Once you’ve done that it’s a simple matter of braving a single Super Scary Shock challenge at the Barons Door, which if you’ve grabbed the 5 Energy Soup from the Haunted Door should have you surviving regardless.
Optimal Super Scary Score Assessment:
Ghoulies Defeated: 550+ Ghoulies total.
Time Taken: >2 Hours 10 minutes total play time.
Navigation:
Chapter 1: The Rescue
Chapter 2: The Restoration
Chapter 3: The Riddle
-3-1: Fetching up the First Verse
-3-2: Second Stanza in the Stables
-3-3: Well Versed in Backtracking
-3-4: Don’t Fear the Reaper
-3-5: Method to the Madness
-3-6: Requisite for a Reckoning
Chapter 4: The Reckoning
Chapter 5: The Race
ENCUMBERED TO CRIVEN’S QUARTERS
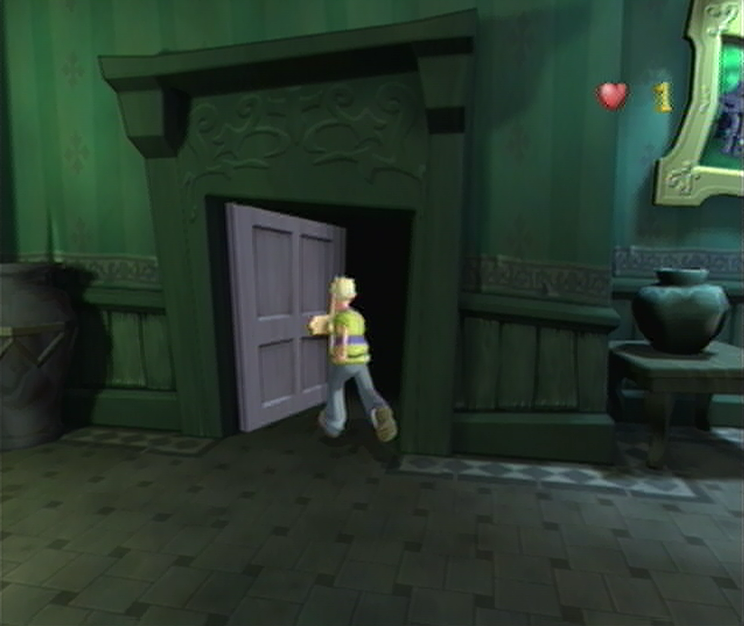
![]() After a particularly exhausting run from the Archives, Cooper and Amber close in on the final stretch of the Grand Hallway to put themselves back outside Ghoulhaven Hall. Unfortunately, their path is soon intercepted by Mr. Ribs gangly frame as he slides in front of the duo. “Please stay! And please don’t hurt Mr. Ribs again! You rescue many strange girl and boy prisoners!” Mr. Ribs manages to stammer out to a defeated looking Cooper. “We not help, or nasty Baron do same to Mr. Ribs & Cookie! Please go see Mr. Crivens in his room! He know what to do!” As Mr. Ribs points to a doorway in the distance, Amber breathes a heavy sigh of frustration, “I ain’t going anywhere near that crusty old butler dude again! You go pay him a visit.” Amber prods Coopers chest with her index finger, “I’ll go with Bonehead here and try to find a phone to call for help.” and just like that, Cooper is alone once more… Right, let’s get through that doorway…
After a particularly exhausting run from the Archives, Cooper and Amber close in on the final stretch of the Grand Hallway to put themselves back outside Ghoulhaven Hall. Unfortunately, their path is soon intercepted by Mr. Ribs gangly frame as he slides in front of the duo. “Please stay! And please don’t hurt Mr. Ribs again! You rescue many strange girl and boy prisoners!” Mr. Ribs manages to stammer out to a defeated looking Cooper. “We not help, or nasty Baron do same to Mr. Ribs & Cookie! Please go see Mr. Crivens in his room! He know what to do!” As Mr. Ribs points to a doorway in the distance, Amber breathes a heavy sigh of frustration, “I ain’t going anywhere near that crusty old butler dude again! You go pay him a visit.” Amber prods Coopers chest with her index finger, “I’ll go with Bonehead here and try to find a phone to call for help.” and just like that, Cooper is alone once more… Right, let’s get through that doorway…
HOUSEKEEPING STORE

![]() As you start off in the Housekeeping Store you’ll be thrown headlong into a challenge; find the hidden key, but don’t defeat the Haunted Television Set found in the center of the room. So long as you manage to avoid getting too near the Television Set you shouldn’t have a problem, the real issue will be locating the hidden key, which resides in one of the many wardrobes around this room. Smash open the wardrobe to your immediate left to go through a process of elimination; if you’re extremely lucky, you’ll manage to find the Key inside this particular wardrobe, otherwise just continue forward towards the collection of crates across from your starting position. Once you’ve arrived here you should spot a portrait of Dr. Krackpot to your right, smash it open quickly for a Freeze Ghoulies Soup Tin. Once you’ve picked up the Super Soup, make your way to the now immobilized Television Set and administer seven hits until you reduce its health to 6 points.
As you start off in the Housekeeping Store you’ll be thrown headlong into a challenge; find the hidden key, but don’t defeat the Haunted Television Set found in the center of the room. So long as you manage to avoid getting too near the Television Set you shouldn’t have a problem, the real issue will be locating the hidden key, which resides in one of the many wardrobes around this room. Smash open the wardrobe to your immediate left to go through a process of elimination; if you’re extremely lucky, you’ll manage to find the Key inside this particular wardrobe, otherwise just continue forward towards the collection of crates across from your starting position. Once you’ve arrived here you should spot a portrait of Dr. Krackpot to your right, smash it open quickly for a Freeze Ghoulies Soup Tin. Once you’ve picked up the Super Soup, make your way to the now immobilized Television Set and administer seven hits until you reduce its health to 6 points.
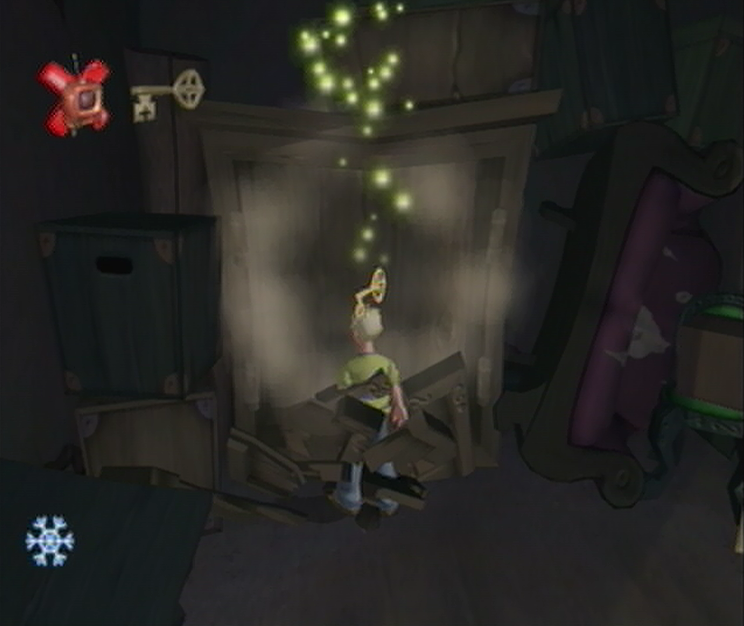
![]() Technically we’re still following the rules, as we haven’t defeated the Haunted Television just yet; we’ve just made it rather easy to dispatch it in a single hit when the time comes. Once you’ve finished with that you’ll need to rummage through the remaining wardrobes in search of the Key. There’s a single wardrobe to the right of the Haunted Television Set, with another pair to be found on either side of the room after you’ve passed it. You should manage to break open these wardrobes fairy quickly before the Haunted Television Set has regained its mobility. Once you’ve managed to acquire the Hidden Key after a panicked process of elimination the Challenge will sort itself out, rendering the door on the opposite side of the room unlocked, and forgoing the Challenge Rules. From here we’ll finish off the Haunted Television Set since the rules no longer apply and then locate the open Challenge Door on the opposite side of the room.
Technically we’re still following the rules, as we haven’t defeated the Haunted Television just yet; we’ve just made it rather easy to dispatch it in a single hit when the time comes. Once you’ve finished with that you’ll need to rummage through the remaining wardrobes in search of the Key. There’s a single wardrobe to the right of the Haunted Television Set, with another pair to be found on either side of the room after you’ve passed it. You should manage to break open these wardrobes fairy quickly before the Haunted Television Set has regained its mobility. Once you’ve managed to acquire the Hidden Key after a panicked process of elimination the Challenge will sort itself out, rendering the door on the opposite side of the room unlocked, and forgoing the Challenge Rules. From here we’ll finish off the Haunted Television Set since the rules no longer apply and then locate the open Challenge Door on the opposite side of the room.
CRIVEN’S QUARTERS
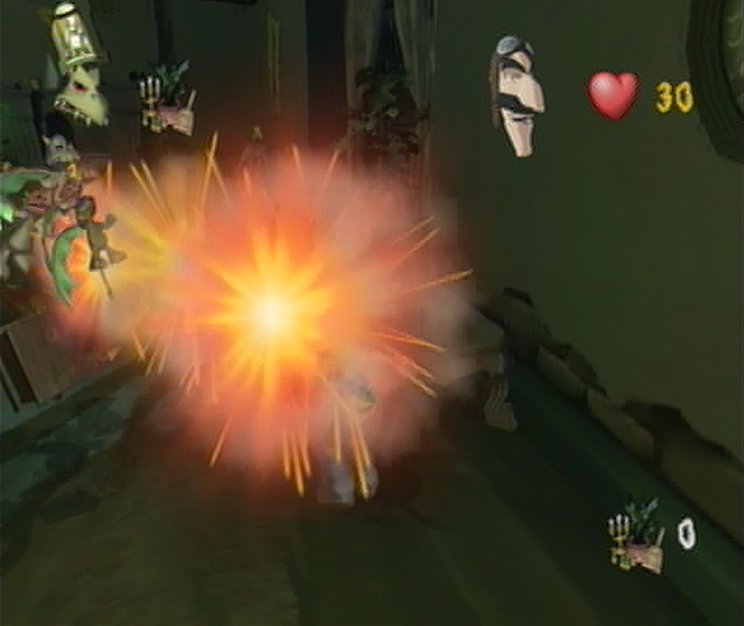
![]() Akin to the Kitchen, Crivens Quarters is filled to the brim with an abundance of Flying Imps, sending the prim and proper butler hiding inside his own wardrobe. “Woe is me!” Crivens whimpers through the crack in the door, “Can anyone save poor old Crivens from these winged monsters? I’m staying in here until they do!” Right, let’s help him out, shall we? For the purposes of this challenge you’ll have to rely on the items found around the room, so to get things going conservatively you’ll want to grab the large Record Player found to your right and immediately toss it toward the gathering of Imps to take them out in a single hit. If you hold onto it too long they’ll divebomb into it, so be sure to use it while you’ve got it and you’ll take quite a number of them out of the air. From here you’ll have to do a bit of scouring to find a few idle items around the room, some key weapons include a Lamp leaning against the corner to the right, and a Candelabra just in front of the fireplace.
Akin to the Kitchen, Crivens Quarters is filled to the brim with an abundance of Flying Imps, sending the prim and proper butler hiding inside his own wardrobe. “Woe is me!” Crivens whimpers through the crack in the door, “Can anyone save poor old Crivens from these winged monsters? I’m staying in here until they do!” Right, let’s help him out, shall we? For the purposes of this challenge you’ll have to rely on the items found around the room, so to get things going conservatively you’ll want to grab the large Record Player found to your right and immediately toss it toward the gathering of Imps to take them out in a single hit. If you hold onto it too long they’ll divebomb into it, so be sure to use it while you’ve got it and you’ll take quite a number of them out of the air. From here you’ll have to do a bit of scouring to find a few idle items around the room, some key weapons include a Lamp leaning against the corner to the right, and a Candelabra just in front of the fireplace.
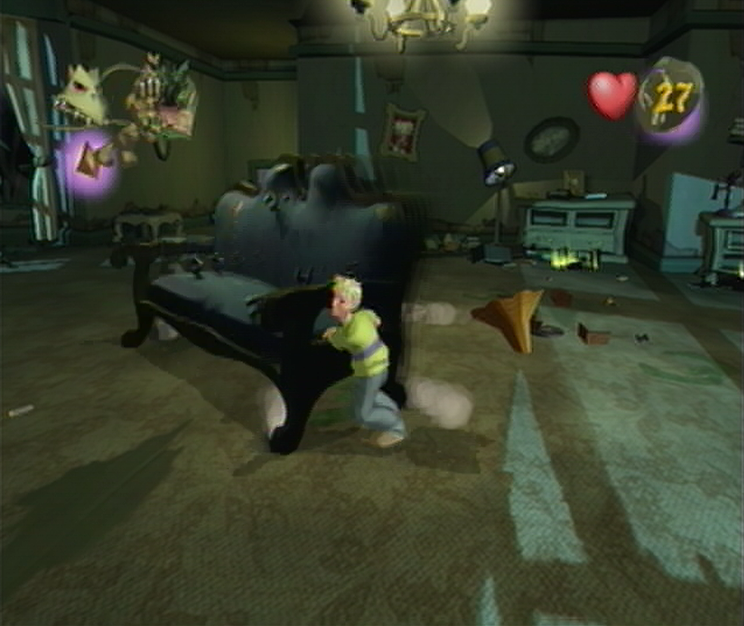
![]() If you’ve still got a few Flying Imps soaring, theres a collection of decanters on Crivens’ bed that you can use to pick off the final few, otherwise a second wave of Flying Imps will burst in from the windows giving you twice the trouble! Luckily these new Imps will have difficulty in managing their numbers, so if you circle around the room and let them dive into the ground, chances are that you’ll cause two to collide and effectively defeat each other in the process. There’s still a few items that you can use, such as a large pan that can be found next to Crivens wardrobe to be used when the Imps have gotten themselves stuck in the flooring. Once you’ve managed to run out of items, you’ll move onto the last hidden weapon; the large couch in the center of the room. In similar fashion to the Pool Table we used to sweep out the Skeletons in Chapter 1, we’ll have to lure the Flying Imps to surround the couch and then send it spinning when appropriate.
If you’ve still got a few Flying Imps soaring, theres a collection of decanters on Crivens’ bed that you can use to pick off the final few, otherwise a second wave of Flying Imps will burst in from the windows giving you twice the trouble! Luckily these new Imps will have difficulty in managing their numbers, so if you circle around the room and let them dive into the ground, chances are that you’ll cause two to collide and effectively defeat each other in the process. There’s still a few items that you can use, such as a large pan that can be found next to Crivens wardrobe to be used when the Imps have gotten themselves stuck in the flooring. Once you’ve managed to run out of items, you’ll move onto the last hidden weapon; the large couch in the center of the room. In similar fashion to the Pool Table we used to sweep out the Skeletons in Chapter 1, we’ll have to lure the Flying Imps to surround the couch and then send it spinning when appropriate.
STUCK IN THE MIDDLE WITH THE BARONS LITTLE RIDDLE
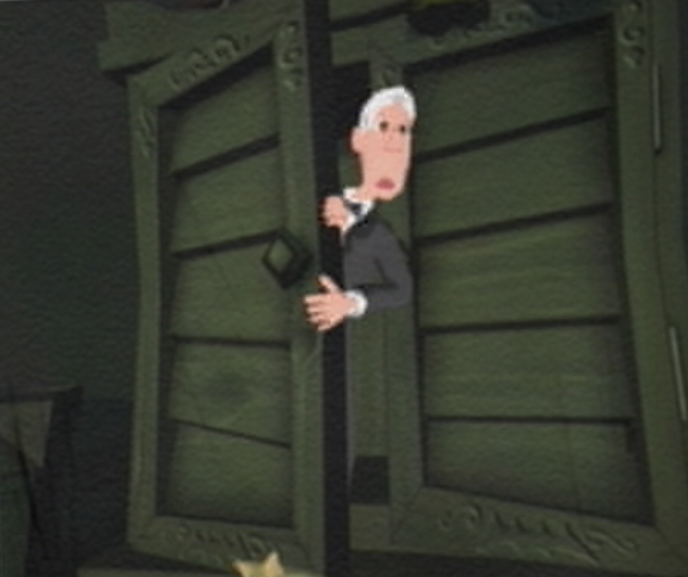
![]() After Cooper knocks the final Flying Imp straight into the wardrobe, Crivens opens the door nervously and peers out to survey the damage. “My, oh my!” he breathes, taking it all in, “What a rotten mess those Imps have made. I fear Ms. Buffbrass is not going to like this one little bit!” Pulling his view away from the dormant Imp bodies littering the room, Crivens turns to look down at Cooper, “Now, I hear young sir is to try to help the unfortunate souls that have been imprisoned in this no-good house?” Cooper nods sheepishly as Crivens extends an arm to pat him on the shoulder, “Most brave of you, Sir! Now, the only person who has the key to unlock these poor wretches is Baron Von Ghoul himself! However, I’m afraid that his quarters is sealed by a powerful magical rhyme!” Coopers defeated disposition comes rushing back to him as Crivens thinks for a moment, “I once had the very rhyme written down, but that uncouth Fiddlesworth told the Baron and he confiscated it.”
After Cooper knocks the final Flying Imp straight into the wardrobe, Crivens opens the door nervously and peers out to survey the damage. “My, oh my!” he breathes, taking it all in, “What a rotten mess those Imps have made. I fear Ms. Buffbrass is not going to like this one little bit!” Pulling his view away from the dormant Imp bodies littering the room, Crivens turns to look down at Cooper, “Now, I hear young sir is to try to help the unfortunate souls that have been imprisoned in this no-good house?” Cooper nods sheepishly as Crivens extends an arm to pat him on the shoulder, “Most brave of you, Sir! Now, the only person who has the key to unlock these poor wretches is Baron Von Ghoul himself! However, I’m afraid that his quarters is sealed by a powerful magical rhyme!” Coopers defeated disposition comes rushing back to him as Crivens thinks for a moment, “I once had the very rhyme written down, but that uncouth Fiddlesworth told the Baron and he confiscated it.”
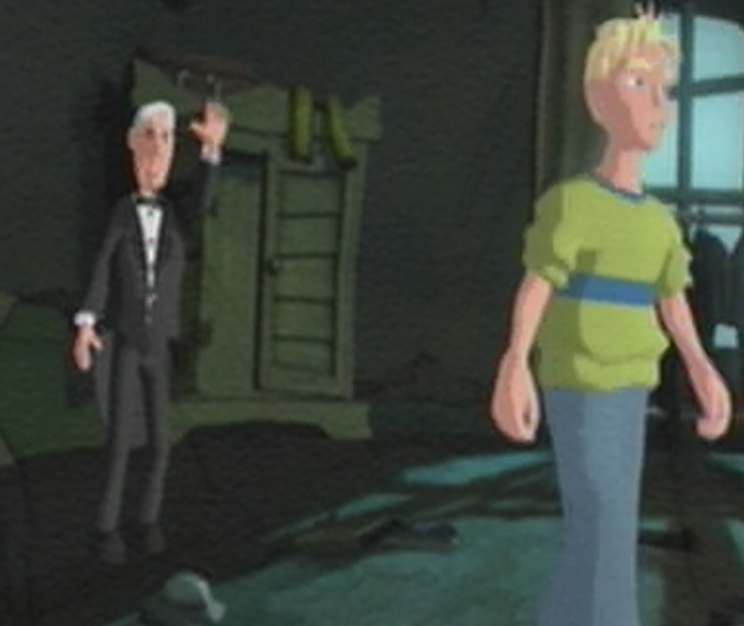
![]() “The master ripped it up into three pieces and hid them in the far flung reaches of the house!” A look of bewilderment washed over Coopers’ face. “Don’t be disheartened, young sir! I happen to know exactly where they are!” Crivens pursed his face as though recalling a long lost memory, “There’s one piece in the Greenhouse, another in the Stables and… Let’s see… Yes! I do recall that the final piece is held by the rather mad Dr. Krackpot in his Ghouly-making laboratory!” Crivens finished as calmly as though he had been telling Cooper the weather. “May I recommend that you start with the Greenhouse? Go upstairs and down the Infirmary fire escape. From there it’s just a short stroll across the lawns and through the Cottage Garden. Good luck, Sir!” Crivens gives a curt wave as Cooper is tasked with yet another cumbersome objective. Once you’ve managed to regain control it’s just a matter of finding the exit of Criven’s Quarters, which can be found where you came through initially.
“The master ripped it up into three pieces and hid them in the far flung reaches of the house!” A look of bewilderment washed over Coopers’ face. “Don’t be disheartened, young sir! I happen to know exactly where they are!” Crivens pursed his face as though recalling a long lost memory, “There’s one piece in the Greenhouse, another in the Stables and… Let’s see… Yes! I do recall that the final piece is held by the rather mad Dr. Krackpot in his Ghouly-making laboratory!” Crivens finished as calmly as though he had been telling Cooper the weather. “May I recommend that you start with the Greenhouse? Go upstairs and down the Infirmary fire escape. From there it’s just a short stroll across the lawns and through the Cottage Garden. Good luck, Sir!” Crivens gives a curt wave as Cooper is tasked with yet another cumbersome objective. Once you’ve managed to regain control it’s just a matter of finding the exit of Criven’s Quarters, which can be found where you came through initially.
HOUSEKEEPING STORE
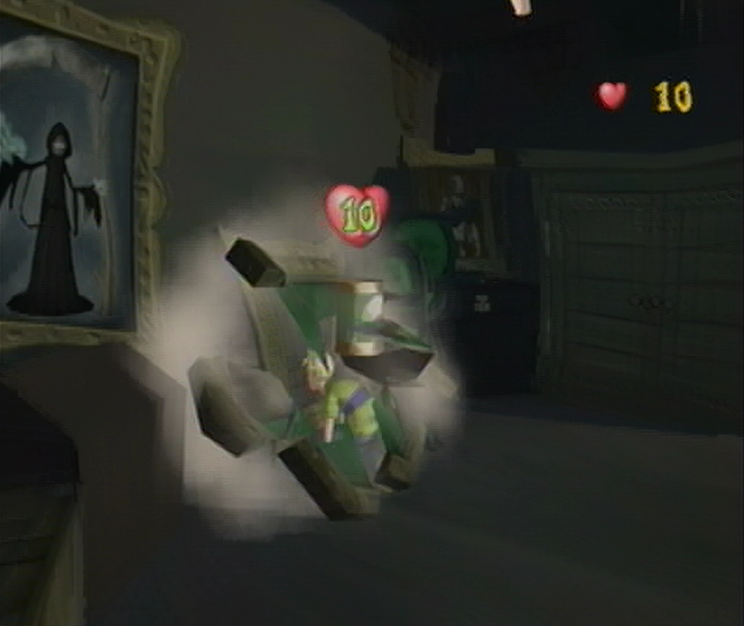
![]() Upon returning to the Housekeeping Store you should take immediate notice to the eerily quiet nature. Don’t let your guard down, this is how our new breed of Ghouly likes to hide until it’s exposed. To have the upper hand from the get go, we’ll use this moment of silence to our advantage by smashing the portraits around the room first. From your current position, head to the left and break the Medusa portrait on its side to reveal an Energy Boost Soup Tin that will increase your health by 10 units. Once you’ve managed that, venture over to the right side of the room and you’ll spot two portraits across from each other; a landscape of Ghoulhaven Hall and a Golden Jigsaw Piece from the Banjo-Kazooie series. Destroy their frames to discover a Turbo Cooper! and Knock Down Mania! Soup Tin respectively, but do not pick them up just yet. Instead, we’ll need to go around the quarters and break every wardrobe around the quarters just as you would have done to expose the hidden Key the last time.
Upon returning to the Housekeeping Store you should take immediate notice to the eerily quiet nature. Don’t let your guard down, this is how our new breed of Ghouly likes to hide until it’s exposed. To have the upper hand from the get go, we’ll use this moment of silence to our advantage by smashing the portraits around the room first. From your current position, head to the left and break the Medusa portrait on its side to reveal an Energy Boost Soup Tin that will increase your health by 10 units. Once you’ve managed that, venture over to the right side of the room and you’ll spot two portraits across from each other; a landscape of Ghoulhaven Hall and a Golden Jigsaw Piece from the Banjo-Kazooie series. Destroy their frames to discover a Turbo Cooper! and Knock Down Mania! Soup Tin respectively, but do not pick them up just yet. Instead, we’ll need to go around the quarters and break every wardrobe around the quarters just as you would have done to expose the hidden Key the last time.
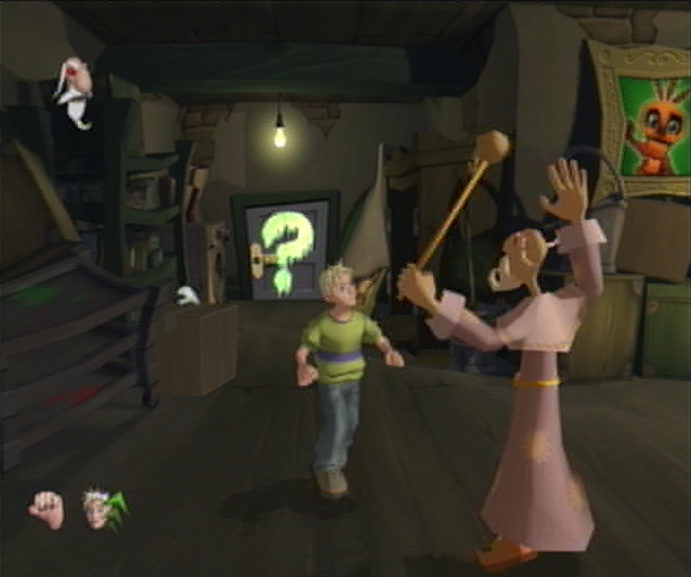
![]() If you’ve found yourself crashing down on the correct cabinet, you’ll discover your newest Ghouly; the Warlock! This surly sorcerer is quite the adversary, as you’ll only have a limited time to rush after him and get some hits in before he’s used his magic to whisk himself to another area of the room, leaving you to play a game of catchup. This window of opportunity is lessened given that he’ll bombard you with a number of spells reflecting his total health; the more damage he accumulates, the more spells he’ll toss your way before teleporting. Luckily we’ll have the aid of the Super Soups to make our job a little easier, and once the battle has begun we’ll rush back and collect the Turbo Cooper! and Knock-Down Mania! Tins. You’ll then have to quickly dash over to the Warlock the second he manages to teleport to a new area and then start dishing out the damage. The Knock-Down Mania Tin will take away 10 health without wasting time trying to get the geezer into a dizzied state.
If you’ve found yourself crashing down on the correct cabinet, you’ll discover your newest Ghouly; the Warlock! This surly sorcerer is quite the adversary, as you’ll only have a limited time to rush after him and get some hits in before he’s used his magic to whisk himself to another area of the room, leaving you to play a game of catchup. This window of opportunity is lessened given that he’ll bombard you with a number of spells reflecting his total health; the more damage he accumulates, the more spells he’ll toss your way before teleporting. Luckily we’ll have the aid of the Super Soups to make our job a little easier, and once the battle has begun we’ll rush back and collect the Turbo Cooper! and Knock-Down Mania! Tins. You’ll then have to quickly dash over to the Warlock the second he manages to teleport to a new area and then start dishing out the damage. The Knock-Down Mania Tin will take away 10 health without wasting time trying to get the geezer into a dizzied state.
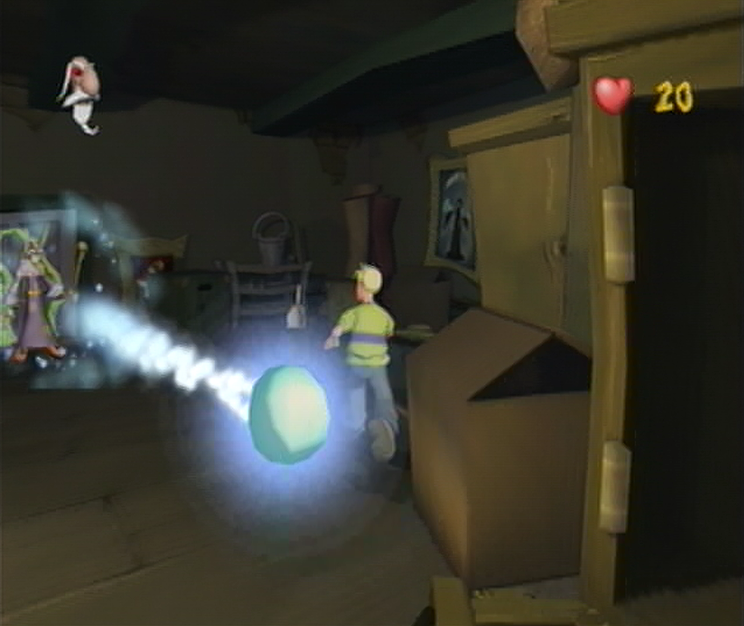
![]() Once you’ve managed to knock down the Warlock, be on your toes and keep an eye out for where the he might appear next; it might be on the opposite side of the room but its not uncommon for him to reappear where you’ve just finished with him. After you’ve managed to keep this volley up for a while your Soups will begin to wear thin. If you’ve managed to leave the Warlock with an inkling of health you should be able to grab one of the Cardboard Boxes nearest the Challenge Door or central wardrobe to finish him off; just be sure to send one his way before he’s gotten a chance to cast a spell or your package won’t meet its intended target. Once you’ve managed to defeat the Warlock you’ll have to brave one last task before you progress ahead, and that’s surviving the Super Scary Shock hidden inside the Washing Machine next to the exit. If you’ve managed to keep your total health above 10 this shouldn’t cause much worry, just solve the sequence and you’re free!
Once you’ve managed to knock down the Warlock, be on your toes and keep an eye out for where the he might appear next; it might be on the opposite side of the room but its not uncommon for him to reappear where you’ve just finished with him. After you’ve managed to keep this volley up for a while your Soups will begin to wear thin. If you’ve managed to leave the Warlock with an inkling of health you should be able to grab one of the Cardboard Boxes nearest the Challenge Door or central wardrobe to finish him off; just be sure to send one his way before he’s gotten a chance to cast a spell or your package won’t meet its intended target. Once you’ve managed to defeat the Warlock you’ll have to brave one last task before you progress ahead, and that’s surviving the Super Scary Shock hidden inside the Washing Machine next to the exit. If you’ve managed to keep your total health above 10 this shouldn’t cause much worry, just solve the sequence and you’re free!
GRAND HALLWAY

![]() Welcome back to the Grand Hall! Right, you haven’t been put on good terms to start out health-wise, so it’s best to avoid the Haunted Portraits and then continue over to the left hand side of the main floor here. Once you’ve done a bit of a jog you should manage to spot a large pillar in front of a bench against the wall, tucked neatly between two Thorned Challenge Doors. Whip yourself around the pillar to the unseen bit facing the bench and you’ll discover an Invisibility! Super Soup Tin waiting to be picked up. Under the guise of the Invisibility Tin, work your way toward the grand staircase housing a trio of equipped Skeletons and sneak your way past them; given your current health and timely nature of the Soup Tin you’ll want to avoid picking a fight at all costs. Once you’ve managed that, it’s just a case of taking an immediate right at the second set of stairs and squeezing in between the two Zombie Pirates waiting at the top and then heading left towards the Challenge Door.
Welcome back to the Grand Hall! Right, you haven’t been put on good terms to start out health-wise, so it’s best to avoid the Haunted Portraits and then continue over to the left hand side of the main floor here. Once you’ve done a bit of a jog you should manage to spot a large pillar in front of a bench against the wall, tucked neatly between two Thorned Challenge Doors. Whip yourself around the pillar to the unseen bit facing the bench and you’ll discover an Invisibility! Super Soup Tin waiting to be picked up. Under the guise of the Invisibility Tin, work your way toward the grand staircase housing a trio of equipped Skeletons and sneak your way past them; given your current health and timely nature of the Soup Tin you’ll want to avoid picking a fight at all costs. Once you’ve managed that, it’s just a case of taking an immediate right at the second set of stairs and squeezing in between the two Zombie Pirates waiting at the top and then heading left towards the Challenge Door.
Navigation:
Chapter 1: The Rescue
Chapter 2: The Restoration
Chapter 3: The Riddle
Chapter 4: The Reckoning
Chapter 5: The Race
IT WOULD SEEM THAT THE BUTLER DID IT!

![]() As Cooper crosses the threshold to the Baron’s Quarters, he’s in for quite a shocking display taking place on the other side of the room. It seems that Crivens has managed to get to the Baron’s Quarters before we could, and what’s more he’s taking on the Baron by himself! While both men are completely cast in shadow from the light of the full moon outside, it’s clear to anyone that the Baron is getting pummeled by the kindly old butler donned in a tuxedo. After laying it on thick with a bout of punches to the Barons chest and jaw, Crivens changes things up by bashing his master over the head with the comically large and heavy key intended to free the prisoners of the Hall. While there isn’t any sort of struggle from the Barons end, he collapses to the floor in oddly-stiff fashion while Crivens makes his way over to the light. Smiling boldly, Crivens seems to be quite proud at himself for singlehandedly dealing with the Baron as he makes his way over to a stunned Cooper.
As Cooper crosses the threshold to the Baron’s Quarters, he’s in for quite a shocking display taking place on the other side of the room. It seems that Crivens has managed to get to the Baron’s Quarters before we could, and what’s more he’s taking on the Baron by himself! While both men are completely cast in shadow from the light of the full moon outside, it’s clear to anyone that the Baron is getting pummeled by the kindly old butler donned in a tuxedo. After laying it on thick with a bout of punches to the Barons chest and jaw, Crivens changes things up by bashing his master over the head with the comically large and heavy key intended to free the prisoners of the Hall. While there isn’t any sort of struggle from the Barons end, he collapses to the floor in oddly-stiff fashion while Crivens makes his way over to the light. Smiling boldly, Crivens seems to be quite proud at himself for singlehandedly dealing with the Baron as he makes his way over to a stunned Cooper.
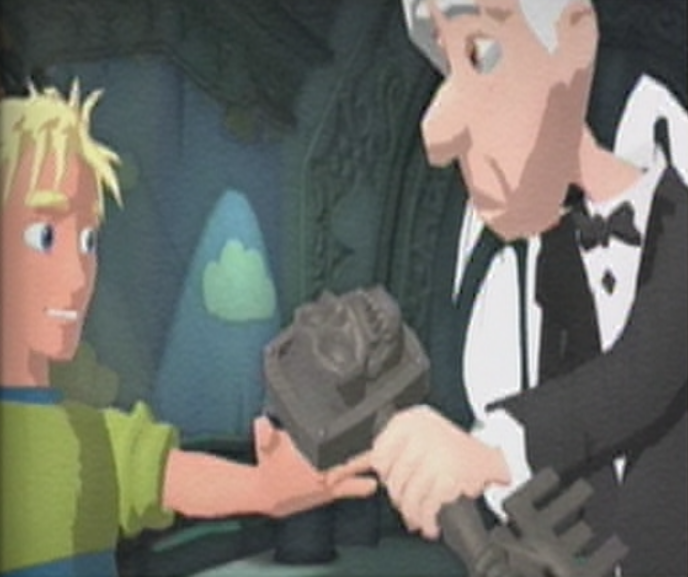
![]() “Crivens!“, Cooper manages to blurt out in shock, clearly taken aback by how agile and spry the elderly man was moments ago, “What’s going on? Who were you fighting?!” Crivens takes a look at the window before turning back to Cooper and placing his hand around the lads shoulder. “Oh that, Sir.” the butler says flatly adjusting his bowtie as though he had only just forgotten what had happened, “I’ve just had a little disagreement with the Baron on your behalf!” As the two stare at each other blankly in shocked silence, Crivens clears his throat softly before turning his attention to the specialty weapon he used to take on Baron Von Ghoul. Reaching into his back pocket, Crivens pulls out a rather heavy key thats been crafted with a skeletons face on the handle. “I believe this key I took from him will help you release those poor souls“, Crivens offers as he gestures towards the large key and raises his eyebrows for dramatic effect.
“Crivens!“, Cooper manages to blurt out in shock, clearly taken aback by how agile and spry the elderly man was moments ago, “What’s going on? Who were you fighting?!” Crivens takes a look at the window before turning back to Cooper and placing his hand around the lads shoulder. “Oh that, Sir.” the butler says flatly adjusting his bowtie as though he had only just forgotten what had happened, “I’ve just had a little disagreement with the Baron on your behalf!” As the two stare at each other blankly in shocked silence, Crivens clears his throat softly before turning his attention to the specialty weapon he used to take on Baron Von Ghoul. Reaching into his back pocket, Crivens pulls out a rather heavy key thats been crafted with a skeletons face on the handle. “I believe this key I took from him will help you release those poor souls“, Crivens offers as he gestures towards the large key and raises his eyebrows for dramatic effect.

![]() As Cooper reaches out for the key in gratitude, Crivens nearly places it in his open hand but pauses just for a moment. Twisting his face into a sinister grin, Crivens withdraws the key as he reels his arm back and then uses the momentum to swing the key right into Coopers jaw where it connects with a tremendous thunk! Cooper crumples to the ground immediately as Crivens’ daunting frame towers over him from above. As the elderly man raises his bony hand into the air, Cooper watches in utmost horror as the would-be butler pulls away at the mask that hides his true face. In one sure tug that only gets caught momentarily on his nose, the mask is taken off completely, revealing a chortling Baron Von Ghoul underneath! As Cooper breathes in a silent gasp from the floor below, the Baron removes his fancy facade and in a whirlwind of activity changes into a pair of full length baby blue pajamas with a maroon housecoat that comes up much too short on his wrists.
As Cooper reaches out for the key in gratitude, Crivens nearly places it in his open hand but pauses just for a moment. Twisting his face into a sinister grin, Crivens withdraws the key as he reels his arm back and then uses the momentum to swing the key right into Coopers jaw where it connects with a tremendous thunk! Cooper crumples to the ground immediately as Crivens’ daunting frame towers over him from above. As the elderly man raises his bony hand into the air, Cooper watches in utmost horror as the would-be butler pulls away at the mask that hides his true face. In one sure tug that only gets caught momentarily on his nose, the mask is taken off completely, revealing a chortling Baron Von Ghoul underneath! As Cooper breathes in a silent gasp from the floor below, the Baron removes his fancy facade and in a whirlwind of activity changes into a pair of full length baby blue pajamas with a maroon housecoat that comes up much too short on his wrists.

![]() “Foolish boy!“, the Baron spits out as he relishes in setting up such an elaborate scheme that was orchestrated so well, “Did you like my clever disguise?” he says leaning closer and stroking his chin, chuckling to himself to himself as Cooper stares up in disbelief. “Bet you never guessed that the butler did it?!” He shouts as he points a mocking finger. Cooper blinks twice as the joke is lost on him entirely and the smirking Baron takes some time to walk leisurely around the room, thinking what to do next. Turning towards Cooper, the Baron rubs his hands together in triumph as he flashes a wicked smile to the boy below, “Oh, how I’ve enjoyed toying with you throughout my house! But I fear your feeble adventure ends here!” The Baron says matter-o-factly before creeping toward Cooper with his arms outstretched, his twisted smile still stretching across his face. “Oh yes indeed“, Baron Von Ghoul adds as he advances, chuckling maniacally as Cooper scrambles to his feet.
“Foolish boy!“, the Baron spits out as he relishes in setting up such an elaborate scheme that was orchestrated so well, “Did you like my clever disguise?” he says leaning closer and stroking his chin, chuckling to himself to himself as Cooper stares up in disbelief. “Bet you never guessed that the butler did it?!” He shouts as he points a mocking finger. Cooper blinks twice as the joke is lost on him entirely and the smirking Baron takes some time to walk leisurely around the room, thinking what to do next. Turning towards Cooper, the Baron rubs his hands together in triumph as he flashes a wicked smile to the boy below, “Oh, how I’ve enjoyed toying with you throughout my house! But I fear your feeble adventure ends here!” The Baron says matter-o-factly before creeping toward Cooper with his arms outstretched, his twisted smile still stretching across his face. “Oh yes indeed“, Baron Von Ghoul adds as he advances, chuckling maniacally as Cooper scrambles to his feet.
THE FINAL FIGHT: COOPER AGAINST BARON VON GHOUL
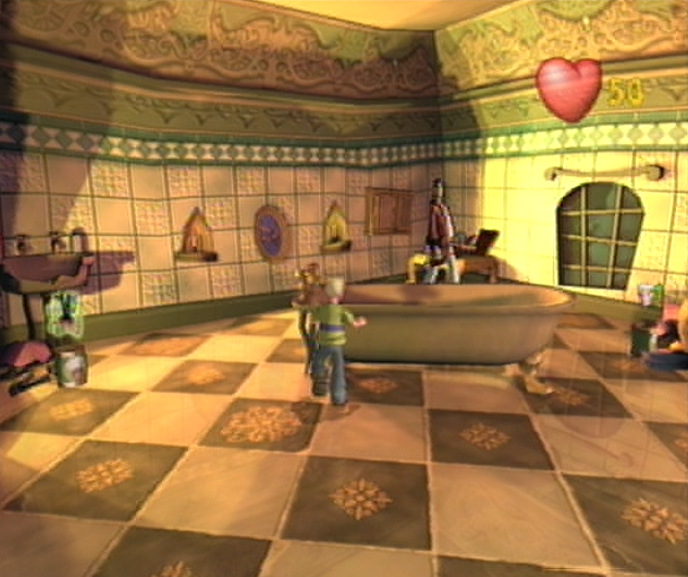
![]() There’s literally no time to waste as you start off against the Baron, as he’ll come up swinging before you’ve had a chance to familiarize yourself with this new area. Before the Baron has a chance to rush over to your position, you’ll want to escape his clutches by heading over to his private bathroom to the left, which can be found just past the billowing cloud curtains. Once you’ve found your way inside you’ll need to crack open the sink, which can be found on the leftmost wall wedged in the corner. Doing so will reveal a Super Weapons! Soup Tin, which we’ll leave by the wayside as we continue out trek through the bathroom. Be sure to avoid the lunges of the mad Baron if he’s managed to follow you inside, and carry on to the corner opposite where you should manage to spot a thin shelf overhead a small table. Delivering a swift kick to the shelf will expose the hidden Turbo Cooper! Soup Tin above, which we’ll also leave behind for later – let’s start to work on the offensive.
There’s literally no time to waste as you start off against the Baron, as he’ll come up swinging before you’ve had a chance to familiarize yourself with this new area. Before the Baron has a chance to rush over to your position, you’ll want to escape his clutches by heading over to his private bathroom to the left, which can be found just past the billowing cloud curtains. Once you’ve found your way inside you’ll need to crack open the sink, which can be found on the leftmost wall wedged in the corner. Doing so will reveal a Super Weapons! Soup Tin, which we’ll leave by the wayside as we continue out trek through the bathroom. Be sure to avoid the lunges of the mad Baron if he’s managed to follow you inside, and carry on to the corner opposite where you should manage to spot a thin shelf overhead a small table. Delivering a swift kick to the shelf will expose the hidden Turbo Cooper! Soup Tin above, which we’ll also leave behind for later – let’s start to work on the offensive.
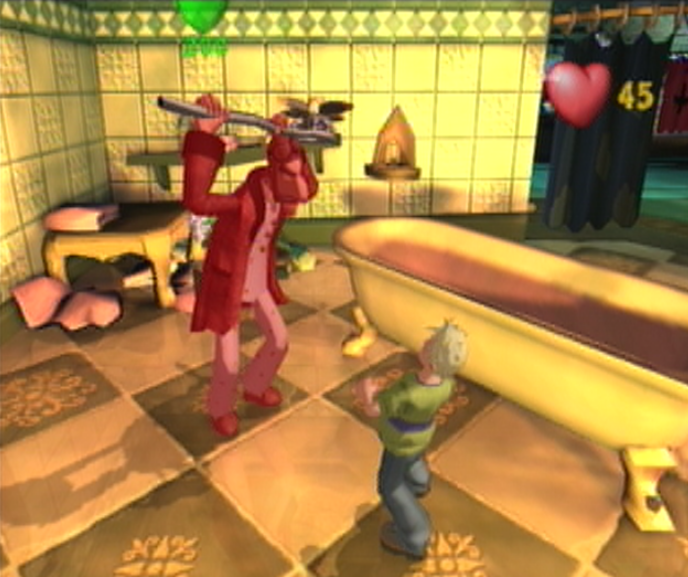
![]() You’ll effectively have to lure the Baron into your attack range by approaching him and coaxing him into swinging, and then backing away quickly before he’s had a chance to land a hit with his propeller. If you’ve done this correctly the Baron will come up just short, leaving himself wide open for an attack. If you’ve managed to get in a solid hit, the Baron will turn red with anger and try following it up immediately with a second swing; this can be negated by following the technique above until you’ve gotten to the third hit, in which the dizzied Baron will be vulnerable for a showy finisher. After you’ve whacked the Baron across the room, he’ll drop his trusty propeller, which you’ll need to pick up before he’s gotten the chance to. While the Baron attempts to flee, we’ll rush back to the bathroom and collect our Super Weapons! and Turbo Cooper! Soup Tins, which should allow us to save a good chunk of time otherwise wasted chasing the Baron around his own room.
You’ll effectively have to lure the Baron into your attack range by approaching him and coaxing him into swinging, and then backing away quickly before he’s had a chance to land a hit with his propeller. If you’ve done this correctly the Baron will come up just short, leaving himself wide open for an attack. If you’ve managed to get in a solid hit, the Baron will turn red with anger and try following it up immediately with a second swing; this can be negated by following the technique above until you’ve gotten to the third hit, in which the dizzied Baron will be vulnerable for a showy finisher. After you’ve whacked the Baron across the room, he’ll drop his trusty propeller, which you’ll need to pick up before he’s gotten the chance to. While the Baron attempts to flee, we’ll rush back to the bathroom and collect our Super Weapons! and Turbo Cooper! Soup Tins, which should allow us to save a good chunk of time otherwise wasted chasing the Baron around his own room.
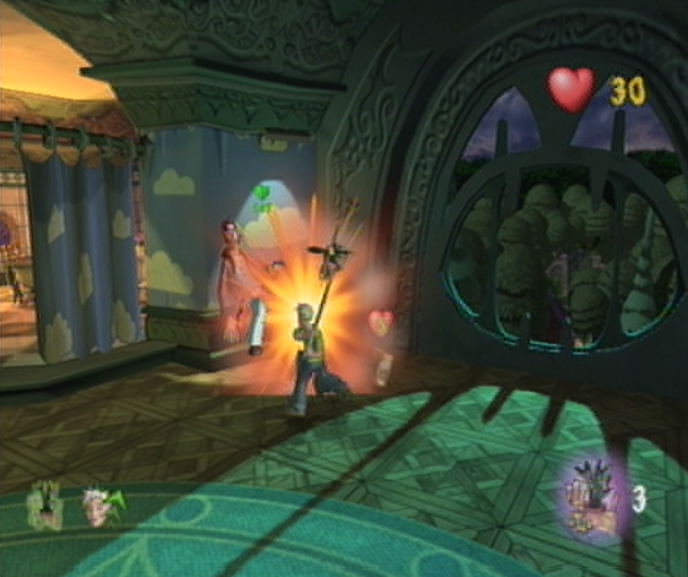
![]() Under normal circumstances the propeller will only provide you with three hits to land on the Baron before it crumbles in your hands, allowing the Baron to withdraw a second from within his housecoat and resume his post. With each successive round of sorts, the Baron will get more and more agile, to the point where it can become quite difficult to halt his pacing. With aid from the Super Weapons! Tins however, it’s entirely possible to progress through these stages much more quickly, as you’re still landing the same amount of damage, but you’re dealing it out in one sitting rather than stretching out in increments of three over the course of a few rounds. To make things more difficult, the Baron will be blinking red in this stage, and you’ll only manage to land a hit when he’s turned back to normal momentarily. It will take some timing on your part, but you should manage the pattern fairly easily. Try keeping the Baron isolated in a single area and keep pinning him down.
Under normal circumstances the propeller will only provide you with three hits to land on the Baron before it crumbles in your hands, allowing the Baron to withdraw a second from within his housecoat and resume his post. With each successive round of sorts, the Baron will get more and more agile, to the point where it can become quite difficult to halt his pacing. With aid from the Super Weapons! Tins however, it’s entirely possible to progress through these stages much more quickly, as you’re still landing the same amount of damage, but you’re dealing it out in one sitting rather than stretching out in increments of three over the course of a few rounds. To make things more difficult, the Baron will be blinking red in this stage, and you’ll only manage to land a hit when he’s turned back to normal momentarily. It will take some timing on your part, but you should manage the pattern fairly easily. Try keeping the Baron isolated in a single area and keep pinning him down.
A PANTOMIME PLANE FOR THE CONSIDERABLY INSANE
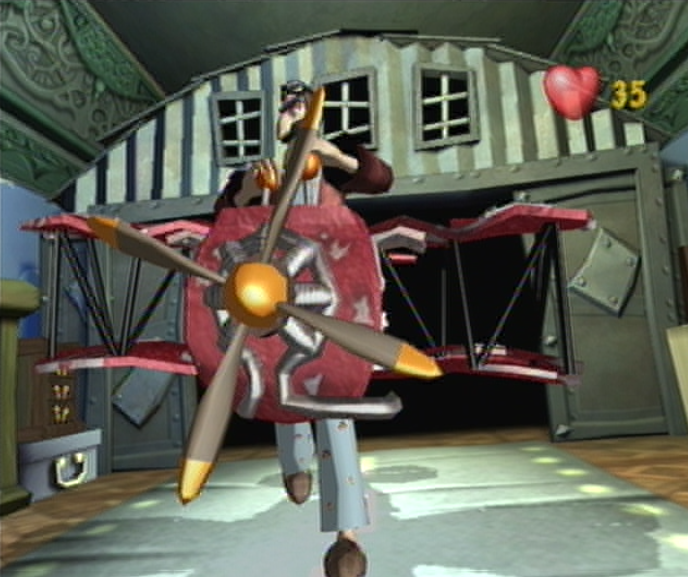
![]() You should squeeze in at least four untapped hits from the Super Weapons! Tin before you’ll have to rely on the original three hits provided from the propeller to take care of the Baron. If you waste one of the propellers hits, you’ll have to repeat his initial stage to grab his propeller once more, so try to make every shot count. After you’ve given the Baron a taste of his own medicine and reduce his energy to 140 points, he’ll see that a change of strategy is in order. “Gadzooks, Crivens and all manner of old English exclamations! This isn’t working!” Turning his head toward his makeshift runway, the Baron calls for desperate measures, “I can’t put it off any longer. She may not be completely ready but it’s time to unveil my pride and joy… the Red Baron!” Scrambling into his garage, the Baron soon emerges with a large red biplane that he wears like a suit. As the Baron runs down his runway, he springs into the air and his plane takes over – leaving the Baron to hover just above the floor.
You should squeeze in at least four untapped hits from the Super Weapons! Tin before you’ll have to rely on the original three hits provided from the propeller to take care of the Baron. If you waste one of the propellers hits, you’ll have to repeat his initial stage to grab his propeller once more, so try to make every shot count. After you’ve given the Baron a taste of his own medicine and reduce his energy to 140 points, he’ll see that a change of strategy is in order. “Gadzooks, Crivens and all manner of old English exclamations! This isn’t working!” Turning his head toward his makeshift runway, the Baron calls for desperate measures, “I can’t put it off any longer. She may not be completely ready but it’s time to unveil my pride and joy… the Red Baron!” Scrambling into his garage, the Baron soon emerges with a large red biplane that he wears like a suit. As the Baron runs down his runway, he springs into the air and his plane takes over – leaving the Baron to hover just above the floor.
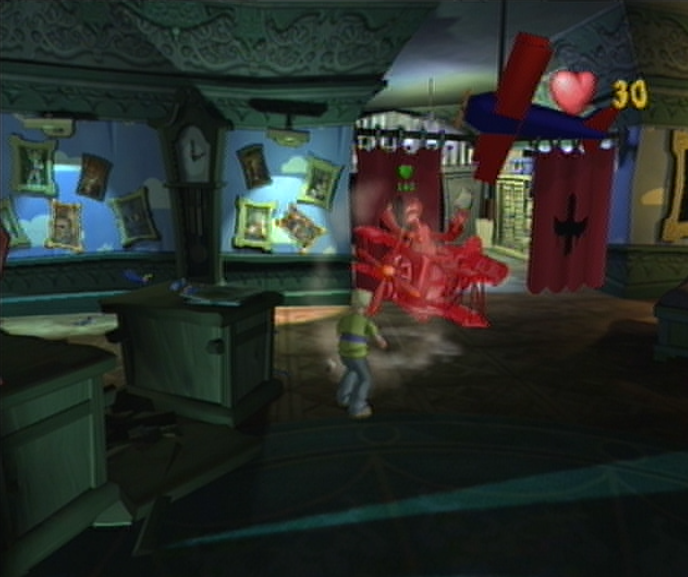
![]() Right, things are starting to get a little tricky now. You’ll have to avoid the Barons divebombs and wait until he’s crash landed after preforming one to get in any damage. If the Baron manages to dive into you after shouting his signature “Tally-Ho!“, you’ll lose ten energy from the ensuing ram, same goes if you simply bump into the propeller as the Baron flies around. Your best bet is to use the desk nearest the large window as your cover, as the Baron will be unable to dive into you if you take out the midsection with a solid whack and then stand inside it. After the Baron has toured around his room for a while, he’ll dive bomb towards the desk and if you’ve managed to stay between the two drawers he’ll spin out of control. Be on your toes here; you’ll have to follow the Baron once he’s stopped spinning and begins traveling in a new direction. While he’s facing away from you, you’ll have to land a sturdy hit to the back of his plane, which will send him hurtling to the ground.
Right, things are starting to get a little tricky now. You’ll have to avoid the Barons divebombs and wait until he’s crash landed after preforming one to get in any damage. If the Baron manages to dive into you after shouting his signature “Tally-Ho!“, you’ll lose ten energy from the ensuing ram, same goes if you simply bump into the propeller as the Baron flies around. Your best bet is to use the desk nearest the large window as your cover, as the Baron will be unable to dive into you if you take out the midsection with a solid whack and then stand inside it. After the Baron has toured around his room for a while, he’ll dive bomb towards the desk and if you’ve managed to stay between the two drawers he’ll spin out of control. Be on your toes here; you’ll have to follow the Baron once he’s stopped spinning and begins traveling in a new direction. While he’s facing away from you, you’ll have to land a sturdy hit to the back of his plane, which will send him hurtling to the ground.
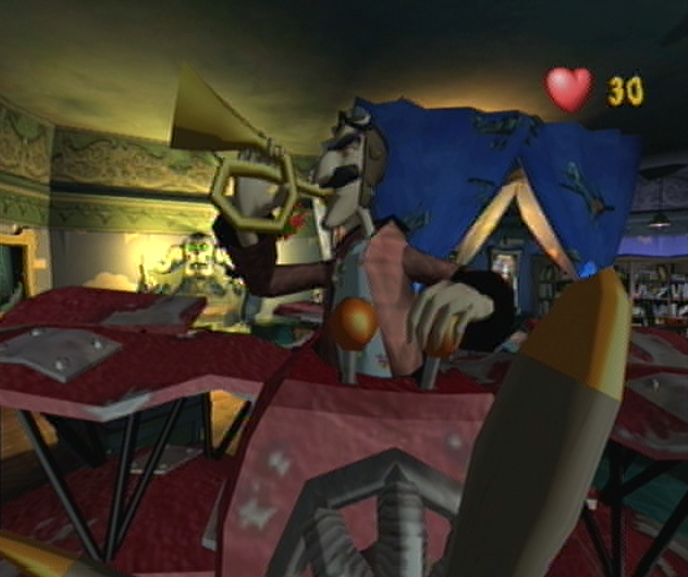
![]() Before the Baron has gotten a chance to regain his composure, work your way back towards the center of the desk and line it up so that the Baron will force himself into another crash landing. A second whack to the back of his biplane will send the Baron to the floor once more, “Mwa haa! Your puny attacks cannot harm me! You must join me and together we shall rule the mansion as father and son..!” A shocked Cooper looks up towards the mad Baron with considerable doubt, “Nooooooo! That’s not true! That’s impossible!” The Baron takes a moment to reconsider, “No, wait, wrong speech! What I meant to say is I’m a sporting gentleman, so take this weapon and I’ll give you a fighting chance!” Now that Cooper has become equipped with his Soda Pop gun, we’ll fire a shot once the Baron has crashed into the desk again. Drenched with soda, the Baron will ponder to himself before withdrawing a trumpet from within his cockpit, sounding out a call to the Ghoulies…
Before the Baron has gotten a chance to regain his composure, work your way back towards the center of the desk and line it up so that the Baron will force himself into another crash landing. A second whack to the back of his biplane will send the Baron to the floor once more, “Mwa haa! Your puny attacks cannot harm me! You must join me and together we shall rule the mansion as father and son..!” A shocked Cooper looks up towards the mad Baron with considerable doubt, “Nooooooo! That’s not true! That’s impossible!” The Baron takes a moment to reconsider, “No, wait, wrong speech! What I meant to say is I’m a sporting gentleman, so take this weapon and I’ll give you a fighting chance!” Now that Cooper has become equipped with his Soda Pop gun, we’ll fire a shot once the Baron has crashed into the desk again. Drenched with soda, the Baron will ponder to himself before withdrawing a trumpet from within his cockpit, sounding out a call to the Ghoulies…
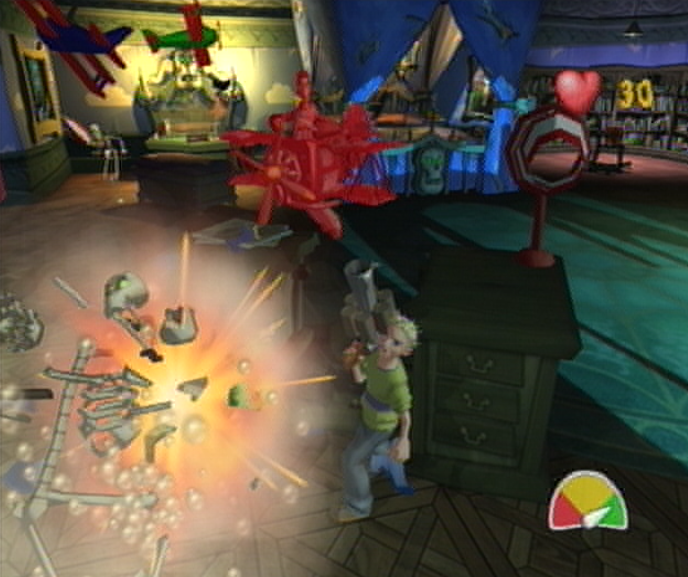
![]() Responding to their masters call, the portraits around the room depicting various phases of the Barons youth are soon slashed open to allow a gaggle of Ghoulies passage to the Baron’s Quarters, which in this case is a crew of Skeletons. You’ll want to spin around on the spot as soon as you regain control here, as the desk is directly in front of one of the portraits. Blast the Skeleton before it has a chance to sneak up on you and then work your way to the floor to deal with the others. If you’ve taken a bit of damage from the Baron you’ll have an opportunity to recover during this segment if you blast the two large vases found in front of the large central window, each one containing a 5 Energy Boost! Soup Tin inside. Make sure to keep watch for the Baron while you’re doing this however, as he’s still likely hit you with his propeller. Once you’ve managed to pop a single shot into each of the Skeletons the Baron will render himself vulnerable from your Soda Pop gun again.
Responding to their masters call, the portraits around the room depicting various phases of the Barons youth are soon slashed open to allow a gaggle of Ghoulies passage to the Baron’s Quarters, which in this case is a crew of Skeletons. You’ll want to spin around on the spot as soon as you regain control here, as the desk is directly in front of one of the portraits. Blast the Skeleton before it has a chance to sneak up on you and then work your way to the floor to deal with the others. If you’ve taken a bit of damage from the Baron you’ll have an opportunity to recover during this segment if you blast the two large vases found in front of the large central window, each one containing a 5 Energy Boost! Soup Tin inside. Make sure to keep watch for the Baron while you’re doing this however, as he’s still likely hit you with his propeller. Once you’ve managed to pop a single shot into each of the Skeletons the Baron will render himself vulnerable from your Soda Pop gun again.
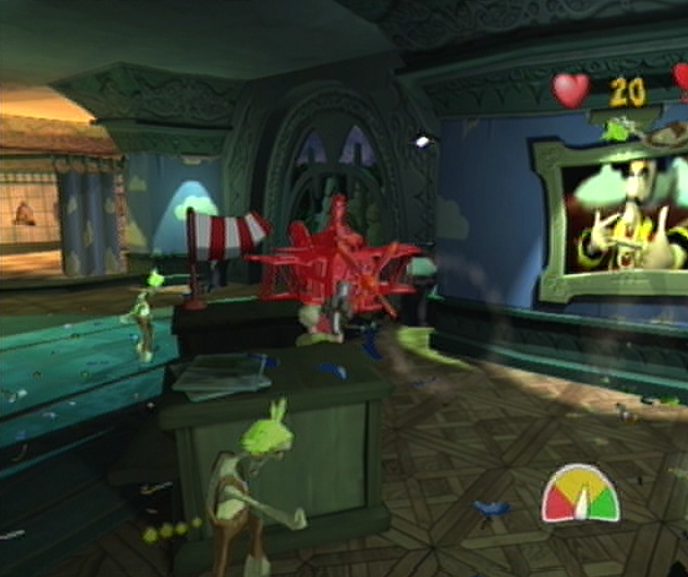
![]() If you’d prefer to save some time in having the Baron decide to divebomb the desk if you’ve chosen to hide behind it, you can always wait until he’s facing the opposite direction and fire a shot into his rear, it can be a little difficult though as he’s prone to turning around at a moments notice. Regardless of how you land your shot, a second drenching from your Soda Pop Grenade will cause the Baron to withdraw his trumpet once more and summon a hoarde of Zombies to flood his bedroom. Compared to the Skeletons prior, the Zombies are a tad more difficult to manage, as they’ll require two hits from your Soda Pop gun to take out, which can draw from your reserves fairly quickly. On the positive side, the Zombies aren’t as agile, so you shouldn’t have much trouble in dealing with them as they shamble along. Take care of the Zombie behind the desk first before working your way through the rest of the ranks, once the Baron is left vulnerable, take him down with a third blasting.
If you’d prefer to save some time in having the Baron decide to divebomb the desk if you’ve chosen to hide behind it, you can always wait until he’s facing the opposite direction and fire a shot into his rear, it can be a little difficult though as he’s prone to turning around at a moments notice. Regardless of how you land your shot, a second drenching from your Soda Pop Grenade will cause the Baron to withdraw his trumpet once more and summon a hoarde of Zombies to flood his bedroom. Compared to the Skeletons prior, the Zombies are a tad more difficult to manage, as they’ll require two hits from your Soda Pop gun to take out, which can draw from your reserves fairly quickly. On the positive side, the Zombies aren’t as agile, so you shouldn’t have much trouble in dealing with them as they shamble along. Take care of the Zombie behind the desk first before working your way through the rest of the ranks, once the Baron is left vulnerable, take him down with a third blasting.
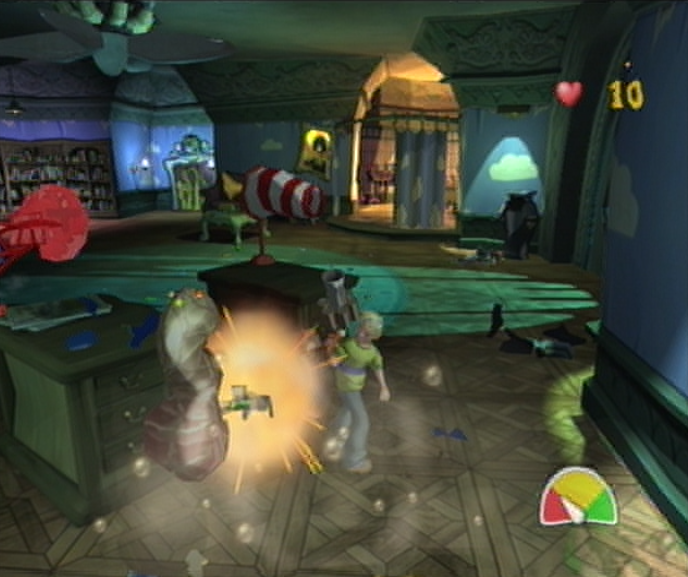
![]() After having his biplane taken down for the third time in row and sopping with sticky soda, the Baron decides to call forth his most volatile ranks of Ghouly. Raising his ornate trumpet to his mouth, the Baron blurts his deflated note as the room soon fills with Worms that have burst through the portraits. Akin to the Skeletons, the Worms can be easily dispatched with a single shot of your Soda Pop gun, just be sure to make every shot count or you’ll be squeezing the trigger in vein as a Worm with a short fuse starts bouncing over to you gingerly. If you’ve got some time to spare it would be wise to start uncovering some handy Super Soups that will help you to survive through these final rounds of Ghoulies. Launch a Soda Pop Grenade towards the large Grandfather clock to the left of the runway near the desk to expose an Invulnerability! Soup Tin. Another can be found in the leftmost shelf of the Barons selection of books, next of his bed near the bathroom.
After having his biplane taken down for the third time in row and sopping with sticky soda, the Baron decides to call forth his most volatile ranks of Ghouly. Raising his ornate trumpet to his mouth, the Baron blurts his deflated note as the room soon fills with Worms that have burst through the portraits. Akin to the Skeletons, the Worms can be easily dispatched with a single shot of your Soda Pop gun, just be sure to make every shot count or you’ll be squeezing the trigger in vein as a Worm with a short fuse starts bouncing over to you gingerly. If you’ve got some time to spare it would be wise to start uncovering some handy Super Soups that will help you to survive through these final rounds of Ghoulies. Launch a Soda Pop Grenade towards the large Grandfather clock to the left of the runway near the desk to expose an Invulnerability! Soup Tin. Another can be found in the leftmost shelf of the Barons selection of books, next of his bed near the bathroom.
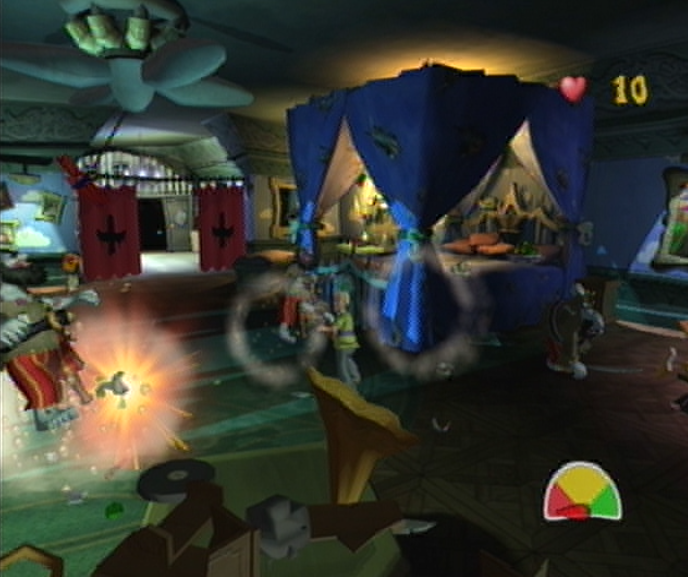
![]() With all of the Worms dealt with the Baron will once again appear vulnerable as he divebombs towards you, wait for him to spin out, or wait until he’s turned the opposite direction to drench him in soda spray once more. Retrieving his trumpet from within the cockpit for the last time, the Baron calls forth a group of rogue Zombie Pirates to finish off Cooper once and for all. These nautical nuisances will proof themselves quite the challenge, as they’ve brought along their treasure chest which they’ll toss from afar. It would be wise to pick up one of the Invulnerability! Super Soup Tins if you haven’t done so already just to provide yourself a bit of insurance if a chest barrels its way towards you with little chance to react. Each Zombie Pirate will require two hits from your Soda Pop Grenade gun, so make fast work of the Pirates by firing quickly and accurately before things have a chance to get too difficult when they start slinging their chests about.
With all of the Worms dealt with the Baron will once again appear vulnerable as he divebombs towards you, wait for him to spin out, or wait until he’s turned the opposite direction to drench him in soda spray once more. Retrieving his trumpet from within the cockpit for the last time, the Baron calls forth a group of rogue Zombie Pirates to finish off Cooper once and for all. These nautical nuisances will proof themselves quite the challenge, as they’ve brought along their treasure chest which they’ll toss from afar. It would be wise to pick up one of the Invulnerability! Super Soup Tins if you haven’t done so already just to provide yourself a bit of insurance if a chest barrels its way towards you with little chance to react. Each Zombie Pirate will require two hits from your Soda Pop Grenade gun, so make fast work of the Pirates by firing quickly and accurately before things have a chance to get too difficult when they start slinging their chests about.
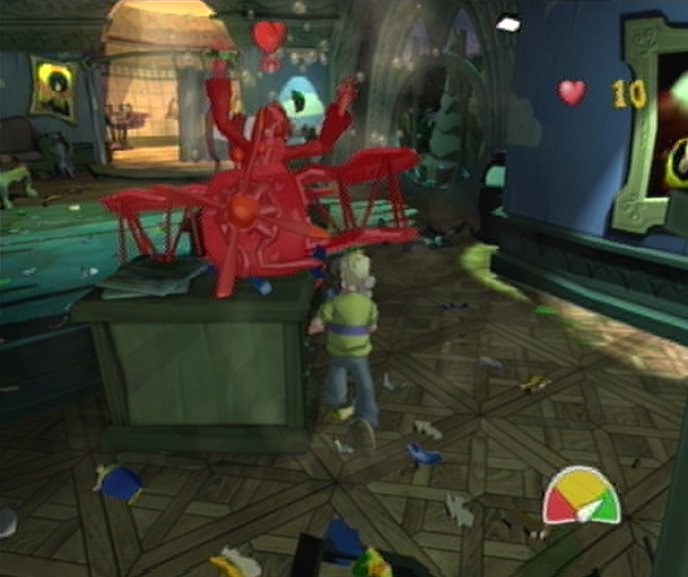
![]() After you’ve managed to defeat all of the Zombie Pirates, the Baron will spin out on his own accord, clearly enraged that you’ve managed to mow down all of his expendable Ghouies, he saves himself a soda soaking and decides to have it out with a dogfight. This is it, the final confrontation with Baron Von Ghoul! If you have the time to venture out onto the floor to pick up the Invulnerability! Super Soup without the Baron divebombing into you, it would be wise to do so now and then travel back to the desk to take cover. The Baron will be relentless in his diving here, which will help to speed things up drastically if you’ve taken shelter behind the desk, otherwise it will be an absolute nightmare if you’re still out on the floor. The Baron will only become vulnerable after he’s crashlanded, so there’s no shots from the rear to be had here. Once you’ve managed to land Soda Pop grenade shots on the Baron however, it will be enough to ground him for good!
After you’ve managed to defeat all of the Zombie Pirates, the Baron will spin out on his own accord, clearly enraged that you’ve managed to mow down all of his expendable Ghouies, he saves himself a soda soaking and decides to have it out with a dogfight. This is it, the final confrontation with Baron Von Ghoul! If you have the time to venture out onto the floor to pick up the Invulnerability! Super Soup without the Baron divebombing into you, it would be wise to do so now and then travel back to the desk to take cover. The Baron will be relentless in his diving here, which will help to speed things up drastically if you’ve taken shelter behind the desk, otherwise it will be an absolute nightmare if you’re still out on the floor. The Baron will only become vulnerable after he’s crashlanded, so there’s no shots from the rear to be had here. Once you’ve managed to land Soda Pop grenade shots on the Baron however, it will be enough to ground him for good!
SENDING THE BARON ON A HIGH FLYING ADVENTURE
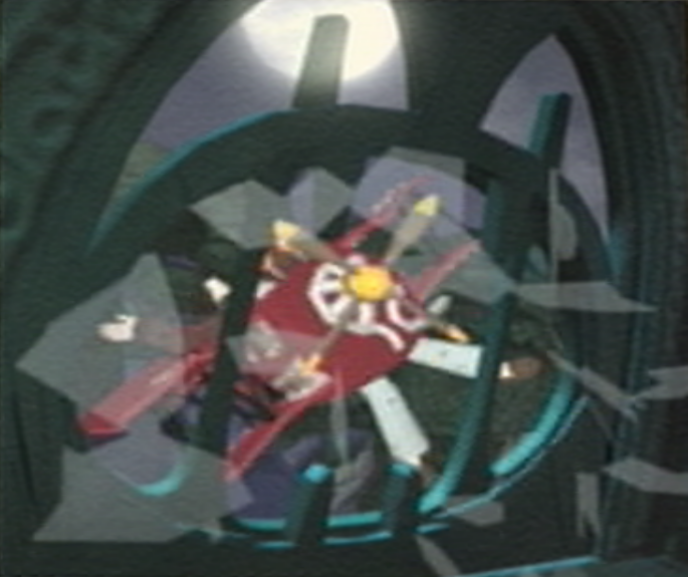
![]() Forcing the Baron to make an emergency landing, Cooper delivers a powerful kick to the defunct propeller, which sends Baron Von Ghoul soaring backwards towards the large window overlooking the front yard below. Upon contact with his bulky biplane, the massive window shatters on impact, sending the middle aged man in his pajamas hurtling towards the ground far, far below. Before his frame has a chance to squeeze all the way through the window however, the illusive Skeleton Key loosens from his grasp and spirals into the air towards Cooper. As Cooper reaches up to catch the key as it falls, a bony limb manages to swipe it up! Spinning about, Cooper scowls only to see that it’s Mr. Ribs and Amber come up to see how he’s made out. “I’m actually almost impressed.” Amber says to a defeated looking Cooper before her smile shows through, “Just kidding! You’re a real hero now! MY hero!” Cooper bears a sheepish smile before turning to Mr. Ribs.
Forcing the Baron to make an emergency landing, Cooper delivers a powerful kick to the defunct propeller, which sends Baron Von Ghoul soaring backwards towards the large window overlooking the front yard below. Upon contact with his bulky biplane, the massive window shatters on impact, sending the middle aged man in his pajamas hurtling towards the ground far, far below. Before his frame has a chance to squeeze all the way through the window however, the illusive Skeleton Key loosens from his grasp and spirals into the air towards Cooper. As Cooper reaches up to catch the key as it falls, a bony limb manages to swipe it up! Spinning about, Cooper scowls only to see that it’s Mr. Ribs and Amber come up to see how he’s made out. “I’m actually almost impressed.” Amber says to a defeated looking Cooper before her smile shows through, “Just kidding! You’re a real hero now! MY hero!” Cooper bears a sheepish smile before turning to Mr. Ribs.
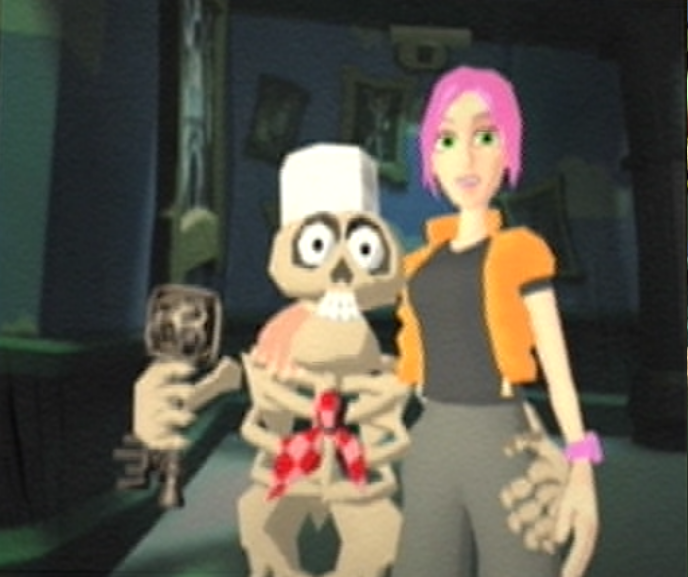
![]() “Mr. Ribs hold key to prisoners and skeleton doors!” the stocky skeleton exclaims as he raises the heavy key into the air, “We go and rescue prisoners! Mr. Ribs want to be hero too!” His pleas fall somewhat on deaf ears as Cooper and Amber become lost in each others eyes as they move in to hug. Amber rests her head on Coopers shoulder before whispering into his ear, “You go with Bonehead.” Clearly expecting something else, Cooper snaps up and cocks his head to the side, “I’ll go tell Ma, Babs and that dubious Fiddler guy that they are free to leave this place! Cooper nods in agreement as Mr. Ribs carries the heavy key over to the Barons Door. Upon approaching it with key in hand, the vines slither away allowing Mr. Ribs to unlock it. Stepping into the darkened doorway, Mr. Ribs turns back toward Cooper and Amber who are still holding each others hands. “Time for kissy-kissy later!” Mr. Ribs protests, “Hero boy chase Mr. Ribs now! Ooh!” Right, let’s go!
“Mr. Ribs hold key to prisoners and skeleton doors!” the stocky skeleton exclaims as he raises the heavy key into the air, “We go and rescue prisoners! Mr. Ribs want to be hero too!” His pleas fall somewhat on deaf ears as Cooper and Amber become lost in each others eyes as they move in to hug. Amber rests her head on Coopers shoulder before whispering into his ear, “You go with Bonehead.” Clearly expecting something else, Cooper snaps up and cocks his head to the side, “I’ll go tell Ma, Babs and that dubious Fiddler guy that they are free to leave this place! Cooper nods in agreement as Mr. Ribs carries the heavy key over to the Barons Door. Upon approaching it with key in hand, the vines slither away allowing Mr. Ribs to unlock it. Stepping into the darkened doorway, Mr. Ribs turns back toward Cooper and Amber who are still holding each others hands. “Time for kissy-kissy later!” Mr. Ribs protests, “Hero boy chase Mr. Ribs now! Ooh!” Right, let’s go!
Navigation:
Chapter 1: The Rescue
Chapter 2: The Restoration
Chapter 3: The Riddle
Chapter 4: The Reckoning
Chapter 5: The Race
-5-1: We’re leaving a lasting Imp-ression
IT’S SOUPSWILL THAT ENDS WELL!
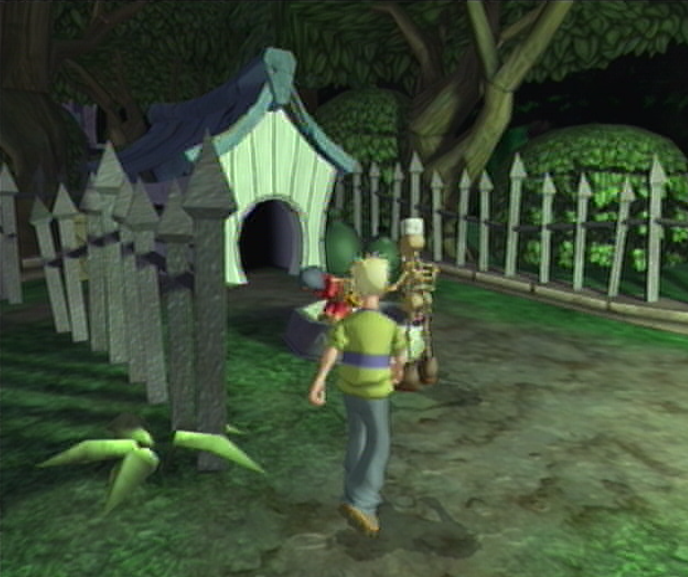
![]() While the Race is still on with our final prisoner left to be rescued, our time limit that forced us to sprint through the last rooms doesn’t apply any longer, as we’ve managed to escape Ghoulhaven Hall with time to spare! Aside from our ever pressing Time Taken statistic for our Super Scary Score, we can finally stop to take in the sights, such as the struggling Baron Von Ghoul who has finished his descent from his Quarters wedged in between the legs of his own statue just to the right. If you spin around on the spot however, you should manage to make out a crate placed in front of the gate here; if you smash it open you’ll find a Turbo Cooper! Soup Tin. From here, spin back around and sprint down the path towards Mr. Ribs who’s managed to find our final prisoner tied up in the large dish in front of the doghouse. Work your way around the fence toward Ribs and we’ll have rescued every prisoner in Ghoulhaven Hall.
While the Race is still on with our final prisoner left to be rescued, our time limit that forced us to sprint through the last rooms doesn’t apply any longer, as we’ve managed to escape Ghoulhaven Hall with time to spare! Aside from our ever pressing Time Taken statistic for our Super Scary Score, we can finally stop to take in the sights, such as the struggling Baron Von Ghoul who has finished his descent from his Quarters wedged in between the legs of his own statue just to the right. If you spin around on the spot however, you should manage to make out a crate placed in front of the gate here; if you smash it open you’ll find a Turbo Cooper! Soup Tin. From here, spin back around and sprint down the path towards Mr. Ribs who’s managed to find our final prisoner tied up in the large dish in front of the doghouse. Work your way around the fence toward Ribs and we’ll have rescued every prisoner in Ghoulhaven Hall.
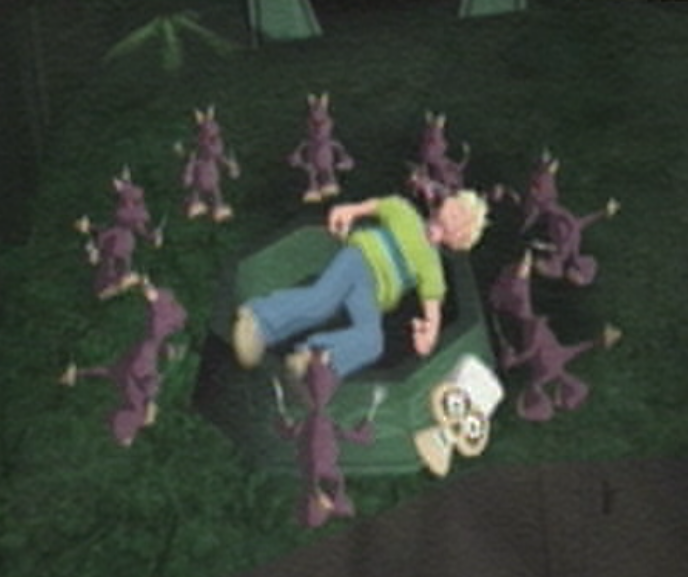
![]() As Mr. Ribs unties the girl who was held captive by Baron Von Ghoul, Cooper exchanges a high five for a job well done. “Nice going there, Ribs, old chum! I guess you are a real hero now!” Mr. Ribs beams proudly as Cooper glances around the Front Yard impatiently, “Right, now where’s Amber? It’s time to leave this dump at last!” As the dubious duo make their way out from the dogs area, the inside of the dogs house lights up with a hundred dozen pairs of glowing red eyes. Just as Cooper and Mr. Ribs approach the end of the gate, a handful of Imps escape the confines of the dog house and run towards them. The leader of the pack wielding a large dogs bone, jumps into the air directly behind Cooper and delivers a heavy blow which sends the lad collapsing into the dogs dish. Without any means to defend himself, a vulnerable Mr. Ribs is left at the mercy of the Imps where he’s literally torn limb from limb with his head landing firmly outside the dish. This can’t be good…
As Mr. Ribs unties the girl who was held captive by Baron Von Ghoul, Cooper exchanges a high five for a job well done. “Nice going there, Ribs, old chum! I guess you are a real hero now!” Mr. Ribs beams proudly as Cooper glances around the Front Yard impatiently, “Right, now where’s Amber? It’s time to leave this dump at last!” As the dubious duo make their way out from the dogs area, the inside of the dogs house lights up with a hundred dozen pairs of glowing red eyes. Just as Cooper and Mr. Ribs approach the end of the gate, a handful of Imps escape the confines of the dog house and run towards them. The leader of the pack wielding a large dogs bone, jumps into the air directly behind Cooper and delivers a heavy blow which sends the lad collapsing into the dogs dish. Without any means to defend himself, a vulnerable Mr. Ribs is left at the mercy of the Imps where he’s literally torn limb from limb with his head landing firmly outside the dish. This can’t be good…
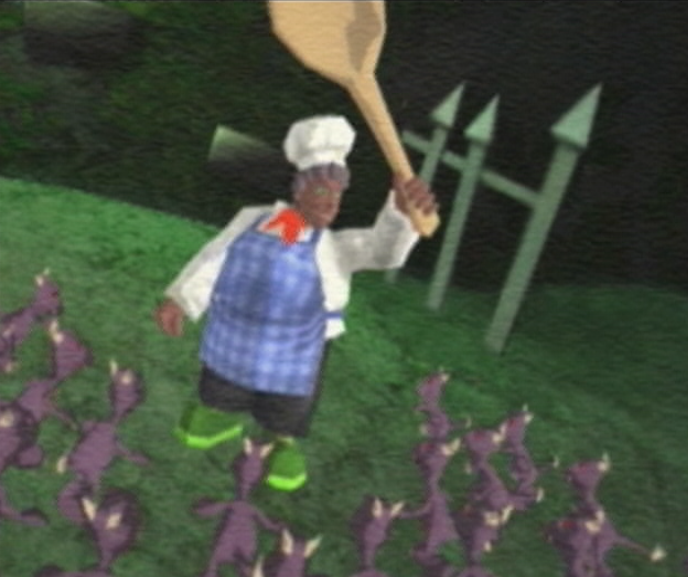
![]() As the growling Imps begin to surround the dog dish brandishing sharpened knives and forks, it seems as though they’ll finally have their vengeance against a Cooks Chair wielding Cooper 99 rooms beforehand. Unbeknownst to any of the Imps however, a figure on the opposite side of the wall hoists themselves up to get a view of the spectacle. As Ma Soupswill stands in the moonlight atop the wall, she drops down to squash an unfortunate Imp before addressing the entire group, “He’s off the menu, yer little purple critters! But I’m gonna spoon up some grief fer yer an’ cook me up some Imp stew!” Flourishing a massive wooden spoon, Ma Soupswill raises it into the air as the Imps quickly lose interest in the leftover scraps in the dogs dish and have starts to crowd around her as they edge on ever-steadily. Let’s hope that Ma’s Imp recipe calls for 100 of these Imp Ghoulies, because that’s the exact number we’ll be taking care of before the night is over…
As the growling Imps begin to surround the dog dish brandishing sharpened knives and forks, it seems as though they’ll finally have their vengeance against a Cooks Chair wielding Cooper 99 rooms beforehand. Unbeknownst to any of the Imps however, a figure on the opposite side of the wall hoists themselves up to get a view of the spectacle. As Ma Soupswill stands in the moonlight atop the wall, she drops down to squash an unfortunate Imp before addressing the entire group, “He’s off the menu, yer little purple critters! But I’m gonna spoon up some grief fer yer an’ cook me up some Imp stew!” Flourishing a massive wooden spoon, Ma Soupswill raises it into the air as the Imps quickly lose interest in the leftover scraps in the dogs dish and have starts to crowd around her as they edge on ever-steadily. Let’s hope that Ma’s Imp recipe calls for 100 of these Imp Ghoulies, because that’s the exact number we’ll be taking care of before the night is over…

![]() Starting off with a meager 25 health, this challenge is more of an endurance test than anything else. Luckily Ma Soupswill is quite agile when it comes to brandishing her massive wooden spoon for defense. From where you start off you’ll need to exhibit some crowd control by clearing out the first waves stemming from inside the dog house ahead. Try and situate yourself as to confront all Imps head on, that way they don’t sneak around to the sides; each doghouse houses 50 Imps, so it’ll take quite some time to mow through them all. Once you’ve finished, turn around and you should manage to spot a crate in the corner of the gate, to the right of a lantern which houses an Energy Boost! Soup Tin worth 10 points, which we’ll pick up quickly before heading off toward the second doghouse. Deal with the long string of Imps along the way until you’ve reached the source. Once you’ve managed to defeat all 100 Imps you’ll have solved the final challenge!
Starting off with a meager 25 health, this challenge is more of an endurance test than anything else. Luckily Ma Soupswill is quite agile when it comes to brandishing her massive wooden spoon for defense. From where you start off you’ll need to exhibit some crowd control by clearing out the first waves stemming from inside the dog house ahead. Try and situate yourself as to confront all Imps head on, that way they don’t sneak around to the sides; each doghouse houses 50 Imps, so it’ll take quite some time to mow through them all. Once you’ve finished, turn around and you should manage to spot a crate in the corner of the gate, to the right of a lantern which houses an Energy Boost! Soup Tin worth 10 points, which we’ll pick up quickly before heading off toward the second doghouse. Deal with the long string of Imps along the way until you’ve reached the source. Once you’ve managed to defeat all 100 Imps you’ll have solved the final challenge!
A SUPER SCARY SAYONARA!
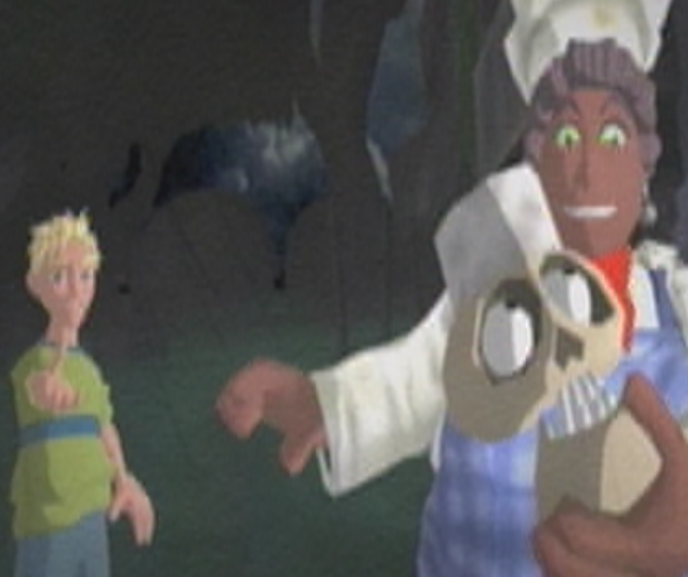
![]() Ma Soupswill tosses her wooden spoon into the air where it spins twice before ending its journey squarely on the back of the final Imp’s head. Speaking of head trauma, a confused and dizzy Cooper shakes off his daze as he rises to his feet. Peering around the yard trying to get his vision to stop blurring, Cooper manages to have everything come in focus just as he sees Ma Soupswill effortlessly push open the large metal gate at the entrance. “C’mon dear, don’ hang about!” Ma shouts as she waves Cooper over, “Yer bin here quite long enough! An’ pass me what’s left o’ me assistant, would yer?” Looking down toward his feet, Cooper jumps in shock as Mr. Ribs skull hops on the spot waiting to be picked up. “Don’t worry, it’s not as bad as it looks! Mr. Ribs says, addressing Cooper’s look of disbelief, “Hero Ribs will be okay! Cookie will fix me up…Oooh.” Scooping up what’s left of Mr. Ribs, Cooper tosses him towards Ma before running through the gate.
Ma Soupswill tosses her wooden spoon into the air where it spins twice before ending its journey squarely on the back of the final Imp’s head. Speaking of head trauma, a confused and dizzy Cooper shakes off his daze as he rises to his feet. Peering around the yard trying to get his vision to stop blurring, Cooper manages to have everything come in focus just as he sees Ma Soupswill effortlessly push open the large metal gate at the entrance. “C’mon dear, don’ hang about!” Ma shouts as she waves Cooper over, “Yer bin here quite long enough! An’ pass me what’s left o’ me assistant, would yer?” Looking down toward his feet, Cooper jumps in shock as Mr. Ribs skull hops on the spot waiting to be picked up. “Don’t worry, it’s not as bad as it looks! Mr. Ribs says, addressing Cooper’s look of disbelief, “Hero Ribs will be okay! Cookie will fix me up…Oooh.” Scooping up what’s left of Mr. Ribs, Cooper tosses him towards Ma before running through the gate.
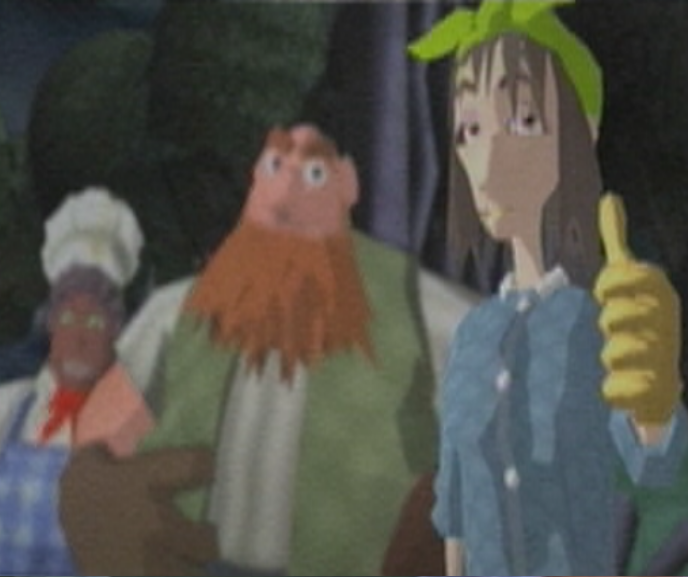
![]() “Well done, young ‘un! Thanks fer what yer done!” Soupswill yells after him, “You an’ pretty Miss Amber take good care o’ yerselves!” A bouncing Ribs also sees Cooper off in Ma’s arms, “Yes, strange boy real hero now, like hero Ribs! Diddly-Doo!” From inside the gate, a rather late Fiddlesworth joins the party to bid farewell, “Pet my piglet! Well, yer done us proud, lad! Yer knobbled that nasty Baron an’ saved ol’ Fiddlesworth from bein’ ‘omeless into the bargain. Fiddlesworth laughs heartily before he begins sniffling, “I actually be rather sad t’see yer go. Yer were the best young friend I ‘ad. I think I’m gonna cry… Sniff! Where’s Babs? I need consolin’!” As if on cue, Babs slides into view as well, giving Cooper a thumbs up, “Well done, kid! Didn’t mean t’be so ‘ard on yer before.” Buffbrass says sympathetically, “I guess lookin’ after Fiddly is better than slavin’ after the Baron…just! Although e’s got some filthy ‘abits an’ ‘e keeps unmentionable things in ‘is sock drawer!” She pauses in reflection, “Ah well, take good care o’ yer both!”
“Well done, young ‘un! Thanks fer what yer done!” Soupswill yells after him, “You an’ pretty Miss Amber take good care o’ yerselves!” A bouncing Ribs also sees Cooper off in Ma’s arms, “Yes, strange boy real hero now, like hero Ribs! Diddly-Doo!” From inside the gate, a rather late Fiddlesworth joins the party to bid farewell, “Pet my piglet! Well, yer done us proud, lad! Yer knobbled that nasty Baron an’ saved ol’ Fiddlesworth from bein’ ‘omeless into the bargain. Fiddlesworth laughs heartily before he begins sniffling, “I actually be rather sad t’see yer go. Yer were the best young friend I ‘ad. I think I’m gonna cry… Sniff! Where’s Babs? I need consolin’!” As if on cue, Babs slides into view as well, giving Cooper a thumbs up, “Well done, kid! Didn’t mean t’be so ‘ard on yer before.” Buffbrass says sympathetically, “I guess lookin’ after Fiddly is better than slavin’ after the Baron…just! Although e’s got some filthy ‘abits an’ ‘e keeps unmentionable things in ‘is sock drawer!” She pauses in reflection, “Ah well, take good care o’ yer both!”

![]() Tracing a route with her finger, Amber lowers the map and smirks at Cooper, “C’mon you! Let’s finally leave these weirdos! I’ve worked a shortcut to get us back on track!” Amber cocks her head to the side as she indulges Cooper, “It’s just down this hill, right at the gnarled old tree and through a quaint-sounding place called Ghoulsville-in-the-Gloom!” Amber stuffs the map into her oversized pack and breaths a sigh of relief, “I’m sure that’s the last we’ll see of this crummy dump and those awful Ghoulies..!“. With the cheers of their friends behind them, Cooper and Amber continue down the path left unfinished just hours prior, making their ascent and catch the sunrise as it bathes them in light. Up ahead, the quaint-sounding ‘Ghoulsville-in-the-Gloom seems trapped in a perpetual raincloud, but this is truly the least of their worries, as the silhouette of Baron Von Ghouls biplane seems to have flown into the village. Perhaps Amber may have spoken much too soon…
Tracing a route with her finger, Amber lowers the map and smirks at Cooper, “C’mon you! Let’s finally leave these weirdos! I’ve worked a shortcut to get us back on track!” Amber cocks her head to the side as she indulges Cooper, “It’s just down this hill, right at the gnarled old tree and through a quaint-sounding place called Ghoulsville-in-the-Gloom!” Amber stuffs the map into her oversized pack and breaths a sigh of relief, “I’m sure that’s the last we’ll see of this crummy dump and those awful Ghoulies..!“. With the cheers of their friends behind them, Cooper and Amber continue down the path left unfinished just hours prior, making their ascent and catch the sunrise as it bathes them in light. Up ahead, the quaint-sounding ‘Ghoulsville-in-the-Gloom seems trapped in a perpetual raincloud, but this is truly the least of their worries, as the silhouette of Baron Von Ghouls biplane seems to have flown into the village. Perhaps Amber may have spoken much too soon…

![]() As the scene fades from view, it’s time to see just how we’ll you’ve done. As discussed in the preface, you’ll be judged on four categories worth 25 points each for a grand total of 100. The first category you’ll be judged in is your Time Taken which should be well under three hours if you’ve managed to follow the best routes detailed here. Next, you’ll be evaluated on how many Ghoulies Defeated you’ve had a part in, which should send you over 700 given the Impish offering in the final scene. Afterwards, you’ll be graded on how well you’ve managed to keep Cooper upright and breathing in Times Fainted; so long as you’ve managed to faint less than 20 times, you’ll be golden for that one as well. Finally, given that you’ve managed to get this far utilizing your time wisely you’ll have liberated all 10 kidnapped children in the Baron’s home, maxing out your Prisoners Rescued score. If you’ve got perfect scores across the board you’ll justly earn your 100/100 Super Scary Score!
As the scene fades from view, it’s time to see just how we’ll you’ve done. As discussed in the preface, you’ll be judged on four categories worth 25 points each for a grand total of 100. The first category you’ll be judged in is your Time Taken which should be well under three hours if you’ve managed to follow the best routes detailed here. Next, you’ll be evaluated on how many Ghoulies Defeated you’ve had a part in, which should send you over 700 given the Impish offering in the final scene. Afterwards, you’ll be graded on how well you’ve managed to keep Cooper upright and breathing in Times Fainted; so long as you’ve managed to faint less than 20 times, you’ll be golden for that one as well. Finally, given that you’ve managed to get this far utilizing your time wisely you’ll have liberated all 10 kidnapped children in the Baron’s home, maxing out your Prisoners Rescued score. If you’ve got perfect scores across the board you’ll justly earn your 100/100 Super Scary Score!
…Or is there… While you might have busted every Ghoulies chops and put a time trial watch to shame, there’s still much to do in the haunted and hallowed halls. If you’re feeling up to more frights and fights, why not pay a visit to the Grabbed by the Ghoulies Bonus Book Guide? It’s sure to see you to unlocking additional content in the form of concept artwork and extra challenging Bonus Challenges that will keep you grabbing Ghoulies for some time to come!
Navigation:
Chapter 1: The Rescue
Chapter 2: The Restoration
Chapter 3: The Riddle
Chapter 4: The Reckoning
Chapter 5: The Race
-5-1: We’re leaving a lasting Imp-ression
ROUNDING UP THE PRISONERS QUICKLIKE
In regards to acquiring a perfect Super Scary Score in Grabbed by the Ghoulies, this chapter is by far the most crucial in setting yourself up for success! Naturally you’ll want to rescue all 10 prisoners to come out on top, but this chapter will also see your Ghouly Counter set up past 600 before emerging outside and your time to be managed in under 3 hours given the 13 minutes provided. The best means to go about this chapter is through practice; if you quit the chapter before you’ve reached Mr. Ribs at the front door, your progress will revert back to the beginning of the chapter, effectively resetting your time and Ghoulies Defeated to whatever you walked into the chapter with – except if you’ve fainted of course, which will not reset. Once you’ve gained the experience you’ll be able to retake the chapter much more quickly and you’ll be able to assess exactly how many more Ghoulies you’ll need to defeat before you pass through the front door, given that you’ll face off against precisely 100 Ghoulies outside in the last scene. If you can manage all of this there’s no reason that the Super Scary Score isn’t attainable. Best of luck on this final run, practice truly does make perfect.
GRAND HALLWAY
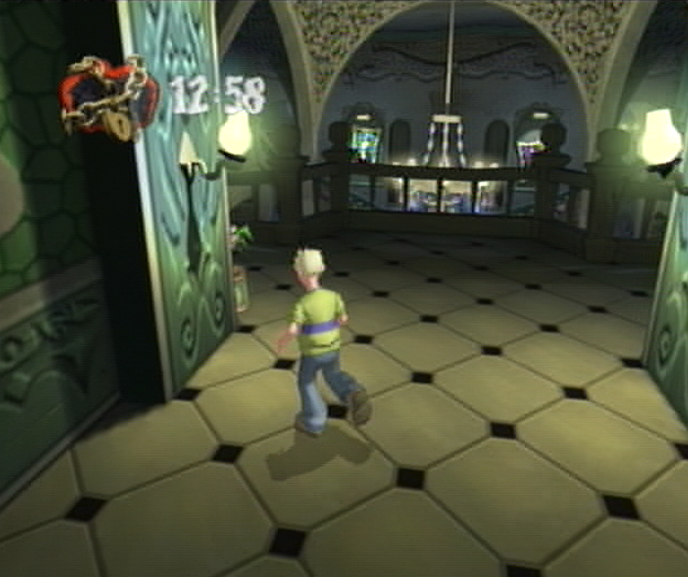
![]() As you emerge back in the Grand Hallway, Mr. Ribs waits for you on the opposite end of the banister near a decorative Skeleton Door. “Come quick! We now begin race to rescue all ten prisoners!, Mr. Ribs shouts across the room, “This make hero out of boy and Mr. Ribs! We take this skeleton key. Skeleton key unlock many magic skeleton doors. They let us get to prisoners fast but will lock for all time when timer runs out.” Right, we’ll be allotted a total of thirteen minutes to rescue all ten prisoners in Ghoulhaven Hall before making our escape, so naturally we’ll have to take many a shortcut to ensure every room is cleared in as little time as possible. From where you start off, you should manage to spot a Turbo Cooper! Soup Tin bouncing just beyond the leftmost corner. Waste no time in sprinting forward and grabbing it and then work your way over to the right to rush over to Mr. Ribs. Once you’ve arrived at the skeleton door we’ll pass through to the Bathroom.
As you emerge back in the Grand Hallway, Mr. Ribs waits for you on the opposite end of the banister near a decorative Skeleton Door. “Come quick! We now begin race to rescue all ten prisoners!, Mr. Ribs shouts across the room, “This make hero out of boy and Mr. Ribs! We take this skeleton key. Skeleton key unlock many magic skeleton doors. They let us get to prisoners fast but will lock for all time when timer runs out.” Right, we’ll be allotted a total of thirteen minutes to rescue all ten prisoners in Ghoulhaven Hall before making our escape, so naturally we’ll have to take many a shortcut to ensure every room is cleared in as little time as possible. From where you start off, you should manage to spot a Turbo Cooper! Soup Tin bouncing just beyond the leftmost corner. Waste no time in sprinting forward and grabbing it and then work your way over to the right to rush over to Mr. Ribs. Once you’ve arrived at the skeleton door we’ll pass through to the Bathroom.
BATHROOM

![]() As you walk into the steamy sauna, Mr. Ribs has already managed to free a girl who’s been placed atop a pile of hot coals. Before Cooper can manage to turn on his heel and follow Mr. Ribs out, a large Hunchback emerges from one of the stalls wanting to fight Cooper for stealing his “friend” away. From where you start off, break the large plate of glass that keeps the heat inside the sauna and then run out onto the floor. Ignore the Hunchback for now and instead carry on toward the Thorned Challenge Door where we’ll find a set of changing panels to the right and left; the right panels head toward the toilet, and the left panels head toward two laundry hampers. Smash open the laundry hamper closest to the Challenge Door and you’ll find a One-Hit Wonder! Soup Tin. From here backtrack to Hunchy and take him out in a single hit once you’ve pummeled your way from his back to his face. With the challenge solved it’s back to the sauna and through the open door.
As you walk into the steamy sauna, Mr. Ribs has already managed to free a girl who’s been placed atop a pile of hot coals. Before Cooper can manage to turn on his heel and follow Mr. Ribs out, a large Hunchback emerges from one of the stalls wanting to fight Cooper for stealing his “friend” away. From where you start off, break the large plate of glass that keeps the heat inside the sauna and then run out onto the floor. Ignore the Hunchback for now and instead carry on toward the Thorned Challenge Door where we’ll find a set of changing panels to the right and left; the right panels head toward the toilet, and the left panels head toward two laundry hampers. Smash open the laundry hamper closest to the Challenge Door and you’ll find a One-Hit Wonder! Soup Tin. From here backtrack to Hunchy and take him out in a single hit once you’ve pummeled your way from his back to his face. With the challenge solved it’s back to the sauna and through the open door.
CONSERVATORY
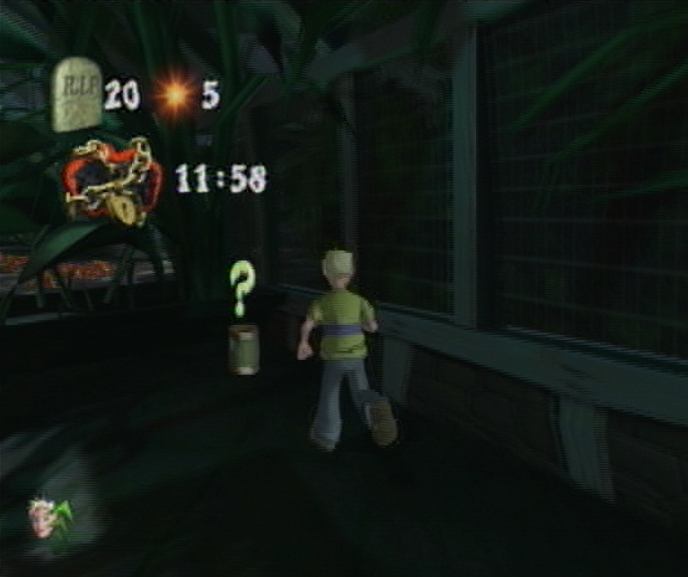
![]() Once you’ve entered the Conservatory, head out into the center of the room to find Mr. Ribs tending to the prisoner thats tied to the tree. After he’s managed to free her, grab the Turbo Cooper! Soup Tin to the left and attempt to follow him out the way you came. A challenge will begin prematurely and you’ll be ambushed by a number of Spiders and Worms. If you’d like to increase your Ghouly count here, give the toy box a swing before grabbing the Turbo Cooper! Soup on the ledge to the left. Sprint back back to the area where the girl was tied up to spot an area ahead with a vined challenge door. Run into this area and you’ll spot a Challenge Complete! Soup Tin to your immediate left as you step in, just behind the bench. Once you’ve managed to snatch up the Super Soup, head back to the Challenge Door where Fiddlesworth will provide us with Little Willy’s Water Pistol one last time, let’s get on with it and travel through the Challenge Door behind Fiddlesworth.
Once you’ve entered the Conservatory, head out into the center of the room to find Mr. Ribs tending to the prisoner thats tied to the tree. After he’s managed to free her, grab the Turbo Cooper! Soup Tin to the left and attempt to follow him out the way you came. A challenge will begin prematurely and you’ll be ambushed by a number of Spiders and Worms. If you’d like to increase your Ghouly count here, give the toy box a swing before grabbing the Turbo Cooper! Soup on the ledge to the left. Sprint back back to the area where the girl was tied up to spot an area ahead with a vined challenge door. Run into this area and you’ll spot a Challenge Complete! Soup Tin to your immediate left as you step in, just behind the bench. Once you’ve managed to snatch up the Super Soup, head back to the Challenge Door where Fiddlesworth will provide us with Little Willy’s Water Pistol one last time, let’s get on with it and travel through the Challenge Door behind Fiddlesworth.
DUNFIDDLIN COTTAGE
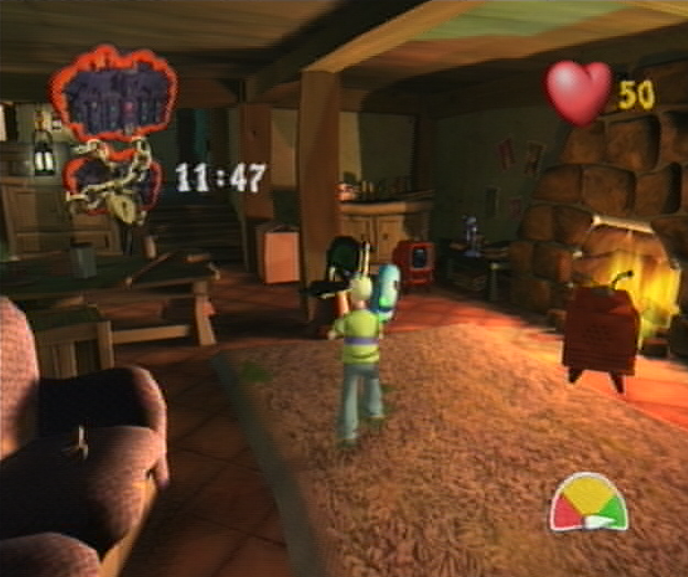
![]() As you’ve arrived in the cottage, the rules will prevent you from damaging any bit of the room, failing to do so will summon the Grim Reaper. Really? Are we still afraid of him at this point in our adventure? As you start off in the room you should manage to spot three Television Sets to the right next to the fire, start off by destroying every single one before you dart up the staircase to find Mr. Ribs standing in front of a large chest with a boy trapped inside. Once Mr. Ribs manages to open the chest, he’ll flee towards the exit where a challenge should have begun. Since the challenge was to have us defeat the three would-be Haunted Television Sets on the ground level – which we took advantage of just now – it’s not as though they’re about to spring up from the broken pieces. Thus, we have an interesting scenario as we follow Mr. Ribs heels out of the room where he would have left us behind. Just make sure to avoid the Reapers touch and you’ll make it out without issue.
As you’ve arrived in the cottage, the rules will prevent you from damaging any bit of the room, failing to do so will summon the Grim Reaper. Really? Are we still afraid of him at this point in our adventure? As you start off in the room you should manage to spot three Television Sets to the right next to the fire, start off by destroying every single one before you dart up the staircase to find Mr. Ribs standing in front of a large chest with a boy trapped inside. Once Mr. Ribs manages to open the chest, he’ll flee towards the exit where a challenge should have begun. Since the challenge was to have us defeat the three would-be Haunted Television Sets on the ground level – which we took advantage of just now – it’s not as though they’re about to spring up from the broken pieces. Thus, we have an interesting scenario as we follow Mr. Ribs heels out of the room where he would have left us behind. Just make sure to avoid the Reapers touch and you’ll make it out without issue.
DINING ROOM

![]() As you enter the Dining Room Fiddlesworth will thank you for cleaning up his cottage, taking the water squirter off of your hands in the process. Carry on to the left where Mr. Ribs is in the process of freeing a young bespectacled boy who’s been chained to his platter. “We rescue platter lad!” Mr. Ribs shouts enthusiastically, “Boy and hero Ribs do well but must be quicker, yes!” As the stocky skeleton makes for the exit, a group of Zombie Pirates flood into the room. As you regain control you’ll have to spin around on the spot to catch sight the Zombie Pirate in front of the vined Challenge Door, as quickly as possible, rush up and grab his sword from the ground and defeat him before he tosses his chest. Use the sword to defeat as many Pirates as possible here before grabbing the One-Hit Wonder! Tin atop a table on the opposite side along with a collection of burgers to throw to take care of the rest. Once that’s done, you’re free to leave through the Challenge Door.
As you enter the Dining Room Fiddlesworth will thank you for cleaning up his cottage, taking the water squirter off of your hands in the process. Carry on to the left where Mr. Ribs is in the process of freeing a young bespectacled boy who’s been chained to his platter. “We rescue platter lad!” Mr. Ribs shouts enthusiastically, “Boy and hero Ribs do well but must be quicker, yes!” As the stocky skeleton makes for the exit, a group of Zombie Pirates flood into the room. As you regain control you’ll have to spin around on the spot to catch sight the Zombie Pirate in front of the vined Challenge Door, as quickly as possible, rush up and grab his sword from the ground and defeat him before he tosses his chest. Use the sword to defeat as many Pirates as possible here before grabbing the One-Hit Wonder! Tin atop a table on the opposite side along with a collection of burgers to throw to take care of the rest. Once that’s done, you’re free to leave through the Challenge Door.
PANTRY
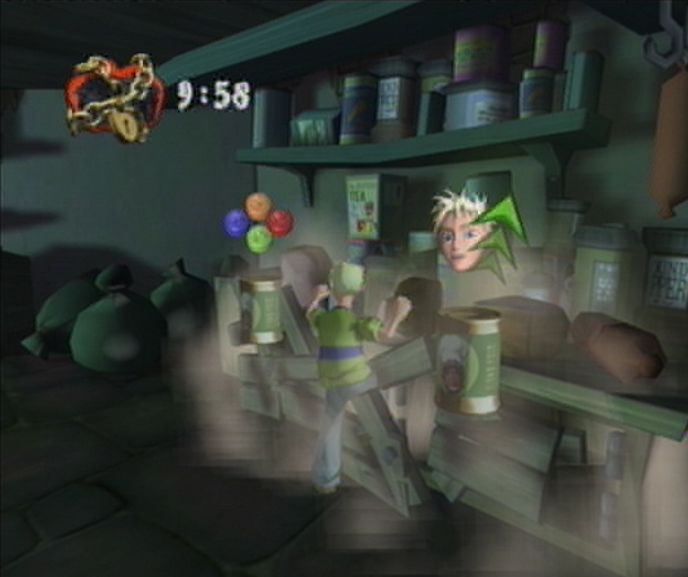
![]() As you’ve likely worked out from the low laughter heard when first entering the room, the Pantry floor is littered with Super Scary Shock sequences. To start off on a good foot, we’ll resist stepping toward Mr. Ribs and instead turn our attention to the right where we’ll see a low cabinet underneath a single shelf. You should manage to avoid any Shock sequences as you approach the cupboard, and once you’re ready for some destruction, break them open to reveal a Turbo Cooper! and – more importantly – a Shocker Blocker! Soup Tin. Once you’ve managed to snag up both Super Soups wander over to Mr. Ribs, completing Shock sequences in the meantime. After you’ve arrived in front of the Freezer, Mr. Ribs will free the shivering girl inside, who seems to have plumped up on freezer food since we were last here. Now that we’ve finished we’ll brave one last Super Shock sequence at the Challenge Door and then carry on through.
As you’ve likely worked out from the low laughter heard when first entering the room, the Pantry floor is littered with Super Scary Shock sequences. To start off on a good foot, we’ll resist stepping toward Mr. Ribs and instead turn our attention to the right where we’ll see a low cabinet underneath a single shelf. You should manage to avoid any Shock sequences as you approach the cupboard, and once you’re ready for some destruction, break them open to reveal a Turbo Cooper! and – more importantly – a Shocker Blocker! Soup Tin. Once you’ve managed to snag up both Super Soups wander over to Mr. Ribs, completing Shock sequences in the meantime. After you’ve arrived in front of the Freezer, Mr. Ribs will free the shivering girl inside, who seems to have plumped up on freezer food since we were last here. Now that we’ve finished we’ll brave one last Super Shock sequence at the Challenge Door and then carry on through.
RELIC STORE
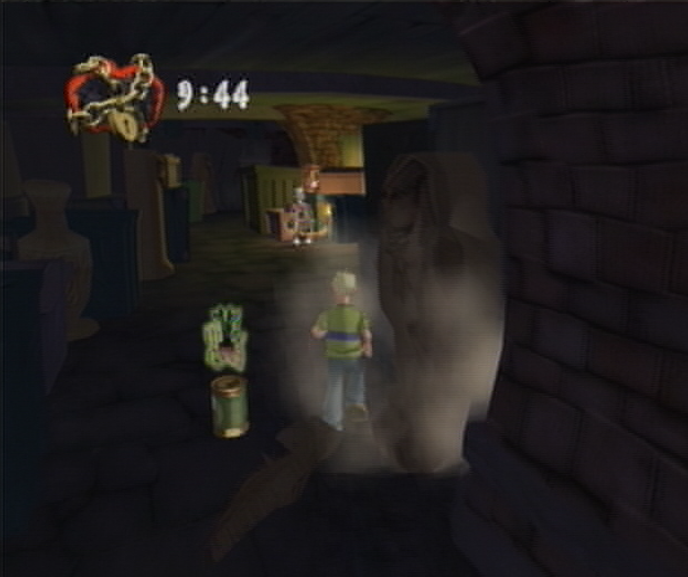
![]() As you head toward Mr. Ribs who has helpfully lit a torch to guide our way, you should manage to spot a sarcophagi to your right as you pass the first pillar. Smash it open to find a Super Weapons! Tin and leave it on the wayside for now. Continue over to Mr. Ribs and you’ll spot another sarcophagi to your left which contain three Miniature Cooper! Tins when you’ve cracked it open; leave these as well and approach Mr. Ribs. Once he’s managed to free the boy the challenge will begin! Set loose the trio of Miniature Coopers on the Zombies and start swinging your torch at the Mummies. If your fuel starts to run low, pick up the Super Weapons! Tin to keep it untapped. Do whatever you can to avoid the Cursed Mummy who appears half way through, as he can cause you to faint if his timed curse manages to find you. Once both breed of Zombies have been defeated, run to Ma Soupswil near the exit and then carrying through to the Laundry.
As you head toward Mr. Ribs who has helpfully lit a torch to guide our way, you should manage to spot a sarcophagi to your right as you pass the first pillar. Smash it open to find a Super Weapons! Tin and leave it on the wayside for now. Continue over to Mr. Ribs and you’ll spot another sarcophagi to your left which contain three Miniature Cooper! Tins when you’ve cracked it open; leave these as well and approach Mr. Ribs. Once he’s managed to free the boy the challenge will begin! Set loose the trio of Miniature Coopers on the Zombies and start swinging your torch at the Mummies. If your fuel starts to run low, pick up the Super Weapons! Tin to keep it untapped. Do whatever you can to avoid the Cursed Mummy who appears half way through, as he can cause you to faint if his timed curse manages to find you. Once both breed of Zombies have been defeated, run to Ma Soupswil near the exit and then carrying through to the Laundry.
LAUNDRY
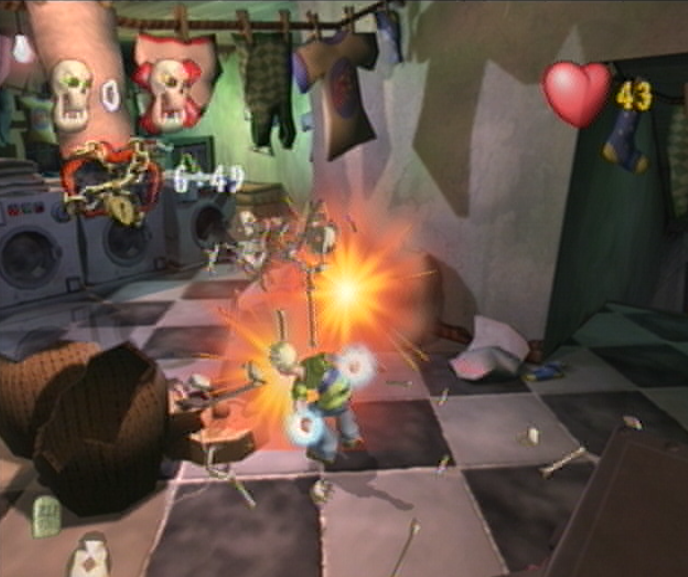
![]() It’s not much of a trek to find Mr. Ribs tending to a boy wedged in a storage cubby, and after he’s freed we’ll be thrust into the next challenge; defeating either 3 Zombies or 3 Skeletons through the dreaded “Next-one-different” format. You’ll find the Zombies hidden inside the washing machines that are facing Mr. Ribs, while the Skeletons are inside the machines facing the windows. Starting off, walk to the right and you’ll spot two hampers in the center of the room. Break open the basket nearest to the back wall and you’ll find a One-Hit Wonder! Tin. Ignore the tin for now and break open the nearest washing machines to expose three Zombies then head back and pick up the One-Hit Wonder! Soup Tin. Ignoring the “Next-One-Different” setup altogether we’ll take out all three at once. From here we’ll rush back to the start of the room and pass through the Challenge Door after braving a brief Shock sequence before the Reaper catches us.
It’s not much of a trek to find Mr. Ribs tending to a boy wedged in a storage cubby, and after he’s freed we’ll be thrust into the next challenge; defeating either 3 Zombies or 3 Skeletons through the dreaded “Next-one-different” format. You’ll find the Zombies hidden inside the washing machines that are facing Mr. Ribs, while the Skeletons are inside the machines facing the windows. Starting off, walk to the right and you’ll spot two hampers in the center of the room. Break open the basket nearest to the back wall and you’ll find a One-Hit Wonder! Tin. Ignore the tin for now and break open the nearest washing machines to expose three Zombies then head back and pick up the One-Hit Wonder! Soup Tin. Ignoring the “Next-One-Different” setup altogether we’ll take out all three at once. From here we’ll rush back to the start of the room and pass through the Challenge Door after braving a brief Shock sequence before the Reaper catches us.
WALLED GARDEN
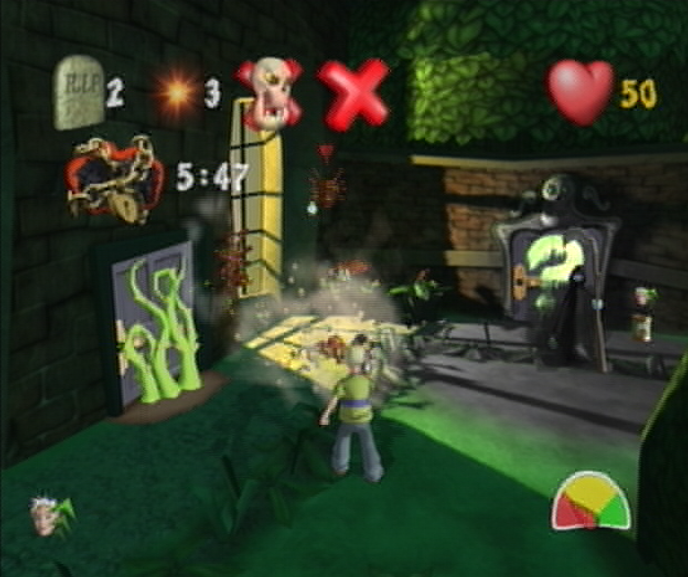
![]() Once we’ve acquired the Soda Pop gun from Babs Buffbrass, we’ll grab the Turbo Cooper! Soup Tin found behind us next to the vined challenge door and then rush over to Mr. Ribs tending to the boy hanging from the snake fountain. Once he’s managed to escape the Challenge Door will slam shut, leaving us behind to deal with the new challenge; defeating four Ghoulies with “Next-One-Different” in mind and avoiding breaking any part of the house. Let’s break all of the rules at once shall we? When the challenge starts, grab the Turbo Cooper! Tin found on the pathway between the hedge trees and then work your way back to the start. You should manage to spot a window closest to the Challenge Door on the right with its lights on, and a flowerbox just in front. Fire a Soda Grenade at the leftmost side to expose four Spiders at once. Before the Reaper has a chance to catch up with you, defeat all of the Spiders and then rush through the open Challenge Door.
Once we’ve acquired the Soda Pop gun from Babs Buffbrass, we’ll grab the Turbo Cooper! Soup Tin found behind us next to the vined challenge door and then rush over to Mr. Ribs tending to the boy hanging from the snake fountain. Once he’s managed to escape the Challenge Door will slam shut, leaving us behind to deal with the new challenge; defeating four Ghoulies with “Next-One-Different” in mind and avoiding breaking any part of the house. Let’s break all of the rules at once shall we? When the challenge starts, grab the Turbo Cooper! Tin found on the pathway between the hedge trees and then work your way back to the start. You should manage to spot a window closest to the Challenge Door on the right with its lights on, and a flowerbox just in front. Fire a Soda Grenade at the leftmost side to expose four Spiders at once. Before the Reaper has a chance to catch up with you, defeat all of the Spiders and then rush through the open Challenge Door.
CINEMA
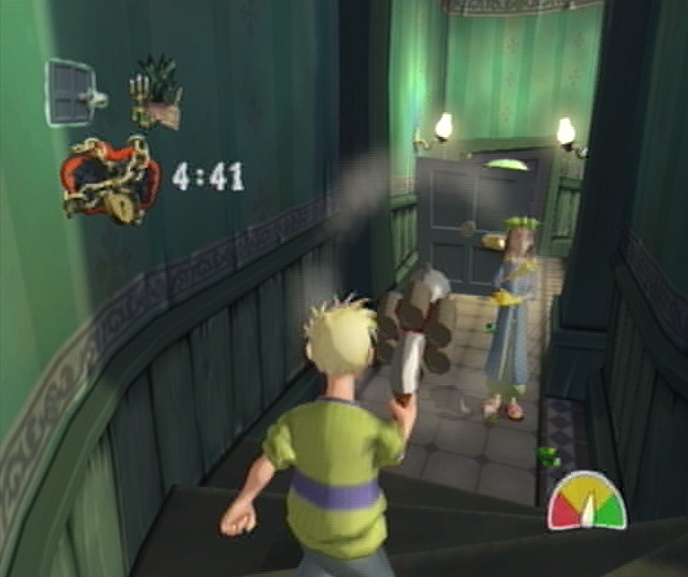
![]() We have a long walk ahead to reach Mr. Ribs in the projection box, which becomes even more difficult as the first corridor that has been filled with Unfavorable Soups. Do your best to traverse the passage without picking up any Soups, and wait out their effects if you do. As you reach the other side, take care of the Haunted Coat to your left and then ascend the staircase to Mr. Ribs. Here’s the tricky bit; there’s a Haunted Door waiting for us at the bottom of the stairs ahead, but so is Babs Buffbrass to confiscate our Soda Pop gun. If you approach the stairs very carefully and avoid descending past the third step from the bottom, you should manage to get a clear shot of the Haunted Door. If you fire a few Soda Pop Grenades at it without getting too close to Babs, you should manage to make it spring to life! Use your Soda Pop gun to take it out while avoiding Babs and you’ll get through this challenge much quicker. Once it’s been solved you’ll just have to carry on down the rest of the corridor.
We have a long walk ahead to reach Mr. Ribs in the projection box, which becomes even more difficult as the first corridor that has been filled with Unfavorable Soups. Do your best to traverse the passage without picking up any Soups, and wait out their effects if you do. As you reach the other side, take care of the Haunted Coat to your left and then ascend the staircase to Mr. Ribs. Here’s the tricky bit; there’s a Haunted Door waiting for us at the bottom of the stairs ahead, but so is Babs Buffbrass to confiscate our Soda Pop gun. If you approach the stairs very carefully and avoid descending past the third step from the bottom, you should manage to get a clear shot of the Haunted Door. If you fire a few Soda Pop Grenades at it without getting too close to Babs, you should manage to make it spring to life! Use your Soda Pop gun to take it out while avoiding Babs and you’ll get through this challenge much quicker. Once it’s been solved you’ll just have to carry on down the rest of the corridor.
LOWER CORRIDORS
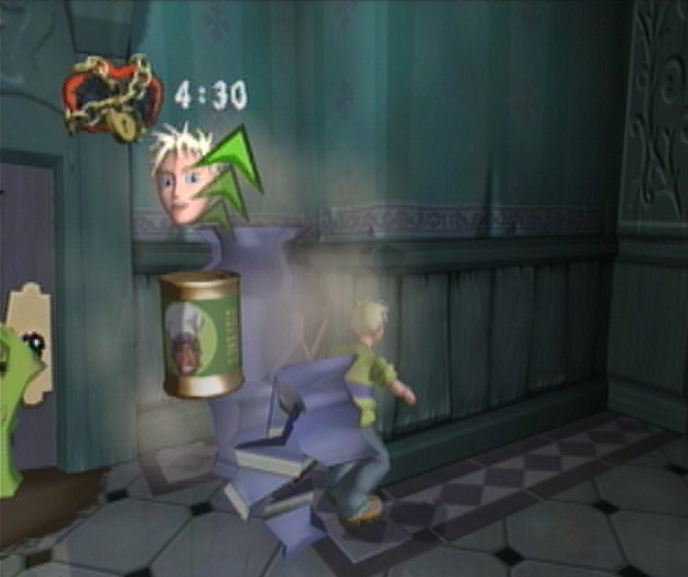
![]() We’re nearly to the end yet, just a quick pass through this lengthy corridor will see us back in the Grand Hallway. This is a great point to take a quick glance at your status to see how you’re doing for fulfilling the Super Scary Score requirements. At this point you should have more than the minimum of 600 Ghoulies defeated while the Time Taken should be anywhere under 2 hours and 50 minutes if you’re expected to clear it in under three hours. Rather than sprinting through the Lower Corridors straight away, we’ll turn around on the spot and destroy the large blue vase to the right of the door for a Turbo Cooper! Soup Tin. Pick it up and sprint to the opposite end of the corridor; your increased speed will have you zipping by all of the Ghoulies that pose a threat. After you’ve passed the phone Shocker that waits for you atop a table, you’ll have to brave the last Super Scary Shock sequence of the game before you can carry on through the exit to the Grand Hallway.
We’re nearly to the end yet, just a quick pass through this lengthy corridor will see us back in the Grand Hallway. This is a great point to take a quick glance at your status to see how you’re doing for fulfilling the Super Scary Score requirements. At this point you should have more than the minimum of 600 Ghoulies defeated while the Time Taken should be anywhere under 2 hours and 50 minutes if you’re expected to clear it in under three hours. Rather than sprinting through the Lower Corridors straight away, we’ll turn around on the spot and destroy the large blue vase to the right of the door for a Turbo Cooper! Soup Tin. Pick it up and sprint to the opposite end of the corridor; your increased speed will have you zipping by all of the Ghoulies that pose a threat. After you’ve passed the phone Shocker that waits for you atop a table, you’ll have to brave the last Super Scary Shock sequence of the game before you can carry on through the exit to the Grand Hallway.
GRAND HALLWAY
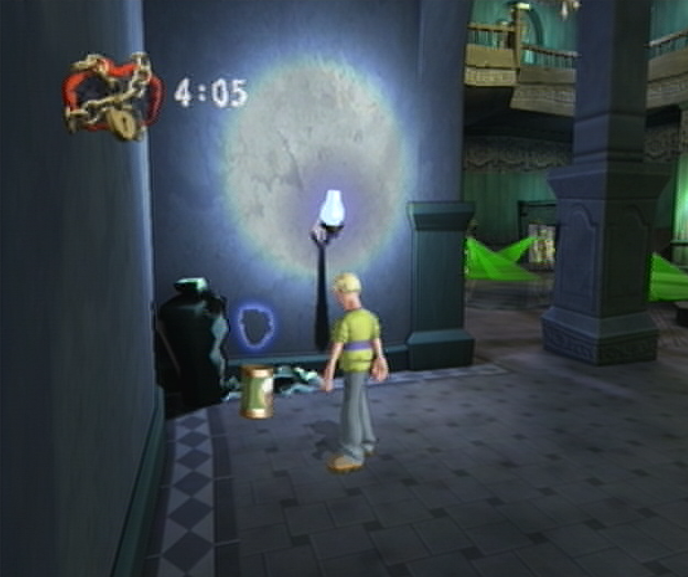
![]() After we’ve traveled through the Lower Corridors we’ll find ourselves back to where it all began: the Grand Hallway. Unfortunately for Cooper however, it’s since become overrun with a dozen Medusas who have taken to patrolling the area. As you make your way towards the floor, stick close to the central staircase and hug the edge as you round the bend. As you’re standing at the base of the staircase you should manage to spot a vined Challenge Door straight ahead with a bench to the right. Approach this vined Challenge Door and you’ll spot an area to the left – head down this corridor and you’ll spot a vase in the corner with a light overhead, which when broken offers up an Invisibility! Soup Tin. Snatch up the Soup Tin once you’ve managed to expose it and then head out onto the floor for some stealthy sprinting. From here it’s just a simple matter of approaching Mr. Ribs waiting for us at the front door to finish the Race! Congratulations!
After we’ve traveled through the Lower Corridors we’ll find ourselves back to where it all began: the Grand Hallway. Unfortunately for Cooper however, it’s since become overrun with a dozen Medusas who have taken to patrolling the area. As you make your way towards the floor, stick close to the central staircase and hug the edge as you round the bend. As you’re standing at the base of the staircase you should manage to spot a vined Challenge Door straight ahead with a bench to the right. Approach this vined Challenge Door and you’ll spot an area to the left – head down this corridor and you’ll spot a vase in the corner with a light overhead, which when broken offers up an Invisibility! Soup Tin. Snatch up the Soup Tin once you’ve managed to expose it and then head out onto the floor for some stealthy sprinting. From here it’s just a simple matter of approaching Mr. Ribs waiting for us at the front door to finish the Race! Congratulations!
– Aside from searching for your girlfriend Amber, you’ll find 100 craftily hidden Bonus Books throughout the game. Learn their locations here.
– Discover the best strategies inside for dealing with all 21 Bonus Challenges in Grabbed by the Ghoulies with Platinum Ranking!
– Venture in to discover over 80 extremely interesting easter eggs and Rareware References hidden inside Grabbed by the Ghoulies.
– Our Grabbed by the Ghoulies Walkthrough will lead you by the hand through all of Ghoulhaven Hall, revealing expert strategies and the like to escape the Manor with a perfect Super Scary Score of 100/100!